

Linux /centos- 安装es(Elasticsearch)-kibana-head安装
CentOS 7.3
1.在线安装es
1、wget https://artifacts.elastic.co/downloads/elasticsearch/elasticsearch-5.5.1.zip
2、解压es.zip
unzip elasticsearch-5.5.1.zip
目录重命名:mv elasticsearch-5.5.1 elasticsearch
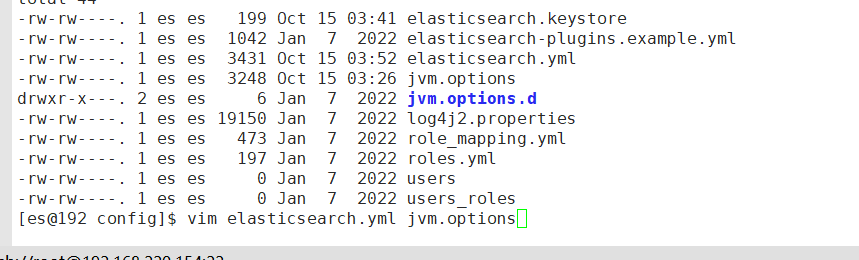
3、修改配文件
cd config 需要修改的配置文件有两个:elasticsearch.yml jvm.options
vim elasticsearch.yml
node.name: node-1 #配置当前es节点名称(默认是被注释的,并且默认有一个节点名)
cluster.name: my- application #默认是被注释的,并且默认有一个集群名
path.data: /home/es/data # 数据目录位置
path.logs: /home/es/logs # 日志目录位置
network.host: 0.0.0.0 #绑定的ip:默认只允许本机访问,修改为0.0.0.0后则可以远程访问
cluster.initial_master_nodes: ["node-1", "node-2"] #默认是被注释的 设置master节点列表 用逗号分隔
discovery.seed_hosts: ["127.0.0.1", "[::1]"]
vim jvm.options
修改默认配置:-Xms1g -Xmx1g (根据自己主机内存修改)
编辑 /etc/security/limits.conf,追加以下内容;
* soft nofile 65536
* hard nofile 65536
编辑 /etc/sysctl.conf,追加以下内容:
vm.max_map_count=655360
保存后,执行:
sysctl -p
重新启动,成功。
4、 启动es
cd elasticsearch-5.5.1/
前台启动:
./bin/elasticsearch
后台启动:
./bin/elasticsearch -d
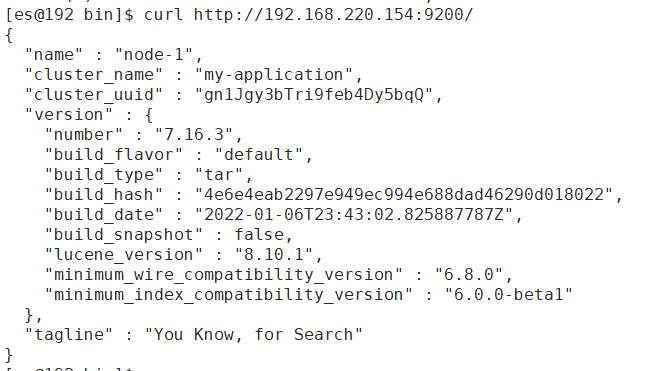
5、启动成功 检测es运行情况
-----------------------------------------------------------------------------------------------------------------------------
安装es head插件
    cd /
    git clone git://github.com/mobz/elasticsearch-head.git
    cd elasticsearch-head/
    npm install grunt -save() #需先安装npm
                              #yum install npm -y
    ll node_modules/grunt     #确认生成文件
    npm install               #执行安装
    npm run start  -d         #后台启动服务

关闭es-head
查看es-head进程kill
    ps -ef|grep head
    kill -9 head-pid
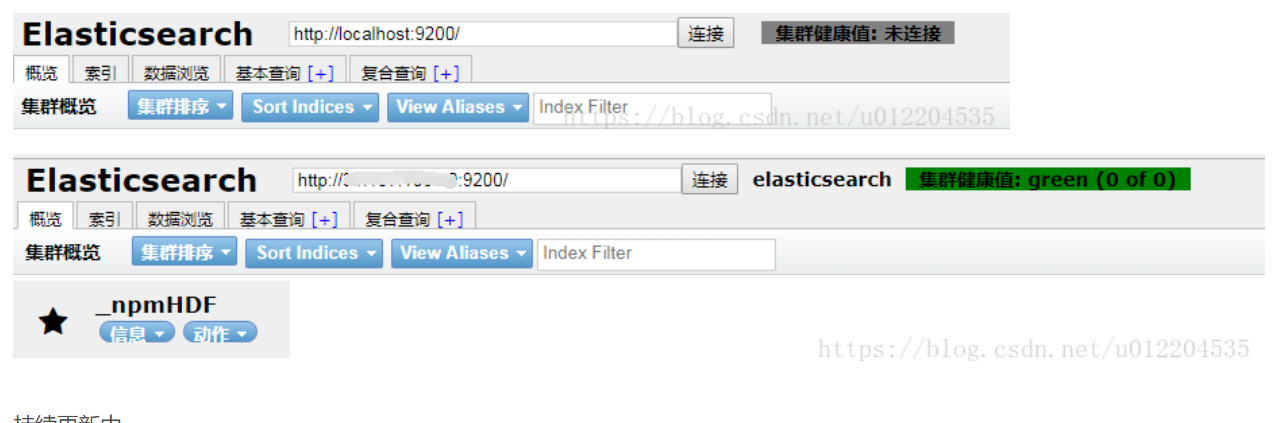
es-head 集群健康值: 未连接
[1]../config/elasticsearch.yml
配置文件底部添加:
    http.cors.enabled: true
    http.cors.allow-origin: "*"
    http.cors.allow-headers: Authorization,X-Requested-With,Content-Length,Content-Type
[2]../elasticsearch-head/Gruntfile.js
添加:hostname
    connect: {
        server: {
            options: {
                hostname: '0.0.0.0',  #添加该行
                port: 9100,
                base: '.',
                keepalive: true
            }
        }
    }
[3]修改es地址
    localhost 改为 具体ip
另一种安装方式
elasticsearch-head 安装
      #elasticsearch-head是基于nodejs开发的,所以需要安装nodejs环境
     2、下载elasticsearch-head安装包
     https://github.com/mobz/elasticsearch-head
     3、解压后再elasticsearch-head 下执行
           npm install

     4、 配置ElasticSearch-head插件
          vim /opt/elasticsearch-head-master/Gruntfile.js
          修改服务器监听地址,增加hostname属性,设置为 hostname: '*'

     5、#修改默认elasticsearch服务连接地址,将localhost修改为elasticsearch的服务器地址
              vim /opt/elasticsearch-head-master/_site/app.js

     6、vi /opt/elasticsearch/config/elasticsearch.yml
     #若连接不上elasticsearch服务,请检查、修改Elasticsearch配置,允许跨域访问
        修改后重新启动Elasticsearch,添加如下配置,支持跨域访问
              http.cors.enabled: true
              http.cors.allow-origin: "*"

    7、启动ElasticSearch-head
         # elasticsearch-head目录下执行
              npm run start
-------------------------------------------------------------------------------------------------------------------------------------
安装kibana
1、下载  https://www.elastic.co/cn/downloads/kibana
2、解压  tar -xzvf kibana-7.3.0-linux-x86_64.tar.gz
3、修改配置文件
#端口             server.port: 5601
#本机地址     server.host: "0.0.0.0"
#连接es        elasticsearch.hosts: ["http://192.168.220.152:9200"]
#i18n.locale: "zh-CN
4、更改数组属主,放到elasticsearch用户下
5、启动
    ./kibana/bin/kibana
后台启动kibana : nohup ./kibana &
查看启动日志 : tail -f nohup
kibana 使用 ps -ef|grep kibana 是查不到进程的,主要原因大概是因为 kibana 是node写的。所以kibana 运行的时候是运行在node 里面。
查看kibana进程:使用 netstat -tunlp|grep 5601
