vue使用TinyMCE
TinyMCE 是一款基于vue的富文本编辑器
使用起来还是非常方便的 还可以根据官网 自己配置一些必要的功能 官网链接
下载 npm install @tinymce/tinymce-vue -S
中文包下载
链接:https://pan.baidu.com/s/1-C5F4rfg1XlZHgnLqsPS7w
提取码:23el
复制这段内容后打开百度网盘手机App,操作更方便哦
CSS文件代码
1 2 3 4 5 6 7 8 9 10 11 12 13 14 15 16 17 18 19 20 21 22 | body { overflow-y: scroll !important;编辑区域滚动 height: 500px;编辑区域高度}::-webkit-scrollbar { /*滚动条整体样式*/ width: 4px; /*高宽分别对应横竖滚动条的尺寸*/ height: 4px;}::-webkit-scrollbar-thumb { /*滚动条里面小方块*/ border-radius: 5px; -webkit-box-shadow: inset 0 0 5px rgba(0, 0, 0, 0.2); background: #e0e5eb;}::-webkit-scrollbar-track { /*滚动条里面轨道*/ /* -webkit-box-shadow: inset 0 0 5px rgba(0, 0, 0, 0.2); */ border-radius: 0; /* background: rgba(0, 0, 0, 0.1); */} |
index.html需要加上这一行代码
1 | <script src="//unpkg.com/tinymce@5.1.5/tinymce.min.js"></script> |
安装之后可以在main.js中引入
1 2 | import VueTinymce from "@packy-tang/vue-tinymce";Vue.use(VueTinymce); |
封装组件
1 2 3 4 5 6 7 8 9 10 11 12 13 14 15 16 17 18 19 20 21 22 23 24 25 26 27 28 29 30 31 32 33 34 35 36 37 38 39 40 41 42 43 44 45 46 47 48 49 50 51 52 53 54 55 56 57 58 59 60 61 62 63 64 65 66 67 68 69 70 71 72 73 74 75 76 77 78 79 80 81 82 83 84 85 86 87 88 89 90 91 92 93 94 95 96 97 98 99 100 | <template> <div class="tinymce"> <vue-tinymce v-model="contentCopy" :setup="setup" :setting="setting" /> </div></template><script>export default { data() { return { contentCopy: "", setting: { language_url: "./tinymce/langs/zh_CN.js",引入文件放到pubilc里 content_css: "./tinymce/css/index.css",自定义编辑区域样式,同样是放到public language: "zh_CN", //注意大小写 // height: 800, //编辑器高度 // width: 600, height: 500, autosave_interval: "2s", //自动保存时间间隔 autosave_prefix: "creator-edit-article-", //保存的字段名 plugins: "print preview searchreplace autolink directionality visualblocks visualchars fullscreen image link media template code codesample table charmap hr pagebreak nonbreaking anchor insertdatetime advlist lists wordcount imagetools textpattern help emoticons autosave autoresize", toolbar: "code undo redo restoredraft | cut copy paste pastetext | forecolor backcolor bold italic underline strikethrough link anchor | alignleft aligncenter alignright alignjustify outdent indent | \ styleselect formatselect fontselect fontsizeselect | bullist numlist | blockquote subscript superscript removeformat | \ table image media charmap emoticons hr pagebreak insertdatetime print preview | fullscreen | lineheight axupimgs", fontsize_formats: "12px 14px 16px 18px 24px 36px 48px 56px 72px", font_formats: "微软雅黑=Microsoft YaHei,Helvetica Neue,PingFang SC,sans-serif;苹果苹方=PingFang SC,Microsoft YaHei,sans-serif;宋体=simsun,serif;仿宋体=FangSong,serif;黑体=SimHei,sans-serif;Arial=arial,helvetica,sans-serif;Arial Black=arial black,avant garde;Book Antiqua=book antiqua,palatino;", image_class_list: [ { title: "None", value: "" }, { title: "Some class", value: "class-name" }, ], images_upload_base_path: "",//上传图片地址 images_upload_handler: function (blobInfo, succFun, failFun) {//本地图片上传 var xhr, formData; var file = blobInfo.blob(); //转化为易于理解的file对象 xhr = new XMLHttpRequest(); xhr.withCredentials = false; xhr.open("POST", "上传图片地址"); xhr.onload = function () { var json; if (xhr.status != 200) { failFun("HTTP Error: " + xhr.status); return; } json = JSON.parse(xhr.responseText); if (!json || typeof json.data.img != "string") { failFun("Invalid JSON: " + xhr.responseText); return; } succFun(json.data.img); }; formData = new FormData(); formData.append("file", file, file.name); // xhr.send(formData); }, importcss_append: true, toolbar_sticky: true, autosave_ask_before_unload: false, }, }; }, props: { content: { type: [String, Object], default: "", }, }, watch: { content: { handler(content) { this.contentCopy = content; }, immediate: true, }, contentCopy: { handler(contentCopy) { this.$emit("update:content", contentCopy); }, immediate: true, }, }, components: {}, computed: {}, mounted() {}, methods: { setup(editor) { console.log(editor); }, },};</script><style lang="scss"></style> |
引入之后的用法
1 2 3 | <creator-tinymce :content.sync="content"></creator-tinymce>import CreatorTinymce from "./components/creator-tinymce.vue";//组件路径 |
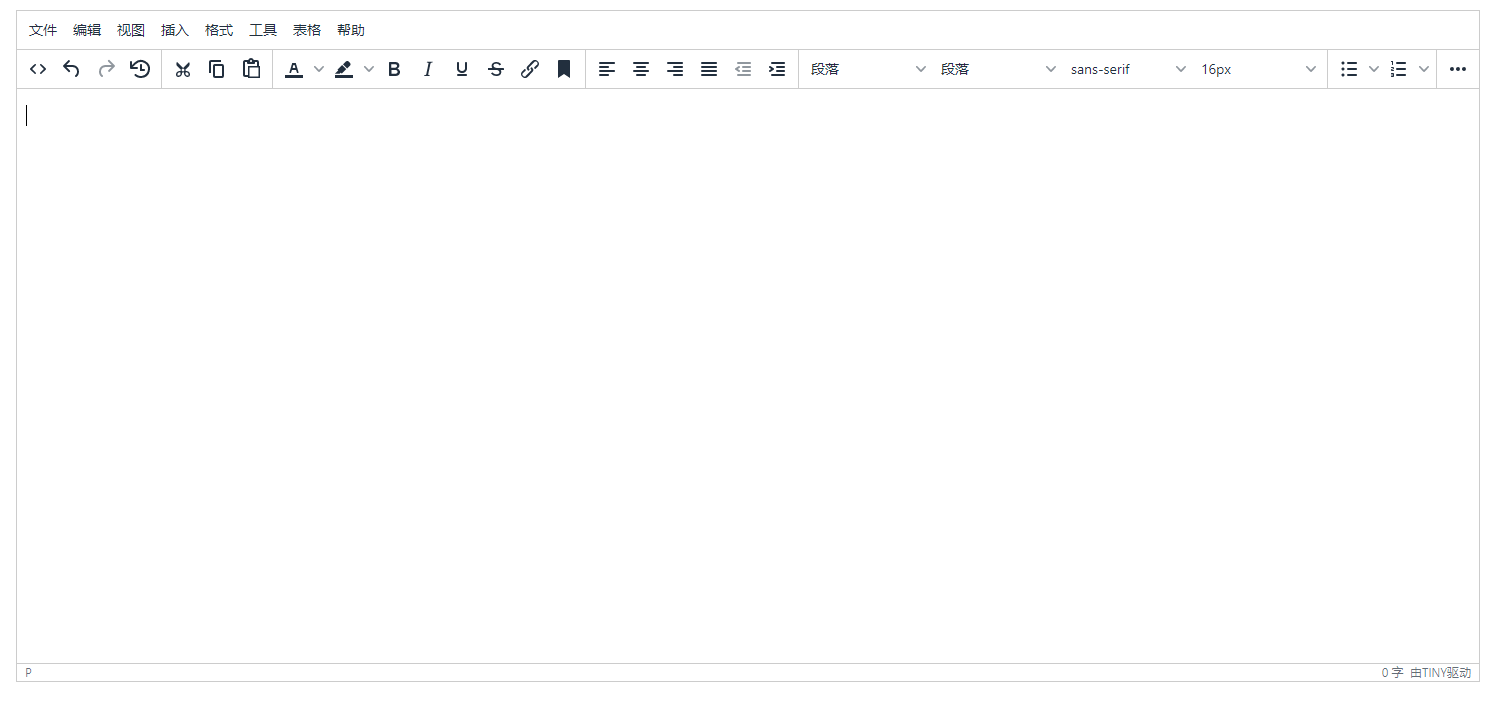
弄完之后大概是这个亚子

如果这篇博客帮到你了,可以请作者喝瓶可乐!!


【推荐】还在用 ECharts 开发大屏?试试这款永久免费的开源 BI 工具!
【推荐】国内首个AI IDE,深度理解中文开发场景,立即下载体验Trae
【推荐】编程新体验,更懂你的AI,立即体验豆包MarsCode编程助手
【推荐】轻量又高性能的 SSH 工具 IShell:AI 加持,快人一步
· .NET制作智能桌面机器人:结合BotSharp智能体框架开发语音交互
· 软件产品开发中常见的10个问题及处理方法
· .NET 原生驾驭 AI 新基建实战系列:向量数据库的应用与畅想
· 从问题排查到源码分析:ActiveMQ消费端频繁日志刷屏的秘密
· 一次Java后端服务间歇性响应慢的问题排查记录
· 《HelloGitHub》第 108 期
· Windows桌面应用自动更新解决方案SharpUpdater5发布
· 我的家庭实验室服务器集群硬件清单
· C# 13 中的新增功能实操
· Supergateway:MCP服务器的远程调试与集成工具