
springboot+mybatis+freemark+oauth开发环境搭建
一、创建springboot工程
1.环境介绍:
a:jdk版本:1.7
b:Springboot版本:1.5.6(使用1.5.9的版本整合mybatis会报错:java.lang.NoClassDefFoundError: org/springframework/dao/support/DaoSupport)
c:工程类型:maven工程
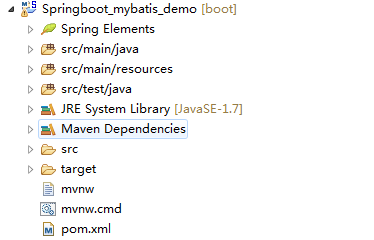
2.创建maven工程:
二、springboot整合mybatis:
1.添加依赖:
<dependency>
  <groupId>org.springframework.boot</groupId>
  <artifactId>spring-boot-starter-web</artifactId>
</dependency>
<!--添加Mybatis依赖 -->
<dependency>
    <groupId>org.mybatis.spring.boot</groupId>
    <artifactId>mybatis-spring-boot-starter</artifactId>
    <version>1.3.1</version>
</dependency>
<!--添加MySQL驱动依赖 -->
<dependency>
    <groupId>mysql</groupId>
    <artifactId>mysql-connector-java</artifactId>
</dependency>
2.配置application.properties:
#端口设置(默认8080)
server.port=9090
#数据库相关配置
spring.datasource.url=jdbc:mysql://localhost:3306/test
spring.datasource.username=root
spring.datasource.password=
spring.datasource.driver-class-name=com.mysql.jdbc.Driver

#mybatis相关配置
mybatis.type-aliases-package=com.example.bean
mybatis.mapper-locations=classpath:mapper/*.xml
3.编写控制层、业务层代码:
a:UserController.java
package com.example.controller;

import org.springframework.beans.factory.annotation.Autowired;
import org.springframework.stereotype.Controller;
import org.springframework.web.bind.annotation.RequestMapping;
import org.springframework.web.bind.annotation.RequestMethod;
import org.springframework.web.servlet.ModelAndView;
import com.example.service.UserService;

@Controller
@RequestMapping(value = "/user")
public class UserController {

     @Autowired
     private UserService userService;


     @RequestMapping(value = "/selectAll",method=RequestMethod.GET)
     public ModelAndView selectAll(){
         ModelAndView mv = new ModelAndView();
         mv = userService.selectAll();
         return mv;
     }

}
b:UserService.java(service接口)
package com.example.service;

import org.springframework.web.servlet.ModelAndView;

public interface UserService {

    public ModelAndView selectAll();
}
c:UserServiceImpl.java(service实现)
package com.example.service.impl;

import java.util.List;

import org.springframework.beans.factory.annotation.Autowired;
import org.springframework.stereotype.Service;
import org.springframework.web.servlet.ModelAndView;
import com.example.bean.User;
import com.example.dao.UserDao;
import com.example.service.UserService;

@Service(value = "userService")
public class UserServiceImpl implements UserService{

    @Autowired
    private UserDao userDao;

    @Override
    public ModelAndView selectAll() {
        ModelAndView mv = new ModelAndView();
        List<User> list = userDao.selectAll();
        for (User user : list) {
            System.out.println(user);
        }
        mv.addObject("userList", list);
        mv.setViewName("demo");
        return mv;
    }

}
d:UserDao.java(dao层接口)
package com.example.dao;

import java.util.List;

import com.example.bean.User;

public interface UserDao {

    public List<User> selectAll();
}
e:UserMapper.xml(mybatis的mapper.xml文件)
<?xml version="1.0" encoding="UTF-8" ?>

<!DOCTYPE mapper PUBLIC "-//mybatis.org//DTD Mapper 3.0//EN" "http://mybatis.org/dtd/mybatis-3-mapper.dtd" >
<mapper namespace="com.example.dao.UserDao">

    <resultMap id="BaseResultMap" type="com.example.bean.User" >
        <id column="pkid" property="pkid" jdbcType="INTEGER" />
        <result column="userName" property="userName" jdbcType="VARCHAR" />
        <result column="passWord" property="passWord" jdbcType="VARCHAR" />
        <result column="userInfo" property="userInfo" jdbcType="VARCHAR" />
      </resultMap>

    <select id="selectAll" resultMap="BaseResultMap">
        select * from user where 1=1
    </select>
</mapper>
f:数据库表及数据:
CREATE TABLE `user` (
  `pkid` int(10) NOT NULL DEFAULT '0',
  `userName` varchar(20) DEFAULT NULL,
  `passWord` varchar(20) DEFAULT NULL,
  `userInfo` varchar(100) DEFAULT NULL,
  PRIMARY KEY (`pkid`)
) ENGINE=InnoDB DEFAULT CHARSET=utf8;

g:SpringbootApplication.java(springboot启动类配置)
package com.example;

import org.mybatis.spring.annotation.MapperScan;
import org.springframework.boot.SpringApplication;
import org.springframework.boot.autoconfigure.SpringBootApplication;

@SpringBootApplication
@MapperScan("com.example.dao")
public class SpringbootMybatisDemoApplication {

    public static void main(String[] args) {
        SpringApplication.run(SpringbootMybatisDemoApplication.class, args);
    }
}
三、springboot整合freemark:
1.添加依赖:
<!-- 添加freemark依赖 -->
<dependency>
    <groupId>org.springframework.boot</groupId>
    <artifactId>spring-boot-starter-freemarker</artifactId>
</dependency>
2.添加application.propertis配置:
#freemark配置
spring.freemarker.template-loader-path=classpath:/templates/
spring.freemarker.suffix=.ftl
注:springboot整合freemark后,默认模板的后缀就是.ftl,因此,上面配置文件中的spring.freemarker.suffix=.ftl可以省略。
3.创建freemark模板文件:
在resources文件夹下创建templates文件夹用于存放.ftl模板文件
demo.ftl文件内容如下:
<!DOCTYPE html>
<html>
<head>
<meta charset="UTF-8">
<title>Insert title here</title>
</head>
<body>
    <h1>用户信息表:</h1><hr/>
    <table>
        <tr>
            <td>用户ID</td>
            <td>用户名</td>
            <td>密码</td>
            <td>用户信息</td>
        </tr>
        <#list userList as item>
            <tr>
                <td>${item.pkid}</td>
                <td>${item.userName}</td>
                <td>${item.passWord}</td>
                <td>${item.userInfo}</td>
            </tr>
        </#list>
    </table>
</body>
</html>
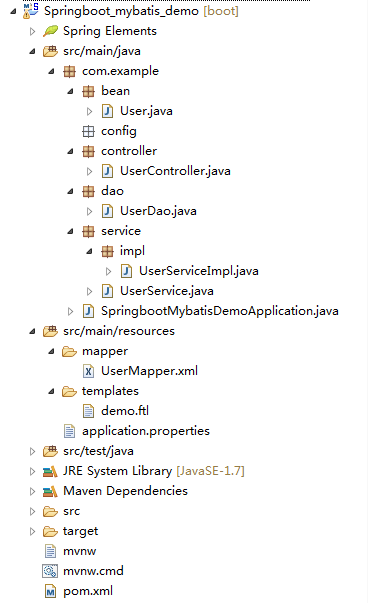
4.工程结构图:
这里再贴一个完整的pom.xml文件吧:
<?xml version="1.0" encoding="UTF-8"?>
<project xmlns="http://maven.apache.org/POM/4.0.0" xmlns:xsi="http://www.w3.org/2001/XMLSchema-instance"
    xsi:schemaLocation="http://maven.apache.org/POM/4.0.0 http://maven.apache.org/xsd/maven-4.0.0.xsd">
    <modelVersion>4.0.0</modelVersion>

    <groupId>com.example</groupId>
    <artifactId>Springboot_mybatis_demo</artifactId>
    <version>0.0.1-SNAPSHOT</version>
    <packaging>jar</packaging>

    <name>Springboot_mybatis_demo</name>
    <description>Demo project for Spring Boot</description>

    <parent>
        <groupId>org.springframework.boot</groupId>
        <artifactId>spring-boot-starter-parent</artifactId>
        <version>1.5.6.RELEASE</version>
        <relativePath/> <!-- lookup parent from repository -->
    </parent>

    <properties>
        <project.build.sourceEncoding>UTF-8</project.build.sourceEncoding>
        <project.reporting.outputEncoding>UTF-8</project.reporting.outputEncoding>
        <java.version>1.7</java.version>
    </properties>

    <dependencies>
        <dependency>
            <groupId>org.springframework.boot</groupId>
            <artifactId>spring-boot-starter</artifactId>
        </dependency>

        <dependency>
            <groupId>org.springframework.boot</groupId>
            <artifactId>spring-boot-starter-test</artifactId>
            <scope>test</scope>
        </dependency>

        <!--添加Web依赖 -->
        <dependency>
            <groupId>org.springframework.boot</groupId>
            <artifactId>spring-boot-starter-web</artifactId>
        </dependency>

        <!--添加Mybatis依赖 -->
        <dependency>
            <groupId>org.mybatis.spring.boot</groupId>
            <artifactId>mybatis-spring-boot-starter</artifactId>
            <version>1.3.0</version>
        </dependency>
        <!--添加MySQL驱动依赖 -->
        <dependency>
            <groupId>mysql</groupId>
            <artifactId>mysql-connector-java</artifactId>
        </dependency>
        <!-- 添加freemark依赖 -->
        <dependency>
            <groupId>org.springframework.boot</groupId>
            <artifactId>spring-boot-starter-freemarker</artifactId>
        </dependency>

    </dependencies>

    <build>
        <plugins>
            <plugin>
                <groupId>org.springframework.boot</groupId>
                <artifactId>spring-boot-maven-plugin</artifactId>
            </plugin>
        </plugins>
    </build>


</project>
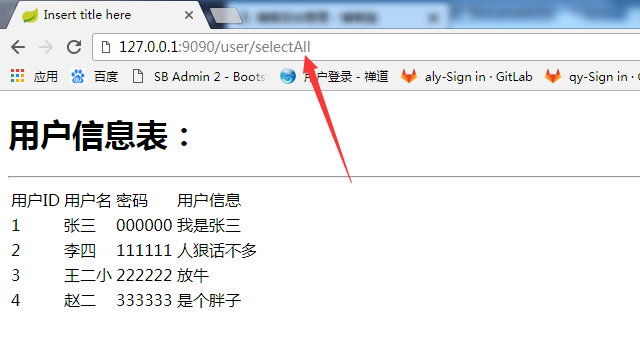
至此,Springboot整合mybatis,Springboot整合freemark的所有配置就完成了,启动springboot项目,浏览器输入127.0.0.1:9090/user/selectAll测试效果如下:
5.效果图:
四、springboot整合oauth:
还在整合,待续。。。

 浙公网安备 33010602011771号