Centos 7安装Elasticsearch 7.6
Centos 7安装Elasticsearch 7.6
Elasticsearch与JDK版本对应关系
在安装
Elasticsearch时,要注意Elasticsearch与JDK的版本对应关系。且Elasticsearch7.6已经内置了JDK环境,不需要本地安装环境支持。
Elasticsearch与JDK版本具体的对应关系可访问官网查看,链接如下:
Elasticsearch 7.6安装
1 下载与解压
本地Linux系统版本:

# 下载Elasticsearch 7.6
wget https://artifacts.elastic.co/downloads/elasticsearch/elasticsearch-7.6.2-linux-x86_64.tar.gz

# 解压
tar -zxvf elasticsearch-7.6.2-linux-x86_64.tar.gz

# 将文件移动到/usr/local目录
cp -r ./elasticsearch-7.6.2 /usr/local
最终安装路径:/usr/local/elasticsearch-7.6.2
2 软件配置
出于安全考虑,Elasticsearch 禁止使用 root 帐号启动,会报错。
java.lang.RuntimeException: can not run elasticsearch as root
创建启动Elasticsearch的新用户
# 创建用户
useradd lzy
# 设置密码
passwd 123456

# 创建 data 和 logs 文件夹
mkdir -p /home/lzy/software/elasticsearch/data
mkdir -p /home/lzy/software/elasticsearch/logs

# 修改文件夹权限
chmod -R 777 /usr/local/elasticsearch-7.6.2
chmod -R 777 /home/lzy/software/elasticsearch
配置 elasticsearch.yml
cd /usr/local/elasticsearch-7.6.2/config
vim elasticsearch.yml
# 表示支持跨域访问
http.cors.enabled: true
# 支持跨域访问时,默认值为"*",表示支持所有域名访问
http.cors.allow-origin: "*"

# 自定义集群名和节点名
cluster.name: lzy-elasticsearch
node.name: node-1

# 数据路径
path.data: /home/lzy/software/elasticsearch/data
# 日志路径
logs.data: /home/lzy/software/elasticsearch/logs

# 配置远程访问
network.host: 0.0.0.0

# 配置访问端口
http.port: 9200

cluster.initial_master_nodes: ["node-1"]
配置 Java 虚拟机参数
vim jvm.options

# JVM初始分配的堆内存
-Xms512m
# JVM最大允许分配的堆内存
-Xmx512m
配置 vm.max_map_count 参数
vim /etc/sysctl.conf
vm.max_map_count = 655360

# 保存之后在终端执行下列命令,刷新参数
sysctl -p
不设置该参数会报错:max virtual memory areas vm.max_map_count [65530] is too low, increase to at least [262144]
设置 limits.conf
vim /etc/security/limits.conf

# 设置每个进程可开启的最大文件数
lzy soft nofile 65535
lzy hard nofile 65535
不设置该参数会报错:max file descriptors [4096] for elasticsearch process is too low, increase to at least [65535]
3 启动 Elasticsearch
# 切换帐号
su lzy

# 启动Elasticsearch
cd /usr/local/elasticsearch-7.6.2/bin
./elasticsearch
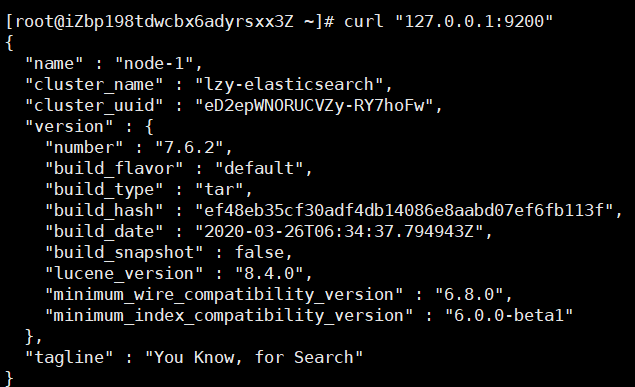
本地访问

远程访问

4 设置密码
cd /usr/local/elasticsearch-7.6.2/config
vim elasticsearch.yml
# 在文件尾部加上下列设置
http.cors.allow-headers: Authorization
xpack.security.enabled: true
xpack.security.transport.ssl.enabled: true
启动 Elasticsearch
su lzy
cd /usr/local/elasticsearch-7.6.2/bin

# 后台启动
./elasticsearch -d

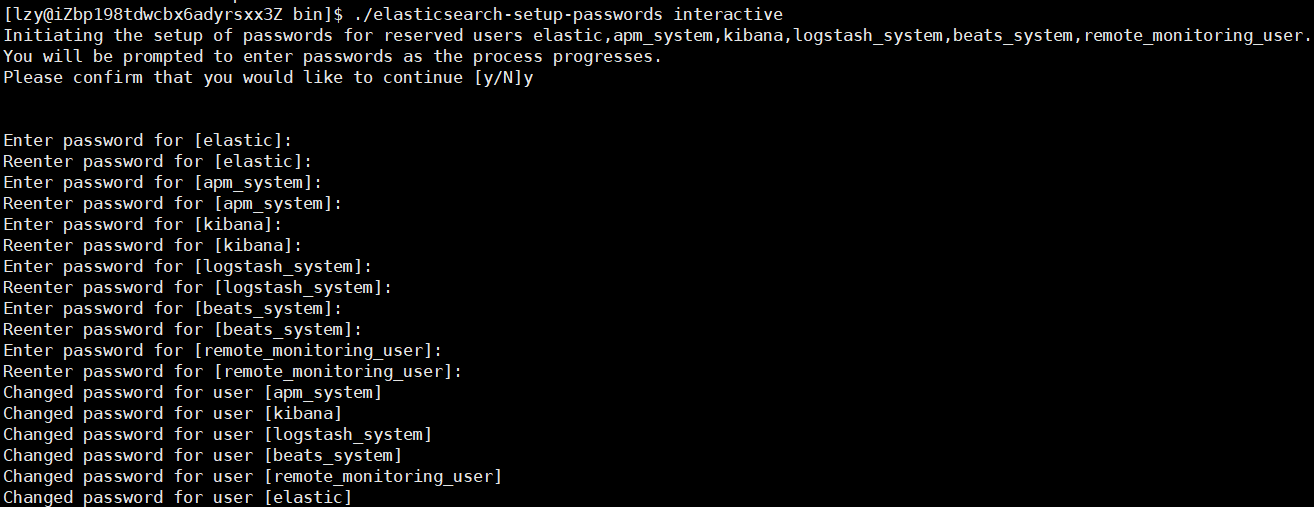
# 设置密码
./elasticsearch-setup-passwords interactive

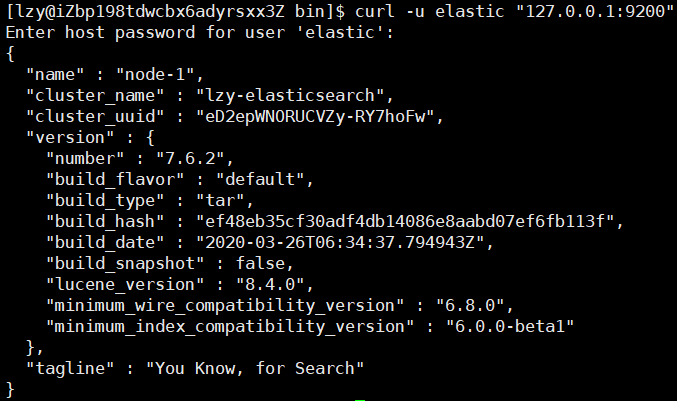
需要携带用户名和密码访问

5 Tips
如果使用的是阿里云服务器,需要配置安全组或者防火墙,否则无法通过 http://ip:9200 远程访问。笔者自己使用的是阿里云轻量应用服务器,配置防火墙即可。

在服务器终端添加端口
# 查看防火墙状态
systemctl status firewalld

# 开启端口
# The permanent option --permanent can be used to set options permanently
firewall-cmd --zone=public --add-port=9200/tcp --permanent

# Reload firewall rules and keep state information
firewall-cmd --reload
这样就可以顺利通过 http://ip:9200 远程访问服务器启动的Elasticsearch。


