potree加载全景图
potree 加载全景图
加载全景图
potree全景图加载示例代码
//360.html
		async function run(){

			proj4.defs("WGS84", "+proj=longlat +ellps=WGS84 +datum=WGS84 +no_defs");
			proj4.defs("pointcloud", viewer.getProjection());
			let transform = proj4("WGS84", "pointcloud");

			let params = {
				transform: transform
			};

			// this file contains coordinates, orientation and filenames of the images:
			// http://5.9.65.151/mschuetz/potree/resources/pointclouds/helimap/360/Drive2_selection/coordinates.txt
			Potree.Images360Loader.load("http://5.9.65.151/mschuetz/potree/resources/pointclouds/helimap/360/Drive2_selection", viewer, params).then( images => {//这里的网址要放置你自己的文件
				viewer.scene.add360Images(images);
			});

			viewer.mapView.showSources(false);
		}
potree加载的全景图的文件夹必须有一个coordinates.txt文件,这个文件格式为

包含了文件名,事件,经纬度和俯仰角,也就是说你加载的文件夹图片必须首先更改Potree.Images360Loader.load的路径,并且这个文件夹内必须还有coordinates.txt。
coordinates.txt
那么如果需要更改coordinates这个文件,我们必须获取到每张图片拍摄点的经纬度。
.csv文件
使用点云拍摄的时候,产生了一个.csv文件,文件内容大致为

其中的xyz就是相对位置坐标,即相对于你最开始拍摄点的相对位置,
也就是说我们上一份文档中写的"projection": "+proj=somerc +lat_0=29.922795 +lon_0=121.626294 +k_0=1 +X_0=0 +y_0=0 +units=m"中的经纬度其实是这个坐标系的原点,因此我们需要将这个相对位置转换成经纬度之间的差值即可
earth_radius = 6371000  # 地球半径(米)
ref_latitude = 29.922795
ref_longitude = 121.626294
ref_altitude = 0  # 高度设置为0
def coordinate_transform(pano_pos_x, pano_pos_y, pano_pos_z):
   # 计算经度偏移
    longitude_offset = pano_pos_x / (earth_radius * math.cos(math.radians(ref_latitude)))

    # 计算纬度偏移
    latitude_offset = pano_pos_y / earth_radius

    # 计算新的经纬度
    new_longitude = ref_longitude + math.degrees(longitude_offset)
    new_latitude = ref_latitude + math.degrees(latitude_offset)
    new_altitude = ref_altitude + pano_pos_z


    return new_longitude, new_latitude, new_altitude
导入.csv文件
with open('pano-poses.csv', 'r') as file:
    reader = csv.reader(file)

    # 跳过第一行
    next(reader)

    with open('coordinates.txt', 'w') as output_file:
        image_number = 0  # 图片编号
        for row in reader:
            data = row[0].split(';')
            if len(data) >= 7:
                try:
                    pano_pos_x = float(data[3])
                    pano_pos_y = float(data[4])
                    pano_pos_z = float(data[5])
                    new_longitude, new_latitude, altitude = coordinate_transform(pano_pos_x, pano_pos_y, pano_pos_z)

                    # 生成图片名称
                    image_name = f"{image_number:05d}-pano.jpg"
                    image_number += 1

                    # 格式化并将数据写入 coordinates.txt 文件
                    output_line = f'"{image_name}" 206923.07709 {format_float(new_longitude)} {format_float(new_latitude)} {altitude} 0 0 0\n'
                    output_file.write(output_line)
                except ValueError:
                    print("Invalid data in this row:", row)
注意
这里尤其注意,经过测试coordinates.txt好像有一定的格式,如果加载不出来,可能数据之间的空格必须符合http://5.9.65.151/mschuetz/potree/resources/pointclouds/helimap/360/Drive2_selection/coordinates.txt这里的格式
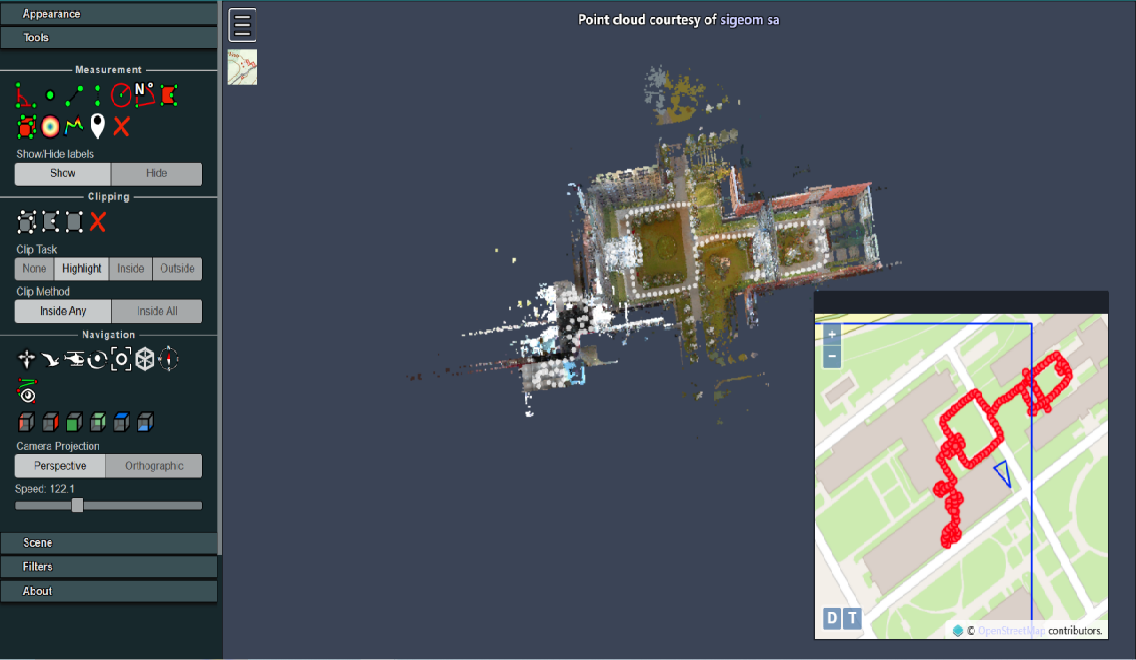
新的问题

这里可以看到点云和全景图基本符合,但是地图并没有匹配上。因为从一开始我们的点云就只有一个经纬度坐标也就是说从一开始就没有点云就没有和地图匹配
匹配地图
这里并没有一个好的方法,经过调试发现最终这个点云如果想和地图匹配还是需要手动调整(也不绝对,希望有高手补充)
这里有点云旋转和平移的代码,但是这里旋转和平移的局部坐标远点并不是我们上面一开始设置的初始经纬度原点,为此这里的方法仅供参考
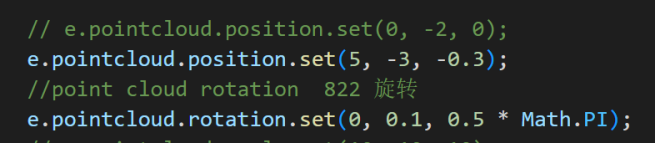
e.pointcloud.position.set

记住原点的位置之后然后将e.pointcloud.position设置为(0,0,0)设置好后,刷新页面
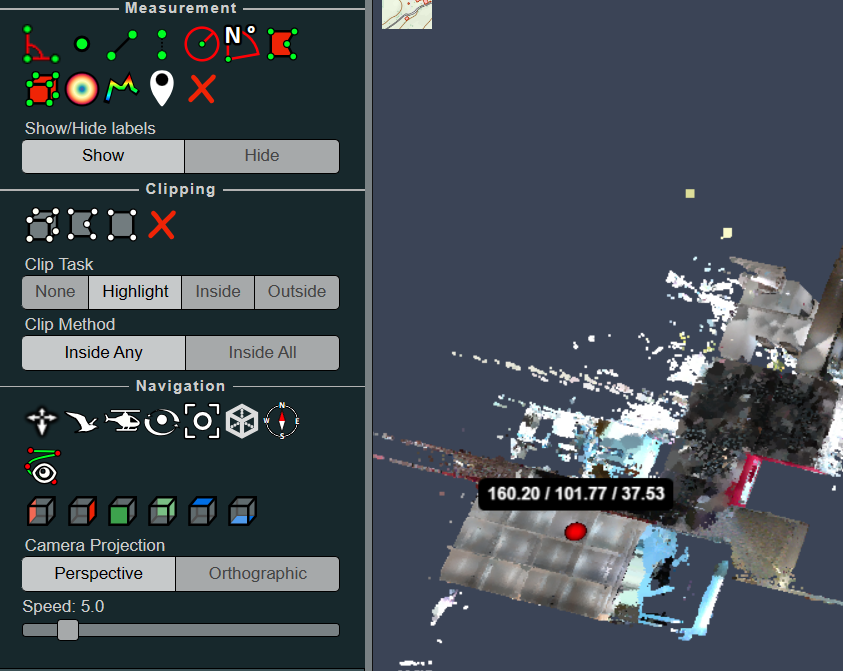
再找到原来原点的位置,两个点相减就是初始平移之间的差值,也就是说之后如果有涉及到平移之间的问题要考虑到初始位置和e.pointcloud.position设置的原点不一样
当然这个因为手动所以肯定会有误差,最后的结果是多找几个点取平均
e.pointcloud.rotation.set
这里的旋转每个参数确实对应的是绕x\y\z轴的旋转,但它的绕的原点也不是初始设置的原点
为此也是一样,需要找几个点辅助验证

之后再将代码更改为e.pointcloud.rotation.set( 0, 0,Math.PI);
这样这个坐标就旋转了180度,在刷新页面,我们再找这三个点,每两个对应点的(x,y)相加在整除2,就是我们绕着旋转的原点。(去三个点也是为了找平均)
当然这个因为手动所以肯定会有误差,最后的结果是多找几个点取平均
把原始代码按照地图匹配结果进行更进
像这里我的最后平移和旋转为

为此最终的代码为
import csv
import math

earth_radius = 6371000  # 地球半径(米)
ref_latitude = 29.922795
ref_longitude = 121.626294
ref_altitude = 0  # 高度设置为0

def format_float(value):
    # 将浮点数格式化为小数点后8位的字符串,确保不足8位时补零
    return f"{value:.8f}"

def hhh(pano_pos_x, pano_pos_y, pano_pos_z):
    longitude_offset = pano_pos_x / (earth_radius * math.cos(math.radians(ref_latitude)))

    # 计算纬度偏移
    latitude_offset = pano_pos_y / earth_radius

    # 计算新的经纬度
    new_longitude = ref_longitude + math.degrees(longitude_offset)
    new_latitude = ref_latitude + math.degrees(latitude_offset)
    new_altitude = ref_altitude + pano_pos_z

    return new_longitude, new_latitude, new_altitude

with open('pano-poses.csv', 'r') as file:
    reader = csv.reader(file)
    image_number = 0  # 图片编号
    num = 206923.07709
    # 跳过第一行
    next(reader)

    with open('coordinates.txt', 'w') as output_file:
        for row in reader:
            data = row[0].split(';')
            if len(data) >= 7:
                try:
                    pano_pos_x = float(data[3]) + 197.21  # Add your initial adjustment
                    pano_pos_y = float(data[4]) + 279.03
                    pano_pos_z = float(data[5]) + 37.53

                    # Additional transformation - rotate around (38.5, 176.4, 1.5) by 0.75*PI
                    rotation_point = (38.5, 176.4, 1.5)
                    rotation_angle = -0.75 * math.pi
                    x_translated = pano_pos_x - rotation_point[0]
                    y_translated = pano_pos_y - rotation_point[1]
                    z_translated = pano_pos_z - rotation_point[2]
                    x_rotated = x_translated * math.cos(rotation_angle) - y_translated * math.sin(rotation_angle)
                    y_rotated = x_translated * math.sin(rotation_angle) + y_translated * math.cos(rotation_angle)
                    pano_pos_x = x_rotated + rotation_point[0]
                    pano_pos_y = y_rotated + rotation_point[1]
                    pano_pos_z = z_translated + rotation_point[2]

                    new_longitude, new_latitude, altitude = hhh(pano_pos_x, pano_pos_y, pano_pos_z)

                    image_name = f"{image_number:05d}-pano.jpg"
                    image_number += 1
                    num += 1
                    # 将数据写入 coordinates.txt 文件
                    output_line = f'"{image_name}"	{num}	{format_float(new_longitude)}	{format_float(new_latitude)}	{format_float(altitude)}	0	0	0\n'
                    output_file.write(output_line)
                except ValueError:
                    print("Invalid data in this row:", row)
最后匹配上的数据肯定没有最初的好,因为之后走的每一步都在增加误差,所以还在找更好的方法更改,当然欢迎大佬讨论。


