pygame-KidsCanCode系列jumpy-part2-加速度与摩擦力
上一节,我们整理了一个游戏开发的新框架(即:Game类),本节将运用这个框架,实现基本的加速度及摩托力效果。
先定义游戏的精灵(下面代码命名为sprites.py)
from part_02.settings import *
import pygame as pg

# Vector可以看成(x,y)的封装
vec = pg.math.Vector2


class Player(pg.sprite.Sprite):
    def __init__(self):
        pg.sprite.Sprite.__init__(self)
        self.image = pg.Surface((30, 30))
        self.image.fill(YELLOW)
        self.rect = self.image.get_rect()
        self.rect.center = WIDTH / 2, HEIGHT / 2
        self.pos = self.rect.center
        # 速度
        self.vel = vec(0, 0)
        # 加速度
        self.acc = vec(0, 0)
        self.width = self.rect.width
        self.height = self.rect.height

    def update(self):
        # 每帧更新前,先初始化加速度为0
        self.acc = vec(0, 0)
        keys = pg.key.get_pressed()
        if keys[pg.K_LEFT]:
            # 按左键时,减速
            self.acc.x = -PLAYER_ACC
        if keys[pg.K_RIGHT]:
            # 按右键时,加速
            self.acc.x = PLAYER_ACC

        # 加速(或减速)时,加入摩擦系数
        self.acc += self.vel * PLAYER_FRICTION

        # 将加速度,作用到速度上
        self.vel += self.acc

        # 更新sprite在屏幕上的位置
        self.pos += self.vel

        # 边界处理
        if self.rect.left > WIDTH:
            self.pos.x = 0 - self.width / 2
        if self.rect.right < 0:
            self.pos.x = WIDTH + self.width / 2

        # 更新rect到新的位置
        self.rect.center = self.pos
稍作解释:
1. 在2D游戏中,会大量用到类似(x,y)的结构,pygame中已经把这种结构封装成了Vector2,我们就直接用它了
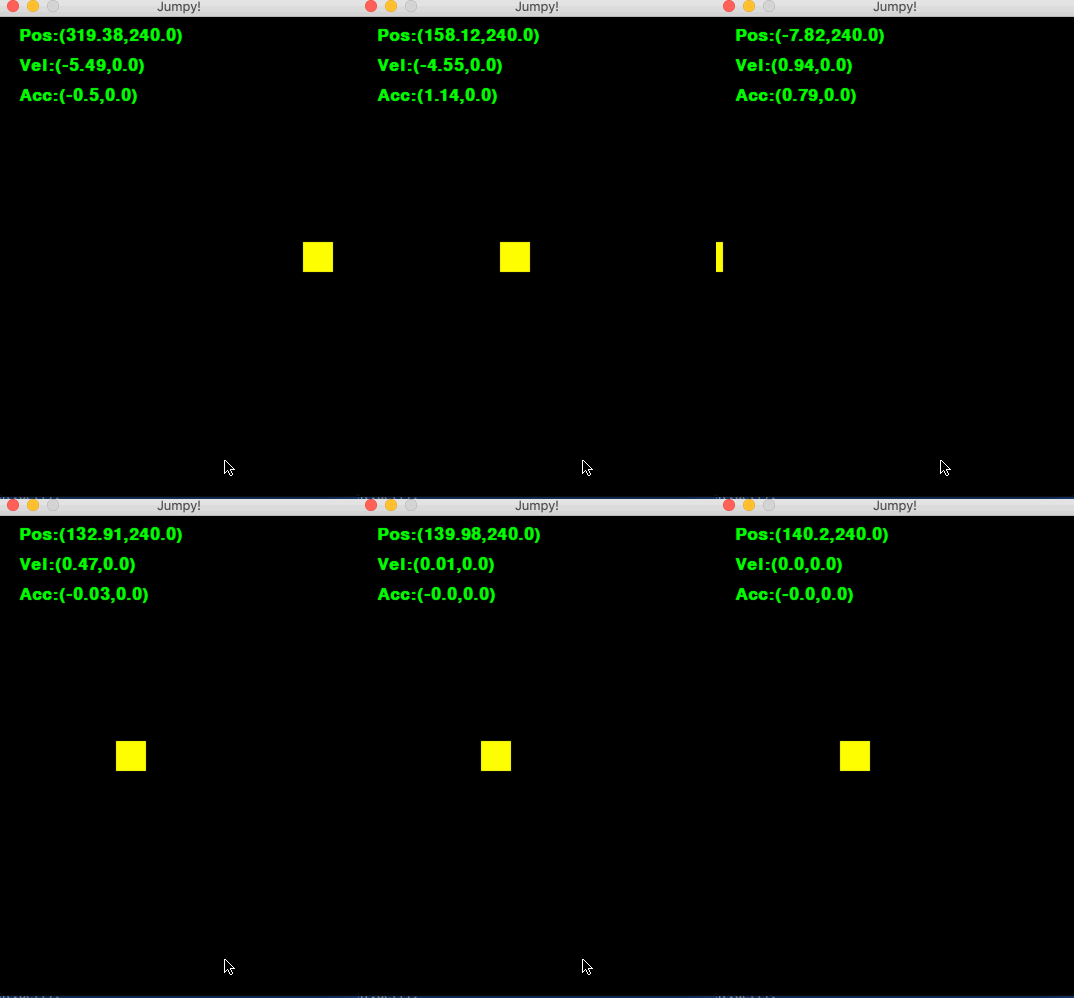
2. 加速度的定义:单位时间内速度的变化量。在游戏中,最基本的单位就是帧,类似于单位时间,所以每一帧,我们在速度self.vel(velocity的缩写)值上的改变即为加速度self.acc( acceleration的缩写)
3. 摩擦力的效果,表现为阻碍物体运动,具体在代码中体现,只要想办法把速度减少一点点,由于加速度也会影响速度,所以有二种做法:a、让每次加速度acc的变化小一点; b、让每次速度vel的变化小一点。上面的代码,使用的是a做法。
加速度以及摩托系数的常量定义,仍然放在settings.py中:
# game options
SIZE = WIDTH, HEIGHT = 360, 480
FPS = 60

TITLE = "Jumpy!"

# Player properties
PLAYER_ACC = 0.8  # 加速度
PLAYER_FRICTION = -0.06  # 摩擦系数

# define color
BLACK = 0, 0, 0
WHITE = 255, 255, 255
RED = 255, 0, 0
GREEN = 0, 255, 0
BLUE = 0, 0, 255
YELLOW = 255, 255, 0
然后在main.py中,利用上节的新框架,把新的sprite类导进来:
from part_02.sprites import *
from part_02.sprites import Player


class Game:

    def __init__(self):
        pg.init()
        pg.mixer.init()
        self.screen = pg.display.set_mode(SIZE)
        pg.display.set_caption(TITLE)
        self.clock = pg.time.Clock()
        self.running = True
        self.playing = False

    def new(self):
        self.all_sprites = pg.sprite.Group()
        # 创建玩家实例,并加入容器
        self.player = Player()
        self.all_sprites.add(self.player)
        g.run()

    def run(self):
        self.playing = True
        while self.playing:
            self.clock.tick(FPS)
            self.events()
            self.update()
            self.draw()

    def update(self):
        self.all_sprites.update()

    def events(self):
        for event in pg.event.get():
            if event.type == pg.QUIT:
                if self.playing:
                    self.playing = False
                self.running = False

    def draw(self):
        self.screen.fill(BLACK)
        self.all_sprites.draw(self.screen)
        self.debug()
        pg.display.update()

    # 为了方便观察pos,vel,acc这些变量,定义一个debug辅助函数
    def debug(self):
        font = pg.font.SysFont('Menlo', 25, True)
        pos_txt = font.render(
            'Pos:(' + str(round(self.player.pos.x, 2)) + "," + str(round(self.player.pos.y, 2)) + ")", 1, GREEN)
        vel_txt = font.render(
            'Vel:(' + str(round(self.player.vel.x, 2)) + "," + str(round(self.player.vel.y, 2)) + ")", 1, GREEN)
        acc_txt = font.render(
            'Acc:(' + str(round(self.player.acc.x, 2)) + "," + str(round(self.player.acc.y, 2)) + ")", 1, GREEN)
        self.screen.blit(pos_txt, (20, 10))
        self.screen.blit(vel_txt, (20, 40))
        self.screen.blit(acc_txt, (20, 70))

    def show_start_screen(self):
        pass

    def show_go_screen(self):
        pass


g = Game()
g.show_start_screen()
while g.running:
    g.new()
    g.show_go_screen()

pg.quit()
新框架的好处这时候就体现出来了,核心代码只要在19行,创建Player实例,并加入all_sprites容器即可。

作者:菩提树下的杨过
出处:http://yjmyzz.cnblogs.com
本文版权归作者和博客园共有,欢迎转载,但未经作者同意必须保留此段声明,且在文章页面明显位置给出原文连接,否则保留追究法律责任的权利。
出处:http://yjmyzz.cnblogs.com
本文版权归作者和博客园共有,欢迎转载,但未经作者同意必须保留此段声明,且在文章页面明显位置给出原文连接,否则保留追究法律责任的权利。


