

pandas速成笔记(2)-excel增删改查基本操作
接上篇继续,本篇演示对excel的基本增删改查操作。
一、读取excel
1.1 常规读取
假设有以下excel文件: 002.xlsx
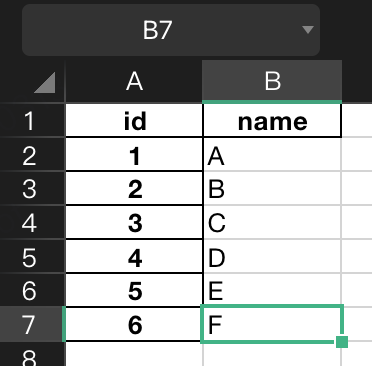
用pandas可以这样读取:
1 2 3 4 5 6 | import pandas as pddf = pd.read_excel("data/002.xlsx")print(df.shape)print(df.columns)print(df) |
显示如下:
1 2 3 4 5 6 7 8 9 | (6, 2)Index(['id', 'name'], dtype='object') id name0 1 A1 2 B2 3 C3 4 D4 5 E5 6 F |
解释:
第1行输出(6,2),表示这是6行2列
第2行输出的是列信息,表示有id, name这2列,都是object类型
第3行输出的就是表格数据,注意最左没有列名的这列,从0到5,如果做过数据库开发的同学,应该都知道:数据表内部通常会有一个唯一键,也称为主键索引。pandas读取的excel,如果没有指定索引,默认会按数字顺序,生成1个默认的索引,即上面的0-5。
如果在读取时,微调一下,指定索引列:
1 | df = pd.read_excel("data/002.xlsx", index_col="id") |
输出就变成了下面这样:
1 2 3 4 5 6 7 8 9 10 | (6, 1)Index(['name'], dtype='object') nameid 1 A2 B3 C4 D5 E6 F |
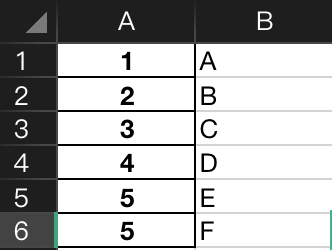
可以看到id变成了现在的索引列,但是要注意一点:pandas里的索引列,跟数据库表中的主键索引,还是有不同的,它允许重复! 感兴趣的同学,可以把这个excel文件的id列,找2行,改成相同的值,比如下面这样:

还是刚才的代码,输出如下:
1 2 3 4 5 6 7 8 9 10 | (6, 1)Index(['name'], dtype='object') nameid 1 A2 B3 C4 D5 E5 F |
1.2 无标题行的excel读取
有时候,可能拿到的excel,没有title,只有数据,比如这样:
1 2 3 4 | import pandas as pddf = pd.read_excel("data/002.xlsx")print(df) |
这时候,读出来是这样:
1 2 3 4 5 6 | 1 A0 2 B1 3 C2 4 D3 5 E4 5 F |
第1行数据会误认为是title,可以加上header=None
1 2 3 4 | import pandas as pddf = pd.read_excel("data/002.xlsx", header=None)print(df) |
这样就正常了:
1 2 3 4 5 6 7 | 0 10 1 A1 2 B2 3 C3 4 D4 5 E5 5 F |
1.3 左侧与上边有空行的读取
再来看一种特殊情况:数据左边和上边都有空行
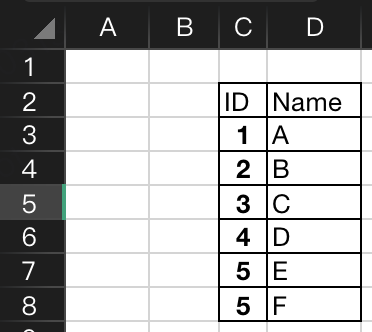
同样可以加一些参数 skiprows=1 , usecols="C:D"表示跳过1行,列从C至D
1 2 3 4 | import pandas as pddf = pd.read_excel("data/002.xlsx", skiprows=1, usecols="C:D", index_col="ID")print(df) |
1.4 多Sheet的读取
假设excel文件,有下面2个Sheet
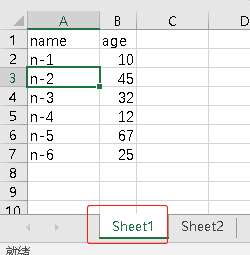
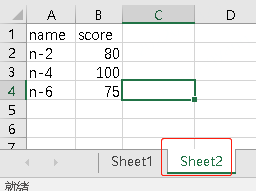
可以通过sheet_name=xxx来指定读取
1 2 3 4 5 6 7 | import pandas as pddf1 = pd.read_excel("./data/test.xlsx", sheet_name="Sheet1")df2 = pd.read_excel("./data/test.xlsx", sheet_name="Sheet2")print(df1)print("----------------------")print(df2) |
输出:
1 2 3 4 5 6 7 8 9 10 11 12 | name age0 n-1 101 n-2 452 n-3 323 n-4 124 n-5 675 n-6 25---------------------- name score0 n-2 801 n-4 1002 n-6 75 |
二、添加/删除一行(或一列)
还是这个excel文件:
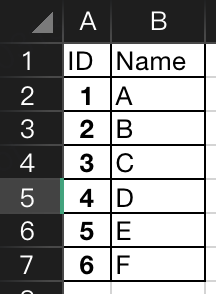
2.1 添加一行
1 2 3 4 5 6 7 8 9 | import pandas as pddf = pd.read_excel("data/002.xlsx", index_col="ID")print(df)print("----------")# 添加一行df.loc[df.size + 1] = {"ID": 7, "Name": "H"}print(df) |
输出如下:
1 2 3 4 5 6 7 8 9 10 11 12 13 14 15 16 17 18 | NameID 1 A2 B3 C4 D5 E6 F---------- NameID 1 A2 B3 C4 D5 E6 F7 H |
2.2 添加一列
1 2 3 4 5 6 7 8 9 | import pandas as pddf = pd.read_excel("data/002.xlsx", index_col="ID")print(df)print("----------")# 添加一列df['Age'] = range(21, 27)print(df) |
输出:
1 2 3 4 5 6 7 8 9 10 11 12 13 14 15 16 17 | NameID 1 A2 B3 C4 D5 E6 F---------- Name AgeID 1 A 212 B 223 C 234 D 245 E 256 F 26 |
2.3 删除一行(或一列)
1 2 3 4 5 6 7 8 9 10 11 12 13 14 15 16 17 18 19 | import pandas as pddf = pd.read_excel("data/002.xlsx", index_col="ID")print(df)print("----------")# 先添加一列df['Age'] = range(21, 27)print(df)# 再删除一列df.drop("Name", axis=1, inplace=True)print("----------")print(df)# 按index值,再删除3行df.drop([3, 4, 5], axis=0, inplace=True)print("----------")print(df) |
输出:
1 2 3 4 5 6 7 8 9 10 11 12 13 14 15 16 17 18 19 20 21 22 23 24 25 26 27 28 29 30 31 32 | NameID 1 A2 B3 C4 D5 E6 F---------- Name AgeID 1 A 212 B 223 C 234 D 245 E 256 F 26---------- AgeID 1 212 223 234 245 256 26---------- AgeID 1 212 226 26 |
三、修改指定单元格
1 2 3 4 5 6 7 8 9 | import pandas as pddf = pd.read_excel("data/002.xlsx", index_col="ID")print(df)print("----------")# 修改ID=1这行的Name值df.loc[1]["Name"] = "test"print(df) |
输出:
1 2 3 4 5 6 7 8 9 10 11 12 13 14 15 16 17 | NameID 1 A2 B3 C4 D5 E6 F---------- NameID 1 test2 B3 C4 D5 E6 F |
四、遍历所有单元格
1 2 3 4 5 6 7 8 9 | import pandas as pddf = pd.read_excel("data/002.xlsx", index_col="ID")print(df)print("----------")# 遍历所有单元格for idx, data in df.iterrows(): print("id:{}\tname:{}".format(idx, data["Name"])) |
输出:
1 2 3 4 5 6 7 8 9 10 11 12 13 14 15 | NameID 1 A2 B3 C4 D5 E6 F----------id:1 name:Aid:2 name:Bid:3 name:Cid:4 name:Did:5 name:Eid:6 name:F |
五、过滤数据
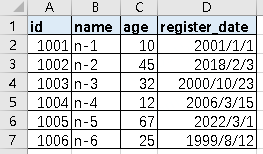
1 2 3 4 5 6 7 8 9 10 11 12 13 14 15 16 17 18 19 | import pandas as pddf = pd.read_excel("./data/test.xlsx", index_col="id")print(df)print("---------------")# 过滤age>30的df2 = df[df["age"] > 30]print(df2)print("---------------")# 选[1,3)行,第[1,2)列,即:第2,3行,第2列df2 = df.iloc[1:3, 1:2]print(df2)print("---------------")# 选择id在(1002,1005)之间的数据df2 = df.query('1002<id<1005')print(df2) |
输出:
1 2 3 4 5 6 7 8 9 10 11 12 13 14 15 16 17 18 19 20 21 22 23 24 | name age register_dateid 1001 n-1 10 2001-01-011002 n-2 45 2018-02-031003 n-3 32 2000-10-231004 n-4 12 2006-03-151005 n-5 67 2022-03-011006 n-6 25 1999-08-12--------------- name age register_dateid 1002 n-2 45 2018-02-031003 n-3 32 2000-10-231005 n-5 67 2022-03-01--------------- ageid 1002 451003 32--------------- name age register_dateid 1003 n-3 32 2000-10-231004 n-4 12 2006-03-15 |
六、保存excel
6.1 单sheet的excel写入
假如要将test.xlsx中id在1002到1005之间(不包含二端)的记录过滤出来,保存到另1个excel中,可以这样写:
1 2 3 4 5 6 | import pandas as pdpd \ .read_excel("./data/test.xlsx", index_col="id") \ .query('1002<id<1005') \ .to_excel("./data/output.xlsx") |
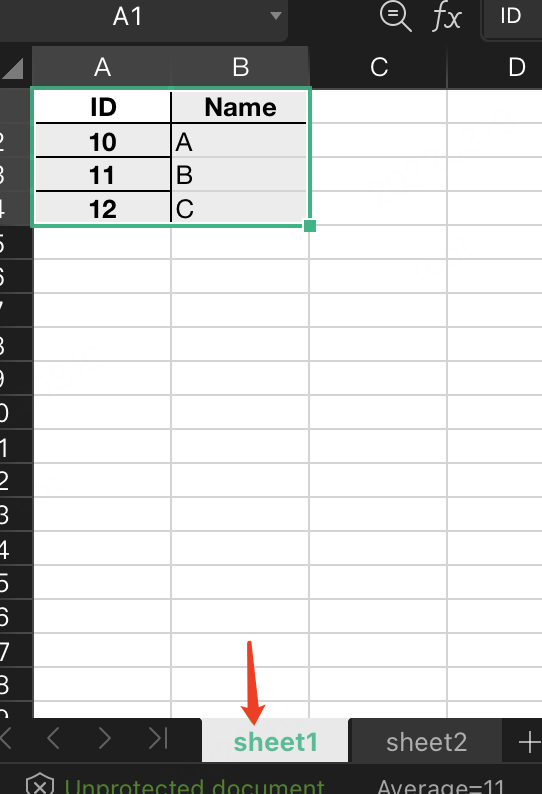
6.2 多sheet的excel写入
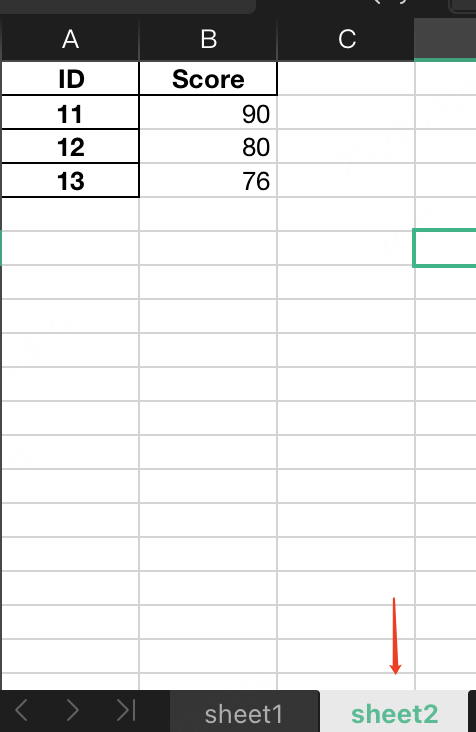
1 2 3 4 5 6 7 8 9 10 11 12 13 14 15 | import pandas as pddf1 = pd.DataFrame({"ID": [10, 11, 12], "Name": ["A", "B", "C"]})df1.set_index("ID", inplace=True)df2 = pd.DataFrame({"ID": [11, 12, 13], "Score": [90, 80, 76]})df2.set_index("ID", inplace=True)writer = pd.ExcelWriter(r"./data/test.xlsx")df1.to_excel(writer, sheet_name="sheet1")df2.to_excel(writer, sheet_name="sheet2")writer.save()print("done") |
效果:
参考链接:
https://pandas.pydata.org/pandas-docs/stable/getting_started/intro_tutorials/index.html
出处:http://yjmyzz.cnblogs.com
本文版权归作者和博客园共有,欢迎转载,但未经作者同意必须保留此段声明,且在文章页面明显位置给出原文连接,否则保留追究法律责任的权利。


【推荐】国内首个AI IDE,深度理解中文开发场景,立即下载体验Trae
【推荐】编程新体验,更懂你的AI,立即体验豆包MarsCode编程助手
【推荐】抖音旗下AI助手豆包,你的智能百科全书,全免费不限次数
【推荐】轻量又高性能的 SSH 工具 IShell:AI 加持,快人一步
· 10年+ .NET Coder 心语 ── 封装的思维:从隐藏、稳定开始理解其本质意义
· 地球OL攻略 —— 某应届生求职总结
· 提示词工程——AI应用必不可少的技术
· 字符编码:从基础到乱码解决
· Open-Sora 2.0 重磅开源!
2021-03-13 freeswitch: 如何指定主叫显示号码
2009-03-13 利用Reflector把"闭包"看清楚
2009-03-13 linq to sql生成not in语句的小技巧