prometheus学习笔记(2)-利用java client写入数据
继续学习prometheus,上一节演示了用http方式使用curl向pushgateway发送数据,本节将研究如何利用client jar包,以java代码的方式写入数据。
一、依赖的jar包

 1 <dependency>
 2     <groupId>io.prometheus</groupId>
 3     <artifactId>simpleclient</artifactId>
 4     <version>0.9.0</version>
 5 </dependency>
 6
 7 <dependency>
 8     <groupId>io.prometheus</groupId>
 9     <artifactId>simpleclient_pushgateway</artifactId>
10     <version>0.9.0</version>
11 </dependency>
主要就是上面2个(这是最小配置),考虑到我们通常是在spring环境中使用,一般还要加1个spring依赖,完整pom如下:

<?xml version="1.0" encoding="UTF-8"?>
<project xmlns="http://maven.apache.org/POM/4.0.0" xmlns:xsi="http://www.w3.org/2001/XMLSchema-instance"
         xsi:schemaLocation="http://maven.apache.org/POM/4.0.0 https://maven.apache.org/xsd/maven-4.0.0.xsd">
    <modelVersion>4.0.0</modelVersion>

    <groupId>com.cnblogs.yjmyzz</groupId>
    <artifactId>spring-boot-demo</artifactId>
    <version>0.0.1-SNAPSHOT</version>

    <properties>
        <java.version>1.8</java.version>
    </properties>

    <dependencies>
        <!-- spring应用最小依赖-->
        <dependency>
            <groupId>org.springframework</groupId>
            <artifactId>spring-context</artifactId>
            <version>5.2.4.RELEASE</version>
        </dependency>

        <!-- The client -->
        <dependency>
            <groupId>io.prometheus</groupId>
            <artifactId>simpleclient</artifactId>
            <version>0.9.0</version>
        </dependency>

        <dependency>
            <groupId>io.prometheus</groupId>
            <artifactId>simpleclient_pushgateway</artifactId>
            <version>0.9.0</version>
        </dependency>

        <!--        下面2个也常用,但在本例中用不到-->
        <!--        <dependency>-->
        <!--            <groupId>io.prometheus</groupId>-->
        <!--            <artifactId>simpleclient_hotspot</artifactId>-->
        <!--            <version>0.9.0</version>-->
        <!--        </dependency>-->
        <!--        <dependency>-->
        <!--            <groupId>io.prometheus</groupId>-->
        <!--            <artifactId>simpleclient_httpserver</artifactId>-->
        <!--            <version>0.9.0</version>-->
        <!--        </dependency>-->

    </dependencies>

    <build>
        <plugins>
            <plugin>
                <artifactId>maven-compiler-plugin</artifactId>
                <version>3.1</version>
                <configuration>
                    <source>1.8</source>
                    <target>1.8</target>
                </configuration>
            </plugin>

        </plugins>
    </build>

</project>
二、示例代码
1 2 3 4 5 6 7 8 9 10 11 12 13 14 15 16 17 18 19 20 21 22 23 24 25 26 27 28 29 30 31 32 33 34 35 36 37 38 39 40 41 42 43 44 45 46 47 48 49 50 51 52 53 54 55 56 57 58 59 60 61 62 63 64 65 66 67 68 69 70 71 72 73 74 75 76 77 78 79 80 81 82 83 84 | package com.cnblogs.yjmyzz.springbootdemo;import io.prometheus.client.Counter;import io.prometheus.client.Gauge;import io.prometheus.client.exporter.PushGateway;import org.springframework.context.annotation.AnnotationConfigApplicationContext;import org.springframework.context.annotation.Bean;import org.springframework.context.annotation.ComponentScan;import java.io.IOException;import java.util.Random;/** * @author 菩提树下的杨过(http : / / yjmyzz.cnblogs.com) * 利用client写入prometheus示例 */@ComponentScan("com.cnblogs.yjmyzz")public class SampleApplication { /** * push网关 * * @return */ @Bean public PushGateway getPushGateway() { return new PushGateway("localhost:9091"); } /** * counter实例 * * @return */ @Bean public Counter getCounter() { return Counter.build() .name("blog_visit") //这里模拟博客访问量 .labelNames("blog_id") //博客id .help("counter_blog_visit") //这个名字随便起 .register(); //注:通常只能注册1次,1个实例中重复注册会报错 } @Bean public Gauge getGauge() { return Gauge.build() .name("blog_fans") //这里模拟粉丝数(注:这里我们没设置label) .help("gauge_blog_fans") .register(); } public static void main(String[] args) throws IOException, InterruptedException { AnnotationConfigApplicationContext context = new AnnotationConfigApplicationContext(SampleApplication.class); //从spring上下文中取出这些实例 Counter counter = context.getBean(Counter.class); Gauge gauge = context.getBean(Gauge.class); PushGateway gateway = context.getBean(PushGateway.class); Random rnd = new Random(); //粉丝数先预设50 gauge.inc(50); while (true) { //随机生成1个blogId int blogId = rnd.nextInt(100000); //该blogId的访问量+1 counter.labels(blogId + "").inc(); //模拟粉丝数的变化 if (blogId % 2 == 0) { gauge.inc(); } else { gauge.dec(); } //利用网关采集数据 gateway.push(counter, "job-counter-test"); gateway.push(gauge, "job-gauge-test"); //辅助输出日志 System.out.println("blogId:" + blogId); Thread.sleep(5000); } }} |
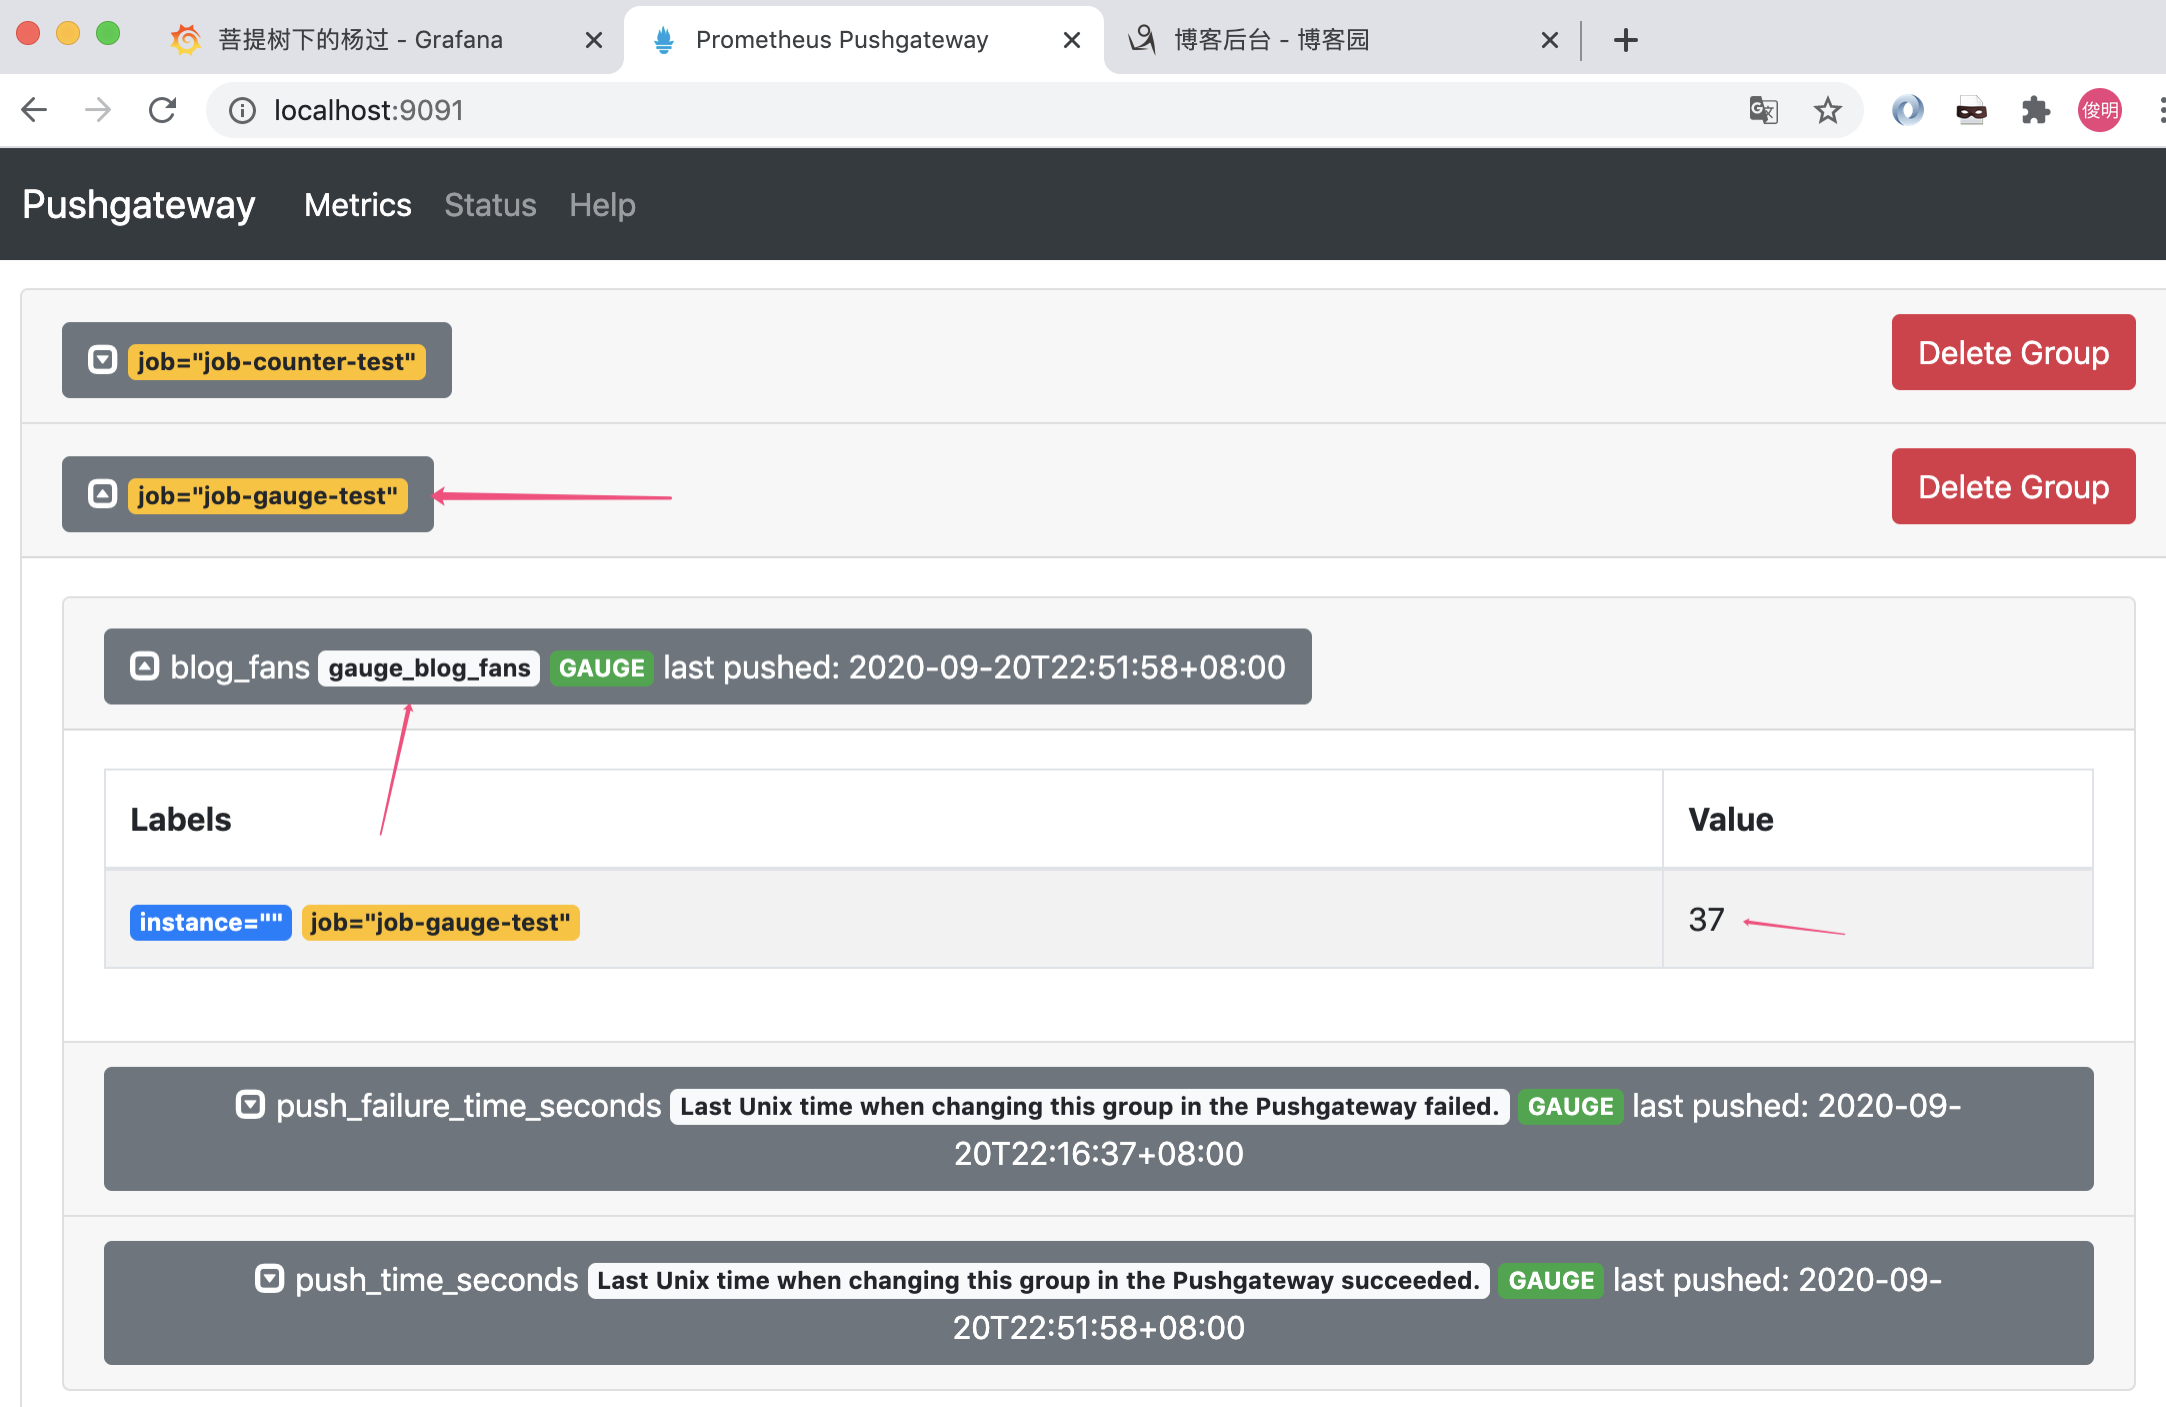
代码运行起来后,可以通过http://localhost:9091,确认job是否执行成功
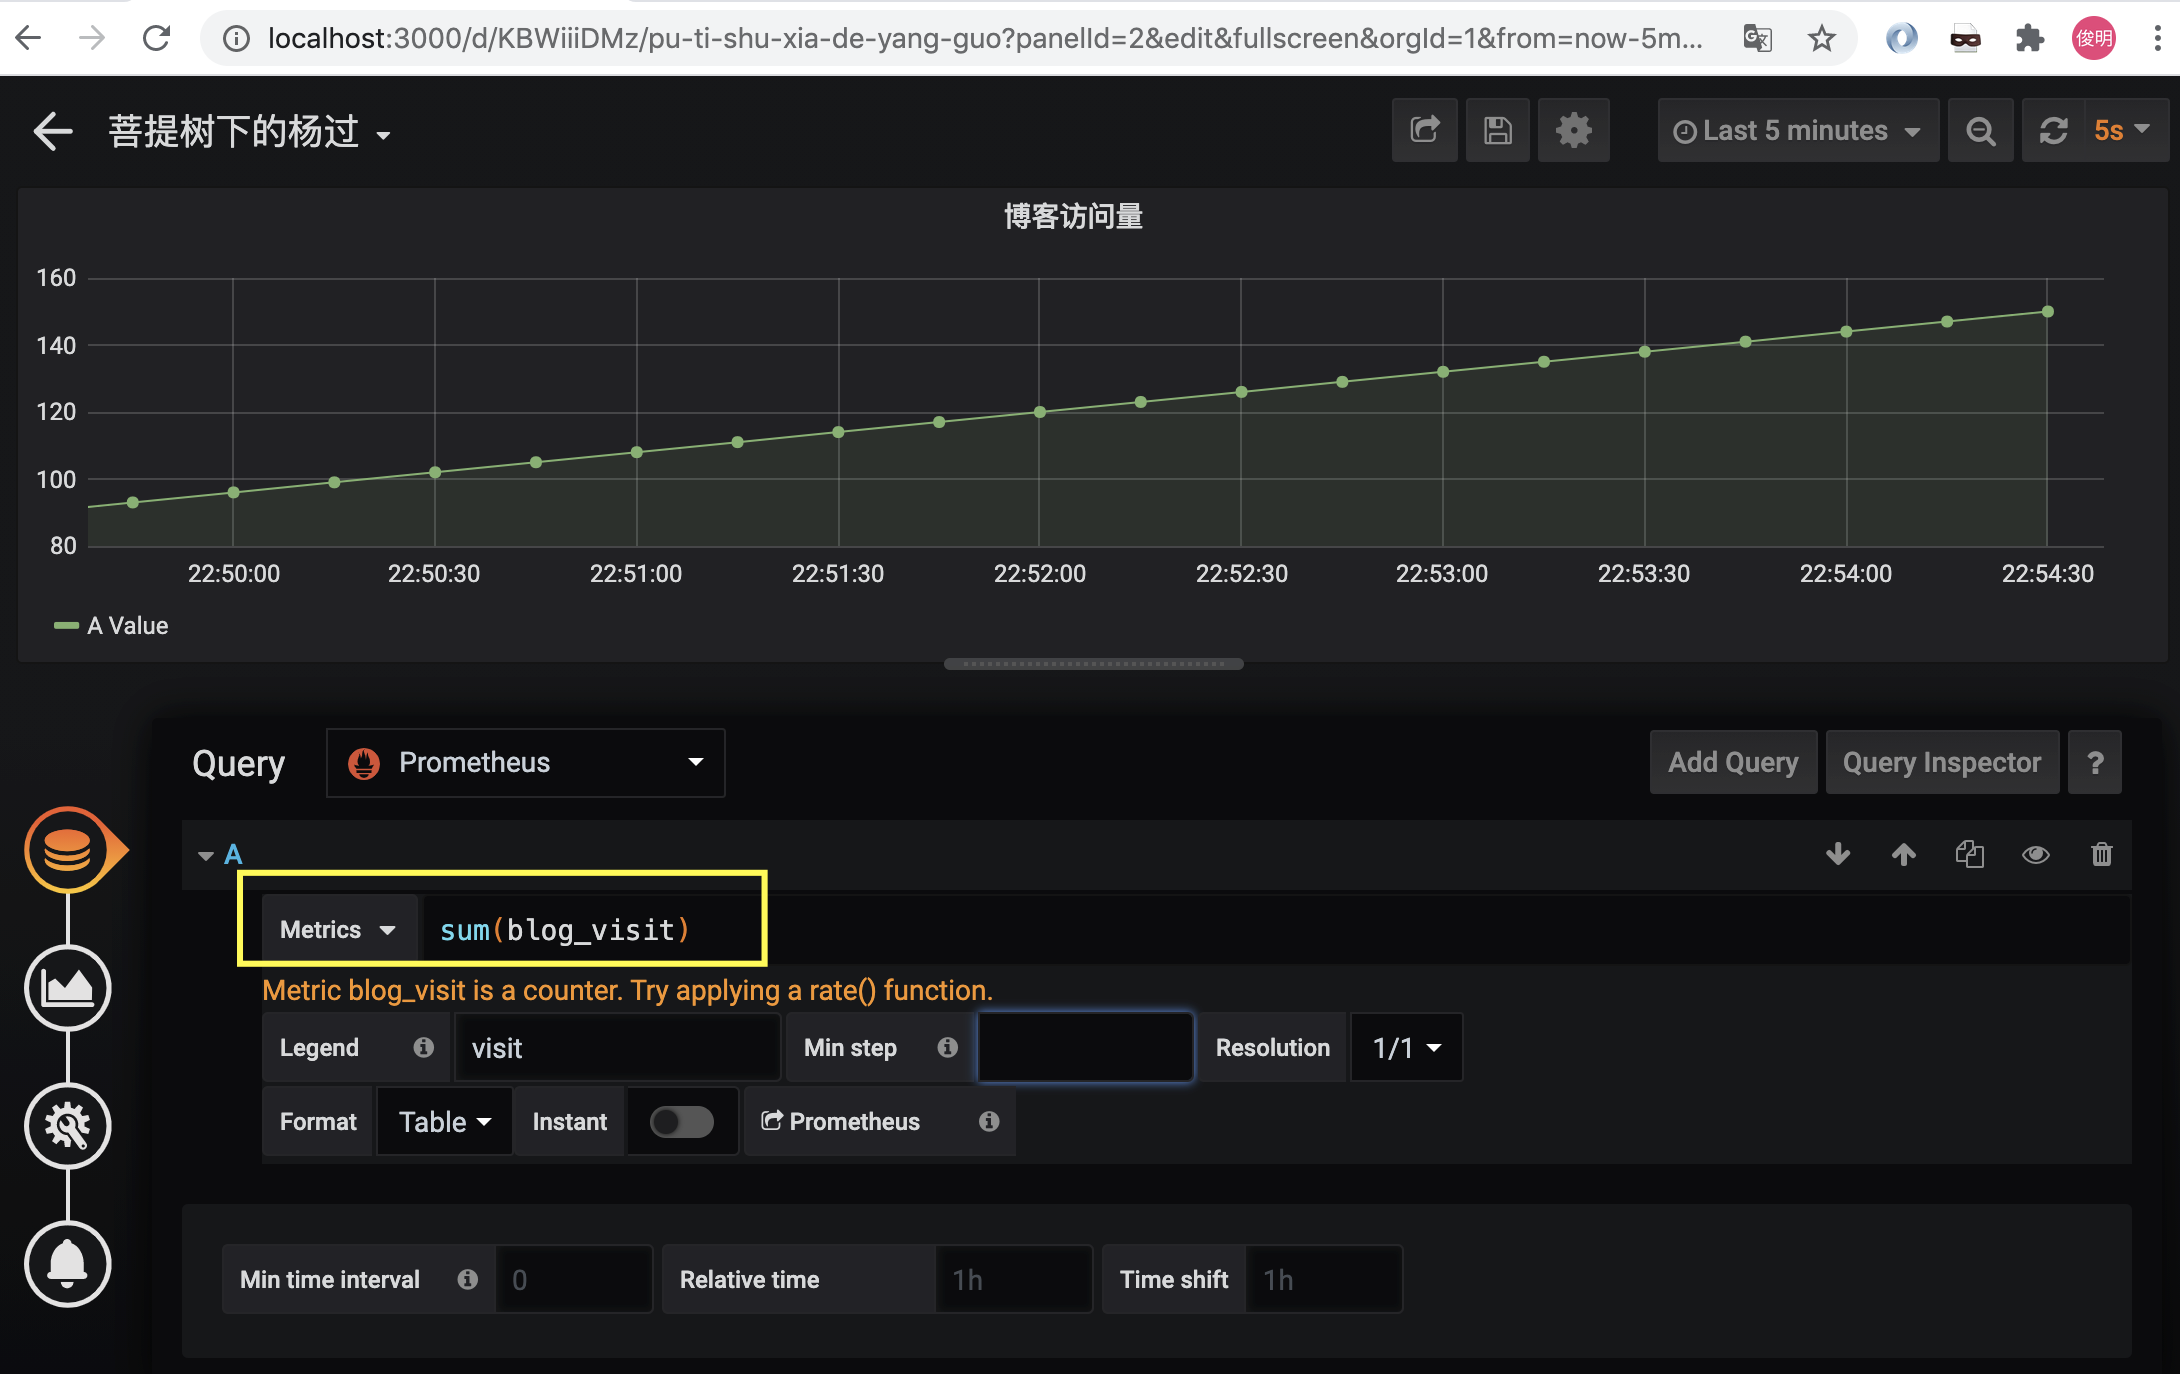
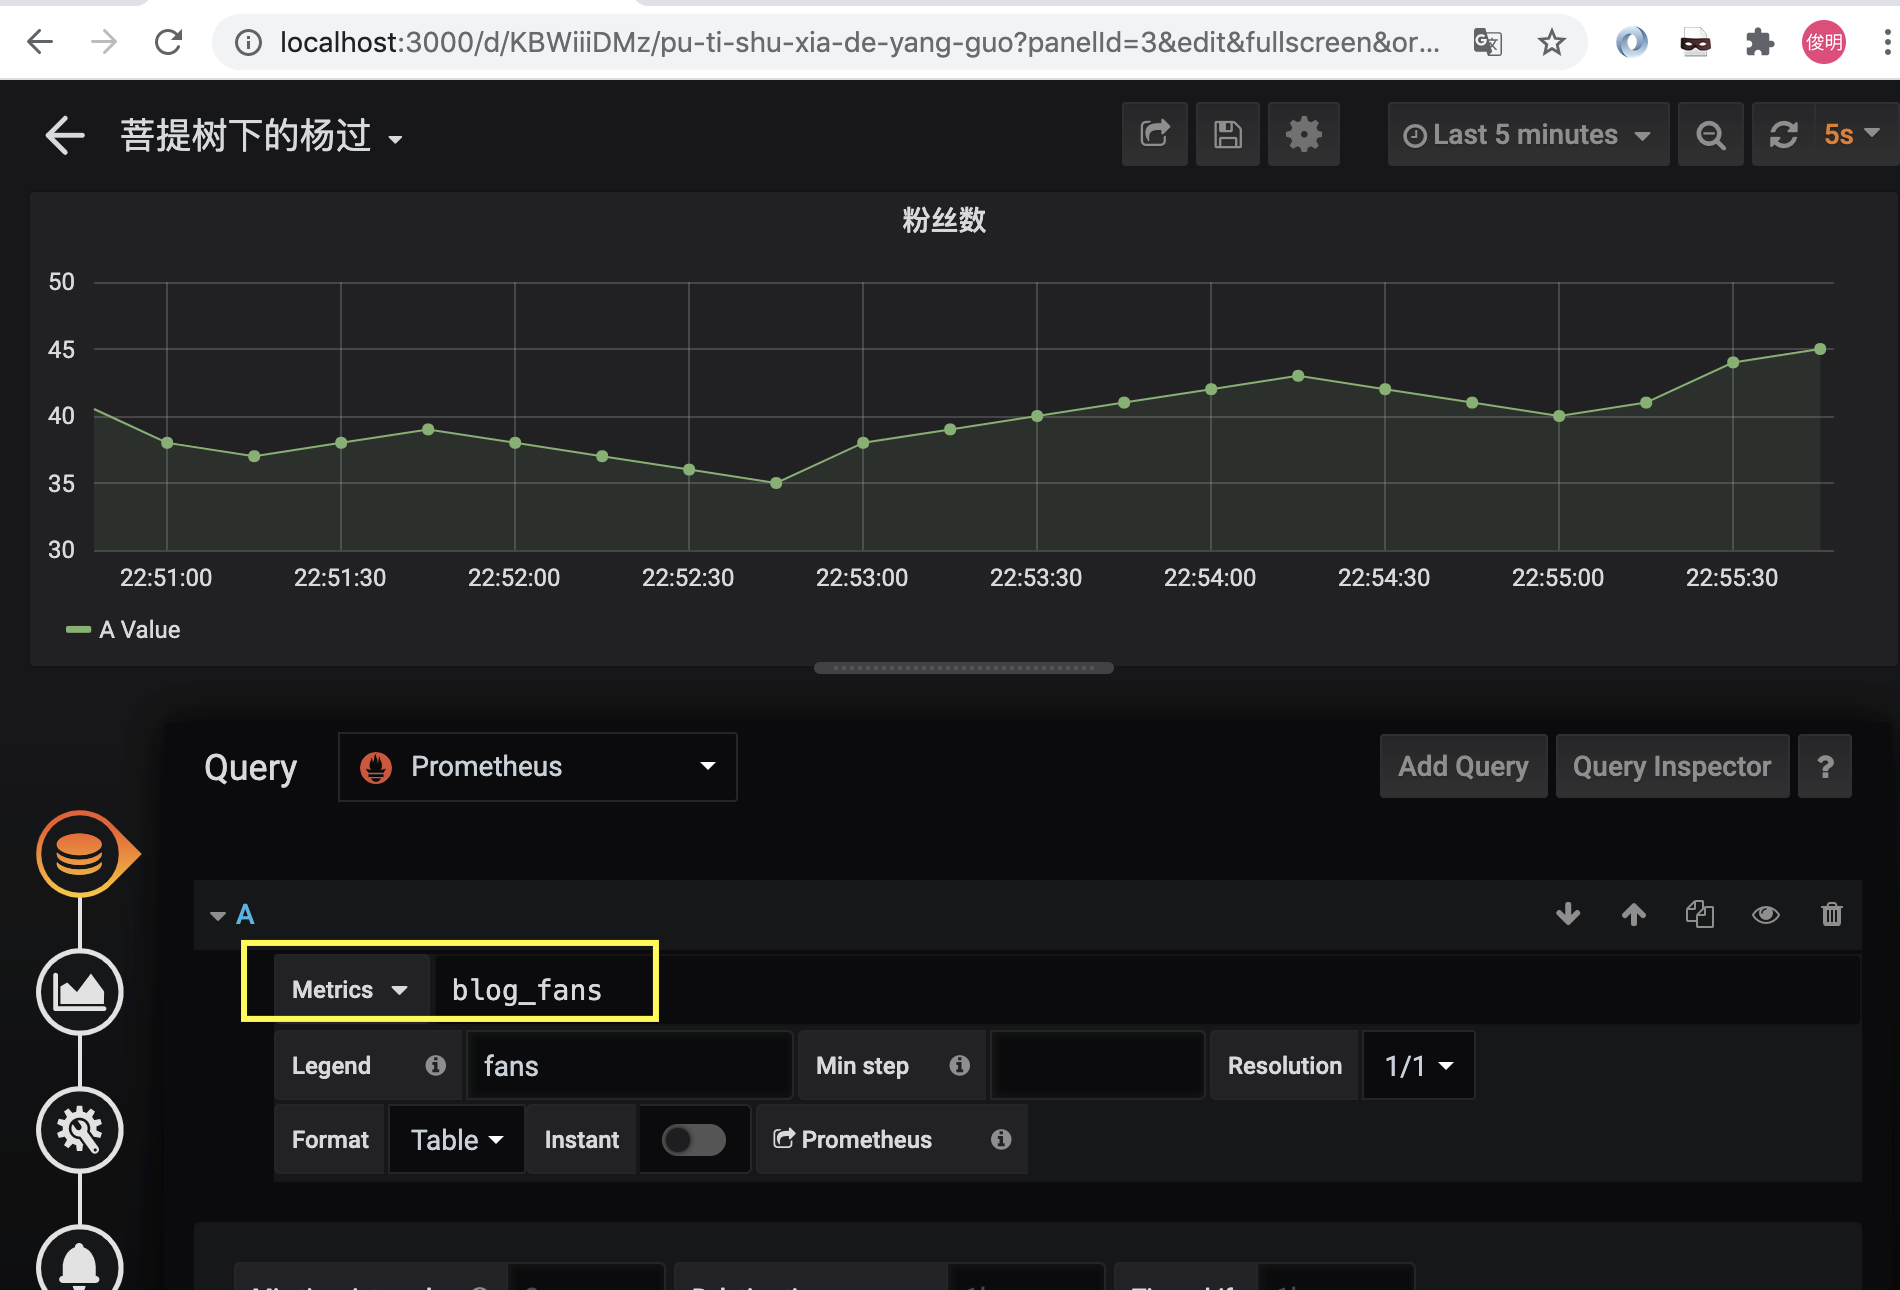
三、配置grafana图表
写入成功后,grafana里就能识别出这2个指标了:
参考文章:
作者:菩提树下的杨过
出处:http://yjmyzz.cnblogs.com
本文版权归作者和博客园共有,欢迎转载,但未经作者同意必须保留此段声明,且在文章页面明显位置给出原文连接,否则保留追究法律责任的权利。
出处:http://yjmyzz.cnblogs.com
本文版权归作者和博客园共有,欢迎转载,但未经作者同意必须保留此段声明,且在文章页面明显位置给出原文连接,否则保留追究法律责任的权利。


【推荐】还在用 ECharts 开发大屏?试试这款永久免费的开源 BI 工具!
【推荐】国内首个AI IDE,深度理解中文开发场景,立即下载体验Trae
【推荐】编程新体验,更懂你的AI,立即体验豆包MarsCode编程助手
【推荐】轻量又高性能的 SSH 工具 IShell:AI 加持,快人一步