babylon.js 学习笔记(6)
接上回继续,今天继续捣腾动画,上一节咱们让汽车的轮子动了起来,回顾一下核心代码:
//轮子转动
const wheelAnimation = (scene, wheels) => {
    //定义一个动画,每秒30帧,绕y轴转动
    const animWheel = new BABYLON.Animation("wheelAnimation", "rotation.y",
        30, BABYLON.Animation.ANIMATIONTYPE_FLOAT, BABYLON.Animation.ANIMATIONLOOPMODE_CYCLE);

    //动画关键帧
    const wheelKeys = [];

    //起始帧
    wheelKeys.push({
        frame: 0,
        value: 0
    });

    //截止帧(即:第30帧,转到360度)
    wheelKeys.push({
        frame: 30,
        value: 2 * Math.PI
    });

    //设置关键帧
    animWheel.setKeys(wheelKeys);

    let result = [];

    for (let i = 0; i < wheels.length; i++) {
        //将wheel与动画关联
        wheels[i].animations = [];
        wheels[i].animations.push(animWheel);

        //开始动画,最后的true表示循环播放
        result.push(scene.beginAnimation(wheels[i], 0, 30, true));
    }

    return result;
}
可能有朋友要问了,这里返回的result有啥用?先卖个关子,后面再讲。
模仿这段代码,略做修改,我们就能让汽车在屏幕上动起来:
//car运动
const carAnimation = (scene, car) => {
    const animCar = new BABYLON.Animation("carAnimation", "position.x",
        30, BABYLON.Animation.ANIMATIONTYPE_FLOAT, BABYLON.Animation.ANIMATIONLOOPMODE_CYCLE);

    //动画关键帧
    const carKeys = [];

    //起始帧
    carKeys.push({
        frame: 0,
        value: -1
    });

    carKeys.push({
        frame: 30,
        value: -0.9
    });

    //截止帧(即:第120帧,走到x=8)
    carKeys.push({
        frame: 120,
        value: 0.9
    });

    carKeys.push({
        frame: 150,
        value: 1
    });

    //设置关键帧
    animCar.setKeys(carKeys);


    car.animations = [];
    car.animations.push(animCar);

    //开始动画
    return scene.beginAnimation(car, 0, 150, true);

}
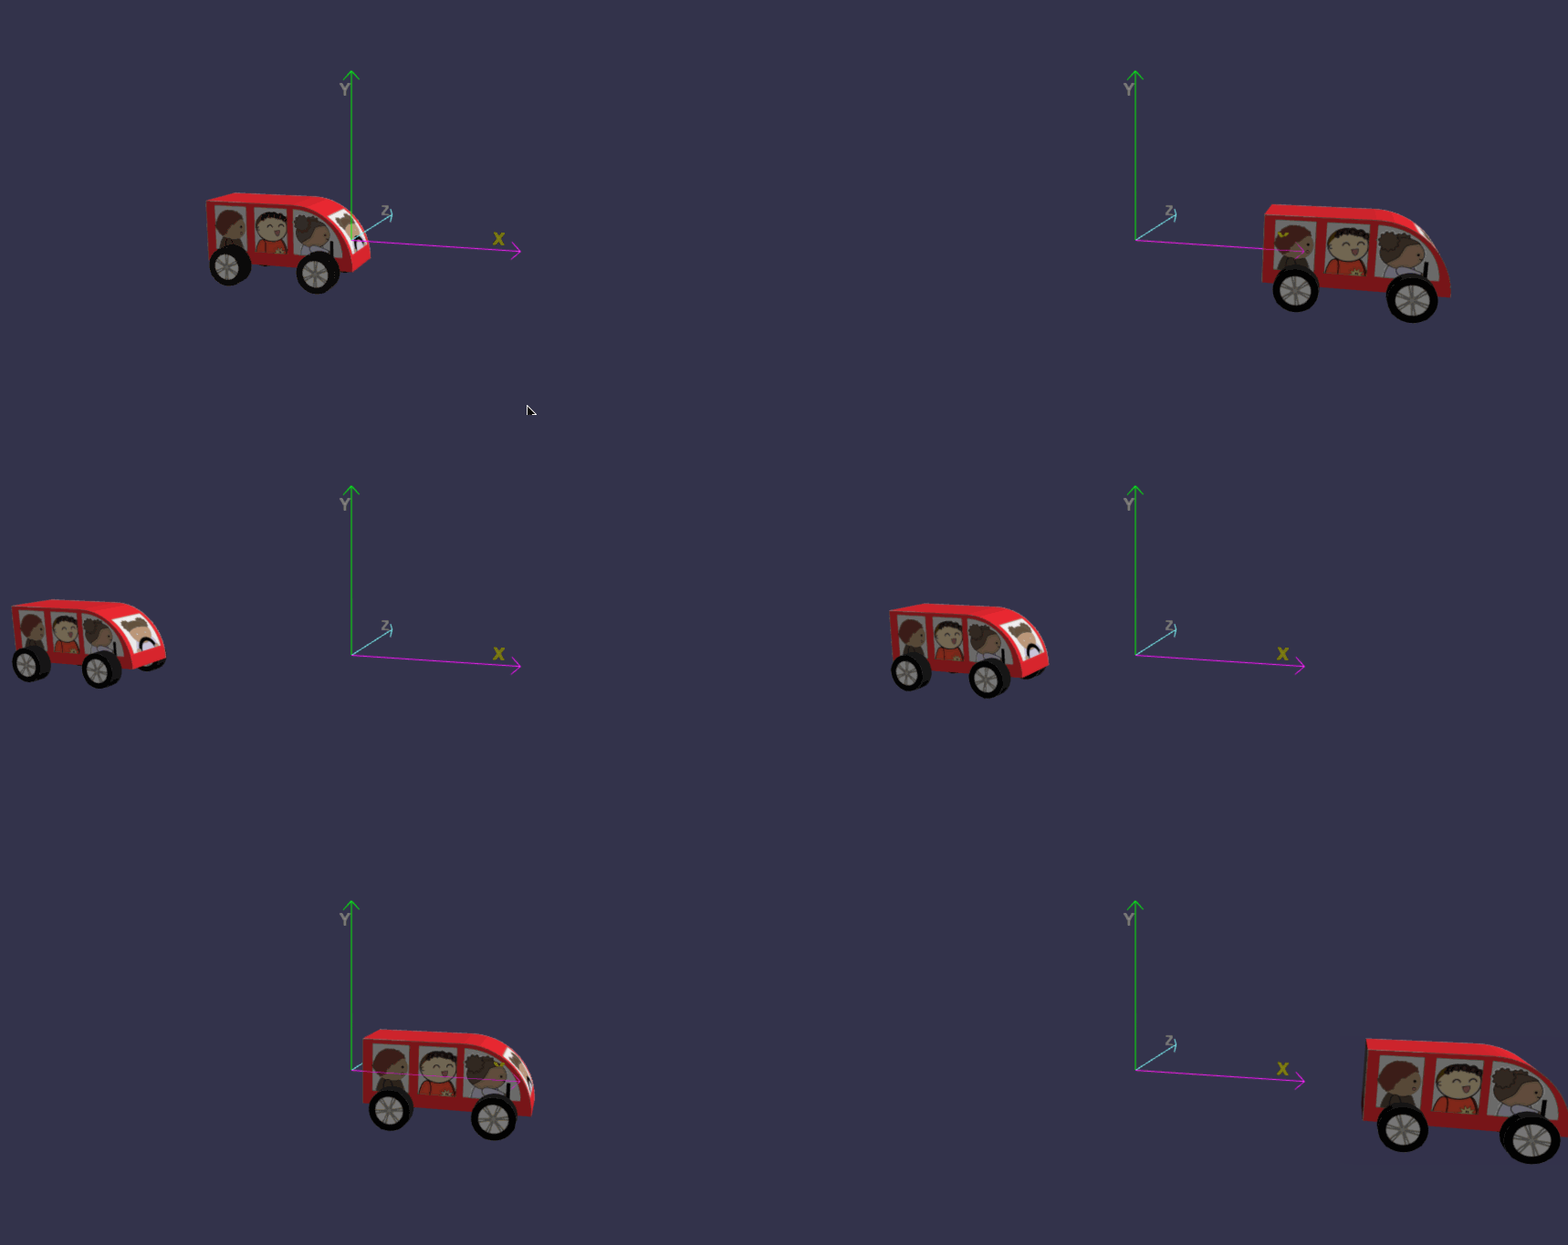
一、如何控制动画暂停/播放?
接下来说说scene.beginAnimation 返回值有啥用?根据官方文档描述,这个返回对象Animatable提供了几个有用的方法:
- pause()
- restart()
- stop()
- reset()
利用这些方法,接下来加点鼠标互动:
- ALT+鼠标单击,暂停/继续播放 汽车运动;
- SHIFT+鼠标单击,暂停/继续播放 车轮转动
//声明2个变量,方便控制动画
let wheelAnimatables, carAnimatable;

const createScene = () => {
    const scene = new BABYLON.Scene(engine);

    ...

    wheelAnimatables = wheelAnimation(scene, wheels);
    carAnimatable = carAnimation(scene, car);

    ...

    return scene;
}

...
window.addEventListener("click", (e) => {
    if (e.altKey) {
        if (carAnimatable._paused) {
            carAnimatable.restart();
        }
        else {
            carAnimatable.pause();
        }
    }

    if (e.shiftKey) {
        let first = wheelAnimatables[0];
        if (first._paused) {
            wheelAnimatables.forEach(element => {
                element.restart();
            });
        }
        else {
            wheelAnimatables.forEach(element => {
                element.pause();
            });
        }
    }
});
在线地址:https://yjmyzz.github.io/babylon_js_study/day06/01.html
为了方便后面复用这个小汽车,我们把它在playground上导出为babylon文件(参考前文提到的做法),核心代码如下:
const createScene = () => {
    const scene = new BABYLON.Scene(engine);

    const camera = new BABYLON.ArcRotateCamera("camera", -Math.PI / 2, Math.PI / 2.5, 2, new BABYLON.Vector3(0, 0, 0));
    camera.attachControl(canvas, true);
    const light = new BABYLON.HemisphericLight("light", new BABYLON.Vector3(1, 1, 0));

    const car = buildCar();
    const wheels = buildWheels(car);
    car.rotation.x = -Math.PI / 2;
    wheelAnimation(scene, wheels);

    return scene;
}

const buildCar = () => {
    //base
    const outline = [
        new BABYLON.Vector3(-0.3, 0, -0.1),
        new BABYLON.Vector3(0.2, 0, -0.1),
    ]

    //curved front
    for (let i = 0; i < 20; i++) {
        outline.push(new BABYLON.Vector3(0.2 * Math.cos(i * Math.PI / 40), 0, 0.2 * Math.sin(i * Math.PI / 40) - 0.1));
    }

    //top
    outline.push(new BABYLON.Vector3(0, 0, 0.1));
    outline.push(new BABYLON.Vector3(-0.3, 0, 0.1));

    //car face UVs
    const faceUV = [];
    faceUV[0] = new BABYLON.Vector4(0, 0.5, 0.38, 1);
    faceUV[1] = new BABYLON.Vector4(0, 0, 1, 0.5);
    faceUV[2] = new BABYLON.Vector4(0.38, 1, 0, 0.5);

    //car material
    const carMat = new BABYLON.StandardMaterial("carMat");
    carMat.diffuseTexture = new BABYLON.Texture("https://yjmyzz.github.io/babylon_js_study/assets/img/car.png");

    //back formed automatically
    const car = BABYLON.MeshBuilder.ExtrudePolygon("car", { shape: outline, depth: 0.2, faceUV: faceUV, wrap: true });
    car.material = carMat;

    return car;
}


const buildWheels = (car) => {
    //wheel face UVs
    const wheelUV = [];
    wheelUV[0] = new BABYLON.Vector4(0, 0, 1, 1);
    wheelUV[1] = new BABYLON.Vector4(0, 0.5, 0, 0.5);
    wheelUV[2] = new BABYLON.Vector4(0, 0, 1, 1);

    //car material
    const wheelMat = new BABYLON.StandardMaterial("wheelMat");
    wheelMat.diffuseTexture = new BABYLON.Texture("https://yjmyzz.github.io/babylon_js_study/assets/img/wheel.png");

    const wheelRB = BABYLON.MeshBuilder.CreateCylinder("wheelRB", { diameter: 0.125, height: 0.05, faceUV: wheelUV })
    wheelRB.material = wheelMat;

    wheelRB.parent = car;
    wheelRB.position.z = -0.1;
    wheelRB.position.x = -0.2;
    wheelRB.position.y = 0.035;

    const wheelRF = wheelRB.clone("wheelRF");
    wheelRF.position.x = 0.1;

    const wheelLB = wheelRB.clone("wheelLB");
    wheelLB.position.y = -0.2 - 0.035;

    const wheelLF = wheelRF.clone("wheelLF");
    wheelLF.position.y = -0.2 - 0.035;

    const wheels = [];
    wheels.push(wheelRB);
    wheels.push(wheelRF);
    wheels.push(wheelLB);
    wheels.push(wheelLF);

    return wheels;
}


//轮子转动
const wheelAnimation = (scene, wheels) => {
    //定义一个动画,每秒30帧,绕y轴转动
    const animWheel = new BABYLON.Animation("wheelAnimation", "rotation.y",
        30, BABYLON.Animation.ANIMATIONTYPE_FLOAT, BABYLON.Animation.ANIMATIONLOOPMODE_CYCLE);

    //动画关键帧
    const wheelKeys = [];

    //起始帧
    wheelKeys.push({
        frame: 0,
        value: 0
    });

    //截止帧(即:第30帧,转到360度)
    wheelKeys.push({
        frame: 30,
        value: 2 * Math.PI
    });

    //设置关键帧
    animWheel.setKeys(wheelKeys);

    for (let i = 0; i < wheels.length; i++) {
        //将wheel与动画关联
        wheels[i].animations = [];
        wheels[i].animations.push(animWheel);

        //开始动画,最后的true表示循环播放
        scene.beginAnimation(wheels[i], 0, 30, true);
    }
}
结合先前画的房屋,可以让小汽车在房屋之间动起来:
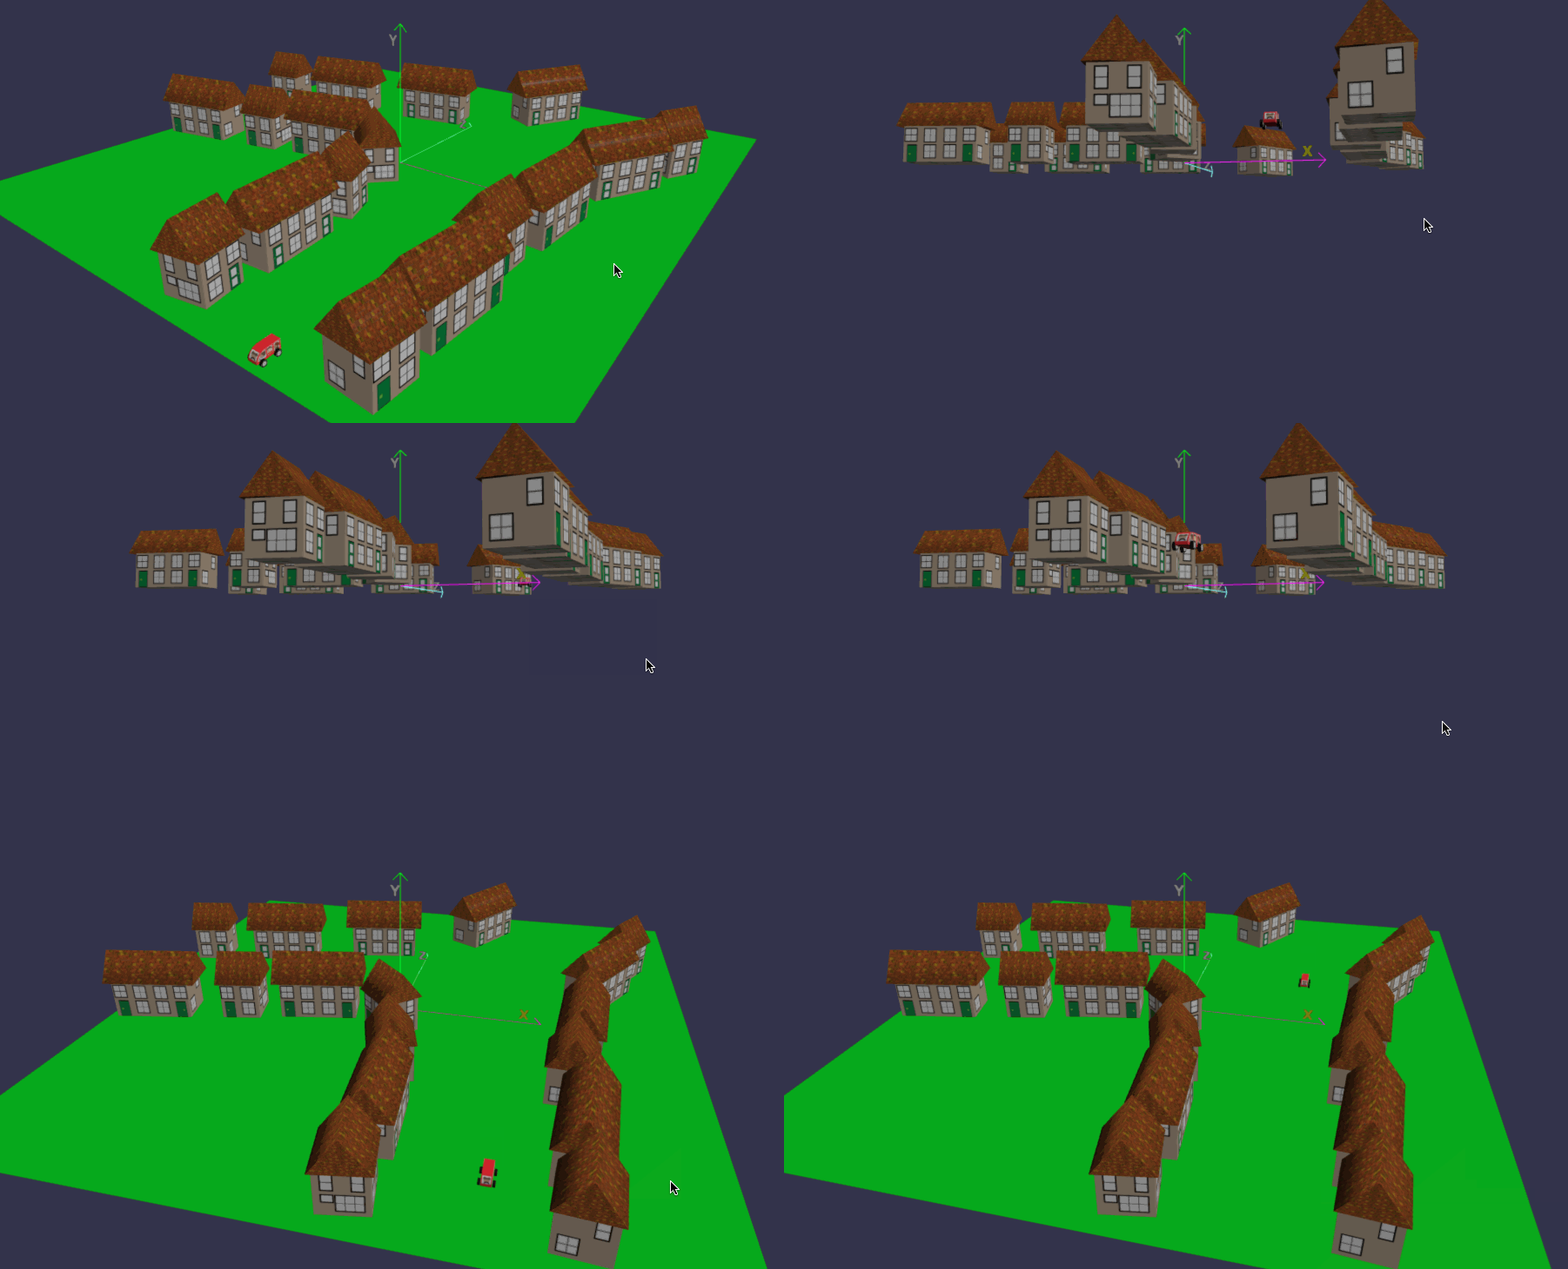
在线地址:https://yjmyzz.github.io/babylon_js_study/day06/02.html (加载的资源比较多,网页首次打开可能比较慢)
二、如何实现复杂的运动轨迹?
2.1 理解movePOV
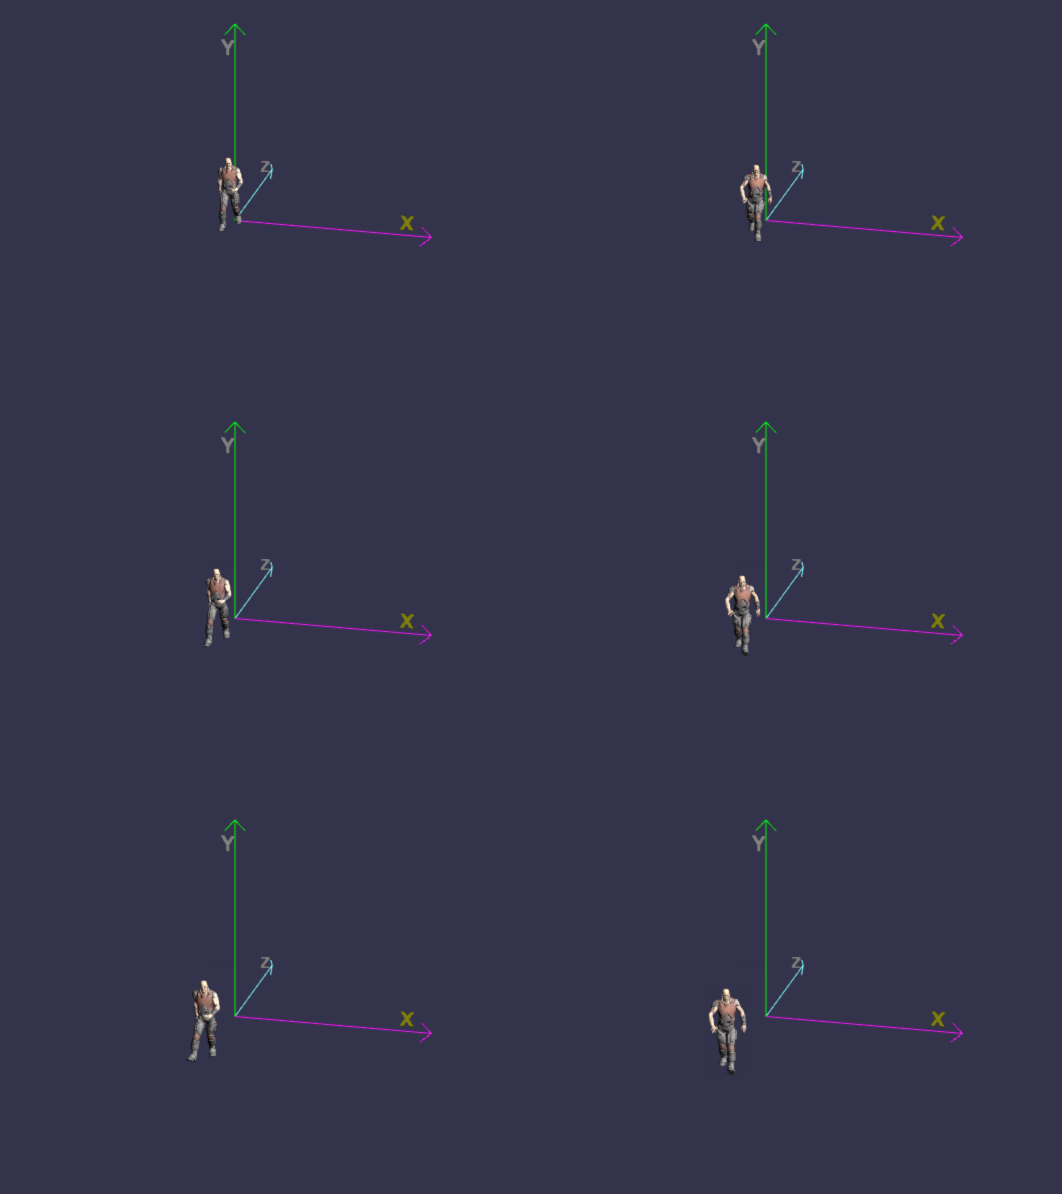
babylon.js提供了movePOV(rightSpeed, upSpeed, forwardSpeed)方法,可以让对象 朝右(x轴负方向)、朝上(z轴正方向)、朝前(z轴负方向) 运动。
下面分别演示一下,基本代码如下:
const createScene = () => {
    const scene = new BABYLON.Scene(engine);

    const camera = new BABYLON.ArcRotateCamera("camera", -Math.PI / 2, Math.PI / 2.5, 15, new BABYLON.Vector3(0, 0, 0));
    camera.attachControl(canvas, true);
    const light = new BABYLON.HemisphericLight("light", new BABYLON.Vector3(1, 1, 0));

    BABYLON.SceneLoader.ImportMeshAsync("him", "../assets/glb/", "dude.babylon").then((result) => {
        var dude = result.meshes[0];
        dude.scaling = new BABYLON.Vector3(0.02, 0.02, 0.02);
        scene.beginAnimation(result.skeletons[0], 0, 100, true, 1.0);

        //向前运动
        const rightSpeed = 0, upSpeed = 0, forwardSpeed = 0.01;
        let distance = 0;

        //控制下一帧的行为
        scene.onBeforeRenderObservable.add(() => {
            //让人物动起来
            dude.movePOV(rightSpeed, upSpeed, forwardSpeed);
            distance += 0.002;
            if (distance > 1) {
                //走的距离>1地,复位
                distance = 0;
                dude.position = BABYLON.Vector3.Zero();
            }

        });
    });

    showAxis(4, scene);
    return scene;
}
向前(z轴负方向):
注:此处的向前,是从人物自身的视角来看的,从观察者(即电脑前的我们)角度来看,即为向我们走来。
向右(x轴负方向):
//向右运动
const rightSpeed = 0.01, upSpeed = 0, forwardSpeed = 0.00;
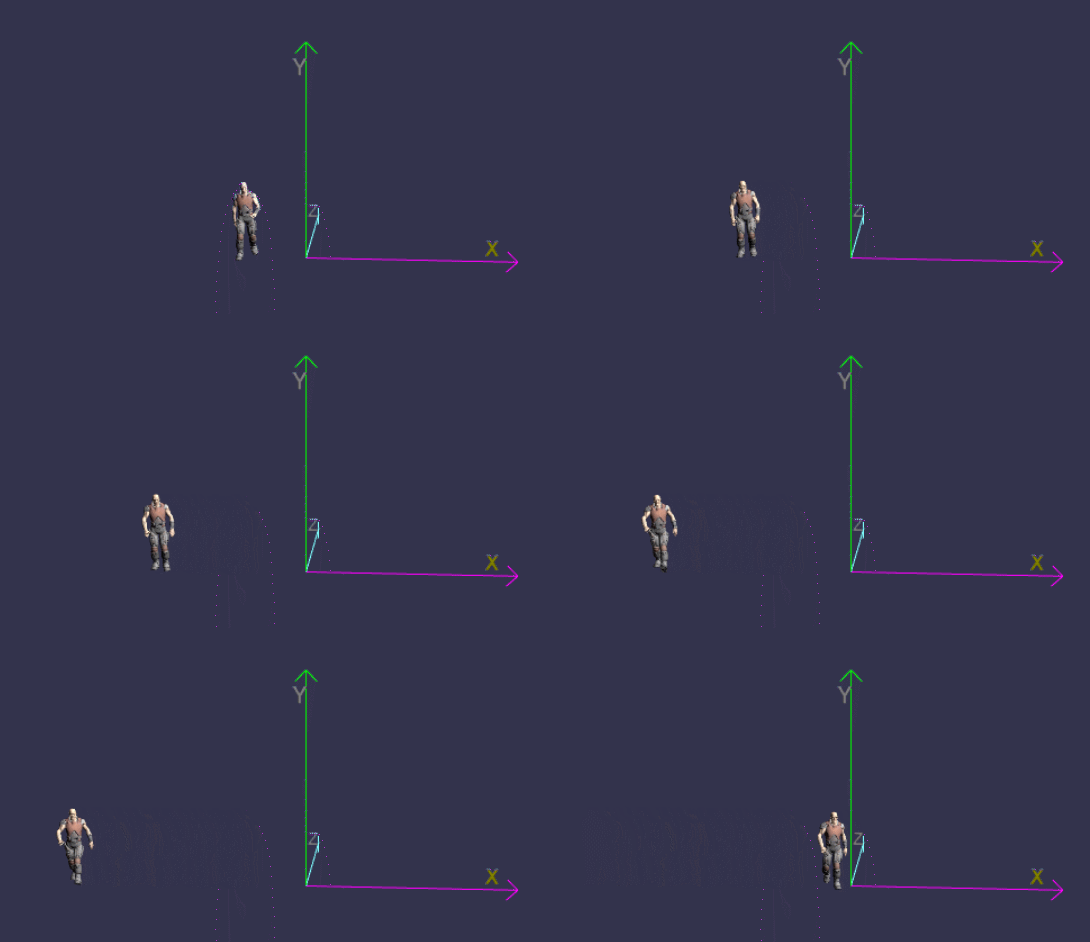
注:由于人物动画走路朝向的设计原因,仅设置rightSpeed有值,会让人横向移动(类似螃蟹),有点奇怪(马上会讲到rotate方法,可以解决这个问题)
向上(Y轴正方向):
//向上运动
const rightSpeed = 0, upSpeed = 0.01, forwardSpeed = 0.00;

2.2 理解rotate
前进过程中如何转向呢?回想下开汽车时,我们用方向盘来转向,babylon.js中自然也有类似方法,即:rotate方法
BABYLON.SceneLoader.ImportMeshAsync("him", "../assets/glb/", "dude.babylon").then((result) => {
    var dude = result.meshes[0];
    dude.scaling = new BABYLON.Vector3(0.02, 0.02, 0.02);
    scene.beginAnimation(result.skeletons[0], 0, 100, true, 1.0);

    //向前运动
    const rightSpeed = 0, upSpeed = 0, forwardSpeed = 0.01;

    let distance = 0, turnFlag = false;

    //控制下一帧的行为
    scene.onBeforeRenderObservable.add(() => {
        //让人物动起来
        dude.movePOV(rightSpeed, upSpeed, forwardSpeed);
        distance += 0.002;

        //走到0.5距离时,右转90度
        if (!turnFlag && Math.abs(distance - 0.5) <= 0.000001) {
            dude.rotate(BABYLON.Axis.Y, Math.PI / 2, BABYLON.Space.LOCAL);
            turnFlag = true;
        }

        if (distance > 1) {
            //走的距离>1地,复位
            distance = 0;
            dude.position = BABYLON.Vector3.Zero();
            dude.rotation = BABYLON.Vector3.Zero();
            turnFlag = false;
        }

    });
});
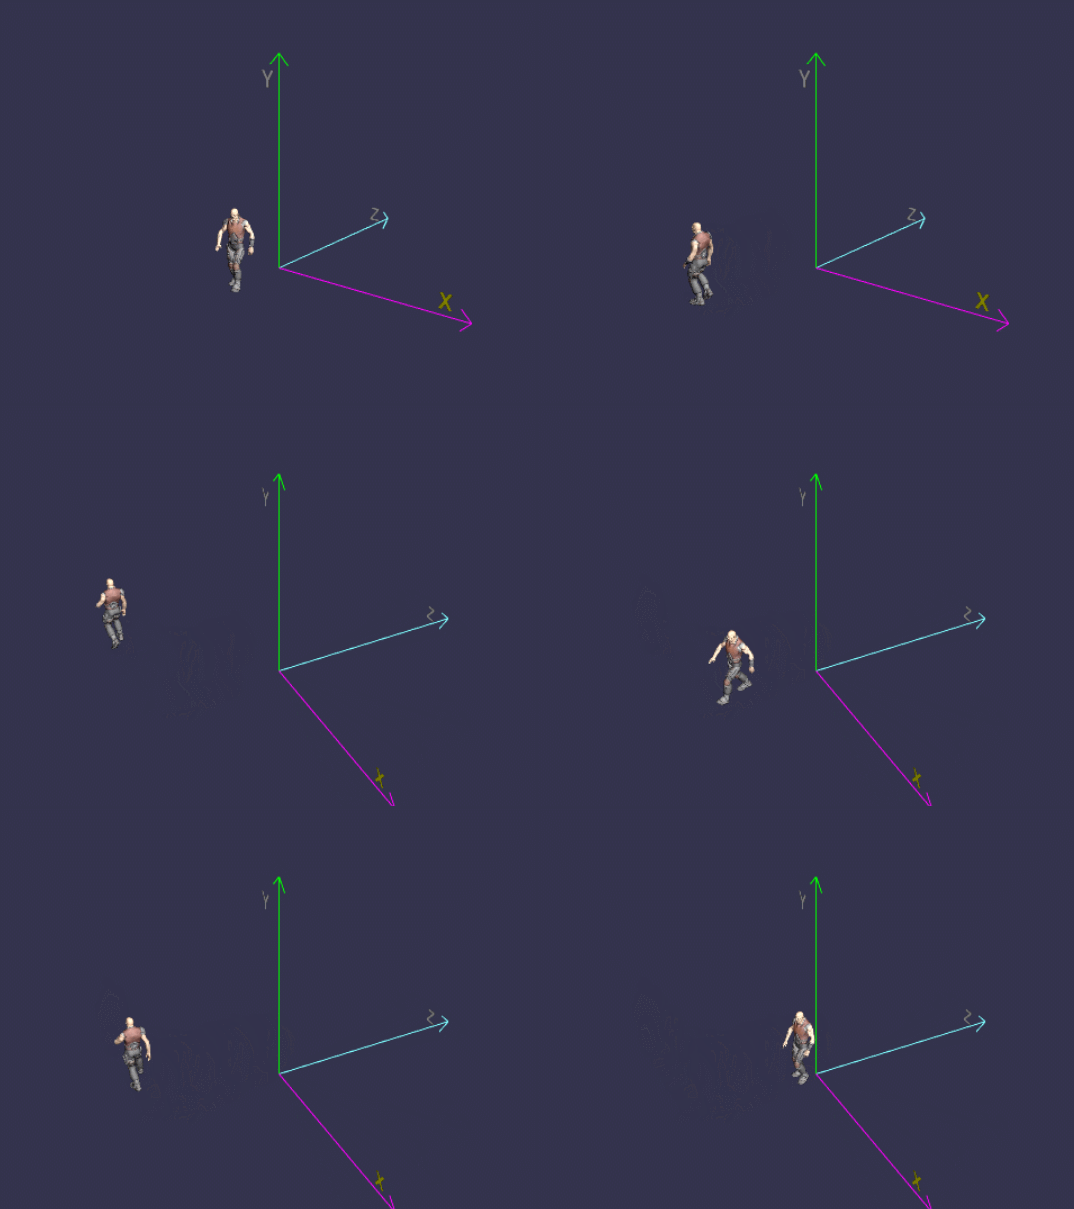
在线地址 :https://yjmyzz.github.io/babylon_js_study/day06/03.html
3 生成复杂运动轨迹
结合movePOV 以及rotate,就能实现相对较为复杂的运动轨迹
const createScene = () => {
    const scene = new BABYLON.Scene(engine);

    const camera = new BABYLON.ArcRotateCamera("camera", -Math.PI / 2, Math.PI / 2.5, 15, new BABYLON.Vector3(0, 0, 0));
    camera.attachControl(canvas, true);
    const light = new BABYLON.HemisphericLight("light", new BABYLON.Vector3(1, 1, 0));

    //画1个正方形(辅助观察人物运动路径)
    const squarePoints = [new BABYLON.Vector3(-2, 0, 2),
    new BABYLON.Vector3(2, 0, 2),
    new BABYLON.Vector3(2, 0, -2),
    new BABYLON.Vector3(-2, 0, -2),
    new BABYLON.Vector3(-2, 0, 2)];
    const square = BABYLON.MeshBuilder.CreateLines("square", { points: squarePoints });

    //走距离dist后,转方向trun(角度)
    const trunPoint = function (turn, dist) {
        this.turn = turn;
        this.dist = dist;
    }

    //运动轨迹(关键转向点)
    //注:因本例中的人物原型太大,加载后缩小处理了,所以这里的距离也要回应缩小(即:*0.2)
    const track = [
        new trunPoint(Math.PI / 2, 4 * 0.2),
        new trunPoint(Math.PI / 2, 8 * 0.2),
        new trunPoint(Math.PI / 2, 12 * 0.2),
        new trunPoint(Math.PI / 2, 16 * 0.2)
    ]

    BABYLON.SceneLoader.ImportMeshAsync("him", "../assets/glb/", "dude.babylon").then((result) => {
        var dude = result.meshes[0];
        dude.scaling = new BABYLON.Vector3(0.02, 0.02, 0.02);
        dude.position = new BABYLON.Vector3(2, 0, 2);
        scene.beginAnimation(result.skeletons[0], 0, 100, true, 1.0);

        //向前运动
        const rightSpeed = 0.00, upSpeed = 0.00, forwardSpeed = 0.01;

        //distance记录走过的距离,p为track中转向点的下标(即:第几个转向点)
        let distance = 0, p = 0;

        //控制下一帧的行为
        scene.onBeforeRenderObservable.add(() => {
            //让人物动起来
            dude.movePOV(rightSpeed, upSpeed, forwardSpeed);
            distance += 0.002;
            //判断关键转向点
            console.log(distance);
            if (distance > track[p].dist) {
                dude.rotate(BABYLON.Axis.Y, track[p].turn, BABYLON.Space.LOCAL);
                p += 1;
                p %= track.length;

                if (p === 0) {
                    //走到最开始的位置时,复位
                    distance = 0;
                    dude.position = new BABYLON.Vector3(2, 0, 2);
                    dude.rotation = BABYLON.Vector3.Zero();
                }
            }
        });
    });

    showAxis(4, scene);
    return scene;
}
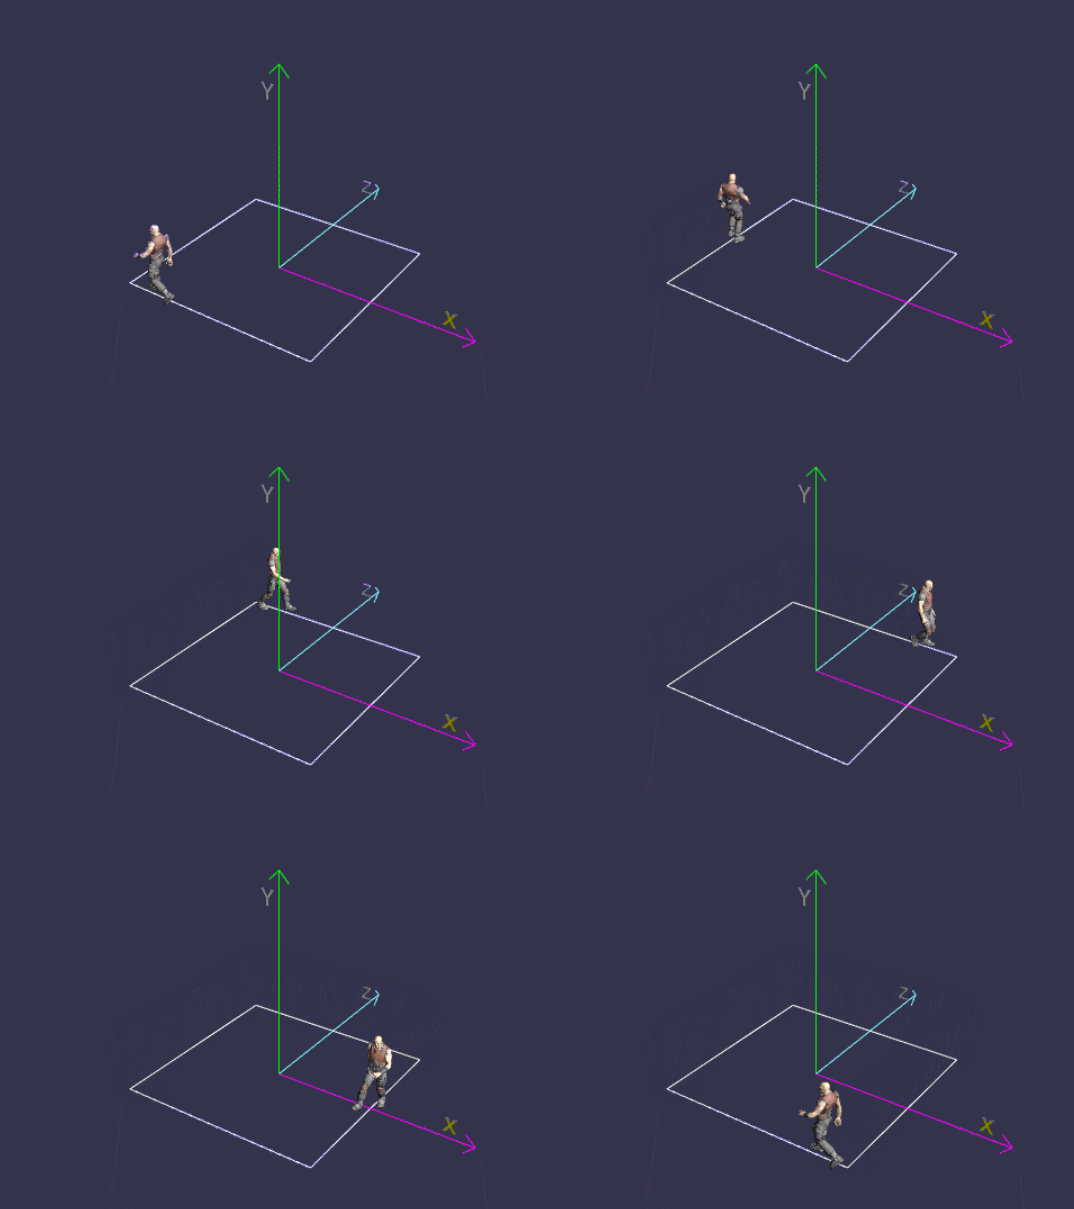
在线地址:https://yjmyzz.github.io/babylon_js_study/day06/04.html
4、碰撞检测
每个mesh对象在babylon.js中实际占据着一块矩形立体空间
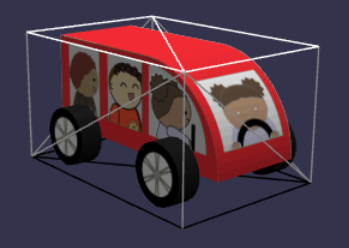
当2个对象碰撞到时,只要这2个立体空间有重叠即为发生了碰撞,对应的方法为 intersectsMesh,下面给1个简单的演示:
BABYLON.SceneLoader.ImportMeshAsync("", "../assets/glb/", "car.babylon").then((result) => {
    var car1 = scene.getMeshByName("car");
    car1.position = new BABYLON.Vector3(-6, 0, 0);
    car1.scaling = new BABYLON.Vector3(4, 4, 4);

    const wheelRB = scene.getMeshByName("wheelRB");
    const wheelRF = scene.getMeshByName("wheelRF");
    const wheelLB = scene.getMeshByName("wheelLB");
    const wheelLF = scene.getMeshByName("wheelLF");
    let wheels = [wheelRB, wheelRF, wheelLB, wheelLF];
    let wheelAnimatables = [];
    for (let i = 0; i < wheels.length; i++) {
        wheelAnimatables.push(scene.beginAnimation(wheels[i], 0, 30, true));
    }

    const animCar = new BABYLON.Animation("carAnimation", "position.x", 30, BABYLON.Animation.ANIMATIONTYPE_FLOAT, BABYLON.Animation.ANIMATIONLOOPMODE_CYCLE);
    const carKeys = [];
    carKeys.push({
        frame: 0,
        value: -6
    });
    carKeys.push({
        frame: 120,
        value: 6
    });

    animCar.setKeys(carKeys);

    car1.animations = [];
    car1.animations.push(animCar);

    let carAnimable = scene.beginAnimation(car1, 0, 120, true);

    //复制出第2辆车,挡在路上
    var car2 = car1.clone("car2");
    car2.position = new BABYLON.Vector3(2, 0, 0.4);
    car2.rotation.y = Math.PI;
    car2.scaling = car1.scaling;

    //注:第2辆车刚复制出来的瞬间,位置与第1辆车就重合了,会导致一出场就碰了,因此要借助ready把首次碰排除掉
    let ready = false;

    //控制下一帧的行为
    scene.onBeforeRenderObservable.add(() => {
        //发生碰撞
        if (car1.intersectsMesh(car2)) {
            if (!ready) {
                ready = true;
                return;
            }

            if (ready){
                //停止动画
                carAnimable.stop();
                //模拟第1辆车,被撞飞
                car1.rotate(BABYLON.Axis.Y, Math.PI*0.4, BABYLON.Space.LOCAL);
                car1.position.x -= 0.2;
                car1.position.y += 0.5;
                return;

            }

        }

    });
});

在线地址 : https://yjmyzz.github.io/babylon_js_study/day06/05.html
参考文档:
https://doc.babylonjs.com/features/introductionToFeatures/chap3/walkpath
https://doc.babylonjs.com/features/introductionToFeatures/chap4/mesh_intersect
出处:http://yjmyzz.cnblogs.com
本文版权归作者和博客园共有,欢迎转载,但未经作者同意必须保留此段声明,且在文章页面明显位置给出原文连接,否则保留追究法律责任的权利。


