

#MybatisPuls基础入门:
MybatisPuls基础入门:
介绍:使用maven搭建
一、环境搭建---配置文件(存放在resources 文件夹下)
1).applicationConetext.xml:
<?xml version="1.0" encoding="UTF-8"?>
<beans xmlns="http://www.springframework.org/schema/beans"
	xmlns:xsi="http://www.w3.org/2001/XMLSchema-instance"
	xmlns:context="http://www.springframework.org/schema/context"
	xmlns:tx="http://www.springframework.org/schema/tx"
	xmlns:mybatis-spring="http://mybatis.org/schema/mybatis-spring"
	xsi:schemaLocation="http://mybatis.org/schema/mybatis-spring http://mybatis.org/schema/mybatis-spring-1.2.xsd
		http://www.springframework.org/schema/beans http://www.springframework.org/schema/beans/spring-beans.xsd
		http://www.springframework.org/schema/context http://www.springframework.org/schema/context/spring-context-4.0.xsd
		http://www.springframework.org/schema/tx http://www.springframework.org/schema/tx/spring-tx-4.0.xsd">


	<!-- 数据源 -->
	<context:property-placeholder location="classpath:db.properties"/>
	<bean id="dataSource" class="com.mchange.v2.c3p0.ComboPooledDataSource">
		<property name="driverClass" value="${jdbc.driver}"></property>
		<property name="jdbcUrl" value="${jdbc.url}"></property>
		<property name="user" value="${jdbc.username}"></property>
		<property name="password" value="${jdbc.password}"></property>
	</bean>

	<!-- 事务管理器 -->
	<bean id="dataSourceTransactionManager"
		class="org.springframework.jdbc.datasource.DataSourceTransactionManager">
		<property name="dataSource" ref="dataSource"></property>
	</bean>
	<!-- 基于注解的事务管理 -->
	<tx:annotation-driven transaction-manager="dataSourceTransactionManager"/>


	<!--  配置SqlSessionFactoryBean
		Mybatis提供的: org.mybatis.spring.SqlSessionFactoryBean
		MP提供的:com.baomidou.mybatisplus.spring.MybatisSqlSessionFactoryBean
	 -->
	<bean id="sqlSessionFactoryBean" class="com.baomidou.mybatisplus.spring.MybatisSqlSessionFactoryBean">
		<!-- 数据源 -->
		<property name="dataSource" ref="dataSource"></property>
		<property name="configLocation" value="classpath:mybatis-config.xml"></property>
		<!-- 别名处理  修改地方1 实体类路径-->
		<property name="typeAliasesPackage" value="com.web.pojo"></property>

		<!--
		   注入全局MP策略配置
		   mp 本身存在 globalConfig ,但我们也需要自己引入
		-->
		<property name="globalConfig" ref="globalConfiguration"></property>
	</bean>

	<!--
	   定义MybatisPlus的全局策略配置
	   需要注入到 bean 中才能起作用
	-->
	<bean id ="globalConfiguration" class="com.baomidou.mybatisplus.entity.GlobalConfiguration">
		<!--
		  在2.3版本以后,dbColumnUnderline 默认值就是true
		    mp 给出了 下划线和驼峰命名 的解决方法
		    例如 : 数据库 : list_name  实体类 listName
		-->
		<property name="dbColumnUnderline" value="true"></property>

		<!--
		    全局的主键策略
		    相当于所有的实体类的自增策略是 Type.Auto
		-->
		<property name="idType" value="0"></property>

		<!--
		     全局的表前缀策略配置 修改地方三  数据库表名前缀
		      默认访问的数据库的表示 该前缀 + 实体类名称  = 数据库表名

		-->
		<property name="tablePrefix" value="tbl_"></property>


	</bean>


	<!--
		配置mybatis 扫描mapper接口的路径
	 -->
	<bean class="org.mybatis.spring.mapper.MapperScannerConfigurer">
		<!-- 修改地方二 mapper接口 -->
		<property name="basePackage" value="com.web.mapper"></property>
	</bean>

</beans>
2)jdbc.properties
	jdbc.driver=com.mysql.jdbc.Driver
	jdbc.url=jdbc:mysql://localhost:3306/fenbushi
	jdbc.username=root
	jdbc.password=520
3)log4j.xml
<?xml version="1.0" encoding="UTF-8" ?>
<!DOCTYPE log4j:configuration SYSTEM "log4j.dtd">

<log4j:configuration xmlns:log4j="http://jakarta.apache.org/log4j/">

 <appender name="STDOUT" class="org.apache.log4j.ConsoleAppender">
   <param name="Encoding" value="UTF-8" />
   <layout class="org.apache.log4j.PatternLayout">
    <param name="ConversionPattern" value="%-5p %d{MM-dd HH:mm:ss,SSS} %m  (%F:%L) \n" />
   </layout>
 </appender>
 <logger name="java.sql">
   <level value="debug" />
 </logger>
 <logger name="org.apache.ibatis">
   <level value="info" />
 </logger>
 <root>
   <level value="debug" />
   <appender-ref ref="STDOUT" />
 </root>
</log4j:configuration>
4).mybatis-config.xml
<?xml version="1.0" encoding="UTF-8" ?>
<!DOCTYPE configuration
PUBLIC "-//mybatis.org//DTD Config 3.0//EN"
"http://mybatis.org/dtd/mybatis-3-config.dtd">
<configuration>

</configuration>
二、环境搭建---所需要依赖
	<dependencies>
    <!-- mp依赖
		 mybatisPlus 会自动的维护Mybatis 以及MyBatis-spring相关的依赖
	 -->
    <dependency>
        <groupId>com.baomidou</groupId>
        <artifactId>mybatis-plus</artifactId>
        <version>2.3</version>
    </dependency>
    <!--junit  测试-->
    <dependency>
        <groupId>junit</groupId>
        <artifactId>junit</artifactId>
        <version>4.9</version>
    </dependency>
    <!-- log4j 日志记录 -->
    <dependency>
        <groupId>log4j</groupId>
        <artifactId>log4j</artifactId>
        <version>1.2.17</version>
    </dependency>
    <!-- c3p0  数据库连接池-->
    <dependency>
        <groupId>com.mchange</groupId>
        <artifactId>c3p0</artifactId>
        <version>0.9.5.2</version>
    </dependency>
    <!-- mysql -->
    <dependency>
        <groupId>mysql</groupId>
        <artifactId>mysql-connector-java</artifactId>
        <version>5.1.37</version>
    </dependency>
    <!-- spring -->
    <dependency>
        <groupId>org.springframework</groupId>
        <artifactId>spring-context</artifactId>
        <version>4.3.10.RELEASE</version>
    </dependency>
    <dependency>
        <groupId>org.springframework</groupId>
        <artifactId>spring-orm</artifactId>
        <version>4.3.10.RELEASE</version>
    </dependency>

</dependencies>
二、创建数据库表和实体类
1.tbl_user表
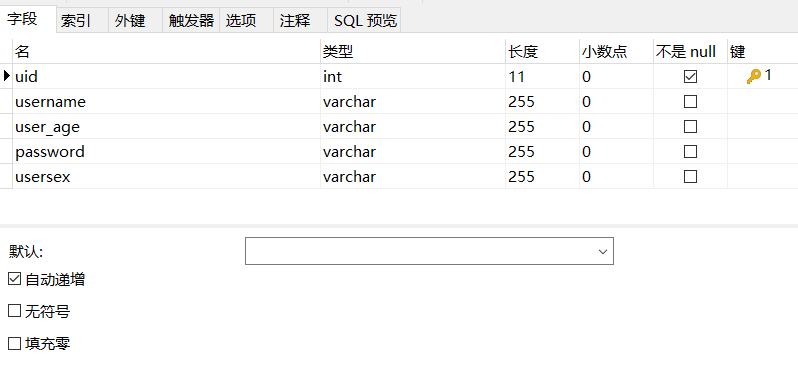
注:配置文件中添加了全局前缀策略,使用的好处是使用MP的CRUD 实体类可以不用指定对应的操作的表
操作的表 = 前缀 + 实体类名

<property name="tablePrefix" value="tbl_"></property>
2.实体类
 public class User {
    /**
     * TableId
     *    value:表示 主键的列名,如果数据库表中的列名等于实体类的名称可以省略
     *    type:主键自增
     *
     * */
    @TableId(value = "uid",type = IdType.AUTO)
    private Integer uid;
    private String username;
    private String userAge;
    private String usersex;
    private String password;
}
注:该配置文件开启了 下划线转驼峰命名的配置,所以该实体类中的 userAge 对应数据库表名中的 user_age,(如果操作的mp依赖是2.3版本以上的则自动默认是开启的);
<property name="dbColumnUnderline" value="true"></property>
3.创建mapper接口并实现 BaseMapper<>
BaseMapper中提供了大部分该对象的CRUD的方法
public interface UserMapper extends BaseMapper<User> {}
三、操作
1.在测试类中设置成员属性
// 读取配置文
private ApplicationContext ioc = new ClassPathXmlApplicationContext("applicationContext.xml");
//获取bean容器中的 userMapper接口
private UserMapper userMapper = ioc.getBean("userMapper",UserMapper.class);
2.查看是否连接上数据库
 @Test
public void testDataScoure(){
    // 获取配置文件中的datasource
    DataSource ds = ioc.getBean("dataSource",DataSource.class);

    // 查看时否连接上
    System.out.println(ds);

    try {
        // 连接信息
        Connection connection = ds.getConnection();
        System.out.println(connection);
    } catch (SQLException e) {
        e.printStackTrace();
    }
}
1.添加:insert
// 添加一个 班级信息
@Test
public void insertClazz(){
    User user = new User();
    user.setUsername("土豆");
    user.setPassword("123");
    user.setUserAge("23");
    Integer insert = usermapperMapper.insert(user);
    System.out.println("影响条数:"+ insert);
	System.out.println("主键id:"+ user.getUid());
}
2.添加:insertAllColumn
   // 添加一个 班级信息
@Test
public void insertClazz(){
    User user = new User();
    user.setUsername("黄瓜");
    user.setPassword("123");
    user.setUserAge("23");
    Integer insert = usermapperMapper.insertAllColumn(user);
    System.out.println("影响条数:"+ insert);
}
总结一:
- insert:方法中自带非空判断,没有属性的属性不会添加。且如果数据不全,能添加到数据库但是没有返回值。
- insertAllColumn:添加的时候没有非空半段,会将所有的属性都添加到数据库。
- 除了查询每个方法都会返回数据库中影响的条数,添加还会放回出添加到数据库的字段并将该值赋值到添加的类中。
3.修改 updateById通过id进行修改
@Test
public void update(){
    User user =new User();
    user.setUid(1);
    user.setPassword("123");
    user.setUsername("小花");
    Integer update = userMapper.updateById(user);
    System.out.println("影响条数:" + update);
}
该方法具有非空判断,只会修改属性不为空的字段
4.修改 updateAllColumnById 覆盖式修改
  @Test
public void updateColumn(){
    User user =new User();
    user.setId(1);
    user.setPassword("123");
    user.setUsername("土豆");
    Integer update = userMapper.updateAllColumnById(user);
    System.out.println("影响条数:" + update);
}
这个方法相当于覆盖,如果部分属性没有值,这个方法执行后数据库的这些属性将会变为空值
5.通过id 查询数据
 /**
 * 查询方法 selectById
 * */
@Test
public void selectById(){
    User user = userMapper.selectById(1);
    System.out.println("id为1 的记录 :" + user);
}
6. selectOne :通过实体类中非空属性进行查询
/**
 * 查询 selectOne
 *
 * */
@Test
public void selectOne(){
    User user1 = new User();
    user1.setUsername("赵小花");
    User user2 = userMapper.selectOne(user1);
    System.out.println("id为1 的记录 :" + user2);
}
注:如果实体类中的属性不为空,则会默认为查询的一个条件
坑:如果查询的时候某些属性都是有许多相同的,查询的时候会报错。因为该方法只能返回条数据
7. selectBatchIds :通过id集合查询数据(参数为集合类型)
 /**
 * 查询 selectBatchIds
 *
 *    通过id 集合查询数据
 * */
@Test
public void selectByIds(){
    List<Integer> ids = new ArrayList<Integer>();
    ids.add(1);
    ids.add(2);
    List<User> users = userMapper.selectBatchIds(ids);
    System.out.println("id为1 的记录 :" + users);
}
8. selectByMap :map集合封装的数据查询数据(参数为map集合)
/**
 *map集合封装的数据查询数据(参数为map集合)
 *
 * */
@Test
public void selectMap(){
   Map<String,Object> map = new HashMap<String,Object>();
   map.put("username","赵小花");
   map.put("user_age","25");
   map.put("password","123");
   List<User> users = userMapper.selectByMap(map);

    System.out.println("查询结果:" + users);
}
注:map中的主键对应的数据库表中的字段,不是实体类中的属性
Wrapper的实现了类有 EntityMapper 和 Condition
9.selectList 条件构造器查询数据
/**
 * 条件构造器 条件查询
 *
 *  降序查询数据
 *
 * */
@Test
public void selectByWrapper1(){

    List<User> users = userMapper.selectList(
            new EntityWrapper<User>().eq("password", "123")
                                     // 两者存起一就好好 推荐使用第一个
                                     // .orderDesc(Arrays.asList(new String[] {"user_age"})) // orderDesc 和 orderAsc 的参数都是 集合可以借助Arrays完成数据操作
                                      .orderBy("user_age") // 默认的是升序 不是降序 可以使用 last 注入自定义的sql 语句
                                      .last("desc limit 1,3")// last 表示 在sql后面拼接sql语句 这样就无法防止sql注入
    );

    System.out.println(users);
}
10.selectList: Condition条件构造
/**
 * 条件构造器 条件查询
 *
 *  降序查询数据
 *
 * */
@Test
public void selectByWrapper1(){

    List<User> users = userMapper.selectList(
            Condition.create().eq("password", "123")
                                     // 两者存起一就好好 推荐使用第一个
                                     // .orderDesc(Arrays.asList(new String[] {"user_age"})) // orderDesc 和 orderAsc 的参数都是 集合可以借助Arrays完成数据操作
                                      .orderBy("user_age") // 默认的是升序 不是降序 可以使用 last 注入自定义的sql 语句
                                      .last("desc limit 1,3")// last 表示 在sql后面拼接sql语句 这样就无法防止sql注入
    );

    System.out.println(users);
}
总结 :Condition 和EntityWarpper 的不同之处在于
- Condition是通过 create()方法创建出来的
- EntityWarpper是需要new出来的
11.selectPage: 条件+分页查询
/**
 * 条件构造器 分页条件查询
 *
 *  需求 性别为男  姓名为 xxx的用户  年龄在 11   到 25之间的用户信息
 *  每页显示 2条数据
 *
 * */
@Test
public void selectByWrapper2(){
    List<User> users = userMapper.selectPage(new Page<User>(1, 2),
            new EntityWrapper<User>().between("user_age", "11","25")
                    .eq("usersex", "男")
                    .eq("username", "张三"));

    System.out.println(users);
}
12.update: 条件构造器记性修改
  	/**
     * 条件构造器 条件查询
     * 修改密码为 123,姓名为张三 或 姓名包含五的人的密码为6666
     *
     * */
    @Test
    public void updateWrapper(){
        User user =  new User();
        user.setPassword("6666");

        Integer update = userMapper.update(user, new EntityWrapper<User>().eq("password", "123")
                .eq("username", "张三")
                .or() // 后面又是 条件组合
                .like("username", "五"));

        System.out.println("影响条数:" + update);
    }
13.update: 条件构造器记性修改
  	/**
     * 条件构造器 条件查询
     * (修改密码为 123,姓名为张三 )或 (姓名包含五密码为111得人),人的密码为6666
     *
     * */
    @Test
    public void updateWrapper(){
        User user =  new User();
        user.setPassword("6666");

        Integer update = userMapper.update(user, new EntityWrapper<User>().eq("password", "123")
                .eq("username", "张三")
                .orNew() // 后面又是 条件组合
                .like("username", "五")
                .eq("username","111"));
        System.out.println("影响条数:" + update);
    }
小结:
- or()表示的是这个条件和前面的条件是平级关系
- orNew()表示的是后面的是后者的另一个条件(条件组合)
14.deleteById:通过id删除信息
/**
     * 删除 deleteById(Id)
     *
     * */
    @Test
    public void deleteById(){
        Integer integer = userMapper.deleteById(1);
        System.out.println("影响条数:" + integer);
    }
15. deleteBatchIds:通过id的集合删除数据(查询相似)
 /**
 * 删除 deleteBatchIds(List supper)
 *   ids 的集合
 * */
@Test
public void deleteBatchIds(){
   List<Integer> list = new ArrayList<Integer>();
   list.add(2);
   list.add(4);
   Integer integer = userMapper.deleteBatchIds(list);
   System.out.println("影响条数:" + integer);
}
16.deleteMap删除 (和selectMap使用相似)
/**
 * 删除 deleteByMap(Map supper)
 *   map中的主键仍然是数据库表的字段
 * */
@Test
public void deleteByMap(){
    Map<String,Object> map = new HashMap<String, Object>();
    map.put("usernmame","张三");
    map.put("password","123");
    Integer integer = userMapper.deleteByMap(map);
    System.out.println("影响条数:" + integer);
}
17.delete:条件构造删除
/**
 * 条件构造器 条件删除
 *删除年龄等于 23 或姓名包含五的数据
 *
 * */
@Test
public void deleteWrapper(){
    Integer delete = userMapper.delete( new EntityWrapper<User>().eq("password", "123")
            .eq("user_age", "23")
            .orNew() // 后面又是 条件组合
            .like("username", "五"));

    System.out.println("影响条数:" + delete);
}
