
MongoDB的常见的客户端连接工具实战
作者:尹正杰
版权声明:原创作品,谢绝转载!否则将追究法律责任。
目录
一.使用mongosh连接MongoDB
1.查看帮助信息
[root@prometheus-server31 ~]# mongosh
Current Mongosh Log ID: 67e2c13485d5fec8e901337a
Connecting to: mongodb://127.0.0.1:27017/?directConnection=true&serverSelectionTimeoutMS=2000&appName=mongosh+2.4.2
Using MongoDB: 8.0.5
Using Mongosh: 2.4.2
For mongosh info see: https://www.mongodb.com/docs/mongodb-shell/
------
The server generated these startup warnings when booting
2025-03-25T22:20:17.903+08:00: Using the XFS filesystem is strongly recommended with the WiredTiger storage engine. See http://dochub.mongodb.org/core/prodnotes-filesystem
2025-03-25T22:20:18.756+08:00: Access control is not enabled for the database. Read and write access to data and configuration is unrestricted
2025-03-25T22:20:18.757+08:00: For customers running the current memory allocator, we suggest changing the contents of the following sysfsFile
2025-03-25T22:20:18.757+08:00: For customers running the current memory allocator, we suggest changing the contents of the following sysfsFile
2025-03-25T22:20:18.757+08:00: We suggest setting the contents of sysfsFile to 0.
2025-03-25T22:20:18.757+08:00: Your system has glibc support for rseq built in, which is not yet supported by tcmalloc-google and has critical performance implications. Please set the environment variable GLIBC_TUNABLES=glibc.pthread.rseq=0
2025-03-25T22:20:18.757+08:00: vm.max_map_count is too low
2025-03-25T22:20:18.757+08:00: We suggest setting swappiness to 0 or 1, as swapping can cause performance problems.
------
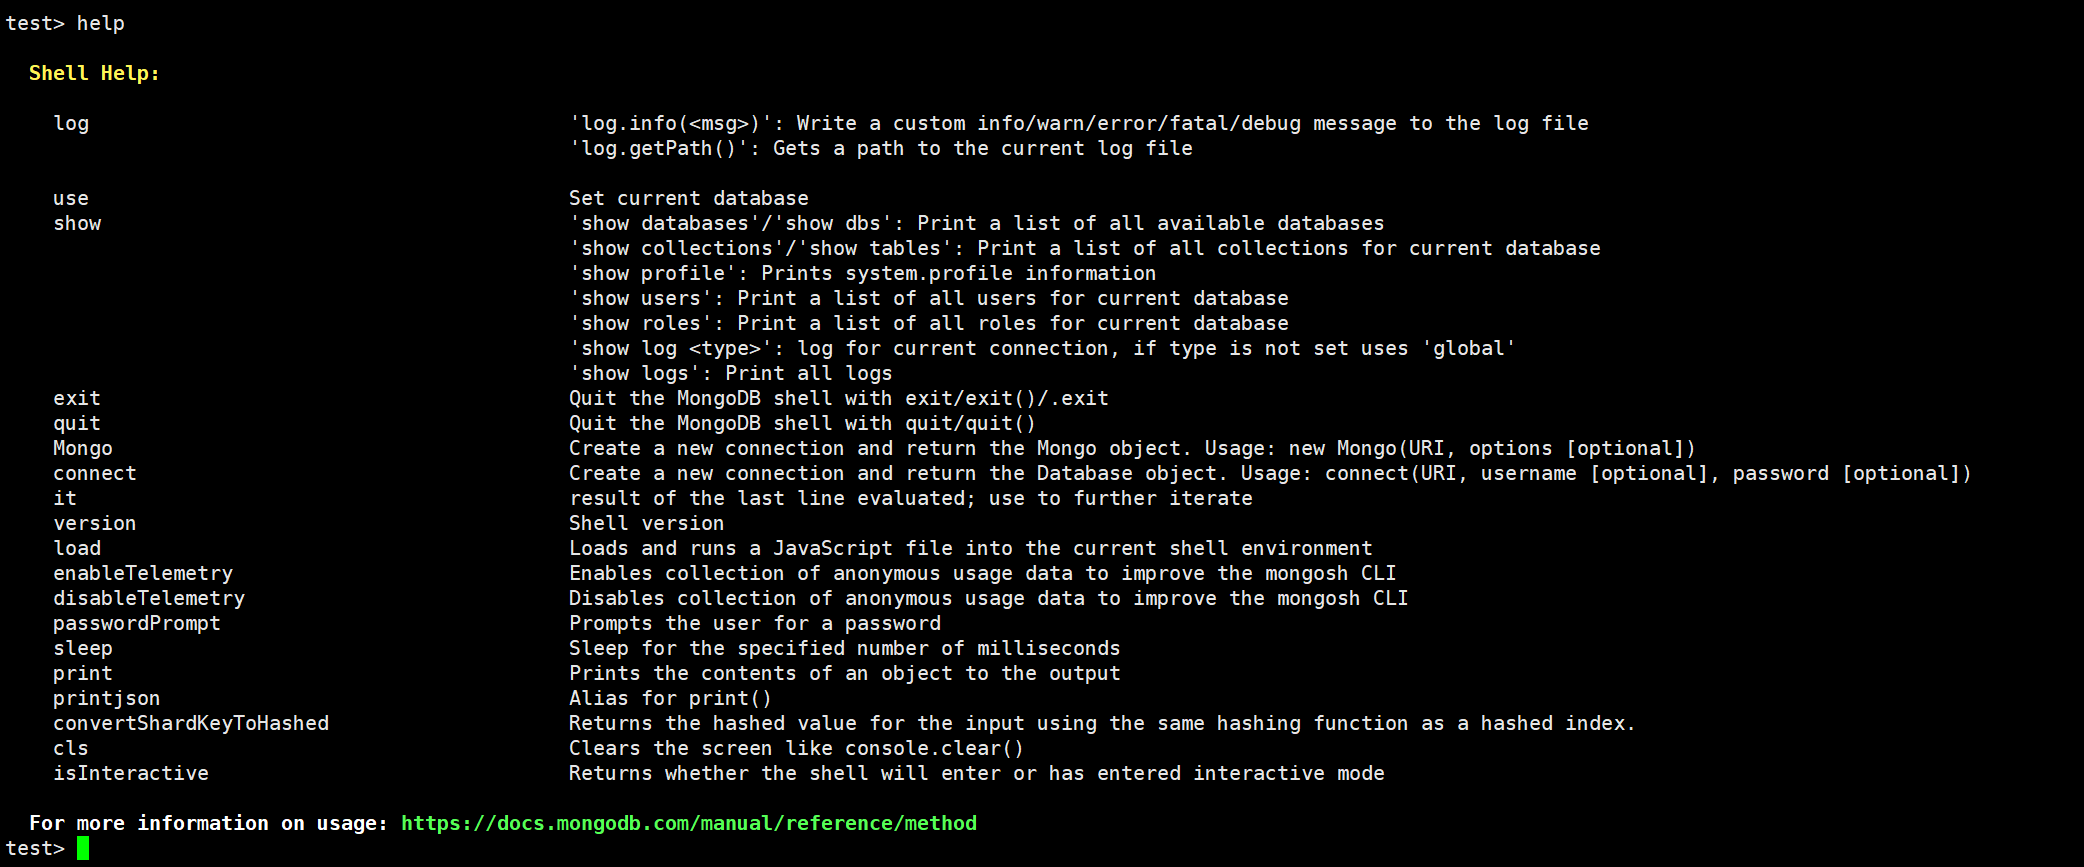
test> help
Shell Help:
log 'log.info(<msg>)': Write a custom info/warn/error/fatal/debug message to the log file
'log.getPath()': Gets a path to the current log file
use Set current database
show 'show databases'/'show dbs': Print a list of all available databases
'show collections'/'show tables': Print a list of all collections for current database
'show profile': Prints system.profile information
'show users': Print a list of all users for current database
'show roles': Print a list of all roles for current database
'show log <type>': log for current connection, if type is not set uses 'global'
'show logs': Print all logs
exit Quit the MongoDB shell with exit/exit()/.exit
quit Quit the MongoDB shell with quit/quit()
Mongo Create a new connection and return the Mongo object. Usage: new Mongo(URI, options [optional])
connect Create a new connection and return the Database object. Usage: connect(URI, username [optional], password [optional])
it result of the last line evaluated; use to further iterate
version Shell version
load Loads and runs a JavaScript file into the current shell environment
enableTelemetry Enables collection of anonymous usage data to improve the mongosh CLI
disableTelemetry Disables collection of anonymous usage data to improve the mongosh CLI
passwordPrompt Prompts the user for a password
sleep Sleep for the specified number of milliseconds
print Prints the contents of an object to the output
printjson Alias for print()
convertShardKeyToHashed Returns the hashed value for the input using the same hashing function as a hashed index.
cls Clears the screen like console.clear()
isInteractive Returns whether the shell will enter or has entered interactive mode
For more information on usage: https://docs.mongodb.com/manual/reference/method
test>
2.MongoDB默认的数据库
| 数据库 | 描述 |
|---|---|
| admin | 系统预留库,MongoDB系统管理库 |
| local | 本地预留库,存储关键日志 |
| config | MongoDB配置信息库。 |
| test | 登录默认存在的测试库,生产环境中可以将其删除 |
	1.根据帮助信息可以看出如何查看数据库信息
test> show databases;
admin   40.00 KiB
config  12.00 KiB
local   40.00 KiB
test>


	2.这是简写形式
test> show dbs;
admin   40.00 KiB
config  12.00 KiB
local   40.00
3.表的基本管理
3.1 往表中插入数据
	1.往teacher(若不存在该表会自动创建)表中插入一个文档
test> db.teacher.insertOne({name:"Jason Yin", blog:"https://www.cnblogs.com/yinzhengjie"})
{
  acknowledged: true,
  insertedId: ObjectId('67e2c40085d5fec8e901337b')
}
test>


	2.往teacher表中插入多条文档
test> db.teacher.insertMany([{name: "尹正杰",hobby:"k8s"},{name: "Jason Yin",age: 18}])
{
  acknowledged: true,
  insertedIds: {
    '0': ObjectId('67e2c47285d5fec8e901337c'),
    '1': ObjectId('67e2c47285d5fec8e901337d')
  }
}
test>
3.2 查看表的数据
test> db.teacher.find()
[
  {
    _id: ObjectId('67e2c40085d5fec8e901337b'),
    name: 'Jason Yin',
    blog: 'https://www.cnblogs.com/yinzhengjie'
  },
  {
    _id: ObjectId('67e2c47285d5fec8e901337c'),
    name: '尹正杰',
    hobby: 'k8s'
  },
  {
    _id: ObjectId('67e2c47285d5fec8e901337d'),
    name: 'Jason Yin',
    age: 18
  }
]
3.3 删除表中单条数据
test> db.teacher.deleteOne({"name": "尹正杰"})
{ acknowledged: true, deletedCount: 1 }
test>

test> db.teacher.find()
[
  {
    _id: ObjectId('67e2c40085d5fec8e901337b'),
    name: 'Jason Yin',
    blog: 'https://www.cnblogs.com/yinzhengjie'
  },
  {
    _id: ObjectId('67e2c47285d5fec8e901337d'),
    name: 'Jason Yin',
    age: 18
  }
]
test>
3.4 删除表中多条数据
test> db.teacher.deleteMany({"name": "Jason Yin"})
{ acknowledged: true, deletedCount: 2 }
test>

test> db.teacher.find()

test>
3.5 删除表中所有数据
test> db.teacher.find()
[
  {
    _id: ObjectId('67e2c85b85d5fec8e901337e'),
    name: '尹正杰',
    hobby: 'k8s'
  },
  {
    _id: ObjectId('67e2c85b85d5fec8e901337f'),
    name: 'Jason Yin',
    age: 18
  },
  {
    _id: ObjectId('67e2c86485d5fec8e9013380'),
    name: 'Jason Yin',
    blog: 'https://www.cnblogs.com/yinzhengjie'
  }
]
test>
test> db.teacher.remove({})
DeprecationWarning: Collection.remove() is deprecated. Use deleteOne, deleteMany, findOneAndDelete, or bulkWrite.
{ acknowledged: true, deletedCount: 3 }
test>
test> db.teacher.find()

test>
test> show tables;
teacher
test>
3.6 删除表
test> show tables;
teacher
test>
test> db.teacher.drop()
true
test>
test> show tables;

test>
4.命令使用技巧
- 数据库相关操作方法:
	输入"db."后连续按2次tab键就可以看到支持的方法。


- 表(tables)或者集合(collection)的相关操作方法:
	输入"db.tableName"后按2次tab键就可以看到支持的方法。

- 复制集相关操作方法:
	输入"rs."后按2次tab键就可以看到支持的方法。

- sh分配集群(sharding cluster)相关操作方法:
	输入"sh."后按2次tab键就可以看到支持的方法。
5.推荐阅读
参考链接:
	https://www.mongodb.com/zh-cn/docs/v5.0/crud/
二.MongoDB compass管理MongoDB
1.下载MongoDB compass软件包
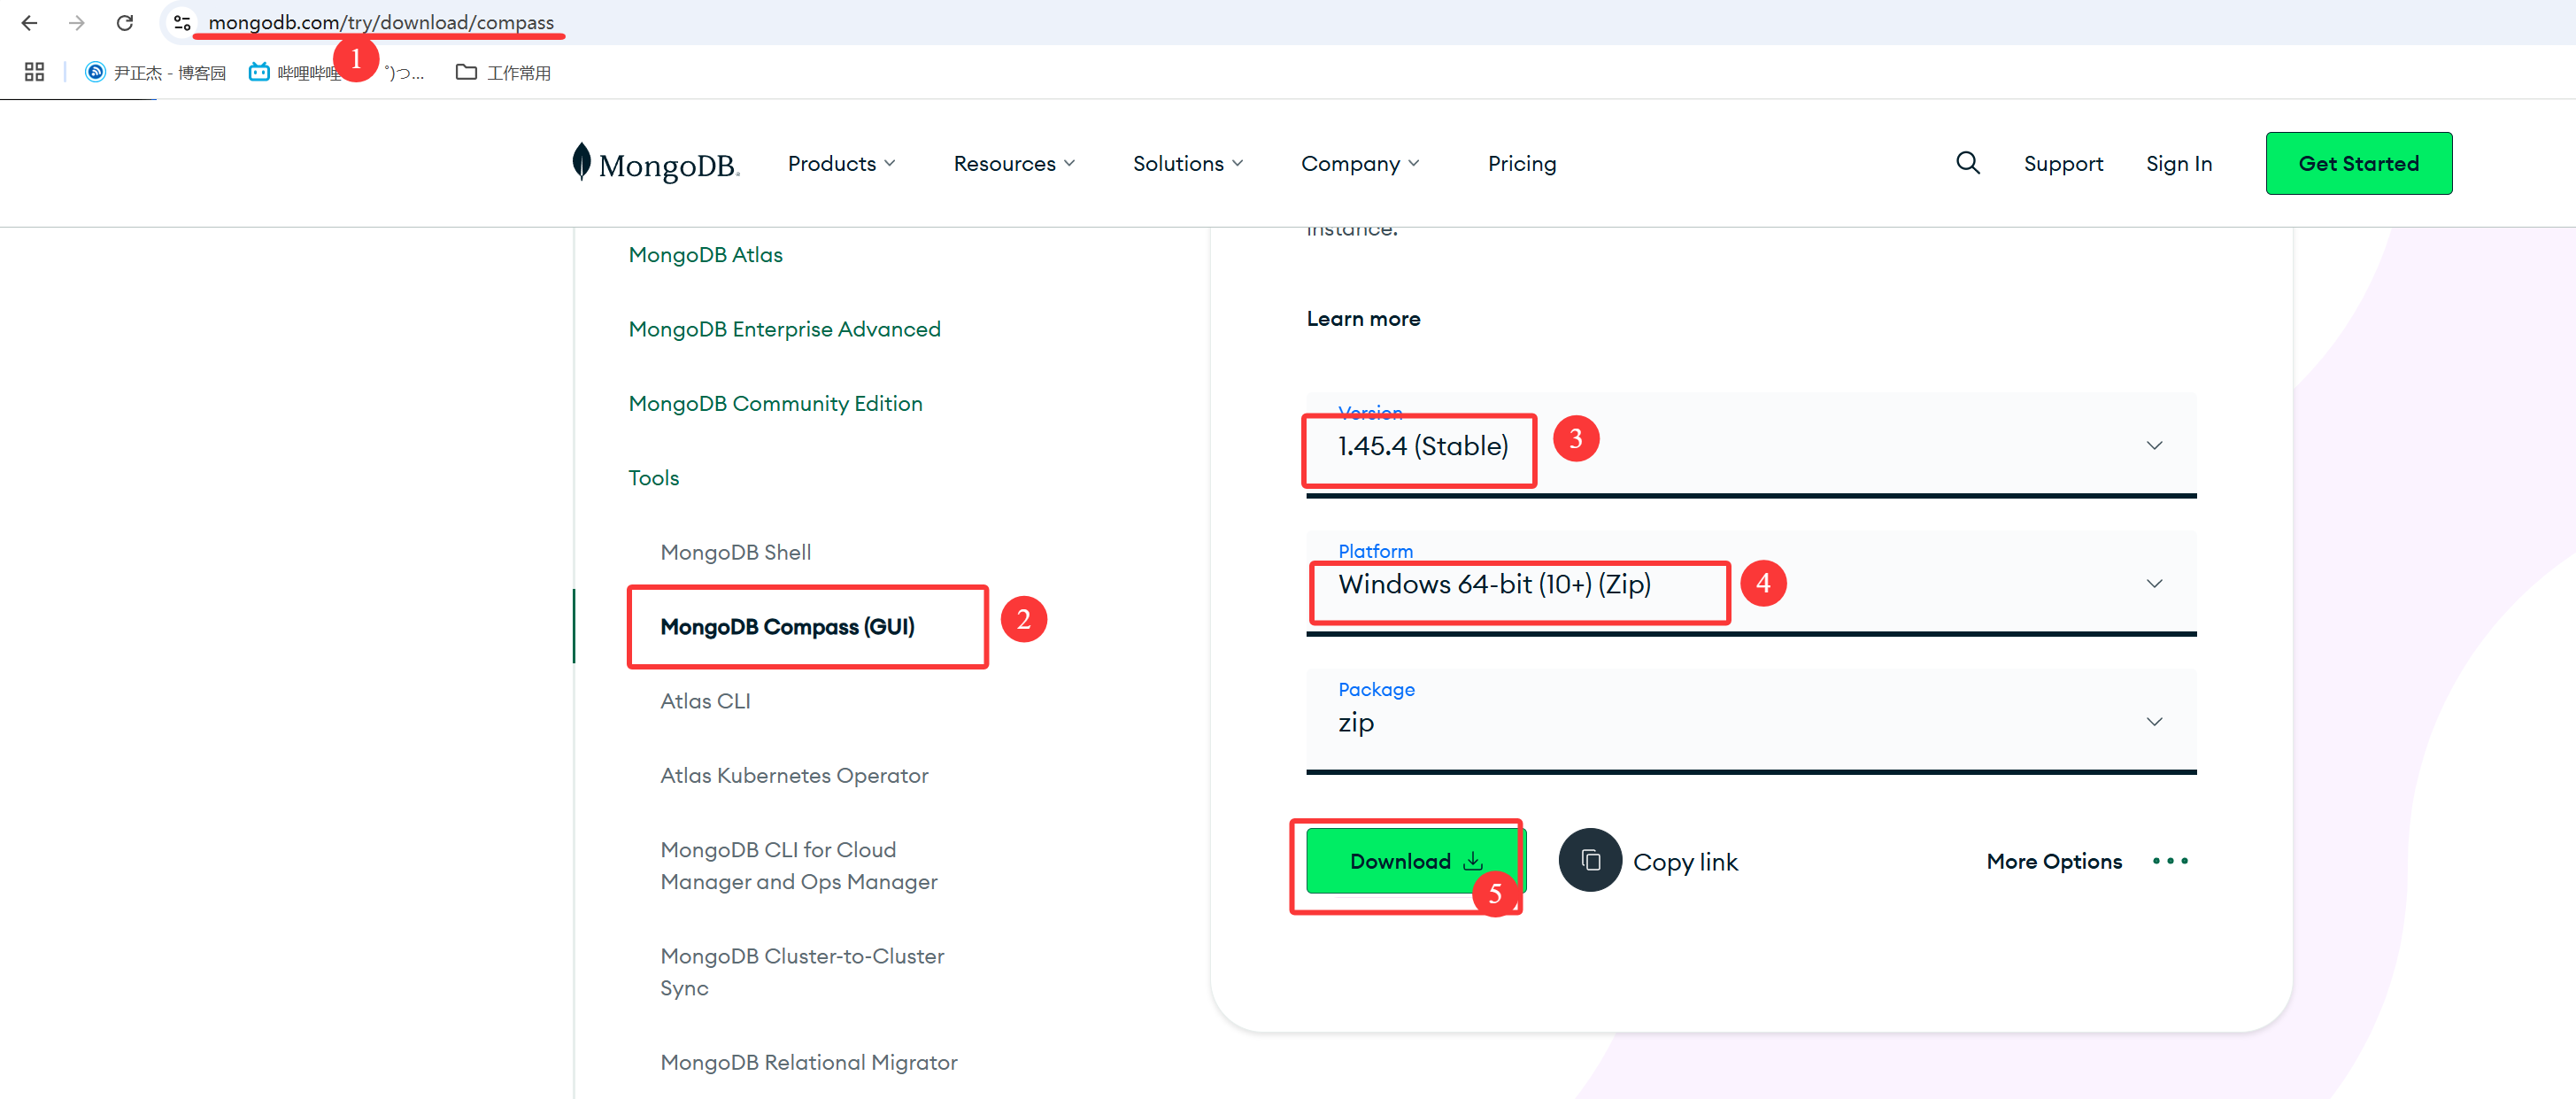
下载地址:
	https://www.mongodb.com/try/download/compass
2.运行compass
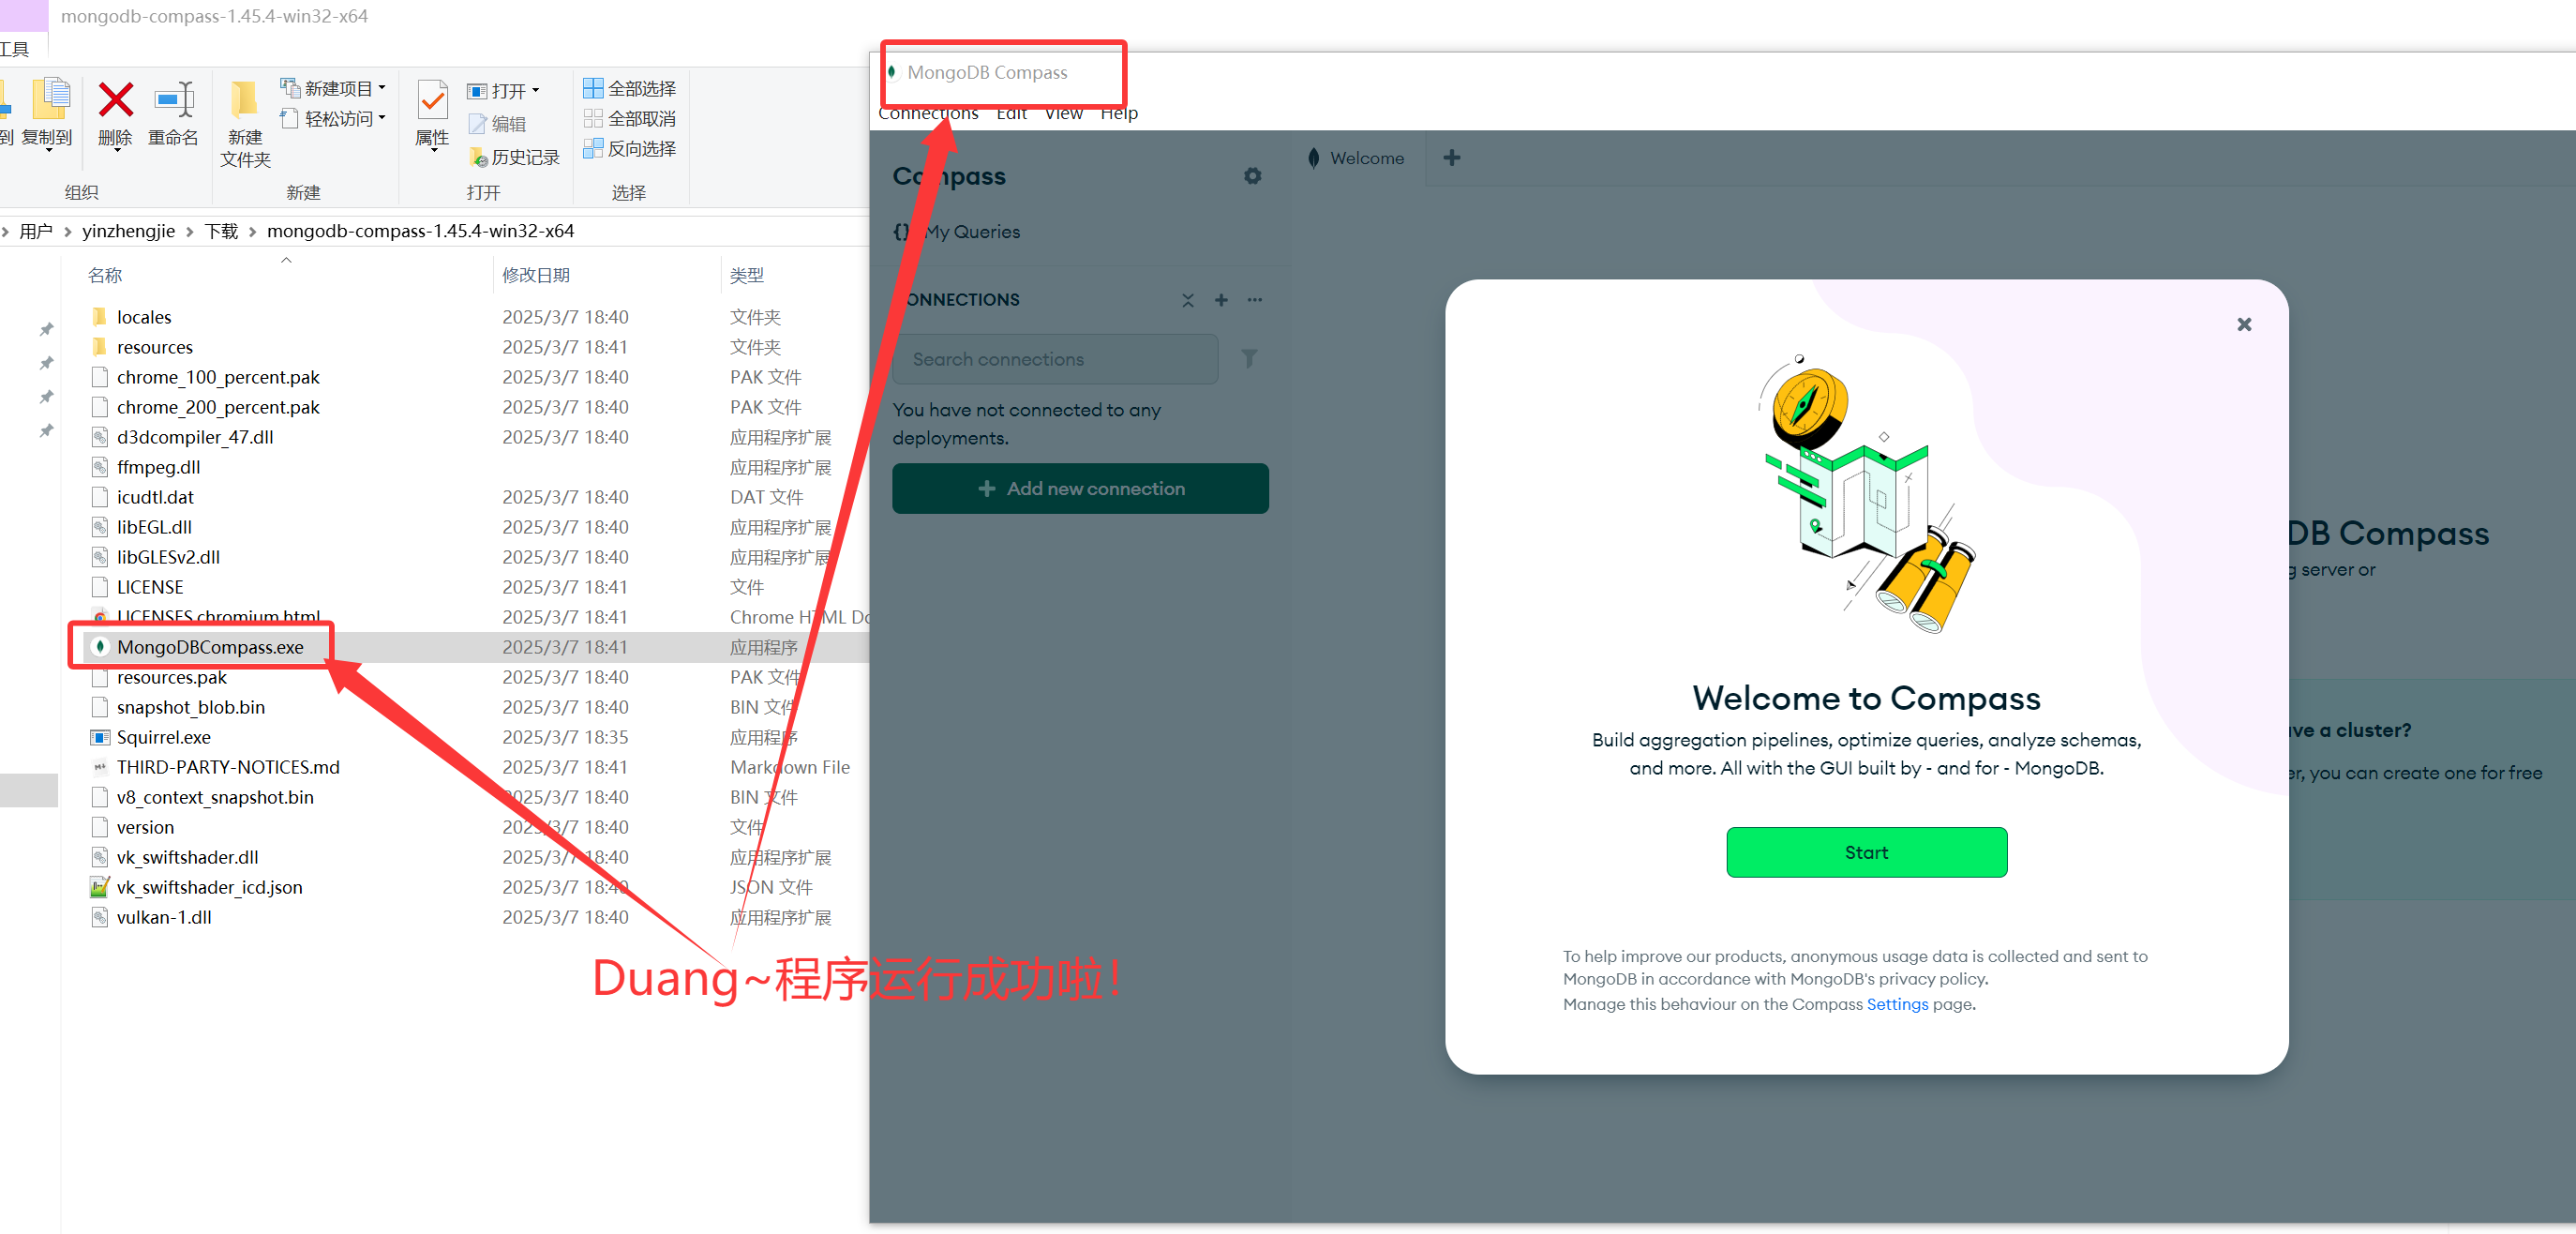
如上图所示,我们可以运行MongoDBCompass程序包。
3.链接MongoDB
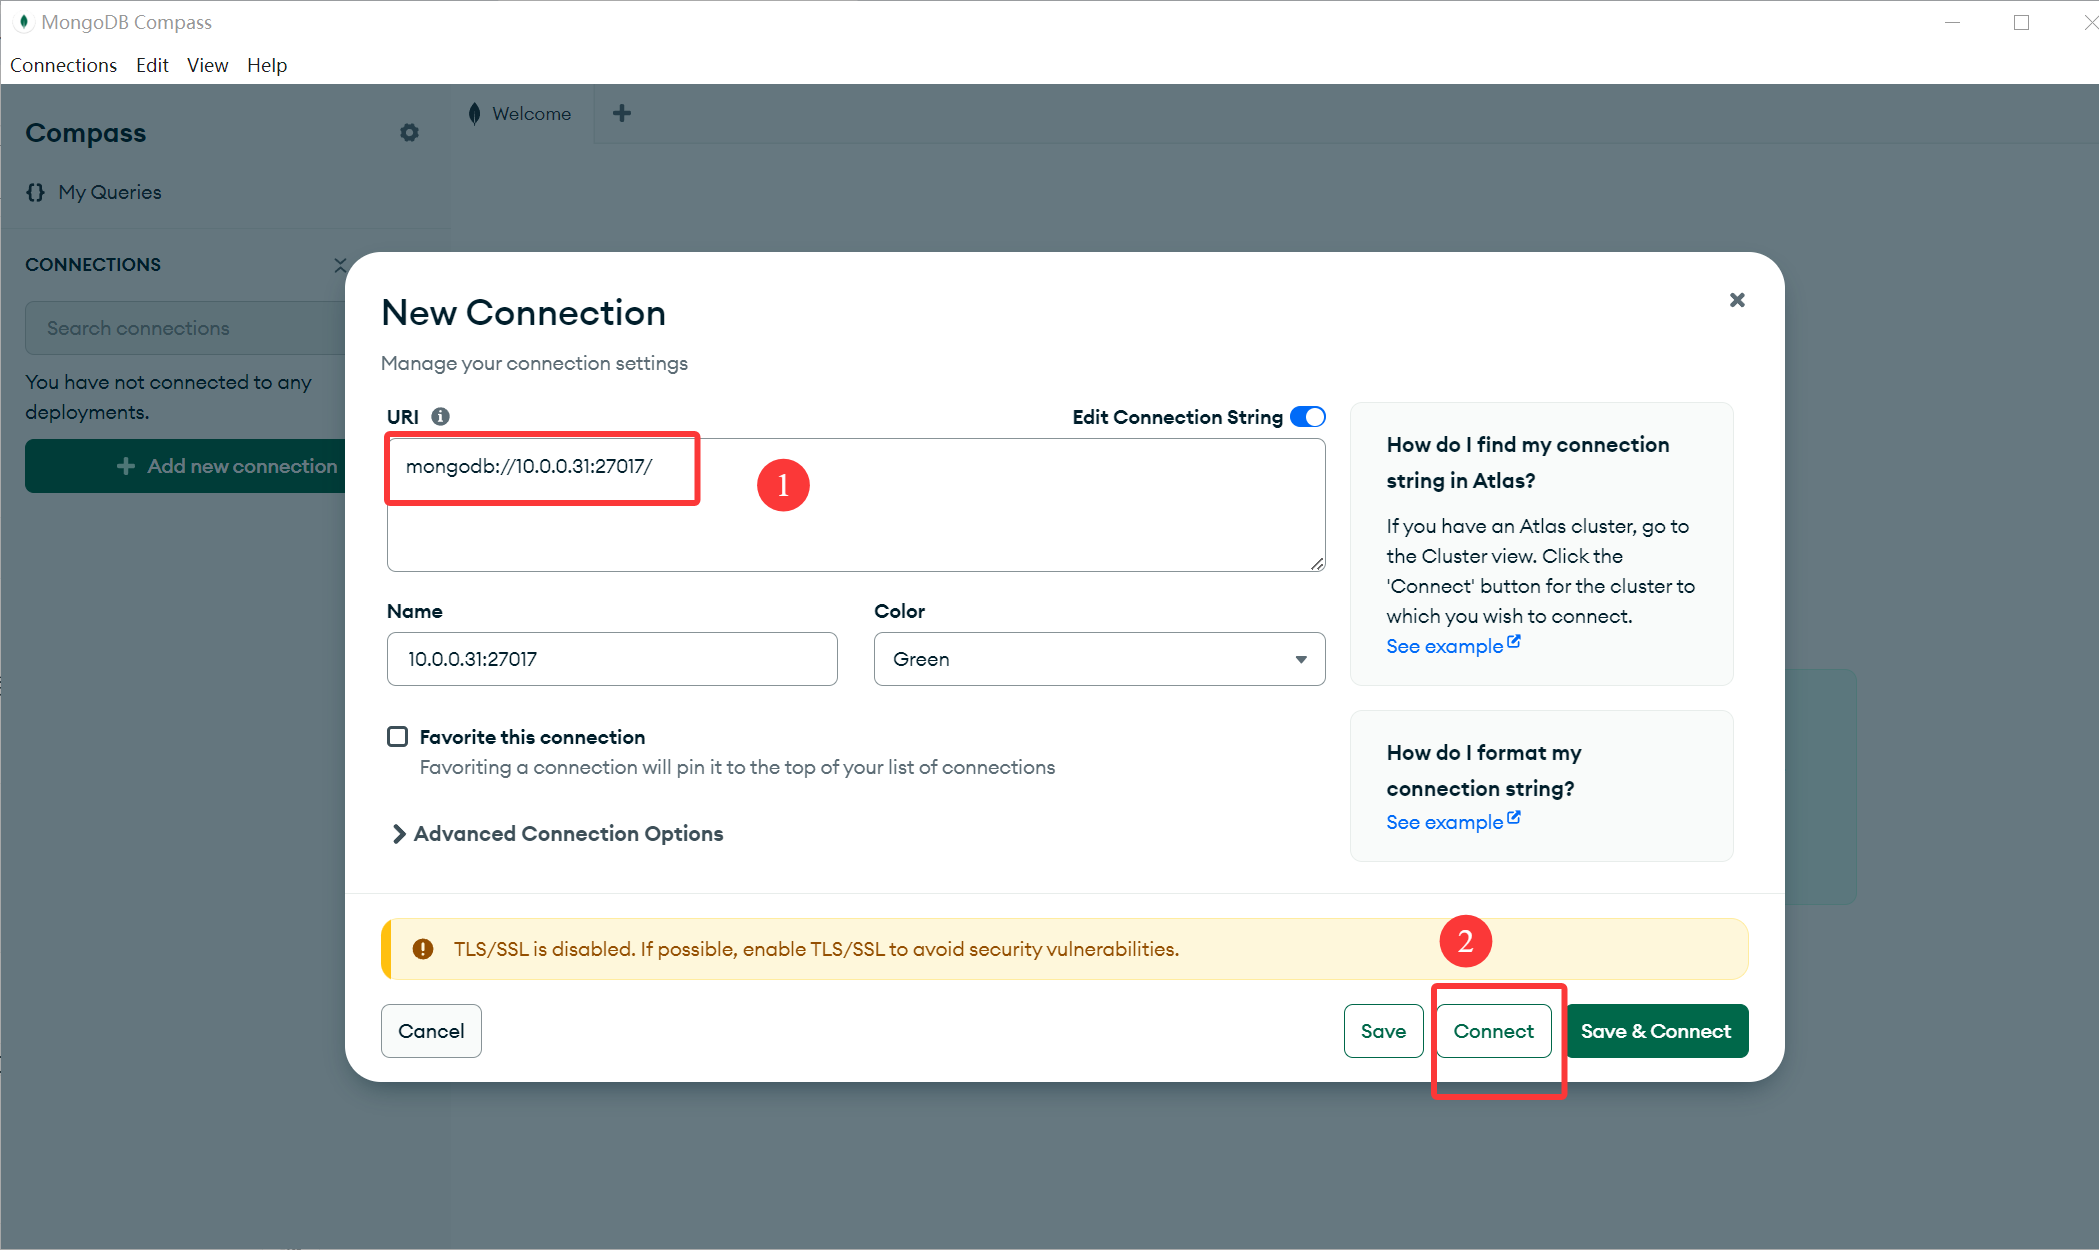
如上图所示,我们可以添加数据库连接。
4.使用图形化工具操作MongoDB
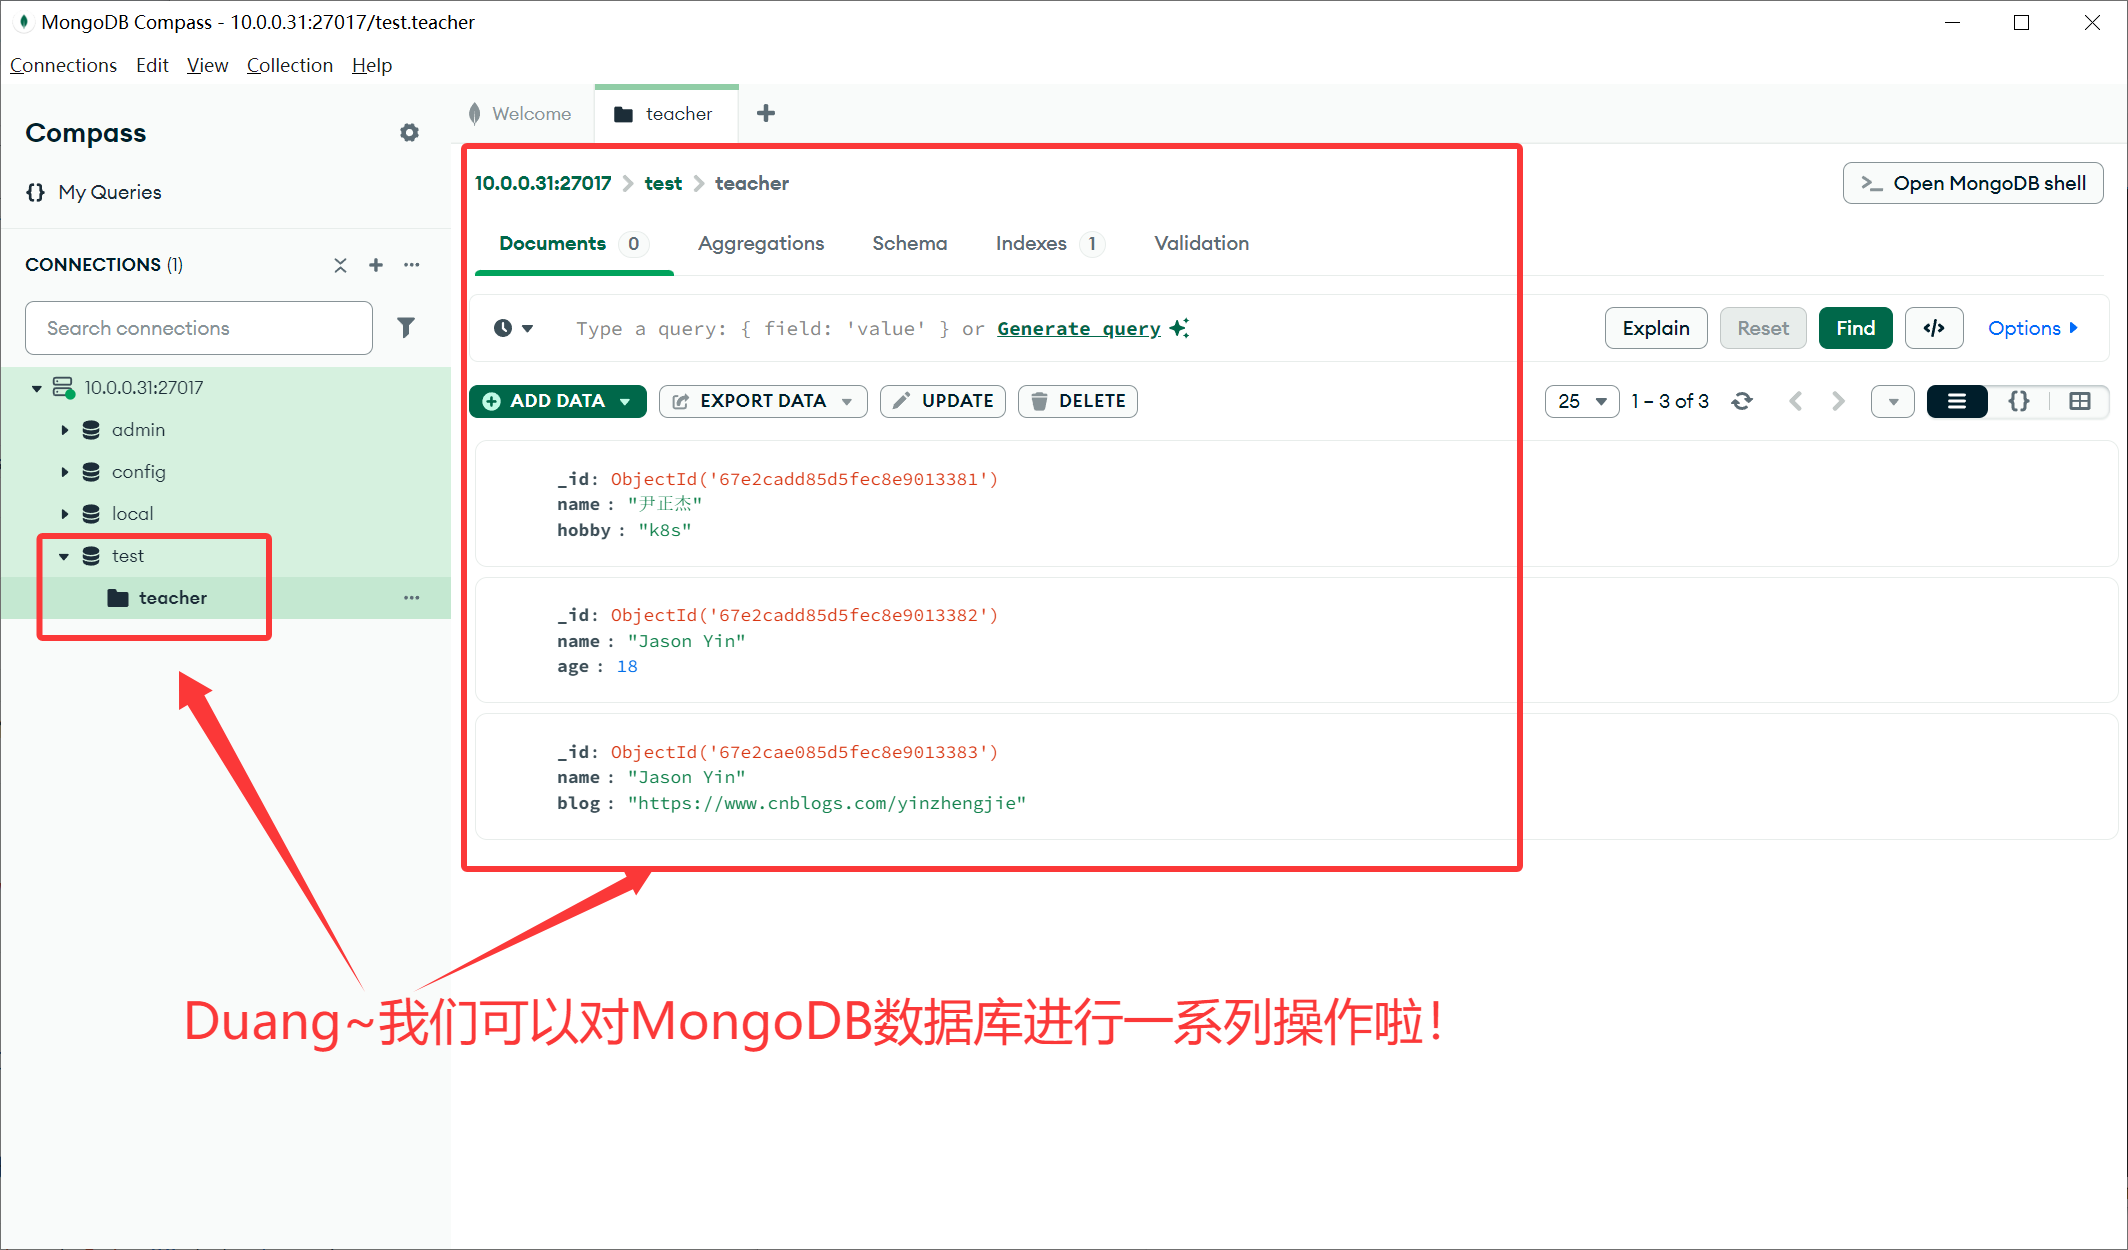
如上图所示,我们可以基于compass工具来图形化管理MongoDB服务哟~
三.基于Python的API访问MongoDB
1.安装Python环境
	1.安装pip3工具包
[root@prometheus-server31 ~]# apt -y install python3-pip


	2.基于pip3安装Python操作MongoDB的模块
[root@prometheus-server31 ~]# pip3 install pymongo -i https://mirrors.aliyun.com/pypi/simple
2.编写Python代码
[root@prometheus-server31 ~]# cat yinzhengjie-mongoDB-api.py
#!/usr/bin/python3

from pymongo import MongoClient

# 客户端链接
client = MongoClient("mongodb://10.0.0.31:27017")

# 指定数据库
db = client["yinzhengjie"]

# 指定表(集合)
teacher = db["teacher"]

for i in range(5):
  docs = { "name": "杰哥讲运维00" + str(i),"age": 18}
  result = teacher.insert_one(docs)
  print(result)

client.close()
[root@prometheus-server31 ~]#
3.测试验证
[root@prometheus-server31 ~]# python3 yinzhengjie-mongoDB-api.py
InsertOneResult(ObjectId('67e2cddc4253a686ff43f261'), acknowledged=True)
InsertOneResult(ObjectId('67e2cddc4253a686ff43f262'), acknowledged=True)
InsertOneResult(ObjectId('67e2cddc4253a686ff43f263'), acknowledged=True)
InsertOneResult(ObjectId('67e2cddc4253a686ff43f264'), acknowledged=True)
InsertOneResult(ObjectId('67e2cddc4253a686ff43f265'), acknowledged=True)
[root@prometheus-server31 ~]#
本文来自博客园,作者:尹正杰,转载请注明原文链接:https://www.cnblogs.com/yinzhengjie/p/18774460,个人微信: "JasonYin2020"(添加时请备注来源及意图备注,有偿付费)
当你的才华还撑不起你的野心的时候,你就应该静下心来学习。当你的能力还驾驭不了你的目标的时候,你就应该沉下心来历练。问问自己,想要怎样的人生。

 浙公网安备 33010602011771号