
jetson-nano使用deepstream-tensorrt部署yolov5
目录
介绍
在主机上训练自己的Yolov5模型,转为TensorRT模型并部署到Jetson Nano上,用DeepStream运行。(先以yolov5s.pt为例)
环境
硬件环境:
-
带cuda的显卡主机
-
Jetson Nano 4G B01
-
csi摄像头、usb摄像头
软件环境:
- yolov5-5.0
- jetpack-4.4
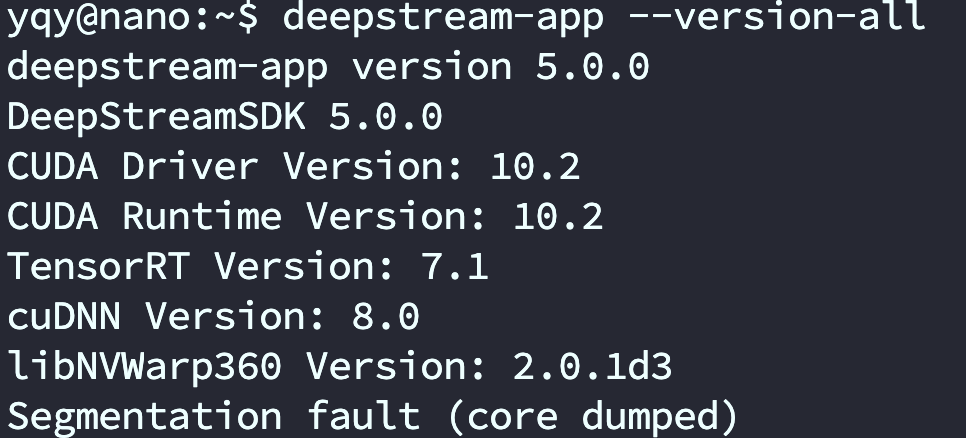
- deepstream-5.0
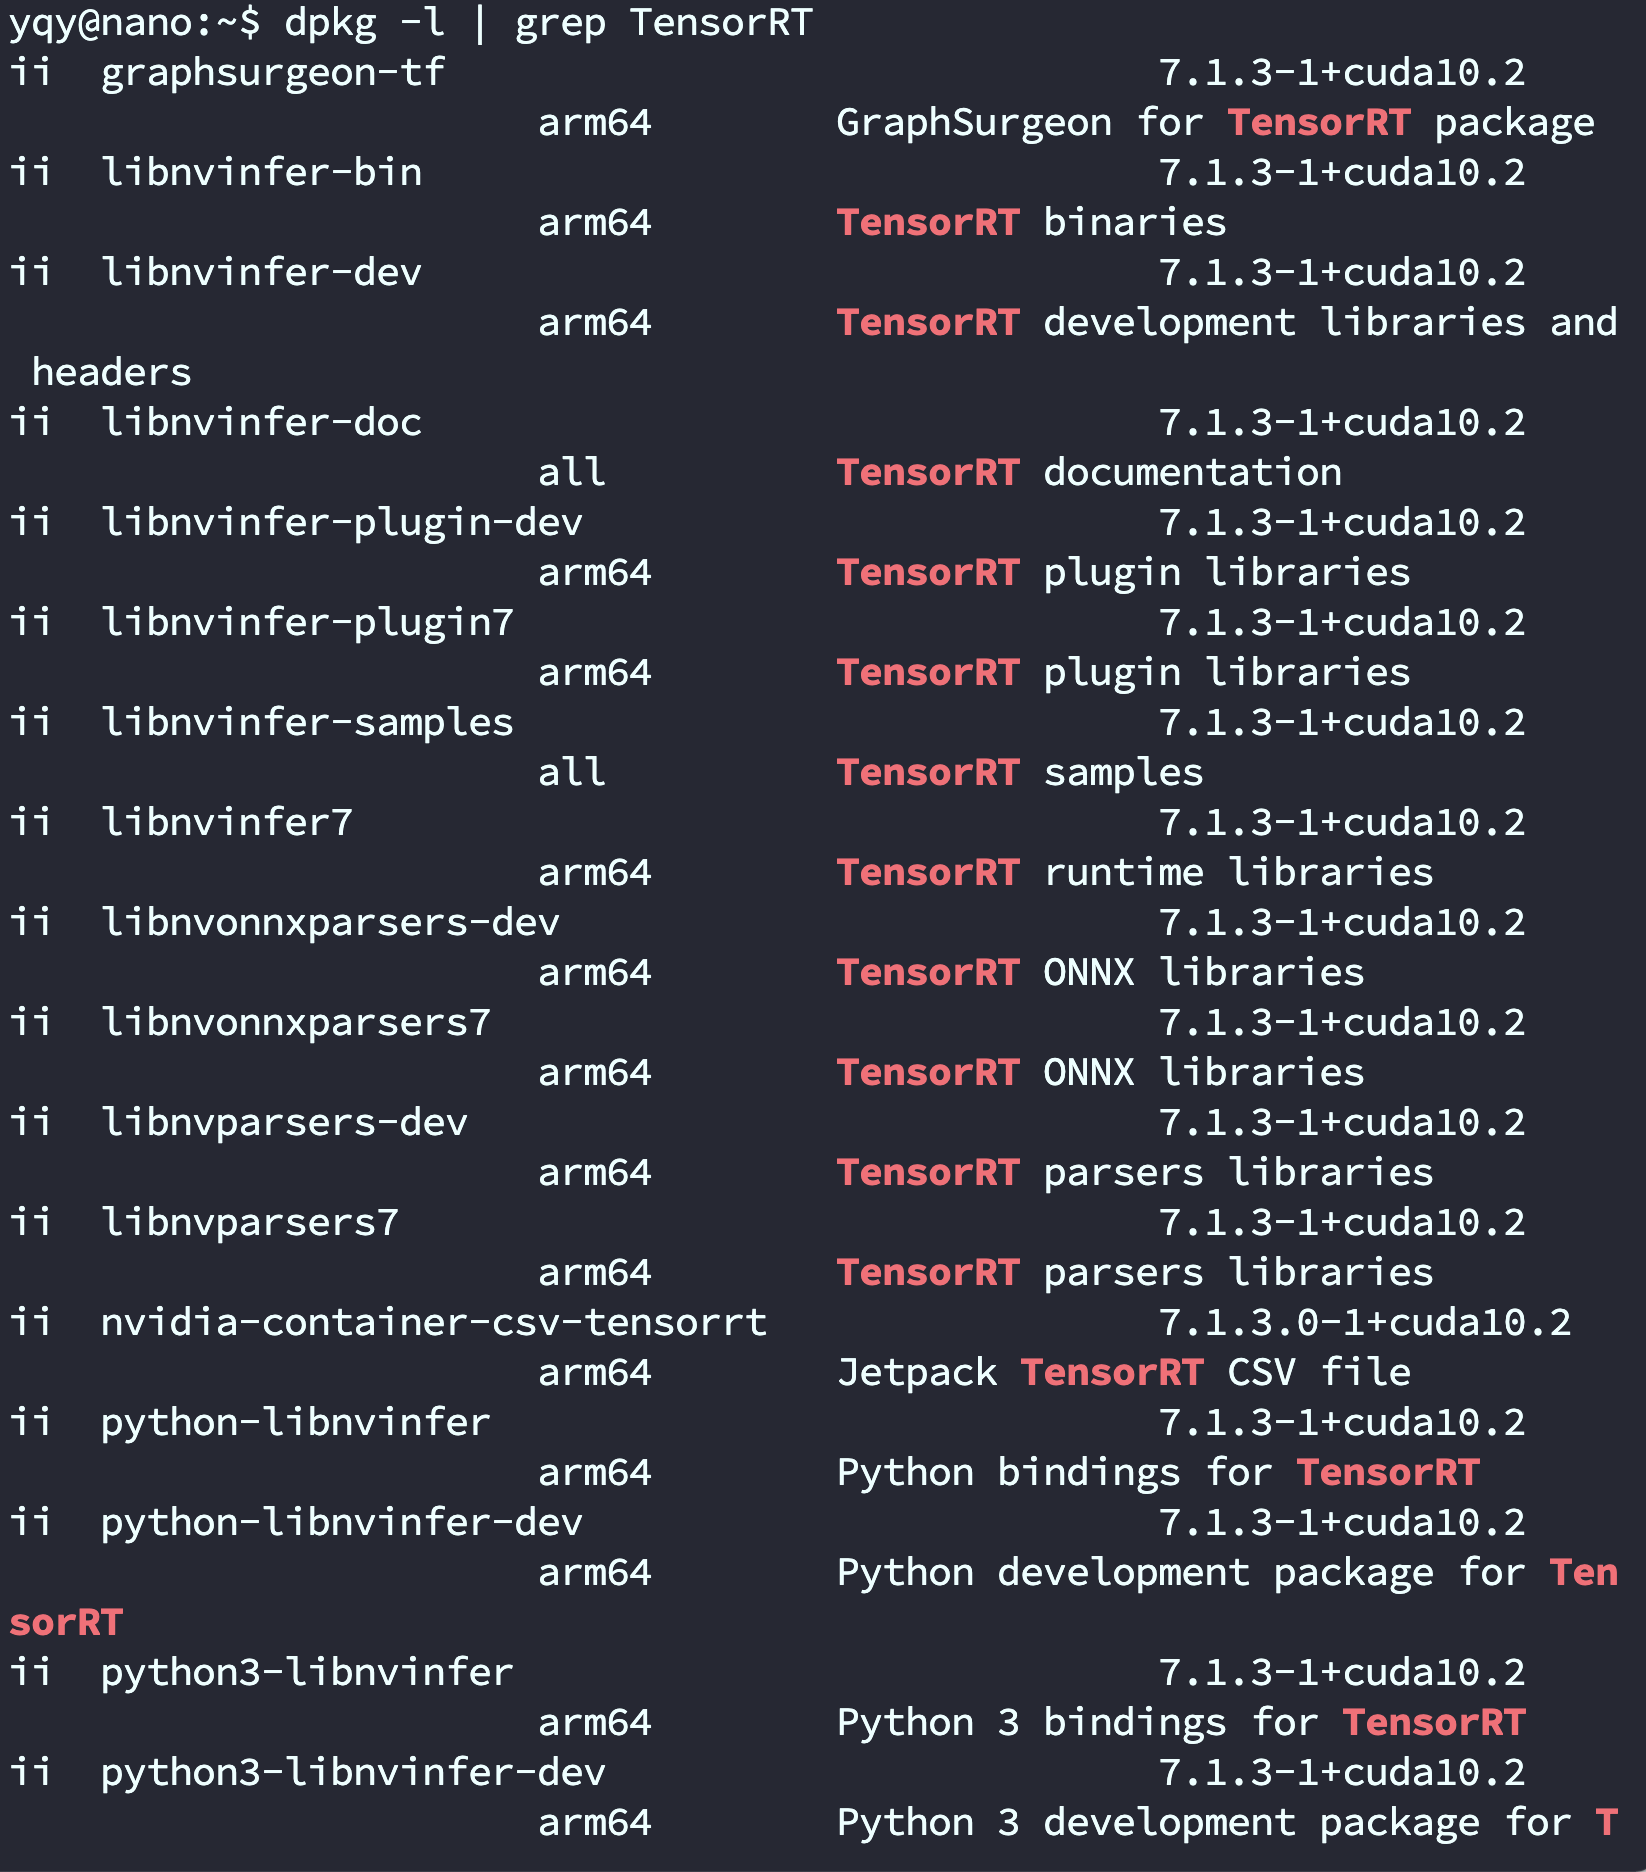
- Tensorrt-7.1
- Cuda-10.2

电脑上
- 下载yolov5
git clone -b v5.0 https://github.com/ultralytics/yolov5.git
git clone -b yolov5-v5.0 https://github.com/wang-xinyu/tensorrtx.git
官方教程文档:
tensorrtx/yolov5 at yolov5-v5.0 · wang-xinyu/tensorrtx (github.com)
- 若电脑上无法转engine在jetson也可以操作
jetson上
搭建yolov5的环境
git clone https://github.com/ultralytics/yolov5.git
python3 -m pip install --upgrade pip
进入yolov5的项目里
pip3 install -r requirements
若出现pillow相关报错:pillow需要pip3 uninstall重新pip3 install pillow
克隆tensorrtx
仓库: https://github.com/wang-xinyu/tensorrtx.git
git clone https://github.com/wang-xinyu/tensorrtx.git
将生成的.wts放到tensorrtx/yolov5/下
若是自己训练的模型需修改tensorrtx/yolov5/yololayer.h
static constexpr int CLASS_NUM = 80
编译代码
cd {tensorrtx}/yolov5/
mkdir build
cd build
cp {ultralytics}/yolov5/yolov5s.wts {tensorrtx}/yolov5/build
cmake ..
make
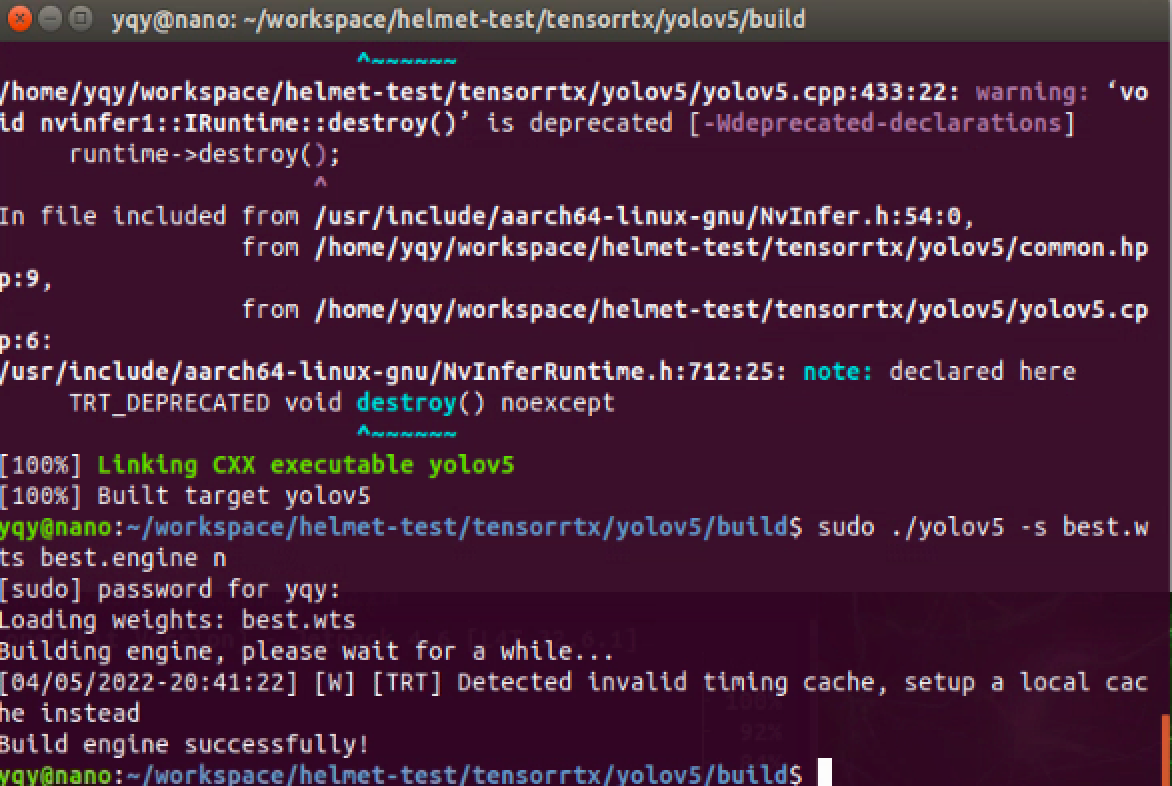
将生成的.wts文件转为.engine文件
sudo ./yolov5 -s yolov5s.wts yolov5s.engine s
将要测试的图片放到tensorrtx/yolov5/samples/下,测试能否检测目标
sudo ./yolov5 -d ../best.engine ../samples
经过测试转成tensorrt后推理速度大幅加快
图片大小:640*640
- Yolov5.s推理速度在130ms左右
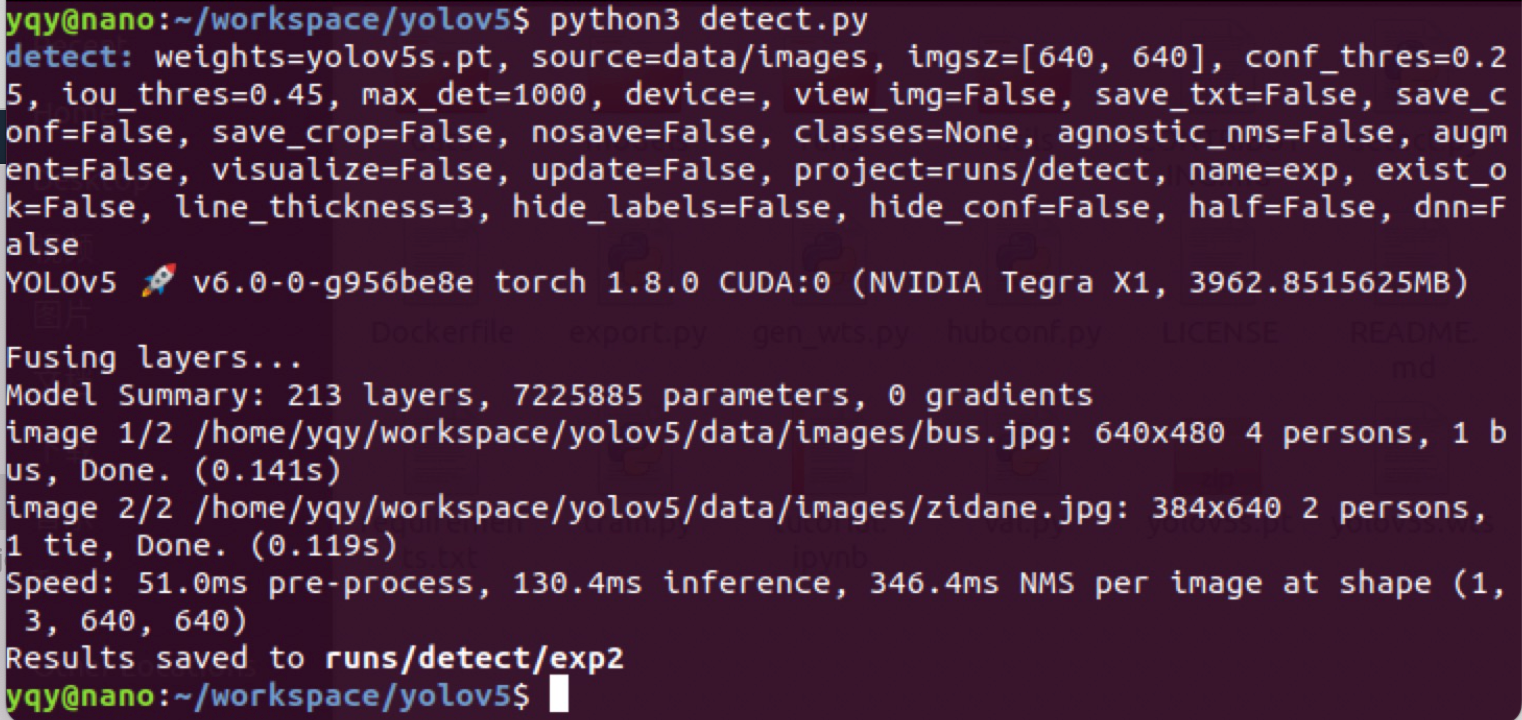
- 转换成tensorrt后的推理速度在70ms左右

安装测试deepstream(5.0)
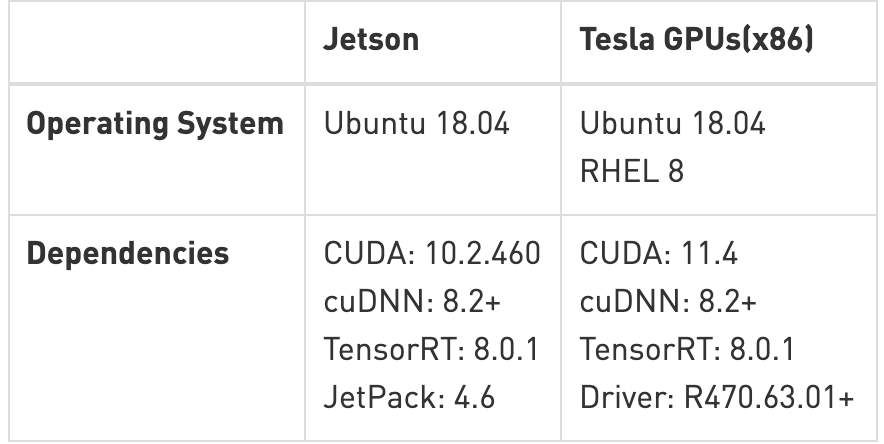
‼️一定要在官方文档中查看deepstream和jetpack相对应的版本,如Jetpack 4.6 support Deepstream 6.0
官方文档:NVIDIA Metropolis Documentation
官网下载:DeepStream Getting Started | NVIDIA Developer
老版本:NVIDIA DeepStream SDK on Jetson (Archived) | NVIDIA Developer
- 精简版笔记
$ sudo apt install \
    libssl1.0.0 \
    libgstreamer1.0-0 \
    gstreamer1.0-tools \
    gstreamer1.0-plugins-good \
    gstreamer1.0-plugins-bad \
    gstreamer1.0-plugins-ugly \
    gstreamer1.0-libav \
    libgstrtspserver-1.0-0 \
    libjansson4=2.11-1
$ sudo apt-get install librdkafka1=0.11.3-1build1
$ tar -xpvf deepstream_sdk_v4.0.2_jetson.tbz2
$ cd deepstream_sdk_v4.0.2_jetson
$ sudo tar -xvpf binaries.tbz2 -C /
$ sudo ./install.sh
$ sudo ldconfig
- 详细版
- 安装测试ds(官方release有详细文档)
安装软件包
sudo apt install \
libssl1.0.0 \
libgstreamer1.0-0 \
gstreamer1.0-tools \
gstreamer1.0-plugins-good \
gstreamer1.0-plugins-bad \
gstreamer1.0-plugins-ugly \
gstreamer1.0-libav \
libgstrtspserver-1.0-0 \
libjansson4=2.11-1
-
下载sdk放入jetson
-
提取解压sdk
sudo tar -xvf deepstream_sdk_v5.1.0_jetson.tbz2 -C /
cd /opt/nvidia/deepstream/deepstream-5.1
sudo ./install.sh
sudo ldconfig
- 安装完成后测试
cd /opt/nvidia/deepstream/deepstream-5.0/samples/configs/deepstream-app/
deepstream-app -c source8_1080p_dec_infer-resnet_tracker_tiled_display_fp16_nano.txt
安装ds-6.0
Quickstart Guide — DeepStream 6.0 Release documentation (nvidia.com)
rscgg37248/DeepStream6.0_Yolov5-6.0: 基于DeepStream6.0和yolov5-6.0的目标检测 (github.com)
- Install
$ sudo apt install \
libssl1.0.0 \
libgstreamer1.0-0 \
gstreamer1.0-tools \
gstreamer1.0-plugins-good \
gstreamer1.0-plugins-bad \
gstreamer1.0-plugins-ugly \
gstreamer1.0-libav \
libgstrtspserver-1.0-0 \
libjansson4=2.11-1

$ sudo tar -xvf deepstream_sdk_v6.0.0_jetson.tbz2 -C /
$ cd /opt/nvidia/deepstream/deepstream-6.0
$ sudo ./install.sh
$ sudo ldconfig
- Test
cd /opt/nvidia/deepstream/deepstream-6.0/samples/configs/deepstream-app/

deepstream-app -c source8_1080p_dec_infer-resnet_tracker_tiled_display_fp16_nano.txt
yolov5检测
‼️Jetson nano的系统版本是4.5.1 TensorRT版本7.x yolov5版本 5.0 pillow需要pip3 uninstall重新pip3 install pillow
安装完ds后在/opt/nvidia/deepstream/deepstream-5.0/sources/objectDetector_Yolo会有一个部署yolo的官方实例代码,但只有yolov3的。
github上有已经改好yolov5的项目:DanaHan/Yolov5-in-Deepstream-5.0: Describe how to use yolov5 in Deepstream 5.0 (github.com)
我使用的tensorrt7的版本在里面有适配的分支:Abandon-ht/Yolov5-in-Deepstream-5.0 at tensorrt7 (github.com)
克隆项目
git clone https://github.com/DanaHan/Yolov5-in-Deepstream-5.0.git
测试
cd Yolov5-in-Deepstream-5.0/Deepstream 5.0
#复制coco数据集的labels
cp ~/darknet/data/coco.names ./labels.txt
#复制之前生成的引擎文件到当前目录
cp ~/tensorrtx/yolov5/build/yolov5s.engine ./
cd nvdsinfer_custom_impl_Yolo
# 生成libnvdsinfer_custom_impl_Yolo.so文件
make -j
#返回到DeepStream5.0/下
cd ..
#测试
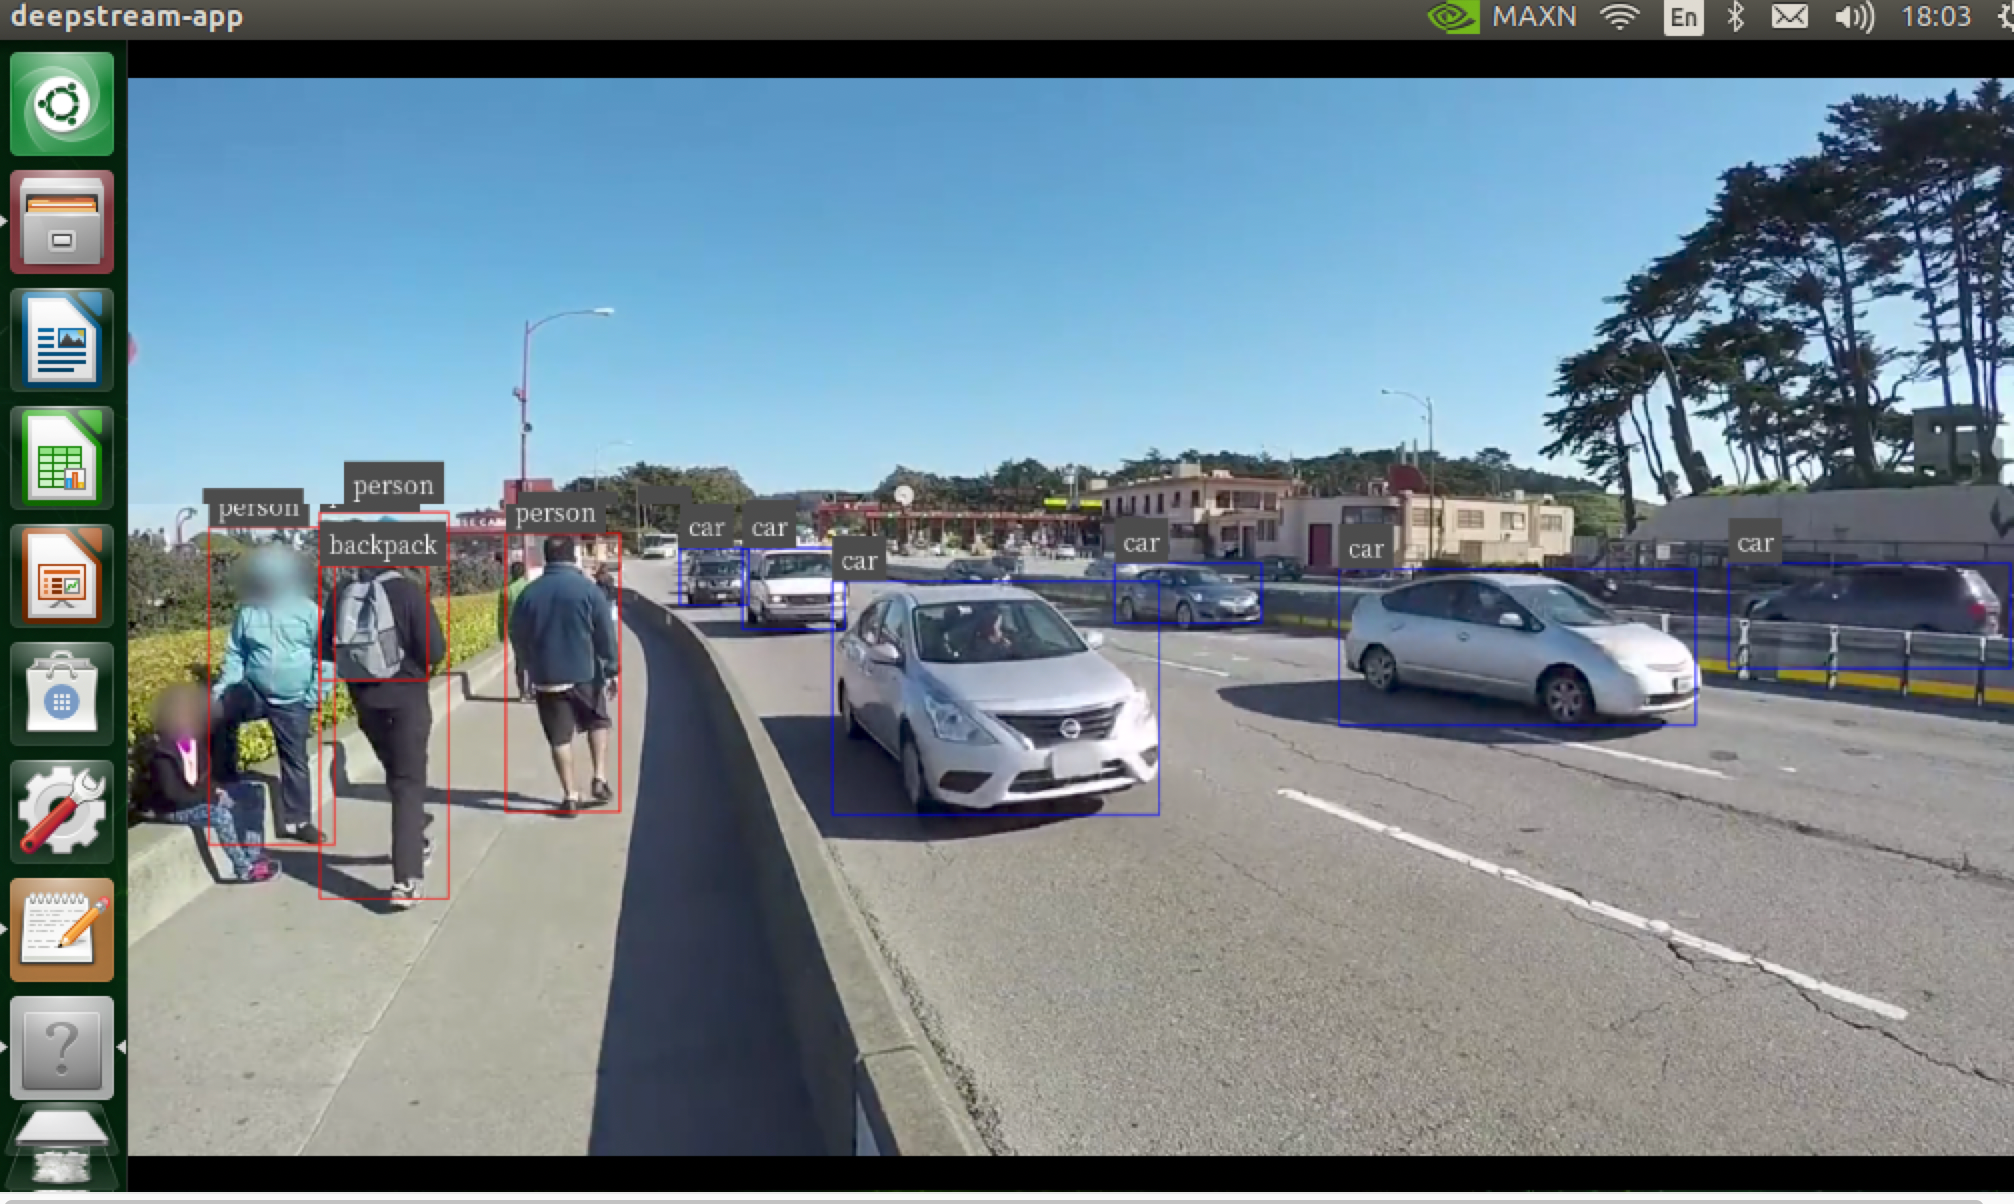
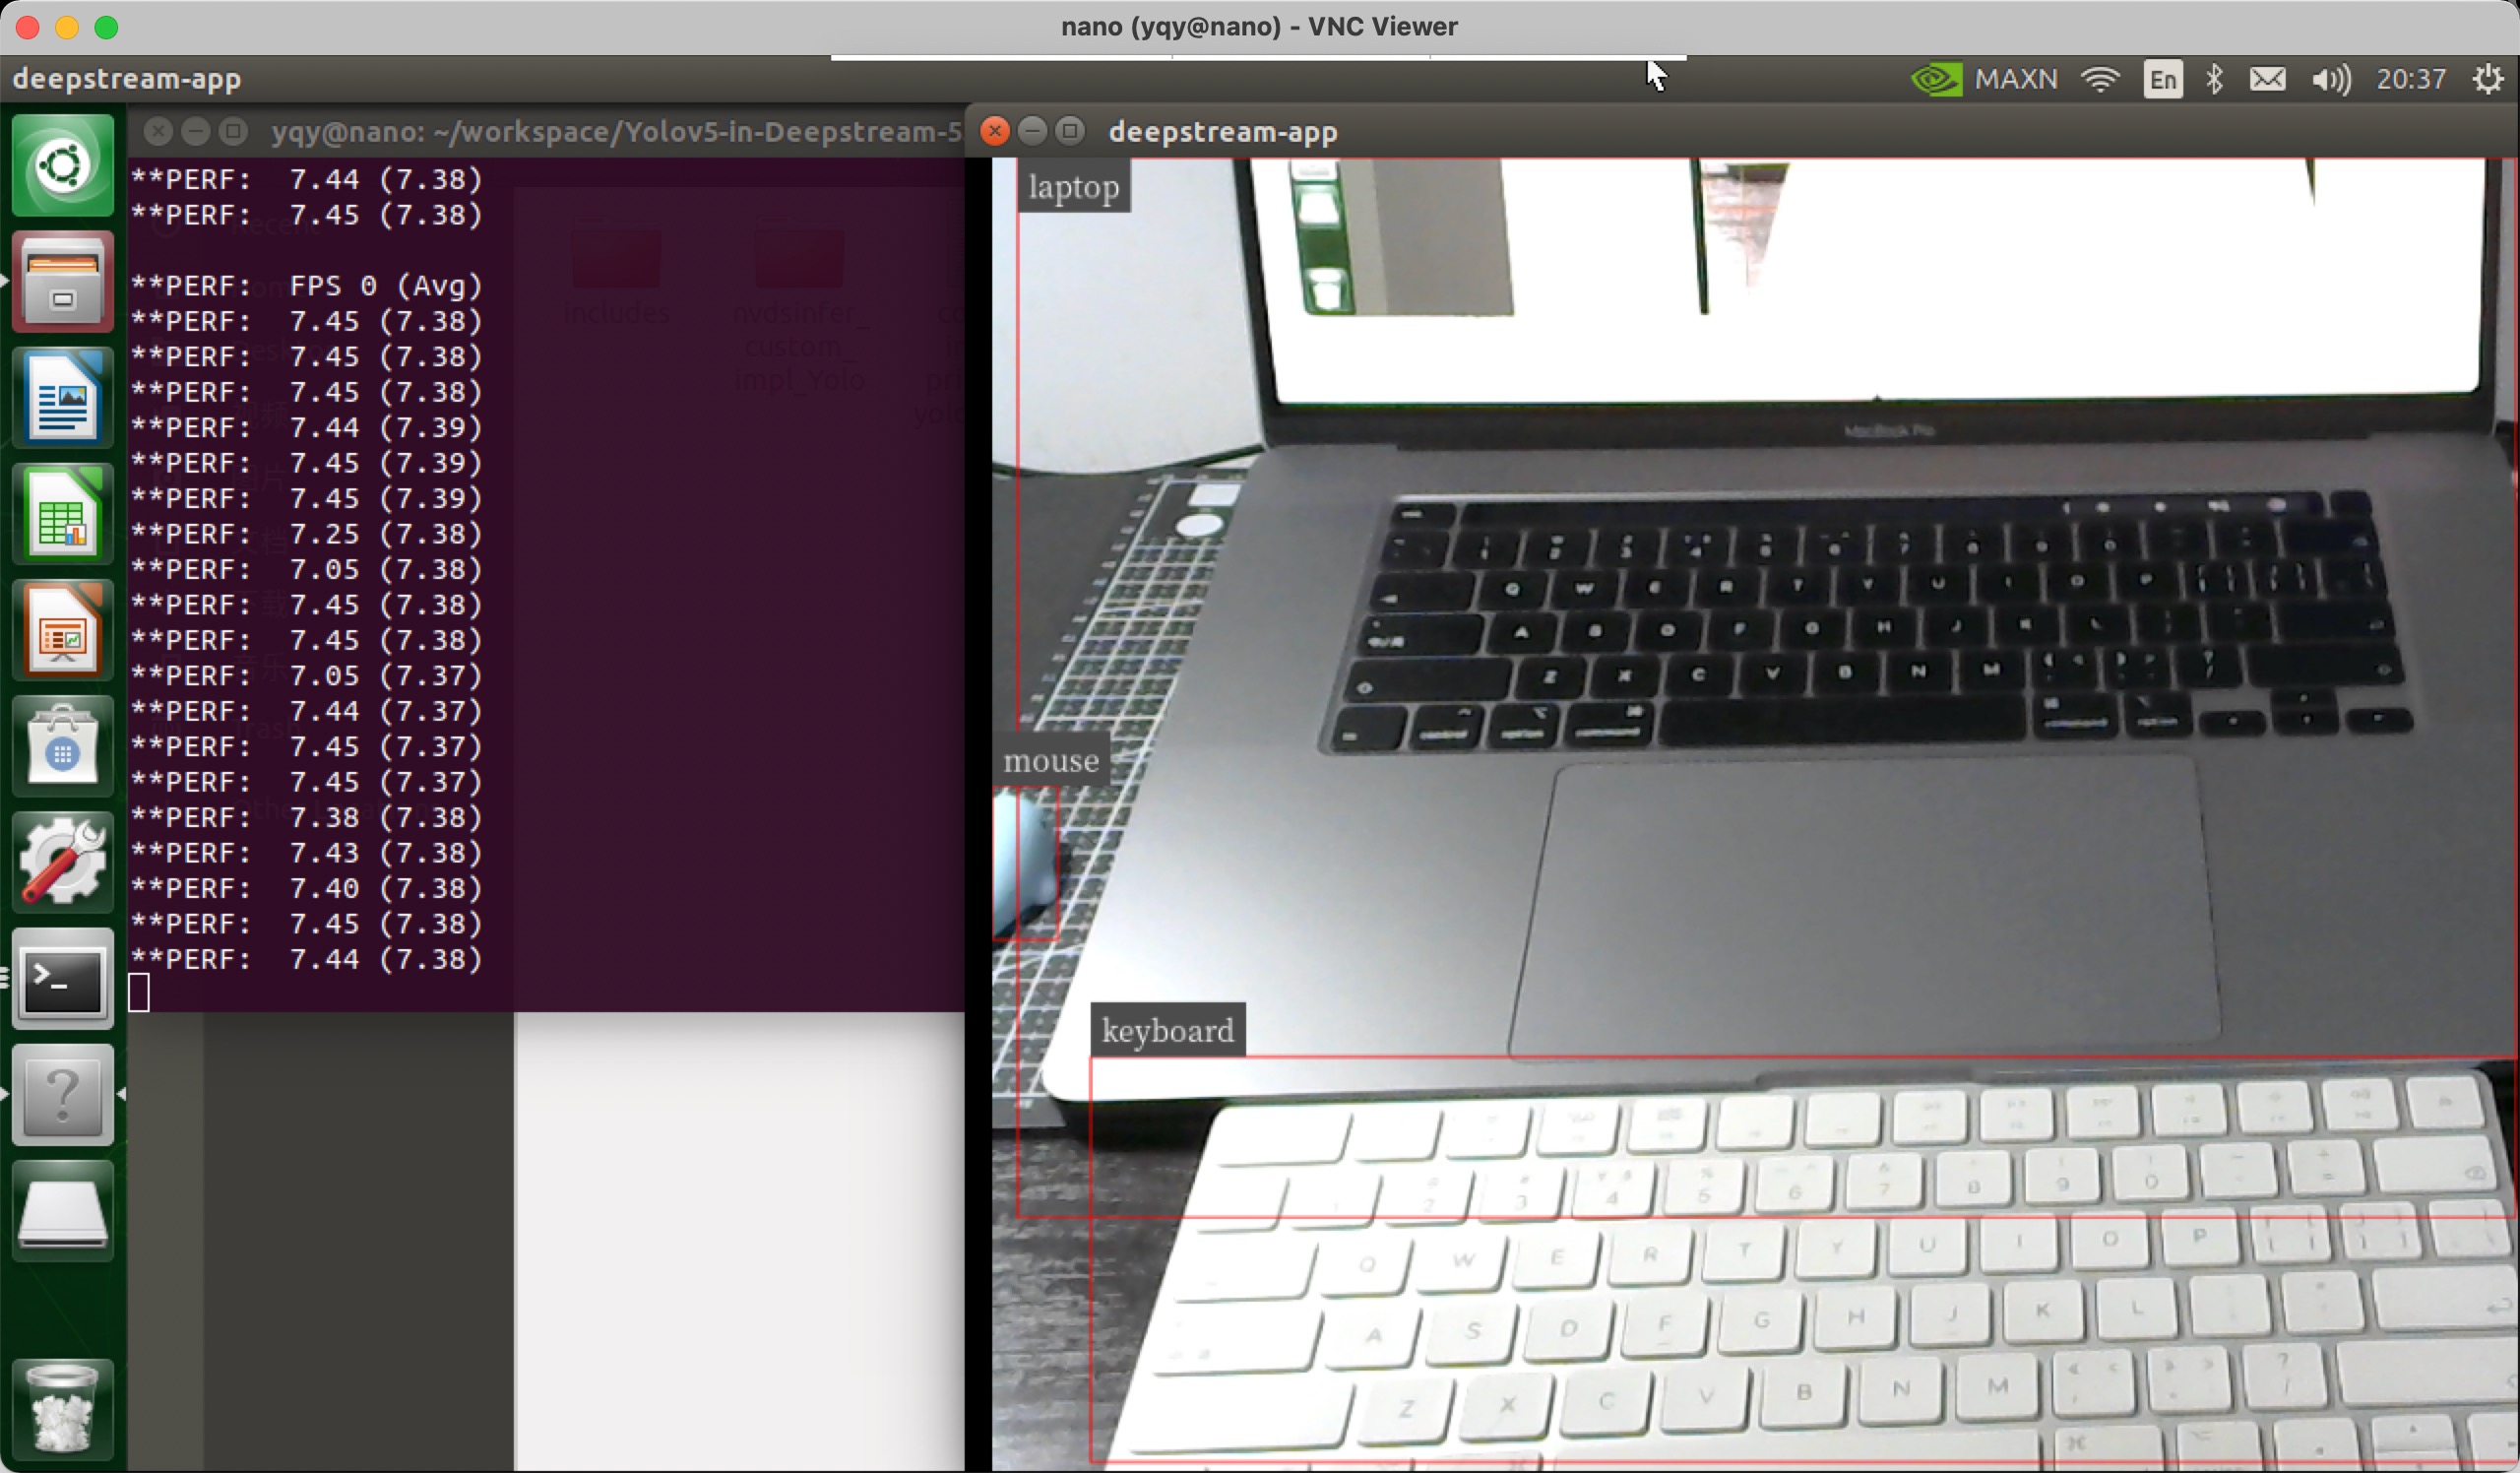
LD_PRELOAD=./libmyplugins.so deepstream-app -c deepstream_app_config_yoloV5.txt
在ds中调用csi or usb摄像头
参考资料如何在deepstream-app里调用USB与CSI摄像头-电子发烧友网 (elecfans.com)
#安装v4l-utils
apt-get install v4l-utils

#查看摄像头信息
v4l2-ctl --list-devices
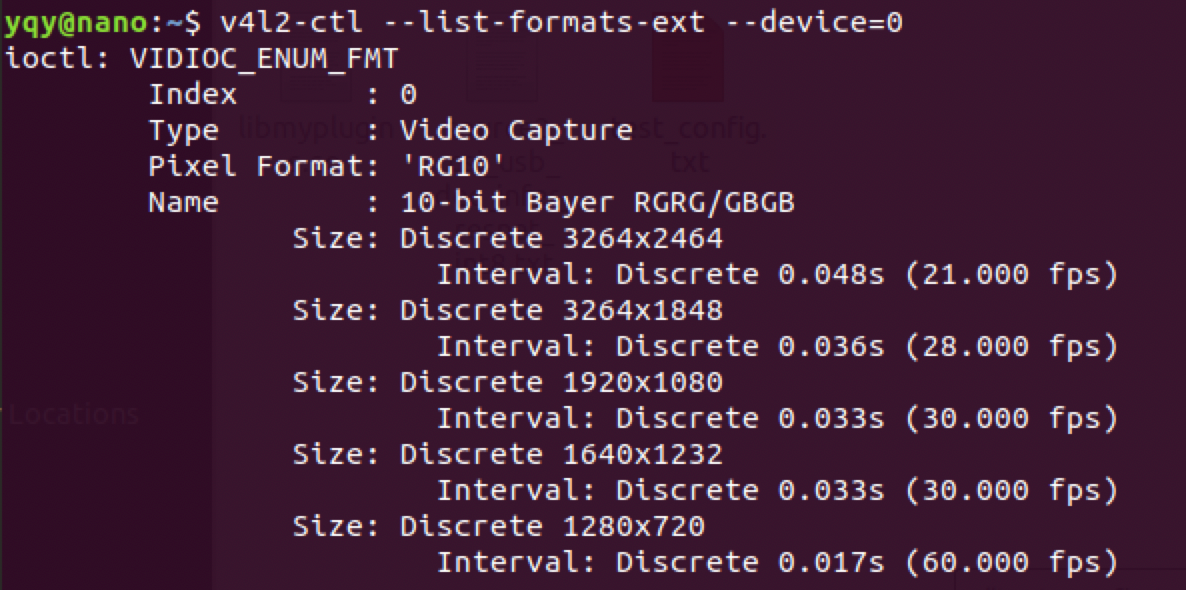
查看摄像头可用分辨率
v4l2-ctl --list-formats-ext --device=0
v4l2-ctl --list-formats-ext --device=1
修改deepstream_app_config_yoloV5.txt的source
我个人使用的是罗技的c920摄像头(usb)
参数如下
[source0]
enable=1
#Type - 1=CameraV4L2 2=URI 3=MultiURI
type=1
camera-width=1280
camera-height=720
camera-fps-n=30
camera-v4l2-dev-node=0
#uri=file://../../samples/streams/sample_1080p_h264.mp4
num-sources=1
gpu-id=0
# (0): memtype_device   - Memory type Device
# (1): memtype_pinned   - Memory type Host Pinned
# (2): memtype_unified  - Memory type Unified
cudadec-memtype=0
插件配置
参考deepstream_sdk_v4.0.2_jetson/samples/configs/deepstream-app/下的配置文件:
-
source30_1080p_resnet_dec_infer_tiled_display_int8.txt:演示具有主要推理功能的30个流解码。(仅适用于dGPU和Jetson AGX Xavier平台。)
-
source4_1080p_resnet_dec_infer_tiled_display_int8.txt:演示具有主要推理,对象跟踪和三个不同辅助分类器的四个流解码。(仅适用于dGPU和Jetson AGX Xavier平台。)
-
source4_1080p_resnet_dec_infer_tracker_sgie_tiled_display_int8_gpu1.txt:在GPU 1上针对主要推理,对象跟踪和三个不同的二级分类器演示四个流解码(对于具有多个GPU卡的系统)。仅适用于dGPU平台。
-
config_infer_primary.txt:将 nvinfer元素配置为主要检测器。
-
config_infer_secondary_carcolor.txt, config_infer_secondary_carmake.txt, config_infer_secondary_vehicletypes.txt:将 nvinfer元素配置为辅助分类器。
-
iou_config.txt:配置一个低级的IOU(联合路口)跟踪器。
-
source1_usb_dec_infer_resnet_int8.txt:演示一台USB摄像机作为输入。
-
source1_csi_dec_infer_resnet_int8.txt:演示一个CSI摄像机作为输入;仅限于Jetson。
-
source2_csi_usb_dec_infer_resnet_int8.txt:演示一台CSI摄像机和一台USB摄像机作为输入;仅限于Jetson。
-
source6_csi_dec_infer_resnet_int8.txt:演示六个CSI摄像机作为输入;仅限于Jetson。
-
source8_1080p_dec_infer-resnet_tracker_tiled_display_fp16_nano.txt:演示8解码+推断+跟踪器;仅适用于Jetson Nano。
-
source8_1080p_dec_infer-resnet_tracker_tiled_display_fp16_tx1.txt:演示8解码+推断+跟踪器;仅适用于Jetson TX1。
-
source12_1080p_dec_infer-resnet_tracker_tiled_display_fp16_tx2.txt:演示12个解码+推断+跟踪器;仅适用于Jetson TX2。
视频输入
- 默认测试视频
[application]
enable-perf-measurement=1
perf-measurement-interval-sec=5
#gie-kitti-output-dir=streamscl

[tiled-display]
enable=0
rows=1
columns=1
width=1280
height=720
gpu-id=0
#(0): nvbuf-mem-default - Default memory allocated, specific to particular platform
#(1): nvbuf-mem-cuda-pinned - Allocate Pinned/Host cuda memory, applicable for Tesla
#(2): nvbuf-mem-cuda-device - Allocate Device cuda memory, applicable for Tesla
#(3): nvbuf-mem-cuda-unified - Allocate Unified cuda memory, applicable for Tesla
#(4): nvbuf-mem-surface-array - Allocate Surface Array memory, applicable for Jetson
nvbuf-memory-type=0

[source0]
enable=1
#Type - 1=CameraV4L2 2=URI 3=MultiURI
type=2
uri=file:/opt/nvidia/deepstream/deepstream-6.0/samples/streams/sample_1080p_h264.mp4
#uri=file:/home/nvidia/Documents/5-Materials/Videos/0825.avi
num-sources=1
gpu-id=0
# (0): memtype_device   - Memory type Device
# (1): memtype_pinned   - Memory type Host Pinned
# (2): memtype_unified  - Memory type Unified
cudadec-memtype=0


[sink0]
enable=1
#Type - 1=FakeSink 2=EglSink 3=File
type=2
sync=0
source-id=0
gpu-id=0
nvbuf-memory-type=0
#1=mp4 2=mkv
container=1
#1=h264 2=h265
codec=1
output-file=yolov4.mp4

[osd]
enable=1
gpu-id=0
border-width=1
text-size=12
text-color=1;1;1;1;
text-bg-color=0.3;0.3;0.3;1
font=Serif
show-clock=0
clock-x-offset=800
clock-y-offset=820
clock-text-size=12
clock-color=1;0;0;0
nvbuf-memory-type=0

[streammux]
gpu-id=0
##Boolean property to inform muxer that sources are live
live-source=0
batch-size=4
##time out in usec, to wait after the first buffer is available
##to push the batch even if the complete batch is not formed
batched-push-timeout=40000
## Set muxer output width and height
width=1280
height=720
##Enable to maintain aspect ratio wrt source, and allow black borders, works
##along with width, height properties
enable-padding=0
nvbuf-memory-type=0

# config-file property is mandatory for any gie section.
# Other properties are optional and if set will override the properties set in
# the infer config file.
[primary-gie]
enable=1
gpu-id=0
model-engine-file=yolov5s.engine
labelfile-path=labels.txt
#batch-size=1
#Required by the app for OSD, not a plugin property
bbox-border-color0=1;0;0;1
bbox-border-color1=0;1;1;1
bbox-border-color2=0;0;1;1
bbox-border-color3=0;1;0;1
interval=0
gie-unique-id=1
nvbuf-memory-type=0
config-file=config_infer_primary_yoloV5.txt

[tracker]
enable=0
tracker-width=512
tracker-height=320
ll-lib-file=/opt/nvidia/deepstream/deepstream-5.0/lib/libnvds_mot_klt.so

[tests]
file-loop=0
camera
- USB摄像头
[source0]
enable=1
#Type - 1=CameraV4L2 2=URI 3=MultiURI
type=1
camera-width=1280
camera-height=720
camera-fps-n=30
camera-fps-d=1
camera-v4l2-dev-node=0
- CSI摄像头
[source0]
enable=1
#Type - 1=CameraV4L2 2=URI 3=MultiURI 4=RTSP 5=CSI
type=5
camera-width=1280
camera-height=720
camera-fps-n=30
camera-fps-d=1
camera-csi-sensor-id=0
videofile
4个相同文件,用MultiURI
[source0]
enable=1
#Type - 1=CameraV4L2 2=URI 3=MultiURI 4=RTSP
type=3
uri=file://../../streams/sample_1080p_h264.mp4
num-sources=4
#drop-frame-interval=2
gpu-id=0
# (0): memtype_device   - Memory type Device
# (1): memtype_pinned   - Memory type Host Pinned
# (2): memtype_unified  - Memory type Unified
cudadec-memtype=0
media stream
[source0]
enable=1
#Type - 1=CameraV4L2 2=URI 3=MultiURI 4=RTSP
type=4
uri=rtsp://admin:admin123@192.168.1.106:554/cam/realmonitor?channel=1&subtype=0
num-sources=1
#drop-frame-interval=2
gpu-id=0
# (0): memtype_device   - Memory type Device
# (1): memtype_pinned   - Memory type Host Pinned
# (2): memtype_unified  - Memory type Unified
cudadec-memtype=0
多路USB
[source0]
enable=1
#Type - 1=CameraV4L2 2=URI 3=MultiURI 4=RTSP
type=3
uri=file://../../streams/sample_1080p_h264.mp4
num-sources=4
#drop-frame-interval=2
gpu-id=0
# (0): memtype_device   - Memory type Device
# (1): memtype_pinned   - Memory type Host Pinned
# (2): memtype_unified  - Memory type Unified
cudadec-memtype=0
多路CSI
[source0]
enable=1
#Type - 1=CameraV4L2 2=URI 3=MultiURI 4=RTSP 5=CSI
type=5
camera-csi-sensor-id=0
camera-width=1280
camera-height=720
camera-fps-n=30
camera-fps-d=1

[source1]
enable=1
#Type - 1=CameraV4L2 2=URI 3=MultiURI 4=RTSP 5=CSI
type=5
camera-csi-sensor-id=1
camera-width=1280
camera-height=720
camera-fps-n=30
camera-fps-d=1

[source2]
enable=1
#Type - 1=CameraV4L2 2=URI 3=MultiURI 4=RTSP 5=CSI
type=5
camera-csi-sensor-id=2
camera-width=1280
camera-height=720
camera-fps-n=30
camera-fps-d=1

[source3]
enable=1
#Type - 1=CameraV4L2 2=URI 3=MultiURI 4=RTSP 5=CSI
type=5
camera-csi-sensor-id=3
camera-width=1280
camera-height=720
camera-fps-n=30
camera-fps-d=1
视频处理
物体检测
# config-file property is mandatory for any gie section.
# Other properties are optional and if set will override the properties set in
# the infer config file.
[primary-gie]
enable=1
model-engine-file=../../models/Primary_Detector/resnet10.caffemodel_b30_int8.engine
#Required to display the PGIE labels, should be added even when using config-file
#property
batch-size=4
#Required by the app for OSD, not a plugin property
bbox-border-color0=1;0;0;1
bbox-border-color1=0;1;1;1
bbox-border-color2=0;0;1;1
bbox-border-color3=0;1;0;1
interval=0
#Required by the app for SGIE, when used along with config-file property
gie-unique-id=1
config-file=config_infer_primary.txt
物体跟踪
[tracker]
enable=1
tracker-width=640
tracker-height=368
#tracker-width=480
#tracker-height=272

#ll-lib-file=/opt/nvidia/deepstream/deepstream-4.0/lib/libnvds_mot_iou.so
#ll-lib-file=/opt/nvidia/deepstream/deepstream-4.0/lib/libnvds_nvdcf.so
ll-lib-file=/opt/nvidia/deepstream/deepstream-4.0/lib/libnvds_mot_klt.so
#ll-config-file required for DCF/IOU only
#ll-config-file=tracker_config.yml
#ll-config-file=iou_config.txt
gpu-id=0
#enable-batch-process applicable to DCF only
enable-batch-process=1
检测后的具体分类
[secondary-gie0]
enable=1
model-engine-file=../../models/Secondary_VehicleTypes/resnet18.caffemodel_b16_int8.engine
gpu-id=0
batch-size=16
gie-unique-id=4
operate-on-gie-id=1
operate-on-class-ids=0;
config-file=config_infer_secondary_vehicletypes.txt

[secondary-gie1]
enable=1
model-engine-file=../../models/Secondary_CarColor/resnet18.caffemodel_b16_int8.engine
batch-size=16
gpu-id=0
gie-unique-id=5
operate-on-gie-id=1
operate-on-class-ids=0;
config-file=config_infer_secondary_carcolor.txt

[secondary-gie2]
enable=1
model-engine-file=../../models/Secondary_CarMake/resnet18.caffemodel_b16_int8.engine
batch-size=16
gpu-id=0
gie-unique-id=6
operate-on-gie-id=1
operate-on-class-ids=0;
config-file=config_infer_secondary_carmake.txt
视频输出
多路合并
单路
[tiled-display]
enable=1
rows=1
columns=1
width=1280
height=720
多路
[tiled-display]
enable=1
rows=4
columns=2
width=1280
height=720
gpu-id=0
#(0): nvbuf-mem-default - Default memory allocated, specific to particular platform
#(1): nvbuf-mem-cuda-pinned - Allocate Pinned/Host cuda memory, applicable for Tesla
#(2): nvbuf-mem-cuda-device - Allocate Device cuda memory, applicable for Tesla
#(3): nvbuf-mem-cuda-unified - Allocate Unified cuda memory, applicable for Tesla
#(4): nvbuf-mem-surface-array - Allocate Surface Array memory, applicable for Jetson
nvbuf-memory-type=0
screen
[sink0]
enable=1
#Type - 1=FakeSink 2=EglSink 3=File 4=RTSPStreaming 5=Overlay
type=5
sync=0
display-id=0
offset-x=0
offset-y=0
width=0
height=0
overlay-id=1
source-id=0
videofile
[sink1]
enable=1
type=3
#1=mp4 2=mkv
container=1
#1=h264 2=h265 3=mpeg4
codec=1
sync=0
bitrate=2000000
output-file=out.mp4
source-id=0
media stream
[sink2]
enable=1
#Type - 1=FakeSink 2=EglSink 3=File 4=RTSPStreaming 5=Overlay
type=4
#1=h264 2=h265
codec=1
sync=0
bitrate=4000000
# set below properties in case of RTSPStreaming
rtsp-port=8554
udp-port=5400
vlc打开网络流 rtsp://192.168.0.118:8554/ds-test
osd
[osd]
enable=1
border-width=2
text-size=15
text-color=1;1;1;1;
text-bg-color=0.3;0.3;0.3;1
font=Serif
show-clock=0
clock-x-offset=800
clock-y-offset=820
clock-text-size=12
clock-color=1;0;0;0
streammux
[streammux]
##Boolean property to inform muxer that sources are live
live-source=1
## 根据路数进行设置
batch-size=4
##time out in usec, to wait after the first buffer is available
##to push the batch even if the complete batch is not formed
batched-push-timeout=40000
## Set muxer output width and height
width=1280
height=720
Sample例程
- DeepStream Sample App /sources/apps/sample_apps/deepstream-app
说明:端到端示例演示了4级联神经网络(1个一级检测器和3个二级分类器)的多相机流,并显示平铺输出。
-
DeepStream Test 1 /sources/apps/sample_apps/deepstream-t
-
DeepStream Test 2 /sources/apps/sample_apps/deepstream-test2
说明:简单的应用程序,建立在test1之上,显示额外的属性,如跟踪和二级分类属性。
- DeepStream Test 3 /sources/apps/sample_apps/deepstream-test3
说明:简单的应用程序,建立在test1的基础上,显示多个输入源和批处理使用nvstreammuxer。
- DeepStream Test 4 /sources/apps/sample_apps/deepstream-test4
说明:这是在Test1示例的基础上构建的,演示了“nvmsgconv”和“nvmsgbroker”插件在物联网连接管道中的使用。对于test4,用户必须修改kafka代理连接字符串才能成功连接。需要安装分析服务器docker之前运行test4。DeepStream分析文档有关于设置分析服务器的更多信息。
- FasterRCNN Object Detector /sources/objectDetector_FasterRCNN
说明:FasterRCNN物体探测器实例。
- SSD Object Detector /sources/objectDetector_SSD
说明:SSD目标探测器实例。
部署自己的模型
Jetson nano上部署自己的Yolov5模型(TensorRT加速)_ailaier的专栏-CSDN博客_jetson nano yolov5
References
部署
-
Custom YOLO Model in the DeepStream YOLO App — DeepStream 6.0 Release documentation (nvidia.com)
-
Jetson nano部署过程记录:yolov5s+TensorRT+Deepstream检测usb摄像头_sshheennddee123的博客-CSDN博客
-
Jetson nano从烧录系统到DeepStream+TensorRT+yolov5检测CSI摄像头视频 - 哔哩哔哩 (bilibili.com)
-
Jetson nano上部署自己的Yolov5模型(TensorRT加速)_ailaier的专栏-CSDN博客_jetson nano yolov5
-
rscgg37248/DeepStream6.0_Yolov5-6.0: 基于DeepStream6.0和yolov5-6.0的目标检测 (github.com)
-
NVIDIA Jetson Nano 2GB 系列文章(30):DeepStream 摄像头“实时性能” - 知乎 (zhihu.com)
-
Jetson nano上部署自己的Yolov5模型(TensorRT加速)_ailaier的专栏-CSDN博客_jetson nano yolov5


【推荐】国内首个AI IDE,深度理解中文开发场景,立即下载体验Trae
【推荐】编程新体验,更懂你的AI,立即体验豆包MarsCode编程助手
【推荐】抖音旗下AI助手豆包,你的智能百科全书,全免费不限次数
【推荐】轻量又高性能的 SSH 工具 IShell:AI 加持,快人一步
· 10年+ .NET Coder 心语 ── 封装的思维:从隐藏、稳定开始理解其本质意义
· 地球OL攻略 —— 某应届生求职总结
· 周边上新:园子的第一款马克杯温暖上架
· Open-Sora 2.0 重磅开源!
· 提示词工程——AI应用必不可少的技术