解析一下vue项目
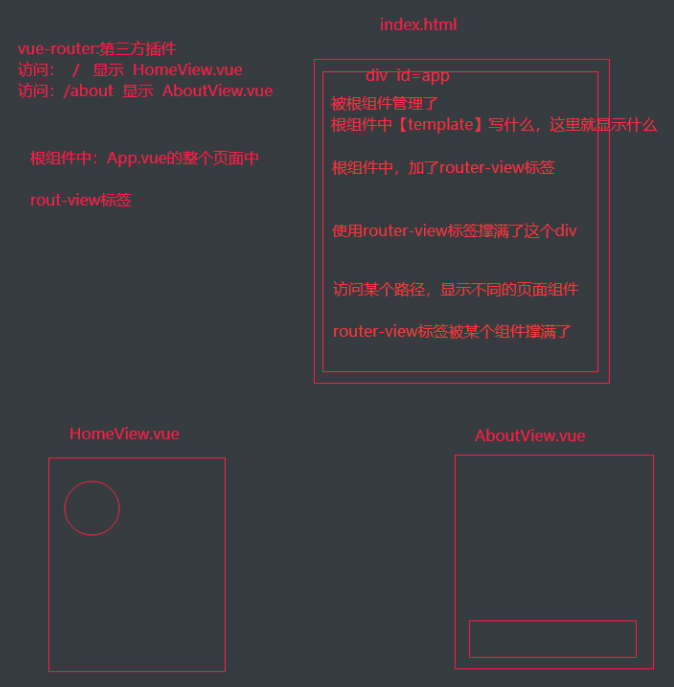
index.html文件:就是被根组件【template】写什么,这里就会显示什么在前端展示。在根组件中加了router-view标签使用router-view标签撑满这个div访问某个路由,显示不同的页面主键,router-view就是被某个组件给占了
vue-router:第三方插件它就是来完成路由匹配的:访问/显示HomeView.vue组件,访问/about显示AboutView.vue这个组件的页面
跟组件中:App.vue的整个页面中rout-view标签
导入组件的方法 import 组件名 from “../文件目录/文件名”
使用HelloWorld.vue写组件在前端使用(HomeView.vue)

Hellowold.vue文件编写
<template>
  <div class="hello">
    <h1>{{ msg }}</h1>
    <button @click="handleClick">点击查看名字</button>
  </div>
</template>
<script>
export default {
  name: 'HelloWorld',
  data(){
    return{
      name:'久保'
    }
  },
  props: {
    msg: String
  },
  methods:{
    handleClick(){
      alert(this.name)
    }
  }
}
</script>
HomeView.vue文件编写
<template>
  <div class="home">
    <HelloWorld msg="02"></HelloWorld>  使用组件因为有一个msg没有值
  </div>
</template>
<script>
import HelloWorld from "@/components/HelloWorld.vue";导入组件
export default {
  name: 'HomeView',
  components: {
    HelloWorld   注册组件
  }
}
</script>
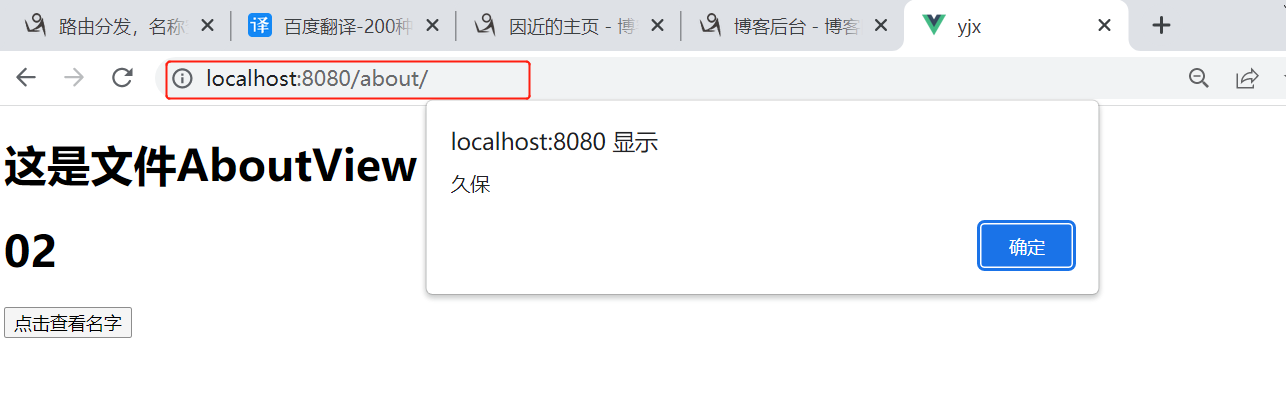
使用HelloWorld.vue写组件在前端使用(AboutView.vue)
AboutView.vue文件编写
<template>
  <div class="about">
    <h1>这是文件AboutView</h1>
    <HelloWorld msg="02">式守</HelloWorld>
  </div>
</template>
<script>
import HelloWorld from "@/components/HelloWorld";
export default {
  name: 'About',   组件名
  components:{
    HelloWorld
  }
}
</script>
路由文件router(index)
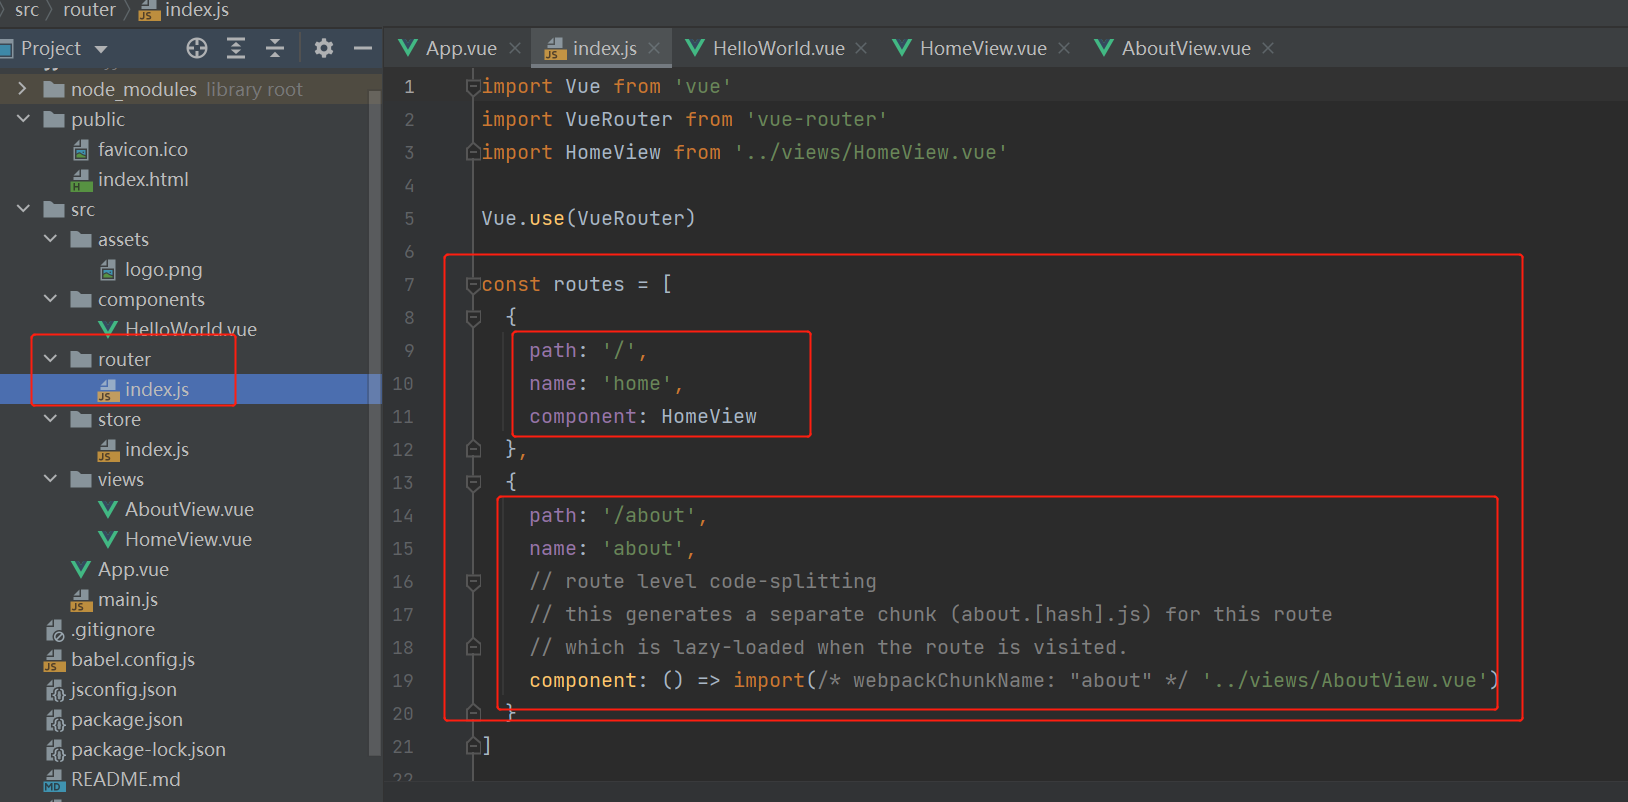
路由导入在views下创建vue文件
在router(index)中导入和注册
自己定义的文件
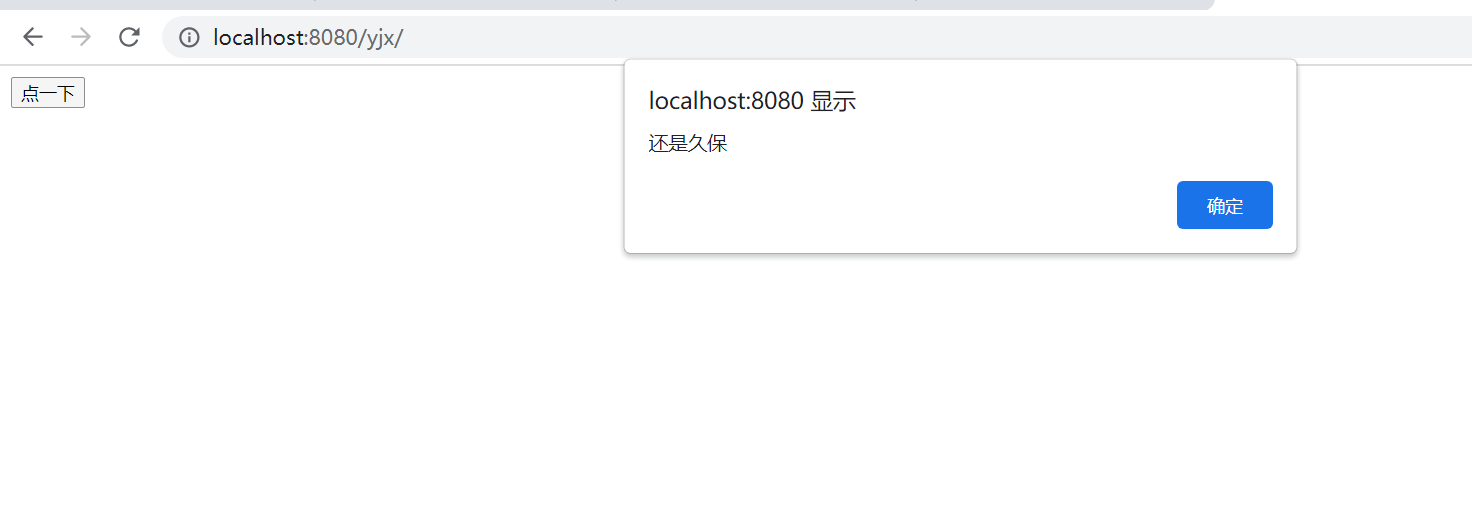
<template>
<div class="yjx">
  <button @click="handleClick">点一下</button>
</div>
</template>
<script>
export default {
  name: "02",
  methods:{
    handleClick(){
      alert('还是久保')
    }
}
}
</script>
<style scoped>
</style>
注册文件中注册
import yjx from "@/views/yjx"; 导入文件
Vue.use(VueRouter)
const routes = [
  {
    path: '/',
    name: 'home',
    component: HomeView
  },
  {
    path: '/about',
    name: 'about',
    component: AboutView
  },   注册
    {
    path: '/yjx',
    name: 'yjx',
    component: yjx
  }
]

浏览器展示效果
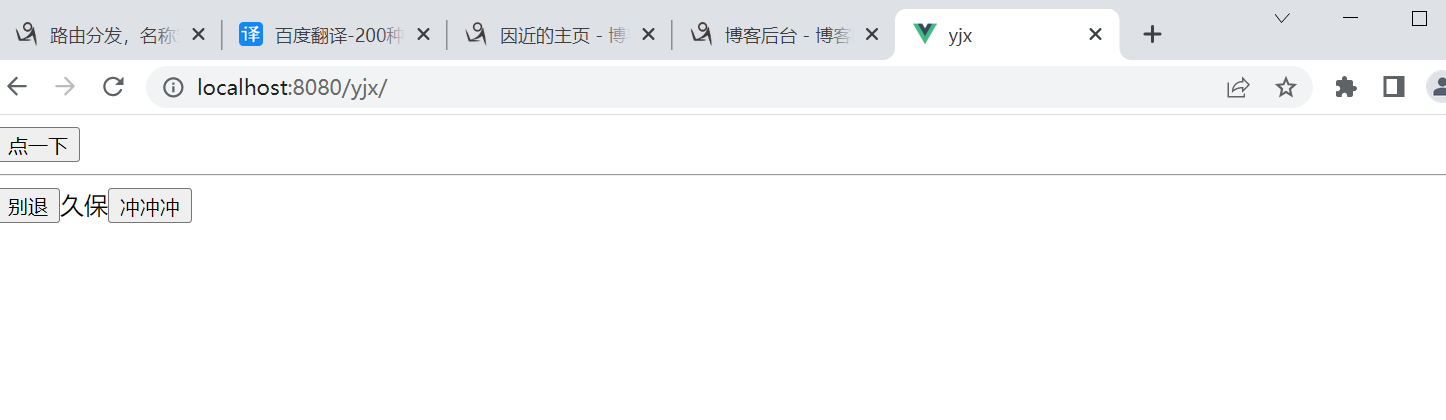
创建小组件Child.vue在页面中使用创建在components下面@符号就是src的途径替代..
在页面文件中注册一个
<template>
<div class="yjx">
  <button @click="handleClick">点一下</button>
  <hr>
  <Child></Child>
</div>
</template>
<script>
import Child from "@/components/Child"; 导入组件文件
export default {
  name: "02",
  methods:{
    handleClick(){
      alert('还是久保')
    }
},
  components:{
    Child   注册组件
  }
}
</script>
<style scoped>
</style>
组件文件Child
<template>
<div>
  <button @click="back">别退</button>{{title}}<button>冲冲冲</button>
</div>
</template>
<script>
export default {
  name: "Child",
  data(){
    return{
      title:'久保'
    }
  },
  methods:{
    back(){
      alert('前面就是久保不要退')
}
  }
}
</script>
<style scoped>
</style>
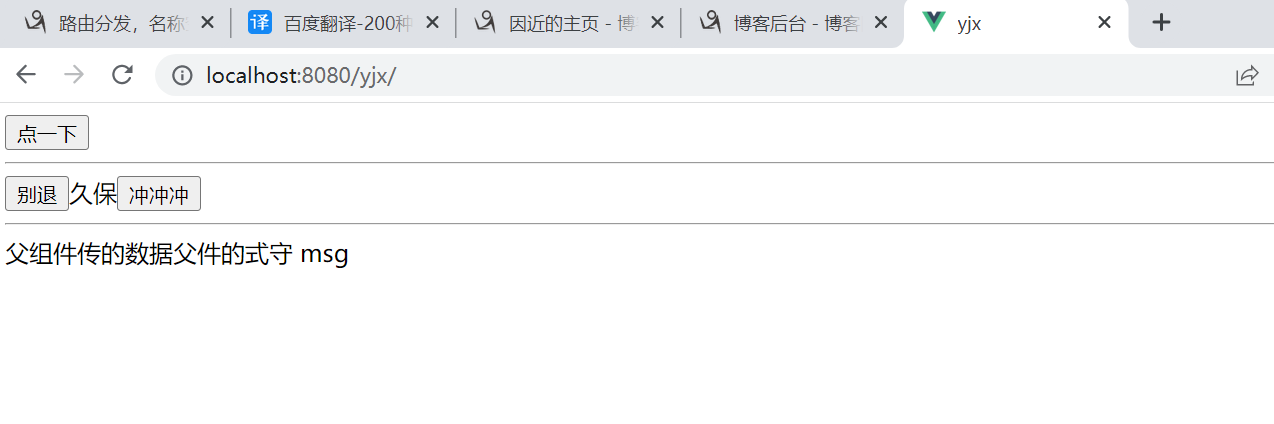
父组件给子组件信息
yxj文件
div里面
<Child :msg="msg"></Child>
export default里面
data(){
    return {
      msg:"父件的式守 msg"
    }
  },
Child文件接收
export default里面
props:['msg'],
div里面
父组件传的数据{{msg}}
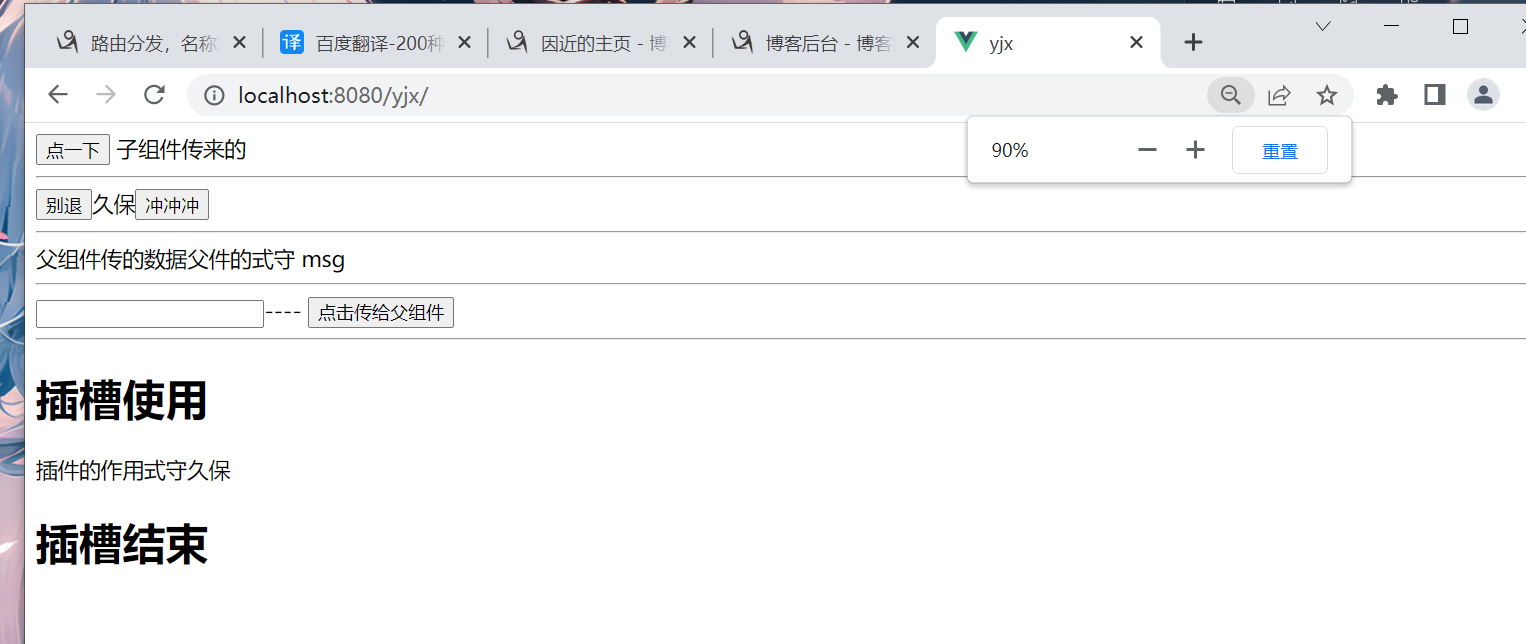
子传父组件
子文件编写
<template>
<div>
  <button @click="back">别退</button>{{title}}<button>冲冲冲</button>
  <hr>
  父组件传的数据{{msg}}
  <hr>
  <input type="text" v-model="name">----{{name}}
  <button @click="handelSend">点击传给父组件</button>
</div>   点击绑定事件
</template>
<script>
export default {
  name: "Child",
  data(){
    return{
      title:'久保',
      name:''  定义一下
    }
  },
  methods:{
    back(){
      alert('前面就是久保不要退')
},handelSend(){
      this.$emit('sui',this.name)
    }   获取input输入的数据传给父件
  },
  props:['msg'],
}
</script>
<style scoped>
</style>
父件的编写
<template>
<div class="yjx">
  <button @click="handleClick">点一下</button>
  子组件传来的{{name}} 展示到前端
  <hr>
  <Child :msg="msg" @sui="hand"></Child>
</div>   子组件的事件sui接收数据绑定方法
</template>
<script>
import Child from "@/components/Child";
export default {
  name: "02",
  data(){
    return {
      msg:"父件的式守 msg",
      name: ''  要定义一下
    }
  },
  methods:{
    handleClick(){
      alert('还是久保')
    },
    hand(name){    接收数据
      this.name = name
    }
},
  components:{
    Child
  }
}
</script>
<style scoped>
</style>
在加一个插件在子组件哦都是在div中
子件中
  <h1>插槽使用</h1>
  <slot></slot>
  <h1>插槽结束</h1>
父件中

<Child :msg="msg" @sui="hand">
    <div>插件的作用式守久保</div>
  </Child>
前后端实现登录
前端页面编写
在views目录下创建一个vue文件
<template>
<div>
  <p>用户名: <input type="text" v-model="name"></p>
  <p>密码: <input type="text" v-model="password"></p>
  <button @click="handleSumbit">登录</button>
</div>
</template>

<script>
import axios from 'axios'  导入axios
export default {
  name: "loginview",
  data(){
    return{name:'',
    password:'',}
  },
  methods:{
    handleSumbit(){
      axios.post('http://127.0.0.1:8000/login/',{  发送数据的地址
        name: this.name,
        password: this.password
      }).then(res =>{
        if(res.data.code==100){
          location.href='https://www.bilibili.com/'  跳转的网址
        }else{
          alert(res.data.msg)
        }
      })
    }
  }
}
</script>
<style scoped>
</style>
在注册一下
import loginview from "@/views/loginview";
Vue.use(VueRouter)

const routes = [
  {
    path: '/',
    name: 'home',
    component: HomeView
  },
  {
    path: '/about',
    name: 'about',
    component: AboutView
  },
    {
    path: '/yjx',
    name: 'yjx',
    component: yjx
  },
      {
    path: '/login',
    name: 'login',
    component: loginview
  }
]
后端的编写
解决跨域问题
注册一下
INSTALLED_APPS = (
            ...
            'corsheaders',
            ...
        )
添加中间件
 MIDDLEWARE = [
            ...
            'corsheaders.middleware.CorsMiddleware',
            ...
        ]
配置文件中添加配置
CORS_ORIGIN_ALLOW_ALL = True
        CORS_ALLOW_METHODS = (
            'DELETE',
            'GET',
            'OPTIONS',
            'PATCH',
            'POST',
            'PUT',
            'VIEW',
        )

        CORS_ALLOW_HEADERS = (
            'XMLHttpRequest',
            'X_FILENAME',
            'accept-encoding',
            'authorization',
            'content-type',
            'dnt',
            'origin',
            'user-agent',
            'x-csrftoken',
            'x-requested-with',
            'Pragma',
            'token'
        )
视图层编写views
from django.http import JsonResponse
import json
def login(request):
    data = json.loads(request.body)  与前端字符编译一下
    name = data.get('name')
    password = data.get('password')
    if name == 'yjx' and password == '123':
        return JsonResponse({'code': 100, 'msg': '登录成功'})
    else:
        return JsonResponse({'code': 101, 'msg': '用户名或者密码错误'})
路由配置
path('login/', views.login)
scoped
加了scoped,表示样式只在当前组件生效,如果不加,子组件都会使用这个样式
<style scoped>
写在这里的样式只会生效在当前组件
</style>
ref属性(放在普通标签上,通过 this.\(refs.名字---》取到的是dom对象,可以直接操作dom,放在组件上,通过该this.\)refs.名字---》取到的是组件对象,这样在父组件中,就拿到了子组件对象,对象属性和方法直接用即可)
前端html文件父组件
<template>
  <div class="home">
    <h1>refs的使用</h1>
    <input type="text" v-model="name" ref="input">   ---->{{name}}
    <br>
    <button @click="handleClick">看控制台</button>
    <br>
    <yzx ref="my"></yzx>
  </div>
</template>
<script>
import yzx from "@/components/yzx";
export default {
  name: 'HomeView',
  data(){
    return{
      name
    }
  },
  components: {
    yzx
  },
  methods:{
    handleClick(){
      console.log(this.$refs)
      // this.$refs.input.value= 'yjx'  input框里就是这个数据
      // this.$refs.my 就是组件对象
      // console.log(this.$refs.my.name) 拿的就是组件的name值
      this.$refs.my.haneleClick()  父件也弹的是子件的name属性
	  this.$refs.my.name='式守'  父件更换了子件的name值
  }}
}
</script>
子组件文件
<template>
<div>
  <h2>组件</h2>
  <button @click="haneldClick">点我看好看的</button>
</div>
</template>
<script>
export default {
  name: "yzx",
  data(){
    return{
      name:"叶子曦"
    }
  },
  methods:{
    haneldClick(){
      alert(this.name)
    }
  }
}
</script>
<style scoped>
</style>
props其它子件的使用
 props: {
        msg: {
          type: String, //类型
          required: true, //必要性
          default: '老王' //默认值
        }
      }
混入mixin,多个就用逗号隔开,要什么注册什么
就是把多个组件共用的配置提取成一个混入对象(如果自己有数据就用自己的)
使用方法在src文件创建一个mixin文件夹,创一个js文件在里面写变量和函数
export const yjx = {
    data(){
        return{
            name:'yzx'
        }
    },
    methods: {
        yjx(){
            alert(this.name)
        }
    }
}
在html文件中使用就不用传变量跟属性
<template>
<div>
  <h1>叶子曦</h1>
  <button @click="yjx">点一下</button>  这样就不用自己写
</div>
</template>
<script>
import {yjx} from '@/mixin'  导入进来
export default {
  name: "YzxView",
  data(){
    return{}
  },
  methods:{},
  mixins:[yjx]    注册一下
}
</script>
<style scoped>
</style>
定义全局混入文件(在main文件中添加)
import {yjx} from "@/mixin";
Vue.mixin(yjx)
插件(用于增强Vue,有很多第三方插件)
Vue.prototype.\(aa='aa'添加数据拿的话this.\)aa(防止与属性里定义的aa给重叠了)
使用方法
	1 定义插件:plugins---》index.js---》
        export default {
            install() {
            # 1 在vue实例中放属性
            # 2 定义混入,全局都可以使用混入
            # 3 自定义指令(不讲了)---》以后我们可能使用了一个第三方插件,它提供了一些指令  v-lq
            # 4 定义全局组件---》全局
        }
    }
在main.js中 使用插件
        import (自己定义的插件名) from '@/plugins'
        Vue.use(插件名)  # 这句话,就会执行lqz中得install,并且把vue传入
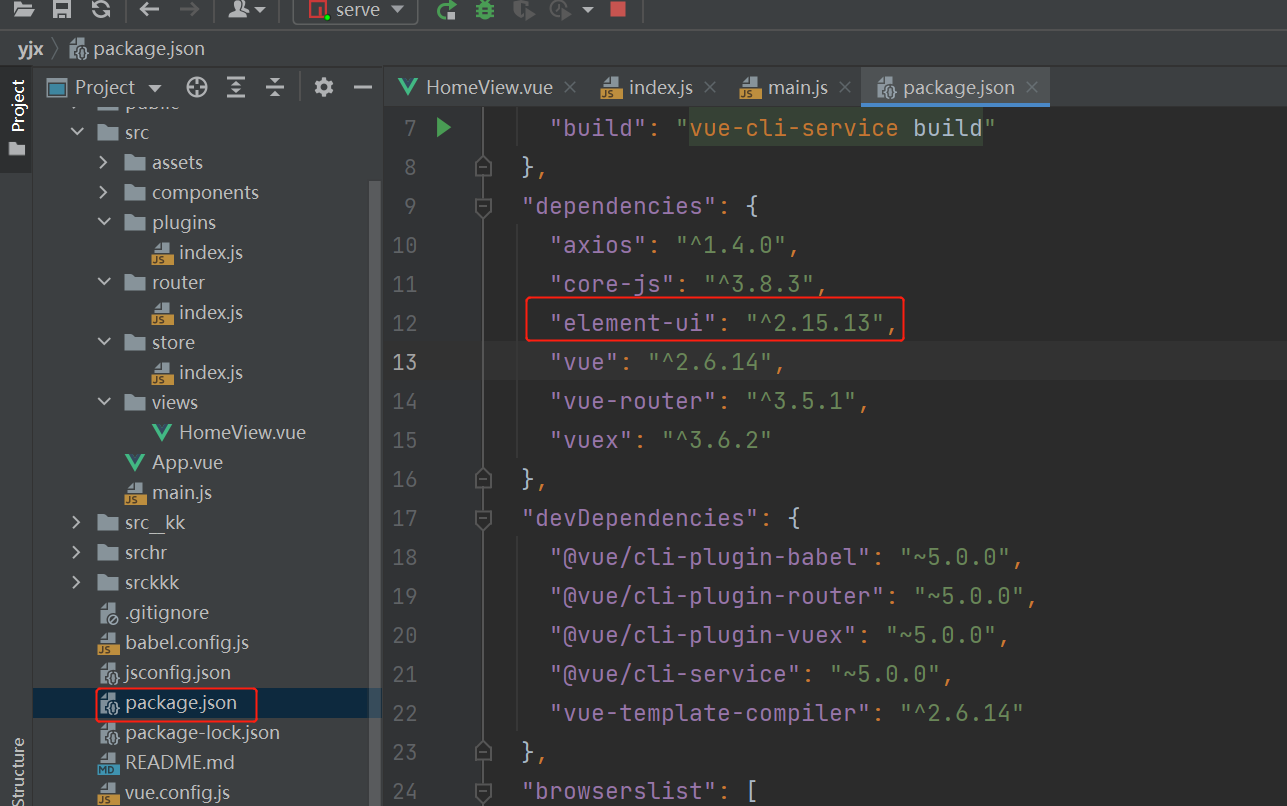
Elementui
在vue项目中引入 elementui
在项目中安装:cnpm install element-ui -S
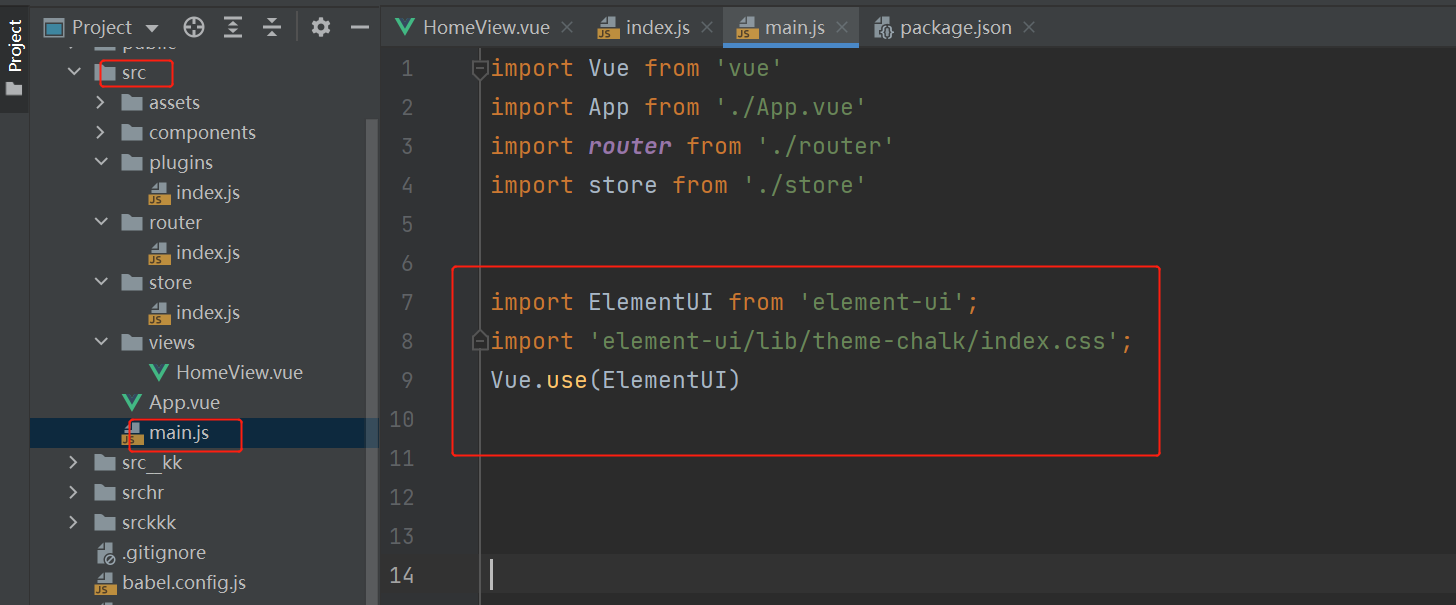
main.js配置这三个
import ElementUI from 'element-ui'; // 把对象引入
import 'element-ui/lib/theme-chalk/index.css'; // 把样式引入
Vue.use(ElementUI)
根据自己的需要导入对应的样式要求
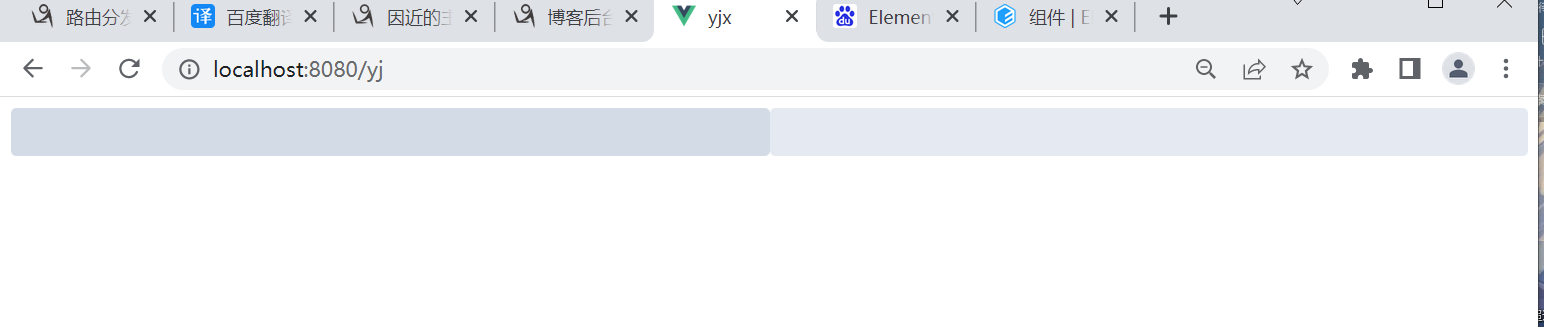
<template>
<div>   需要的内容cv
  <el-row>
    <el-col :span="12"><div class="grid-content bg-purple"></div></el-col>
    <el-col :span="12"><div class="grid-content bg-purple-light"></div></el-col>
  </el-row>
</div>
</template>
<script>
export default {
  name: "yj"
}
</script>
<style scoped>  样式cv
  .el-row {
    margin-bottom: 20px;
    &:last-child {
      margin-bottom: 0;
    }
  }
  .el-col {
    border-radius: 4px;
  }
  .bg-purple-dark {
    background: #99a9bf;
  }
  .bg-purple {
    background: #d3dce6;
  }
  .bg-purple-light {
    background: #e5e9f2;
  }
  .grid-content {
    border-radius: 4px;
    min-height: 36px;
  }
  .row-bg {
    padding: 10px 0;
    background-color: #f9fafc;
  }
</style>