

(五)vue-route路由模块的安装,以及实现 <router-link>页面跳转的原理分析
路由跳转的原理其实就是将组件挂载到对应的路径下面,引用组件的时候就对应了页面的具体路径,而挂载的路径只是客户访问得时候的路径,
当访问到呢个挂载组件的路径时,会找到对应的组件,从而跳转到该组件对应的具体页面的路径
1:安装 vue-router
yarn add vue-router (旧版本得)
yarn add vue-router@4 (新版本得)
2:卸载 vue-router
yarn remove vue-router (旧版本得)
npm uninstall vue-router@4 --save (新版本得)
3:先任意创建3个页面(home.vue,news.vue,user.vue),在创建router.js,将组件挂载到对应的路径下面
import {createRouter,createWebHashHistory} from 'vue-router' //引用组件
import Home from './components/home.vue'//引用组件
import News from './components/news.vue'
import Users from './components/user.vue'
//使用组件里面的createRouter,createWebHashHistory两个模块实现创建路由,和创建模式选择
const router = createRouter({//创建路由
// 内部提供了 history 模式的实现。为了简单起见,我们在这里使用 hash 模式。
history: createWebHashHistory(),
routes:[
//挂载组件,将组件Home挂载到对应的/NewsPath路径下面去,http://192.168.1.2:8084/#/NewsPath就能访问news.vue
{ path: '/', component: Home },
{ path: '/NewsPath', component: News },
{ path: '/UserPath', component: Users },
]
})
//将router暴露出去,让引用他的地方可以用router
export default router
4:在main.js中挂载路由
import { createApp } from 'vue'
import App from './App.vue'
import router from './router';
const app=createApp(App);
//挂载路由
app.use(router)
app.mount('#app1')
5:在App.vue通过 router-view>渲染组件,并且通过 <router-link 实现页面跳转
<template>
<img alt="Vue logo" src="./assets/logo.png">
<ul class="ulstyle">
<li class="listyle">
<router-link to="/" class="astyle">tohome</router-link>
</li>
<li class="listyle">
<router-link to="/NewsPath" class="astyle">tonewspath</router-link>
</li>
<li class="listyle">
<router-link to="/UserPath" class="astyle">touserpath</router-link>
</li>
</ul>
<router-view></router-view>
</template>
<script>
export default {
name: 'App',
components: {
}
}
</script>
<style>
#app1 {
font-family: Avenir, Helvetica, Arial, sans-serif;
-webkit-font-smoothing: antialiased;
-moz-osx-font-smoothing: grayscale;
text-align: center;
color: #2c3e50;
margin-top: 60px;
}
.ulstyle{
width: 100%;
height: 44px;
line-height: 44px;
list-style: none;
background: #000;
color:#fff
}
.listyle{
/* 显示到一行,不换行显示 */
display: inline-block;
margin-right: 20px;
color:#fff;
}
.astyle{
color:#fff
}
</style>
项目目录文件截图

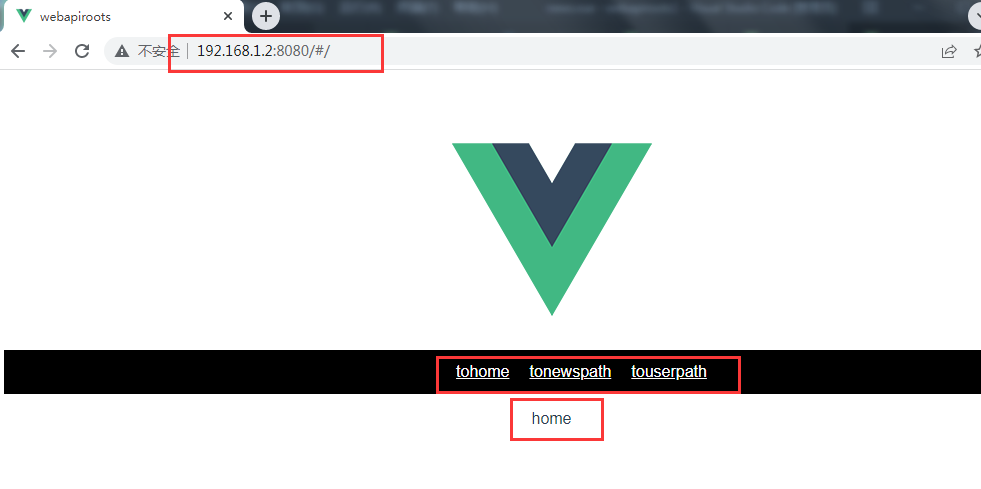
运行效果(点击3个按钮实现home,news,user这3个页面对应的跳转):


【推荐】国内首个AI IDE,深度理解中文开发场景,立即下载体验Trae
【推荐】编程新体验,更懂你的AI,立即体验豆包MarsCode编程助手
【推荐】抖音旗下AI助手豆包,你的智能百科全书,全免费不限次数
【推荐】轻量又高性能的 SSH 工具 IShell:AI 加持,快人一步
· 分享一个免费、快速、无限量使用的满血 DeepSeek R1 模型,支持深度思考和联网搜索!
· 基于 Docker 搭建 FRP 内网穿透开源项目(很简单哒)
· ollama系列01:轻松3步本地部署deepseek,普通电脑可用
· 25岁的心里话
· 按钮权限的设计及实现