其他CSS属性
一、设置元素的颜色和透明度
a、color
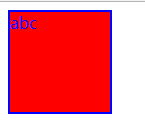
color 属性规定文本的颜色。这个属性设置了一个元素的前景色(在 HTML 表现中,就是元素文本的颜色);光栅图像不受 color 影响。这个颜色还会应用到元素的所有边框,除非被 border-color 或另外某个边框颜色属性覆盖。要设置一个元素的前景色,最容易的方法是使用 color 属性。
 1 <!DOCTYPE html>
 2 <html lang="en">
 3 <head>
 4     <meta charset="UTF-8">
 5     <title>Document</title>
 6     <style>
 7         div{
 8             width: 100px;
 9             height:100px;
10             background: red;
11             color:blue;
12             border-width: 2px;
13             border-style: solid;
14         }
15     </style>
16 </head>
17 <body>
18     <div>
19         abc
20     </div>
21 </body>
22 </html>
b、opacity
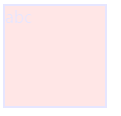
opacity属性设置元素的不透明级别。

 1 <!DOCTYPE html>
 2 <html lang="en">
 3 <head>
 4     <meta charset="UTF-8">
 5     <title>Document</title>
 6     <style>
 7         div{
 8             width: 100px;
 9             height:100px;
10             background: red;
11             color:blue;
12             opacity: 0.1;
13             border-width: 2px;
14             border-style: solid;
15         }
16     </style>
17 </head>
18 <body>
19     <div>
20         abc
21     </div>
22 </body>
23 </html>
我们还可以使用rgba颜色或者hsla颜色设置元素的透明度。
二、设置表格样式
a、border-collapse
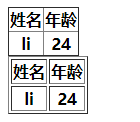
border-collapse 属性设置表格的边框是否被合并为一个单一的边框,还是象在标准的 HTML 中那样分开显示。

 1 <!DOCTYPE html>
 2 <html lang="en">
 3 <head>
 4     <meta charset="UTF-8">
 5     <title>Document</title>
 6     <style>
 7         #tb1{
 8             border-collapse: collapse;
 9         }
10         #tb2{
11             border-collapse: separate;
12         }
13     </style>
14 </head>
15 <body>
16     <table border="1" id="tb1">
17         <tr>
18             <th>姓名</th>
19             <th>年龄</th>
20         </tr>
21         <tr>
22             <th>li</th>
23             <th>24</th>
24         </tr>
25     </table>
26     <table border="1" id="tb2">
27         <tr>
28             <th>姓名</th>
29             <th>年龄</th>
30         </tr>
31         <tr>
32             <th>li</th>
33             <th>24</th>
34         </tr>
35     </table>
36 </body>
37 </html>
b、border-spacing
border-spacing 属性设置相邻单元格的边框间的距离(仅用于“边框分离”模式)。
 1 <!DOCTYPE html>
 2 <html lang="en">
 3 <head>
 4     <meta charset="UTF-8">
 5     <title>Document</title>
 6     <style>
 7         #tb1{
 8             border-collapse: separate;
 9             border-spacing: 2px;
10         }
11
12     </style>
13 </head>
14 <body>
15     <table border="1" id="tb1">
16         <tr>
17             <th>姓名</th>
18             <th>年龄</th>
19         </tr>
20         <tr>
21             <th>li</th>
22             <th>24</th>
23         </tr>
24     </table>
25 </body>
26 </html>

c、caption-side
caption-side 属性设置表格标题的位置。

 1 <!DOCTYPE html>
 2 <html lang="en">
 3 <head>
 4     <meta charset="UTF-8">
 5     <title>Document</title>
 6     <style>
 7         #tb1{
 8             caption-side: bottom;
 9         }
10
11     </style>
12 </head>
13 <body>
14     <table border="1" id="tb1">
15         <caption>
16             学生信息
17         </caption>
18         <tr>
19             <th>姓名</th>
20             <th>年龄</th>
21         </tr>
22         <tr>
23             <th>li</th>
24             <th>24</th>
25         </tr>
26     </table>
27 </body>
28 </html>

d、empty-cells
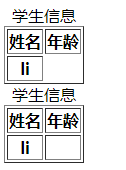
empty-cells 属性设置是否显示表格中的空单元格(仅用于“分离边框”模式)。

 1 <!DOCTYPE html>
 2 <html lang="en">
 3 <head>
 4     <meta charset="UTF-8">
 5     <title>Document</title>
 6     <style>
 7         #tb1{
 8             border-collapse: separate;
 9             empty-cells: hide;
10         }
11         #tb2{
12             border-collapse: separate;
13             empty-cells: show;
14         }
15     </style>
16 </head>
17 <body>
18     <table border="1" id="tb1">
19         <caption>
20             学生信息
21         </caption>
22         <tr>
23             <th>姓名</th>
24             <th>年龄</th>
25         </tr>
26         <tr>
27             <th>li</th>
28             <th></th>
29         </tr>
30     </table>
31     <table border="1" id="tb2">
32         <caption>
33             学生信息
34         </caption>
35         <tr>
36             <th>姓名</th>
37             <th>年龄</th>
38         </tr>
39         <tr>
40             <th>li</th>
41             <th></th>
42         </tr>
43     </table>
44 </body>
45 </html>
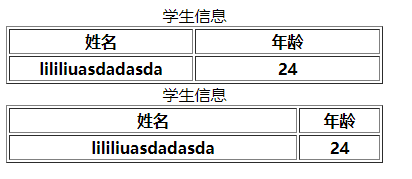
e、table-layout
tableLayout 属性用来显示表格单元格、行、列的算法规则。
固定表格布局:
固定表格布局与自动表格布局相比,允许浏览器更快地对表格进行布局。在固定表格布局中,水平布局仅取决于表格宽度、列宽度、表格边框宽度、单元格间距,而与单元格的内容无关。通过使用固定表格布局,用户代理在接收到第一行后就可以显示表格。
自动表格布局:
在自动表格布局中,列的宽度是由列单元格中没有折行的最宽的内容设定的。此算法有时会较慢,这是由于它需要在确定最终的布局之前访问表格中所有的内容。
 1 <!DOCTYPE html>
 2 <html lang="en">
 3 <head>
 4     <meta charset="UTF-8">
 5     <title>Document</title>
 6     <style>
 7         #tb1{
 8             table-layout: fixed;
 9             width: 20%;
10         }
11         #tb2{
12             table-layout: auto;
13             width: 20%;
14         }
15     </style>
16 </head>
17 <body>
18     <table border="1" id="tb1">
19         <caption>
20             学生信息
21         </caption>
22         <tr>
23             <th>姓名</th>
24             <th>年龄</th>
25         </tr>
26         <tr>
27             <th>lililiuasdadasda</th>
28             <th>24</th>
29         </tr>
30     </table>
31     <table border="1" id="tb2">
32         <caption>
33             学生信息
34         </caption>
35         <tr>
36             <th>姓名</th>
37             <th>年龄</th>
38         </tr>
39         <tr>
40             <th>lililiuasdadasda</th>
41             <th>24</th>
42         </tr>
43     </table>
44 </body>
45 </html>
三、设置列表样式
a、list-style
list-style 简写属性在一个声明中设置所有的列表属性。可以按顺序设置如下属性:
- list-style-type
- list-style-position
- list-style-image
可以不设置其中的某个值,比如 "list-style:circle inside;" 也是允许的。未设置的属性会使用其默认值。
 1 <!DOCTYPE html>
 2 <html lang="en">
 3 <head>
 4     <meta charset="UTF-8">
 5     <title>Document</title>
 6     <style>
 7         ol{
 8             list-style: lower-alpha inside;
 9         }
10     </style>
11 </head>
12 <body>
13     <ol>
14         <li>banana</li>
15         <li>apple</li>
16         <li>cabbage</li>
17     </ol>
18 </body>
19 </html>

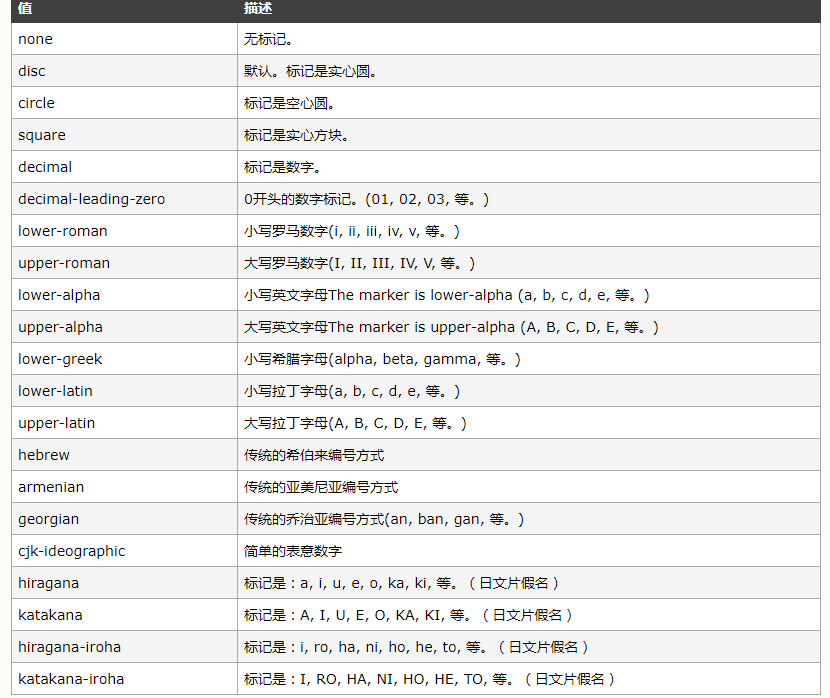
b、list-style-type
list-style-type 属性设置列表项标记的类型。
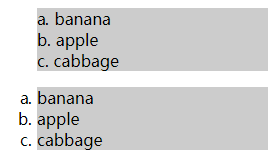
c、list-style-position
list-style-position 属性设置在何处放置列表项标记。

 1 <!DOCTYPE html>
 2 <html lang="en">
 3 <head>
 4     <meta charset="UTF-8">
 5     <title>Document</title>
 6     <style>
 7         ol.inside{
 8             list-style: lower-alpha inside;
 9         }
10         ol.outside{
11             list-style: lower-alpha outside;
12         }
13         li{
14             background: #ccc;
15         }
16     </style>
17 </head>
18 <body>
19     <ol class="inside">
20         <li>banana</li>
21         <li>apple</li>
22         <li>cabbage</li>
23     </ol>
24     <ol class="outside">
25         <li>banana</li>
26         <li>apple</li>
27         <li>cabbage</li>
28     </ol>
29 </body>
30 </html>
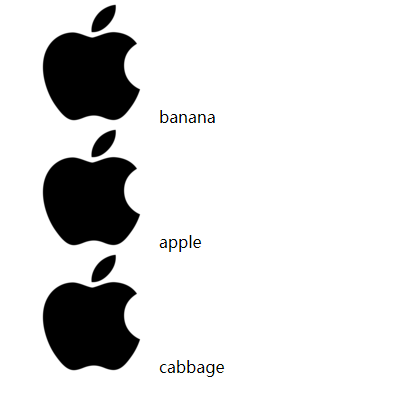
d、list-style-image
list-style-image 属性使用图像来替换列表项的标记。

 1 <!DOCTYPE html>
 2 <html lang="en">
 3 <head>
 4     <meta charset="UTF-8">
 5     <title>Document</title>
 6     <style>
 7         ol.inside{
 8             list-style-image:url(https://ss1.baidu.com/6ONXsjip0QIZ8tyhnq/it/u=3719996677,3436193373&fm=58&w=121&h=121&img.PNG&bpow=1024&bpoh=1024);
 9             list-style-position: inside;
10         }
11
12     </style>
13 </head>
14 <body>
15     <ol class="inside">
16         <li>banana</li>
17         <li>apple</li>
18         <li>cabbage</li>
19     </ol>
20
21 </body>
22 </html>
四、设置光标样式
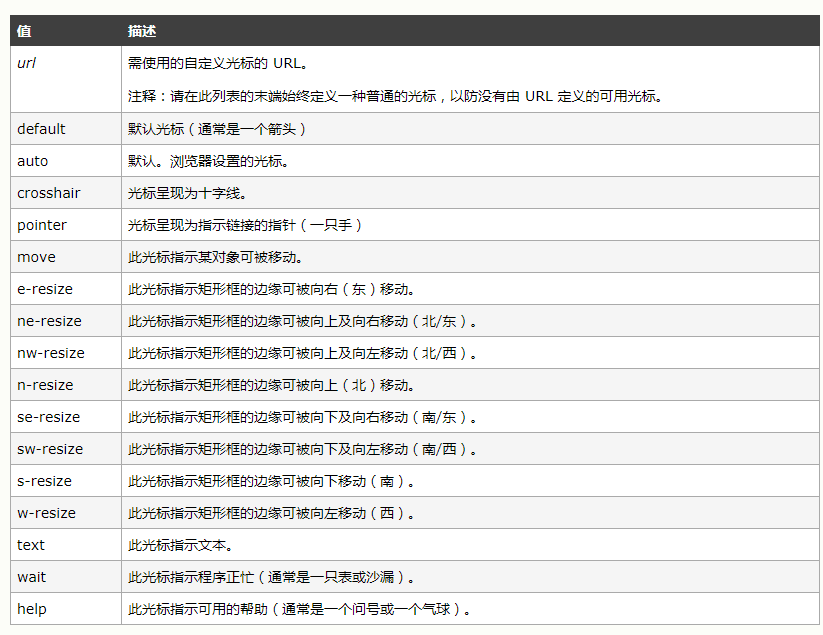
cursor
cursor 属性规定要显示的光标的类型(形状)。该属性定义了鼠标指针放在一个元素边界范围内时所用的光标形状(不过 CSS2.1 没有定义由哪个边界确定这个范围)。
 1 <!DOCTYPE html>
 2 <html lang="en">
 3 <head>
 4     <meta charset="UTF-8">
 5     <title>Document</title>
 6     <style>
 7         ol.inside{
 8             list-style-image:url(https://ss1.baidu.com/6ONXsjip0QIZ8tyhnq/it/u=3719996677,3436193373&fm=58&w=121&h=121&img.PNG&bpow=1024&bpoh=1024);
 9             list-style-position: inside;
10         }
11         li{
12             cursor: help;
13         }
14     </style>
15 </head>
16 <body>
17     <ol class="inside">
18         <li>banana</li>
19         <li>apple</li>
20         <li>cabbage</li>
21     </ol>
22
23 </body>
24 </html>
鼠标放到对应元素上会显示问号。


