SpringCloud Config分布式配置中心
1、介绍
①what
微服务意味着需要将单体拆成很多子服务,每个服务都需要配置才能运行。所以需要一套集中式,动态的配置管理,来解决这个问题。
Spring Cloud Config为微服务架构中的微服务提供了集中化的外部配置支持,配置服务器为每个不同的微服务应用的所有环境,提供了一个中心化的外部配置。
SpringCloud Config也分为服务端和客户端(还需要Git仓库管理配置文件夹,在③how中有介绍)
服务端:也成为分布式配置中心,是一个独立的微服务应用
客户端:通过指定的配置中心管理应用资源,以及业务相关的配置内容,
②why
- 不同的环境有不同的配置,动态化配置更新,比如dev /test/prod/beta/release
- 不需要再每个服务器编写配置文件,服务会向配置中心统一拉取配置自己的信息
- 当配置改变,服务不需要重启就能应用新的配置
- 将配置信息以Rest接口暴露
③how
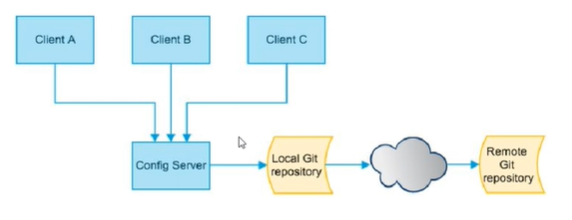
springcloud config是如何获取配置中心的文件,然后进行集中配置下方的呢?
如下图:
Config Server通过本地的Git仓库,和Remote的Git仓库,获取配置信息,然后再集中对各个微服务进行配置。
所以springcloud config需要三个部分:
- 本地/远程Git仓库:存储配置信息
- Config Server:分布式配置中心
- Client:从配置中心获取配置
2、搭建
①Git仓库搭建
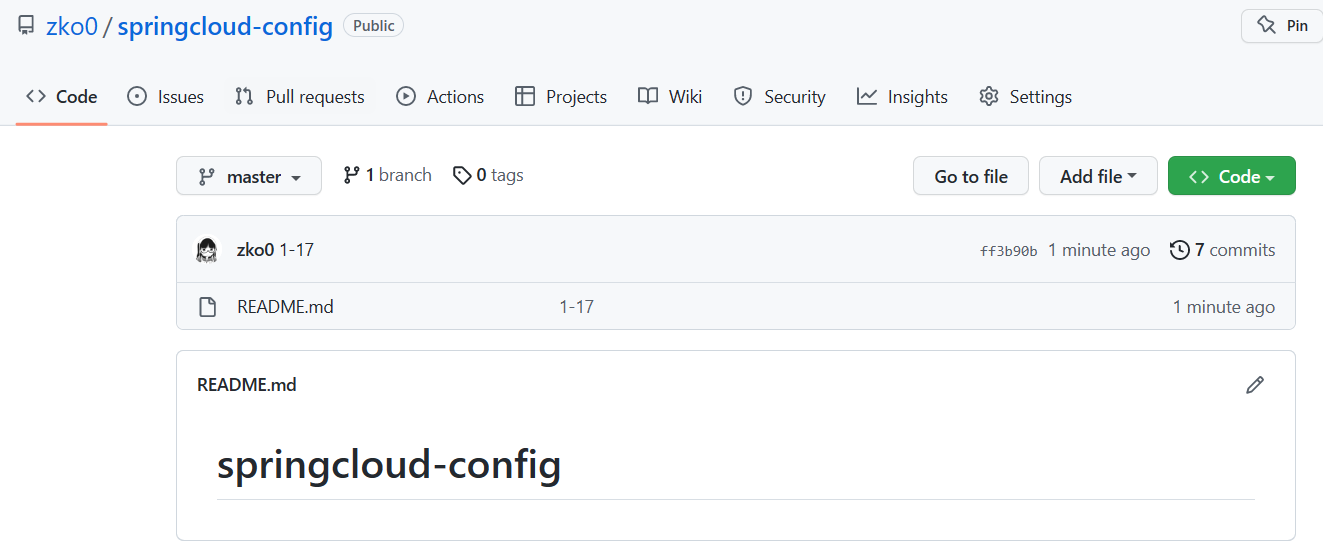
在github上创建springcloud-config项目

初始化仓库
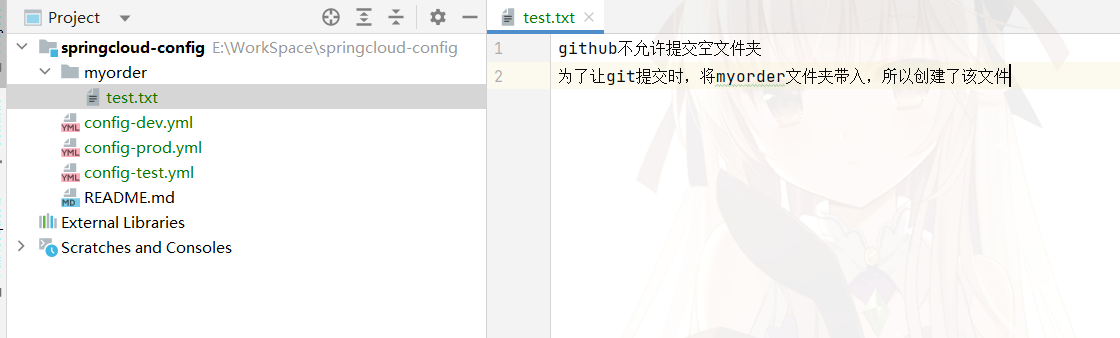
如图,创建文件和文件夹:
push到远程仓库
②Config Server搭建
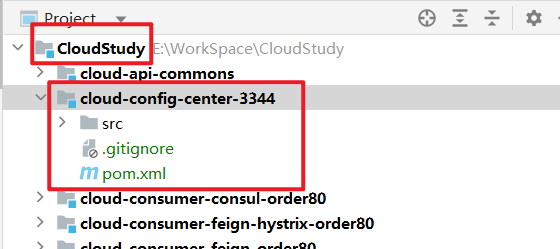
在原来的项目(不是上面Git搭建的项目)中新建子模块cloud-config-center-3344
pom.xml:
<dependencies> <!--config server--> <dependency> <groupId>org.springframework.cloud</groupId> <artifactId>spring-cloud-config-server</artifactId> </dependency> <!--eureka client(通过微服务名实现动态路由)--> <dependency> <groupId>org.springframework.cloud</groupId> <artifactId>spring-cloud-starter-netflix-eureka-client</artifactId> </dependency> <dependency> <groupId>org.springframework.boot</groupId> <artifactId>spring-boot-starter-web</artifactId> </dependency> <dependency> <groupId>org.springframework.boot</groupId> <artifactId>spring-boot-starter-actuator</artifactId> </dependency> <!--热部署--> <dependency> <groupId>org.springframework.boot</groupId> <artifactId>spring-boot-devtools</artifactId> <scope>runtime</scope> <optional>true</optional> </dependency> <dependency> <groupId>org.projectlombok</groupId> <artifactId>lombok</artifactId> <optional>true</optional> </dependency> <dependency> <groupId>org.springframework.boot</groupId> <artifactId>spring-boot-starter-test</artifactId> <scope>test</scope> </dependency> </dependencies>
yml:

server: port: 3344 spring: application: name: cloud-config-center #注册进Eureka服务器的微服务名 cloud: config: server: git: uri: https://github.com/zko0/springcloud-config.git #git的仓库地址 search-paths: #搜索目录 - springcloud-config #如果仓库为私有,需要下面的认证信息 #username: zko0 用户名 #password: xxxxxxx token label: master #读取的分支 eureka: client: service-url: defaultZone: http://localhost:7001/eureka #服务注册到的eureka地址
启动类:
@EnableConfigServer @SpringBootApplication public class ConfigCenterMain3344 { public static void main(String[] args) { SpringApplication.run(ConfigCenterMain3344.class, args); } }
修改springcloud-config工程中的配置文件:

Push到远端仓库

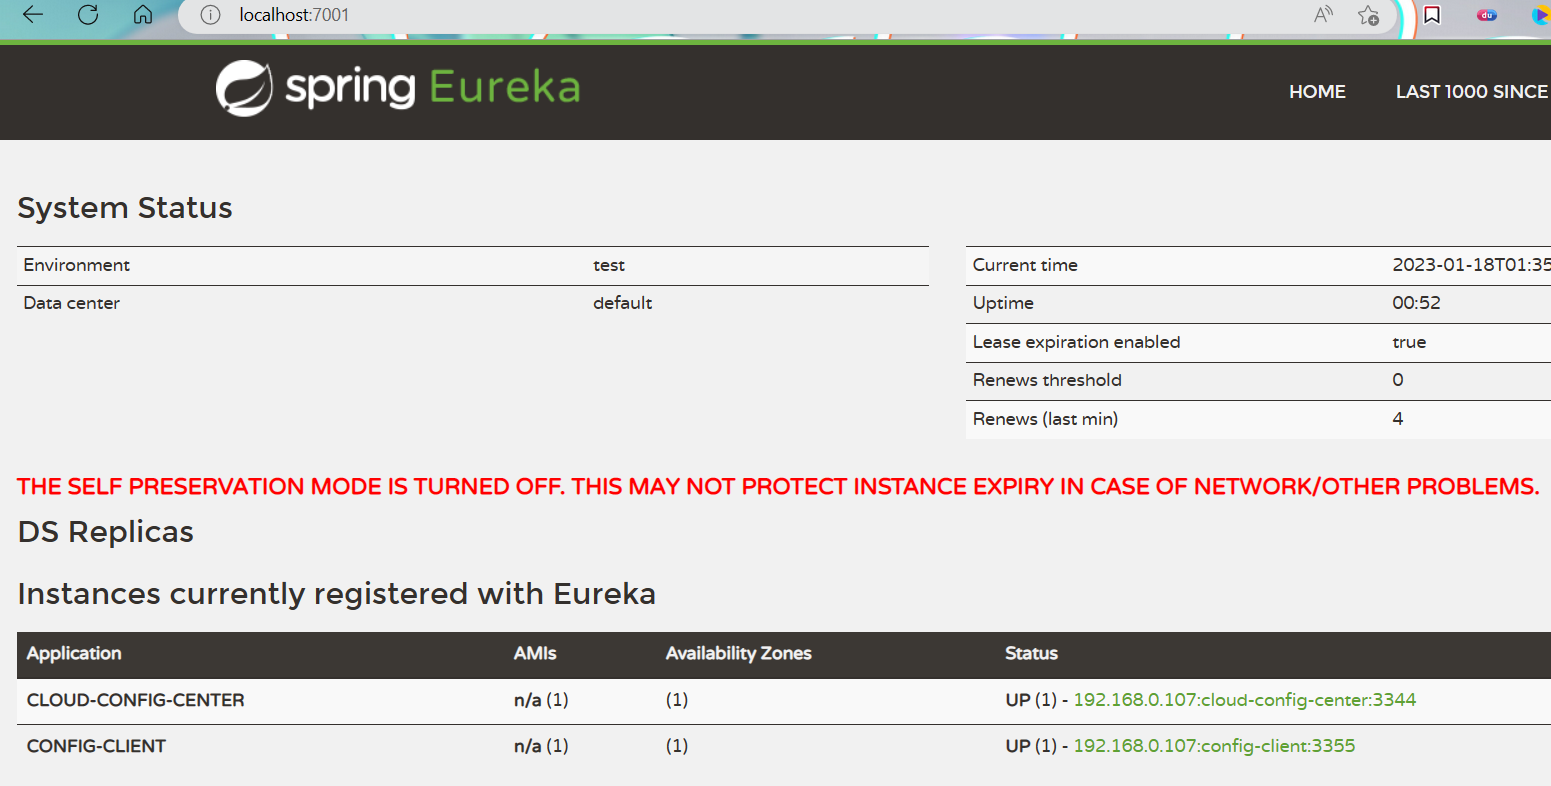
启动Eureka注册中心7001,Config配置中心3344
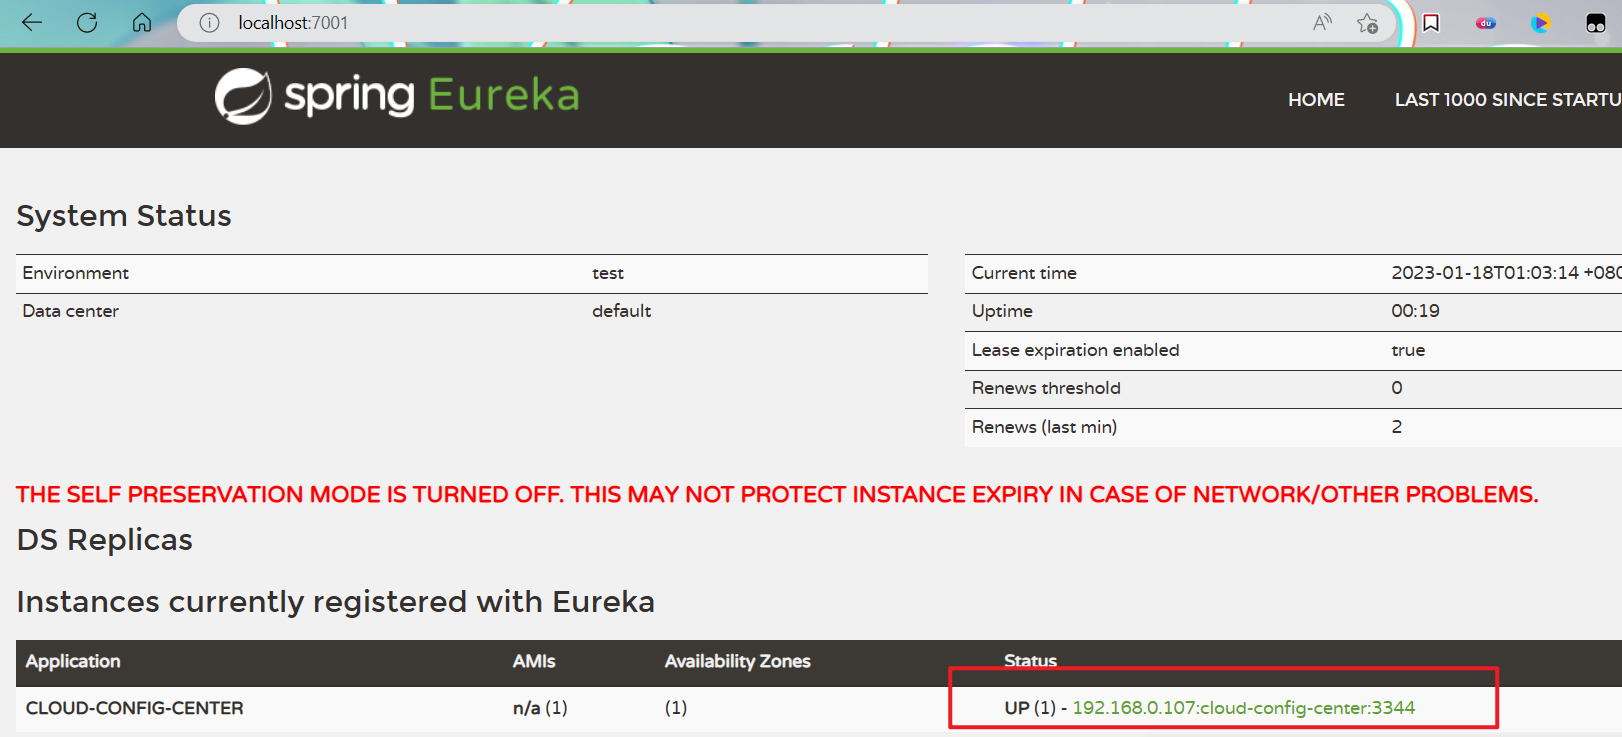
调用Config配置中心的接口,测试,成功:

调用接口的三种URL方式:
/{label}/{application}-{profile}.yml
lable:分支,application:配置前缀名,profile:配置后缀名
ip:port
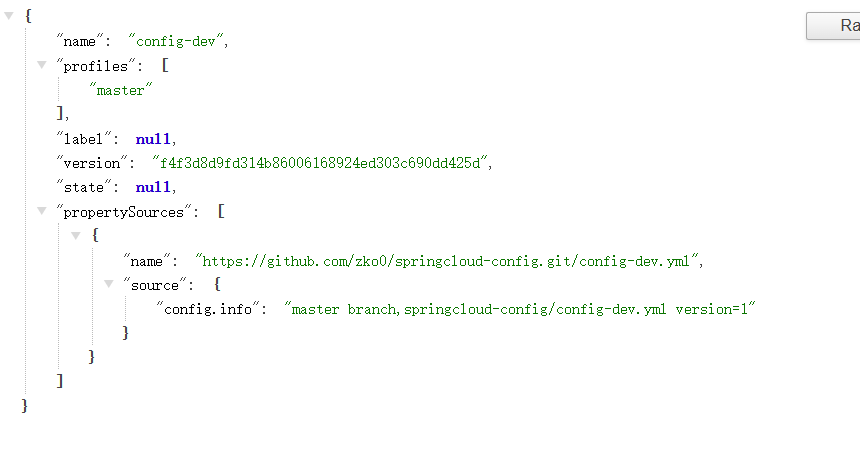
/master/config-dev.yml这种方式显示的是配置文件的内容
/{application}-{profile}.yml (这种情况默认找master)
application:配置前缀名,profile:配置后缀名
ip:port
/config-dev.yml同1
/{application}-{profile}/
lable:分支,application:配置前缀名,profile:配置后缀名
ip:port
/config-dev/master这种方式显示的json串,格式也有所区别
③Clinet搭建
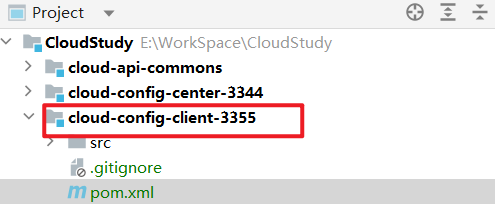
新建模块cloud-config-client-3355
pom.xml:
<dependencies> <!--config server--> <dependency> <groupId>org.springframework.cloud</groupId> <artifactId>spring-cloud-starter-config</artifactId> </dependency> <!--eureka client(通过微服务名实现动态路由)--> <dependency> <groupId>org.springframework.cloud</groupId> <artifactId>spring-cloud-starter-netflix-eureka-client</artifactId> </dependency> <dependency> <groupId>org.springframework.boot</groupId> <artifactId>spring-boot-starter-web</artifactId> </dependency> <dependency> <groupId>org.springframework.boot</groupId> <artifactId>spring-boot-starter-actuator</artifactId> </dependency> <!--热部署--> <dependency> <groupId>org.springframework.boot</groupId> <artifactId>spring-boot-devtools</artifactId> <scope>runtime</scope> <optional>true</optional> </dependency> <dependency> <groupId>org.projectlombok</groupId> <artifactId>lombok</artifactId> <optional>true</optional> </dependency> <dependency> <groupId>org.springframework.boot</groupId> <artifactId>spring-boot-starter-test</artifactId> <scope>test</scope> </dependency> </dependencies>
yml:
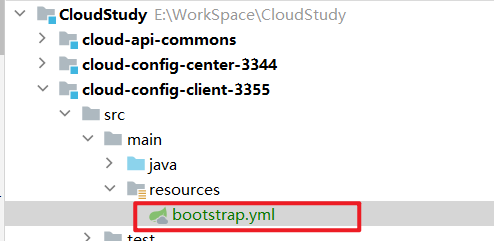
application.yml是用户级别的资源配置项
bootstrap.yml是系统级别的,优先级更高
需要将Client模块的application.yml文件改为bootstrap.yml,这很重要,因为bootstrap.yml比application.yml先加载,bootstrap.yml优先级更高
官方解释:
Spring Cloud 构建于 Spring Boot 之上,在 Spring Boot 中有两种上下文,一种是 bootstrap, 另外一种是 application, bootstrap 是应用程序的父上下文,也就是说 bootstrap 加载优先于 applicaton。bootstrap 主要用于从额外的资源来加载配置信息,还可以在本地外部配置文件中解密属性。这两个上下文共用一个环境,它是任何Spring应用程序的外部属性的来源。bootstrap 里面的属性会优先加载,它们默认也不能被本地相同配置覆盖。
server: port: 3355 spring: application: name: config-client cloud: config: #config客户端配置 label: master #分支名称 name: config #配置文件名称 这三个综合:master分支上的config-dev.yml的配置文件 profile: dev #读取后缀名称 被读取到http://config-3344.com:3344/master/config/dev uri: http://localhost:3344 #配置中心地址 eureka: client: service-url: defaultZone: http://localhost:7001/eureka #服务注册到的eureka地址
启动类:
@EnableEurekaClient @SpringBootApplication public class ConfigClientMain3355 { public static void main(String[] args) { SpringApplication.run(ConfigClientMain3355.class, args); } }
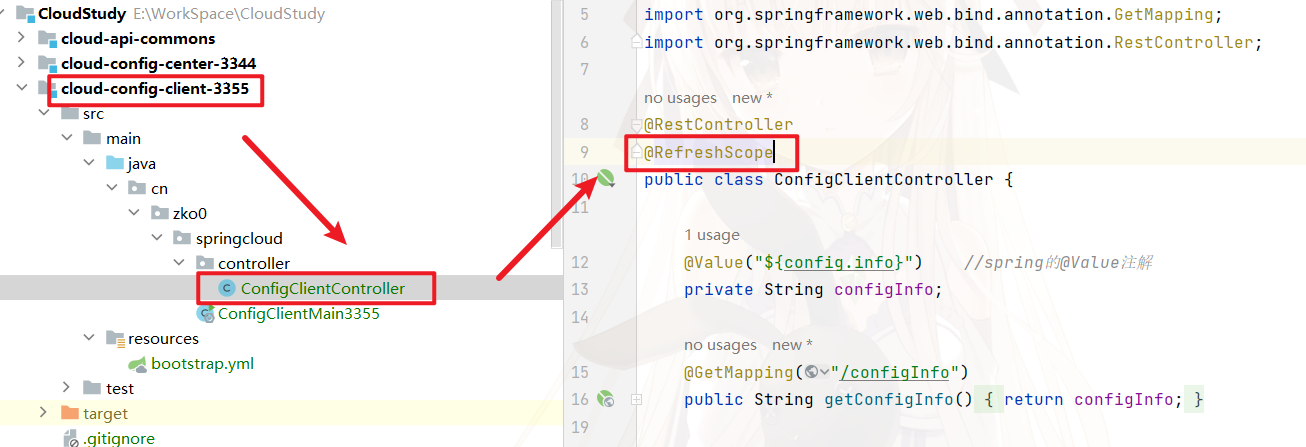
Controller:
通过@Value获取配置文件中的value,通过接口展现出来:
@RestController public class ConfigClientController { @Value("${config.info}") //spring的@Value注解 private String configInfo; @GetMapping("/configInfo") public String getConfigInfo(){ return configInfo; } }
启动Eureka注册中心7001,Config配置中心3344,Config Client3355:
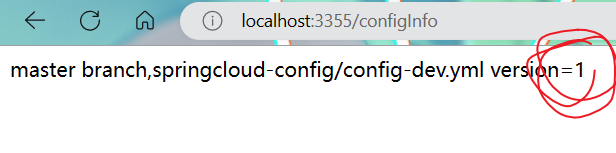
测试3344获取3355所需的配置文件:

测试3355接口:

3、动态刷新
①问题演示
在2的基础上,我们修改仓库中的配置文件:

过了一段时间(可能需要1min以上),访问334获取dev配置,成功刷新了:

但是此时访问3355,通过@Value注入的值,没有刷新:
如果需要3355获取最新的值,重启3355即可。
PS:上面的配置动态更新,还需要重启服务才能生效,不是很傻逼的操作吗?
对,很傻逼,下面有更好的方式
②Client动态刷新(还是需要手动)
往config客户端3355添加健康监控依赖:
<dependency> <groupId>org.springframework.boot</groupId> <artifactId>spring-boot-starter-actuator</artifactId> </dependency>
然后在bootstrap.yml中添加配置:
关于这里的配置,需要学习Actuator的知识,本人也没有进行系统的学习,看到这篇博客写的不错,也涉及了该部分配置的含义讲解。
#暴露监控端点 management: endpoints: web: exposure: include: "*"
在Controller上添加注解开启动态刷新:
启动3355,测试:
首先3355与dev配置文件的value相同

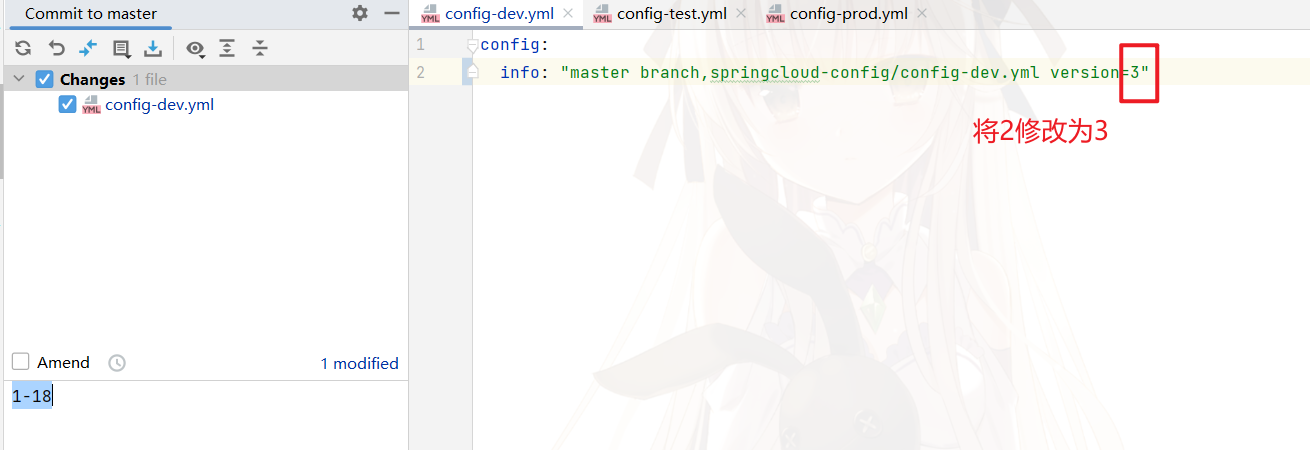
更新dev配置文件,将version修改为3:
等待一段时间,3344的配置中心可以获取到version为3的配置:

需要向3355发送post请求,手动刷新:
http://localhost:3355/actuator/refresh
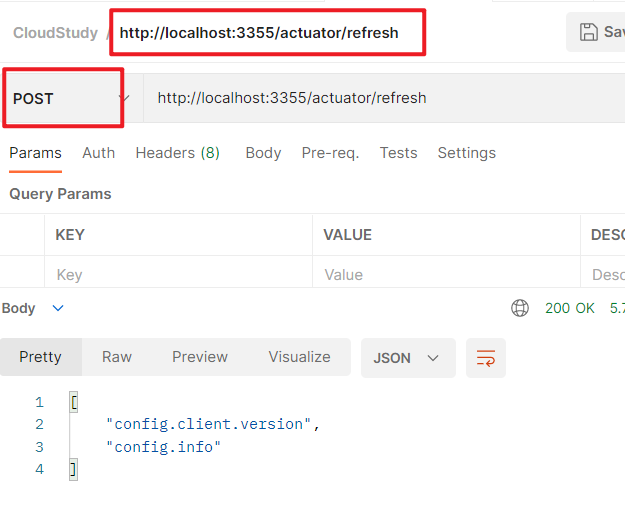
此时3355的version就变更为3了,成功:

③问题
-
需要手动发送Post(虽然可以写个脚本发送,但是还是不完美)
-
不能广播,一次通知,全部生效,只能单个通知
-
大范围自动刷新


【推荐】国内首个AI IDE,深度理解中文开发场景,立即下载体验Trae
【推荐】编程新体验,更懂你的AI,立即体验豆包MarsCode编程助手
【推荐】抖音旗下AI助手豆包,你的智能百科全书,全免费不限次数
【推荐】轻量又高性能的 SSH 工具 IShell:AI 加持,快人一步
· 被坑几百块钱后,我竟然真的恢复了删除的微信聊天记录!
· 没有Manus邀请码?试试免邀请码的MGX或者开源的OpenManus吧
· 【自荐】一款简洁、开源的在线白板工具 Drawnix
· 园子的第一款AI主题卫衣上架——"HELLO! HOW CAN I ASSIST YOU TODAY
· Docker 太简单,K8s 太复杂?w7panel 让容器管理更轻松!