1、前提
1.1、场景需求
我们接下来,基于自由风格来创建一个完整的任务,将项目代码从git仓库中获取到本地,然后借助于Docker镜像,
将该项目运行起来,对外暴露的端口是666,任务构建成功后,浏览器测试效果。 为了保证jenkins的工作空间有足够的空闲,我们基于任务的保留时长及记录保留的数量来进行限制。
1.2、构建任务种类
1.3、构建属性
属性         说明
全局配置     定制构建历史保留规则
源代码仓库   采用git配置
执行构建     采用shell命令的方式执行docker构建
1.4、Jenkins主机安装Docker软件
1.4.1、安装依赖包
# 更新仓库
apt-get update

# 安装 apt 依赖包,用于通过HTTPS来获取仓库:
apt-get install -y \
    apt-transport-https \
    ca-certificates \
    curl \
    gnupg-agent \
    software-properties-common
1.4.2、添加 Docker 的官方 GPG 密钥
curl -fsSL https://mirrors.ustc.edu.cn/docker-ce/linux/ubuntu/gpg | sudo apt-key add -
1.4.3、设置仓库
add-apt-repository \
   "deb [arch=amd64] https://mirrors.ustc.edu.cn/docker-ce/linux/ubuntu/ \
  $(lsb_release -cs) \
  stable"
1.4.4、安装docker软件
apt-get update
apt-get install -y docker-ce docker-ce-cli containerd.io
1.4.5、在仓库中列出可用版本【了解】
# apt-cache madison docker-ce
 docker-ce | 5:24.0.2-1~ubuntu.23.04~lunar | https://mirrors.ustc.edu.cn/docker-ce/linux/ubuntu lunar/stable amd64 Packages
 docker-ce | 5:24.0.1-1~ubuntu.23.04~lunar | https://mirrors.ustc.edu.cn/docker-ce/linux/ubuntu lunar/stable amd64 Packages
 docker-ce | 5:24.0.0-1~ubuntu.23.04~lunar | https://mirrors.ustc.edu.cn/docker-ce/linux/ubuntu lunar/stable amd64 Packages
 docker-ce | 5:23.0.6-1~ubuntu.23.04~lunar | https://mirrors.ustc.edu.cn/docker-ce/linux/ubuntu lunar/stable amd64 Packages
 docker-ce | 5:23.0.5-1~ubuntu.23.04~lunar | https://mirrors.ustc.edu.cn/docker-ce/linux/ubuntu lunar/stable amd64 Packages
 docker-ce | 5:23.0.4-1~ubuntu.23.04~lunar | https://mirrors.ustc.edu.cn/docker-ce/linux/ubuntu lunar/stable amd64 Packages
 docker-ce | 5:23.0.3-1~ubuntu.23.04~lunar | https://mirrors.ustc.edu.cn/docker-ce/linux/ubuntu lunar/stable amd64 Packages
1.4.6、指定版本安装【了解】
apt-get install docker-ce=<VERSION_STRING> docker-ce-cli=<VERSION_STRING> containerd.io
1.4.7、测试docker是否正常运行
1.4.8、提前下载好tomcat镜像
1.5、准备代码仓库
1.5.1、在 gitlab 中创建一个项目 tomcat_pro

1.5.2、准备仓库代码
# 首次需要配置帐号信息
git config --global user.name "root"
git config --global user.email root@test.com

# 克隆项目
git clone git@192.168.10.10:web/tomcat_pro.git
cd tomcat_pro/

# 增加代码包
tar xf /tmp/tomcat-web.tar.gz -C /tmp/tomcat_pro/

# 提交至本地仓库
git add . && git commit -m "tomcat-web"

# 推送至远程目录
git remote add origin git@192.168.10.10:web/tomcat_pro.git
git branch -M main
git push -uf origin main
1.5.3、tomcat_pro/tomcat-web/ROOT/index.jsp代码内容
<%@ page language="java" import="java.util.*" contentType="text/html; charset=UTF-8" %>
<html>
    <head>
    <title>电商网站</title>
    </head>
    <body>
        <h1 style="color:red ; font-size:30px ; display:inline;">  开业大酬宾:  </h1>
        <%
            String str = "买 1 送 2";
            out.print(str);
        %>
    </body>
</html>
1.5.4、gitlab查看项目

2、构建自由项目
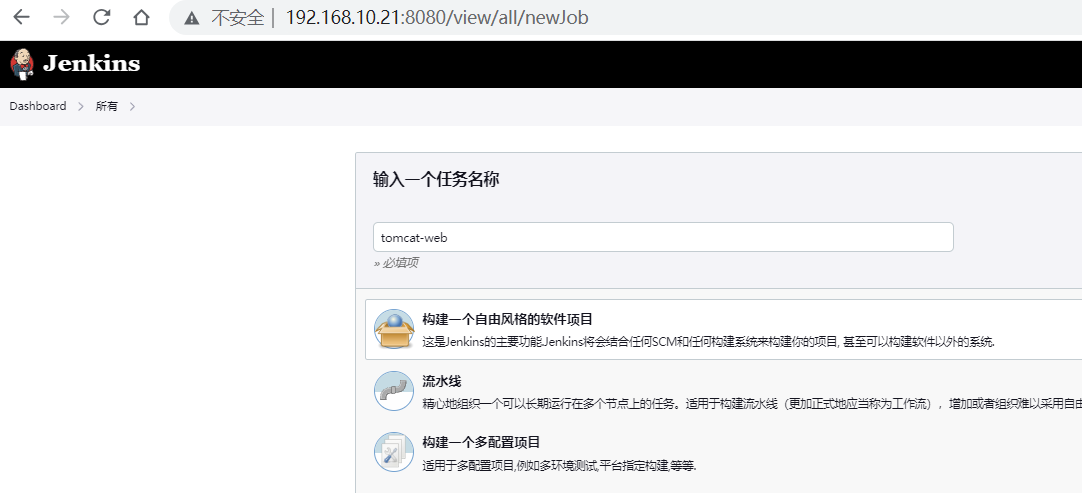
2.1、创建tomcat-web项目
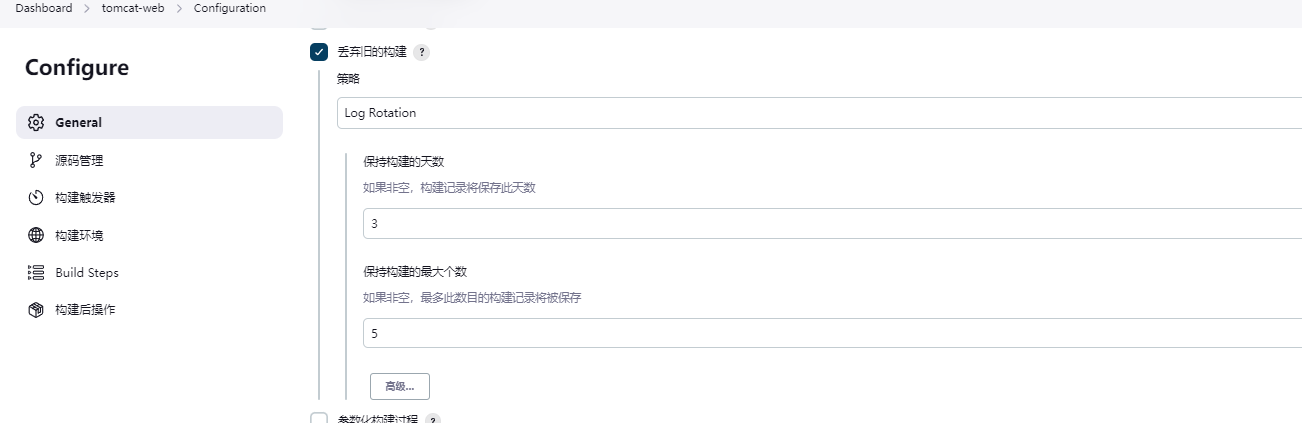
2.2、General【全局配置】
在General全局配置项部分,勾选"Discard old builds【丢弃旧的构建】",定制构建记录的保存时间为3天,构建任务的保存数量为5个
2.3、仓库配置
在源代码管理部分,勾选git仓库,配置仓库地址和认证账号

2.4、【Build Steps】执行构建
在构建部分,我们选择最常用的"Execute shell"模式,这时为了知道如下的命令在哪里执行,所以这里先测试一下
# 我在哪里执行下面的命令
pwd
# 当前目录下有哪些东西
ls

2.5、检查效果
依次点击"Apply"和"Save"后,回到任务界面,然后点击"Build now"
2.6、立执构建测试

2.7、查看日志

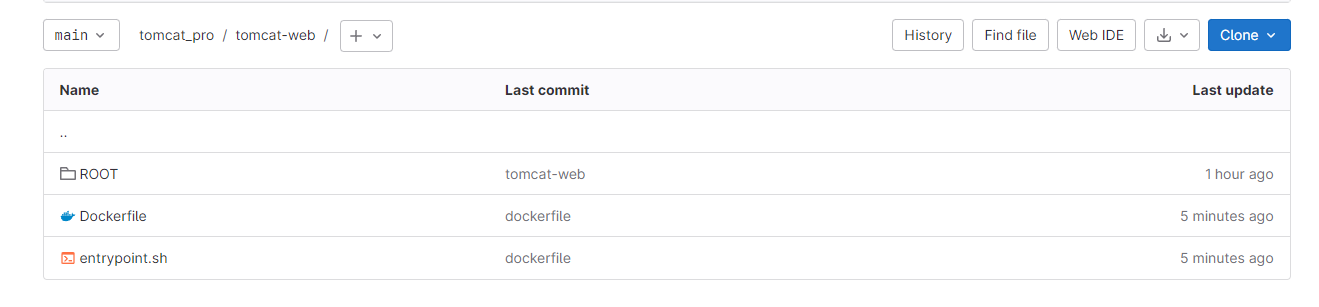
3、制作Dockerfile上传至tomcat_pro项目
3.1、Dockerfile
tomcat_pro# cat tomcat-web/Dockerfile
FROM tomcat:latest

MAINTAINER jenkins&gitlab

ADD ROOT.tar.gz /usr/local/tomcat/webapps
ADD entrypoint.sh /root/entrypoint.sh

EXPOSE 8080 8081

CMD ["/bin/bash","/root/entrypoint.sh"]
3.2、entrypoint.sh
cat << 'CAT_END' > entrypoint.sh
#!/bin/bash
${CATALINA_HOME}/bin/catalina.sh start
tail -f ${CATALINA_HOME}/logs/catalina.out
CAT_END
3.3、推送至远程仓库
git add . && git commit -m "dockerfile" && git push origin
3.4、查看效果
4、改造构建【使用Dockerfile打包、运行镜像】
4.1、增加shell执行
# 压缩包
tar -C tomcat-web -zcf tomcat-web/ROOT.tar.gz ROOT --remove-files

# 构建镜像
docker build -t tomcat-web:v0.1 ./tomcat-web

# 关闭之前启动镜你
num=$(docker ps | grep tomcat-web | wc -l)
[ $num -eq 1 ] && docker rm -f tomcat-web

# 启动镜像
docker run -d --name tomcat-web -p 8081:8080 tomcat-web:v0.1

4.2、查看构建日志

4.3、查看镜像和运行镜像
root@localhost:~# docker images | grep v0.1
tomcat-web    v0.1      44cc0a526733   4 minutes ago   489MB

root@localhost:~# docker ps
CONTAINER ID   IMAGE             COMMAND                  CREATED         STATUS         PORTS                                                 NAMES
ecd318a16bcd   tomcat-web:v0.1   "/bin/bash /root/ent…"   4 minutes ago   Up 4 minutes   8081/tcp, 0.0.0.0:8081->8080/tcp, :::8081->8080/tcp   tomcat-web
4.4、测试访问


 浙公网安备 33010602011771号