概要
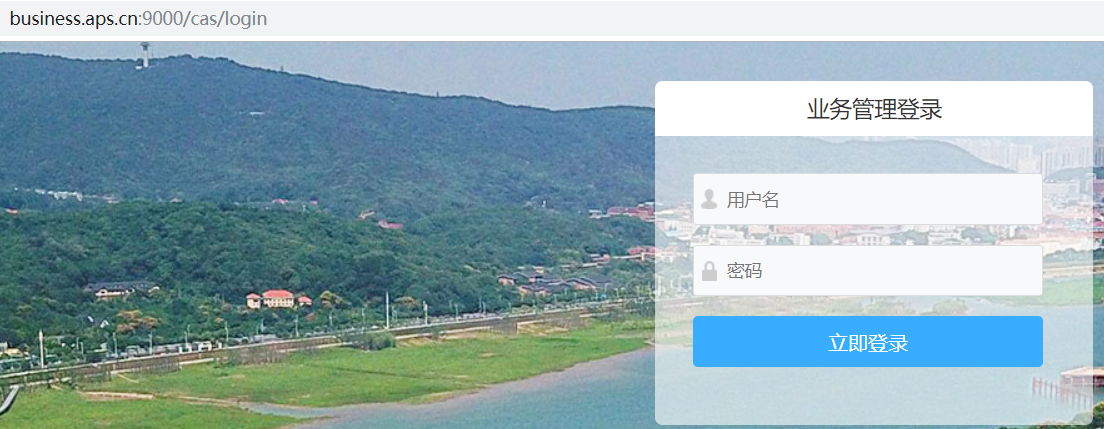
在实际需求中,客户想通过不同的域名显示不同的登录界面,比如输入 manage.aps.cn 显示运维管理登录,business.aps.cn 显示业务管理登录。
实现方法
1.准备两套登录UI
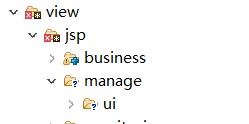
在cas目录 WEB-INF/view/jsp目录下整两份UI。

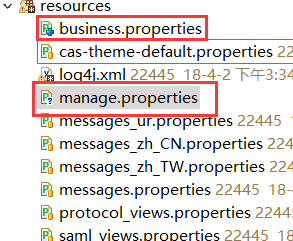
增加两个属性文件,这些属性文件和UI有关系。

查看一下 business.properties

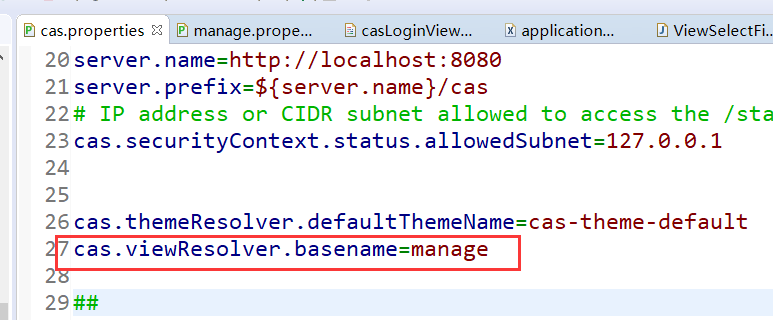
cas 默认显示界面是在cas.properties 文件中配置,配置完成后,不能再变更了,因此需要能够实现切换UI。

2.代码实现
我的思路是通过根据域名动态改变 这个basename。在过滤器中获取域名,并动态改变basename。
实现方式在过滤器中,判断当前的访问域名,判定需要访问哪个UI并进行切换。
修改源码:
org.springframework.web.servlet.view.ResourceBundleViewResolver,
这个代码原本是不能实现UI切换的。
package org.springframework.web.servlet.view;

import java.util.HashMap;
import java.util.LinkedList;
import java.util.List;
import java.util.Locale;
import java.util.Map;
import java.util.MissingResourceException;
import java.util.ResourceBundle;
import org.springframework.beans.BeansException;
import org.springframework.beans.factory.BeanFactory;
import org.springframework.beans.factory.DisposableBean;
import org.springframework.beans.factory.InitializingBean;
import org.springframework.beans.factory.NoSuchBeanDefinitionException;
import org.springframework.beans.factory.support.PropertiesBeanDefinitionReader;
import org.springframework.context.ConfigurableApplicationContext;
import org.springframework.core.Ordered;
import org.springframework.web.context.support.GenericWebApplicationContext;
import org.springframework.web.servlet.View;

public class ResourceBundleViewResolver extends AbstractCachingViewResolver
  implements Ordered, InitializingBean, DisposableBean
{
  public static final String DEFAULT_BASENAME = "views";
  private int order = 2147483647;

  private  ThreadLocal<String>  baseNameLocal= new ThreadLocal<>();

  private ClassLoader bundleClassLoader = Thread.currentThread().getContextClassLoader();
  private String defaultParentView;
  private Locale[] localesToInitialize;
  private final Map<Locale, BeanFactory> localeCache = new HashMap();

  private final Map<List<ResourceBundle>, ConfigurableApplicationContext> bundleCache = new HashMap();

  public void setOrder(int order)
  {
    this.order = order;

  }

  public int getOrder() {
    return this.order;
  }

  public void setBasename(String basename)
  {
    this.baseNameLocal.set(basename);
  }


  public void setBundleClassLoader(ClassLoader classLoader)
  {
    this.bundleClassLoader = classLoader;
  }

  protected ClassLoader getBundleClassLoader()
  {
    return this.bundleClassLoader;
  }

  public void setDefaultParentView(String defaultParentView)
  {
    this.defaultParentView = defaultParentView;
  }

  public void setLocalesToInitialize(Locale[] localesToInitialize)
  {
    this.localesToInitialize = localesToInitialize;
  }

  public void afterPropertiesSet()
    throws BeansException
  {
    if (this.localesToInitialize != null)
      for (Locale locale : this.localesToInitialize)
        initFactory(locale);
  }

  protected View loadView(String viewName, Locale locale)
    throws Exception
  {
    BeanFactory factory = initFactory(locale);
    try {
      return (View)factory.getBean(viewName, View.class);
    }
    catch (NoSuchBeanDefinitionException ex) {
    }
    return null;
  }

  protected synchronized BeanFactory initFactory(Locale locale)
    throws BeansException
  {

    List<ResourceBundle> bundles = new LinkedList();

    String baseName="manage";

    if(this.baseNameLocal.get()!=null){
        baseName=this.baseNameLocal.get();
    }

    ResourceBundle bundle = getBundle(baseName, locale);
    bundles.add(bundle);

    GenericWebApplicationContext factory = new GenericWebApplicationContext();
    factory.setParent(getApplicationContext());
    factory.setServletContext(getServletContext());

    PropertiesBeanDefinitionReader reader = new PropertiesBeanDefinitionReader(factory);
    reader.setDefaultParentBean(this.defaultParentView);
    reader.registerBeanDefinitions(bundle);

    factory.refresh();


    return factory;
  }

  protected ResourceBundle getBundle(String basename, Locale locale)
    throws MissingResourceException
  {
    return ResourceBundle.getBundle(basename, locale, getBundleClassLoader());
  }

  public void destroy()
    throws BeansException
  {
    for (ConfigurableApplicationContext factory : this.bundleCache.values()) {
      factory.close();
    }
    this.localeCache.clear();
    this.bundleCache.clear();
  }
}
增加一个过滤器,根据域名修改 页面视图目录。
package com.redxun.cas;

import java.io.IOException;

import javax.servlet.Filter;
import javax.servlet.FilterChain;
import javax.servlet.FilterConfig;
import javax.servlet.ServletException;
import javax.servlet.ServletRequest;
import javax.servlet.ServletResponse;
import javax.servlet.http.HttpServletRequest;

import org.springframework.web.servlet.view.ResourceBundleViewResolver;

public class ViewSelectFilter implements Filter{

    @Override
    public void destroy() {

    }


    @Override
    public void doFilter(ServletRequest req, ServletResponse res, FilterChain chain)
            throws IOException, ServletException {
        HttpServletRequest request=(HttpServletRequest)req;
        ResourceBundleViewResolver resolver=(ResourceBundleViewResolver) SpringContextHolder.getBean("viewResolver");
        String serverName=request.getServerName();
        String pre=serverName.substring(0,serverName.indexOf("."));
        resolver.setBasename(pre);

        chain.doFilter(req, res);
    }

    @Override
    public void init(FilterConfig arg0) throws ServletException {

    }

}
修改 cas-servlet.xml配置。
<bean id="viewResolver"  class="org.springframework.web.servlet.view.ResourceBundleViewResolver"
        p:order="0">
    <property name="basename" value="${cas.viewResolver.basename}" />
    <property name="cache" value="false"></property>
  </bean>
配置过滤器
<filter>
       <filter-name>ViewSelectFilter</filter-name>
       <filter-class>com.redxun.cas.ViewSelectFilter</filter-class>
   </filter>

  <filter-mapping>
        <filter-name>ViewSelectFilter</filter-name>
        <url-pattern>/*</url-pattern>
    </filter-mapping>
测试效果
在host添加域名映射
192.168.1.77 manage.aps.cn
192.168.1.77 business.aps.cn
测试效果如下:
访问:manage.aps.cn

business.aps.cn

另外一个知识点,我们在过滤器中需要获取,spring mvc的上下文。
我们需要实现一个获取上下文的类。实现接口:ApplicationContextAware
package com.redxun.cas;

import org.springframework.beans.BeansException;
import org.springframework.context.ApplicationContext;
import org.springframework.context.ApplicationContextAware;

public class SpringContextHolder implements ApplicationContextAware {
    private static ApplicationContext _ctx;

    @Override
    public void setApplicationContext(ApplicationContext ctx) throws BeansException {
        _ctx=ctx;
    }
    public static Object getBean(String beanId){
        return _ctx.getBean(beanId);
    }
    public static Object getBean(Class cls){
        return _ctx.getBean(cls);
    }
}
这里配置也是有要求的需要配置 cas-servlet.xml配置文件中。
配置如下:
<bean id="springContextHolder" class="com.redxun.cas.SpringContextHolder"></bean>


【推荐】国内首个AI IDE,深度理解中文开发场景,立即下载体验Trae
【推荐】编程新体验,更懂你的AI,立即体验豆包MarsCode编程助手
【推荐】抖音旗下AI助手豆包,你的智能百科全书,全免费不限次数
【推荐】轻量又高性能的 SSH 工具 IShell:AI 加持,快人一步
· AI与.NET技术实操系列:向量存储与相似性搜索在 .NET 中的实现
· 基于Microsoft.Extensions.AI核心库实现RAG应用
· Linux系列:如何用heaptrack跟踪.NET程序的非托管内存泄露
· 开发者必知的日志记录最佳实践
· SQL Server 2025 AI相关能力初探
· winform 绘制太阳,地球,月球 运作规律
· 震惊!C++程序真的从main开始吗?99%的程序员都答错了
· 【硬核科普】Trae如何「偷看」你的代码?零基础破解AI编程运行原理
· AI与.NET技术实操系列(五):向量存储与相似性搜索在 .NET 中的实现
· 超详细:普通电脑也行Windows部署deepseek R1训练数据并当服务器共享给他人