
SpringBoot+Mybatis+PostMan(八):用户角色权限访问控制一
Springboot+Mybatis+redis+postman项目实战总目录*
第二篇章:用户角色权限访问控制
SpringBoot+Mybatis+PostMan(九):用户角色权限访问控制二(加入资源表和资源角色对应表)
SpringBoot+Mybatis+PostMan(十):用户角色权限访问控制三(禁用session、启用token并集成redis)
继上一篇用户角色控制入门文章后,我们现在在上一个篇章项目的基础上继续实现连接数据库类型的用户角色控制。和往常一样,我们先实现一把准备工作。
项目代码获取地址:https://github.com/yeyuting-1314/testdemo_roleControll.git
一、准备工作
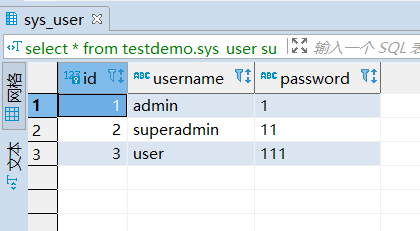
1. 首先新建用户角色表和用户角色关联表:
CREATE TABLE testdemo.`sys_role` (
    `id` bigint NOT NULL AUTO_INCREMENT comment '角色ID ',
    `role_name` varchar(50) comment '角色名',
    `role` varchar(50) comment '角色',
    PRIMARY KEY (`id`)
);
ALTER table testdemo.`sys_role` comment '角色表'

CREATE TABLE testdemo.`sys_user_role` (
    `user_id` bigint default null comment '用户id ',
    `role_id` bigint default null comment '角色id'
);
ALTER table testdemo.`sys_role` comment '用户角色关联表'
插入相应数据,如下所示:
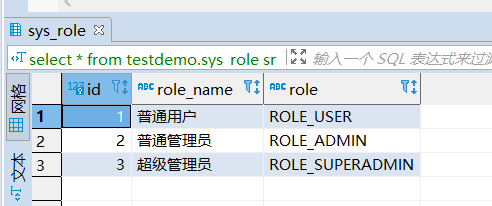

值得注意的是,这里role表中role列名字都是以"ROLE_"开头,这是因为在角色控制中,在匹配用户角色的时候,WebSecurityConfigurerAdapter识别要求是ROLE_开头,所以在后面查找到相应角色进行权限控制时,需要ROLE_开头。
2. 新建相应实体类:
Role类:
/**
 * @author yeyuting
 * @create 2021/1/20
 */
@TableName("sys_role")
public class Role {

    // 可以看出来这个角色类十分的简单,除了 id 只有角色和角色名
    // 在 Spring Security 中,默认使用以简单的字符串形式来表示角色,
    // 所以我们只需要提供一个 String 类型的字段用来表示角色即可
    // 需要注意的是在 Spring Security 中角色字符串表示需要以 “ROLE_” 前缀开头(例如:ROLE_ADMIN)

    int id ;

    // 角色的中文名
    String roleName ;
    // 角色的字符串表示
    String role ;

    public int getId() {
        return id;
    }

    public void setId(int id) {
        this.id = id;
    }

    public String getRoleName() {
        return roleName;
    }

    public void setRoleName(String roleName) {
        this.roleName = roleName;
    }

    public String getRole() {
        return role;
    }

    public void setRole(String role) {
        this.role = role;
    }
}
UserRole类:
/**
 * @author yeyuting
 * @create 2021/1/20
 */
public class UserRole {
    int userId ;
    int roleId ;

    public int getUserId() {
        return userId;
    }

    public void setUserId(int userId) {
        this.userId = userId;
    }

    public int getRoleId() {
        return roleId;
    }

    public void setRoleId(int roleId) {
        this.roleId = roleId;
    }
}
二、接下来开始正餐
3. 对权限访问进行配置:
/**
 * @author yeyuting
 * @create 2021/1/21
 */
@Configuration
@EnableWebSecurity
public class SecurityConfiguration extends WebSecurityConfigurerAdapter {


    @Autowired
    private UserDetailsService userDetailsService;

    @Bean
    public PasswordEncoder passwordEncoder() {
        return new BCryptPasswordEncoder();
    }


    @Override
    public void configure(WebSecurity web) throws Exception {
        super.configure(web);
    }

    @Override
    public void configure(AuthenticationManagerBuilder auth) throws Exception {
        auth.userDetailsService(userDetailsService)
                .passwordEncoder(passwordEncoder());//passwoldEncoder是对密码的加密处理,如果user中密码没有加密,则可以不加此方法。注意加密请使用security自带的加密方式。
    }

    @Override
    protected void configure(HttpSecurity http) throws Exception {
        http.csrf().disable()//禁用了 csrf 功能
                .authorizeRequests()//限定签名成功的请求
                .antMatchers("/user/**","/admin/**" , "superAdmin/**").hasAnyRole("USER","ADMIN","SUPERADMIN")//对decision和govern 下的接口 需要 USER 或者 ADMIN 权限
                .antMatchers("/user/**").permitAll()///employee/login 不限定
                .antMatchers("/admin/**").hasAnyRole("ADMIN" ,"SUPERADMIN" )//对admin下的接口 需要ADMIN权限
                .antMatchers("superAdmin/**" ).hasRole("SUPERADMIN")

                .anyRequest().permitAll()//其他没有限定的请求,允许访问
                .and().anonymous()//对于没有配置权限的其他请求允许匿名访问
                .and().formLogin()//使用 spring security 默认登录页面
                .and().httpBasic();//启用http 基础验证

    }

}
4.roleMapper.xml实现角色查询:
<?xml version="1.0" encoding="utf-8" ?>
<!DOCTYPE mapper PUBLIC "-//mybatis.org//DTD Mapper 3.0//EN" "http://mybatis.org/dtd/mybatis-3-mapper.dtd" >
<mapper namespace="testdemo.system.dao.RoleMapper">
    <resultMap id="RoleMap" type="testdemo.system.dto.Role">

        <result property="id" column="id"/>
        <result property="role_name" column="roleName"/>
        <result property="role" column="role"/>

    </resultMap>

    <select id="selectOne1" resultMap="RoleMap">
        select * from sys_role where id = #{id}
    </select>

</mapper>
5. userRoleMapper.xml实现用户对应角色id查询
<?xml version="1.0" encoding="utf-8" ?>
<!DOCTYPE mapper PUBLIC "-//mybatis.org//DTD Mapper 3.0//EN" "http://mybatis.org/dtd/mybatis-3-mapper.dtd" >
<mapper namespace="testdemo.system.dao.UserRoleMapper">
    <resultMap id="UserRoleMap" type="testdemo.system.dto.UserRole">

        <result property="userId" column="user_id"/>
        <result property="roleId" column="role_id"/>

    </resultMap>

    <select id="selectList" resultMap="UserRoleMap">
        select * from sys_user_role where user_id = #{userId}
    </select>

</mapper>
6. RoleMapper.java方法:
/**
 * @author yeyuting
 * @create 2021/1/21
 */
@Repository
@Mapper
public interface RoleMapper{

    public Role selectOne1(int id);

}
7. UserRoleMapper.java方法:
**
 * @author yeyuting
 * @create 2021/1/21
 */
@Repository
@Mapper
public interface UserRoleMapper {
    public List<UserRole> selectList(int id);

}
8. 接下来实现前端数据传递并判断用户角色,并进行权限控制:
@Service
public class UserServiceImpl implements UserService ,UserDetailsService {
    @Autowired
    UserMapper userMapper ;

    @Autowired
    TokenUtil tokenUtil ;

    @Autowired
    JedisUtil jedisUtil ;

    @Autowired
    RoleMapper roleMapper ;

    @Autowired
    UserRoleMapper userRoleMapper ;

   //其他代码--------------------------------------------------


    @Override
    /*
    * /*
     * 用户在登录时 Spring Security 会通过 UserDetailsService.loadUserByUsername() 方法获取登录的用户的详细信息,
     * 然后会将用户的数据封装进 UserDetails 对象中,因此这里需要实现UserDetailsService接口,并重写loadUserByUsername方法
    * */
    public UserDetails loadUserByUsername(String username) throws UsernameNotFoundException {
        //角色和权限共用GrantedAuthority接口,后面采集到的角色信息将存储到grantedAuthorities集合中
        List<GrantedAuthority> grantedAuthorities = new ArrayList<>();
        //将前端传过来的username信息传入数据库比对,将匹配的用户信息存入user对象
        User user = userMapper.selectByName1(username) ;

        if (user == null){
            throw new UsernameNotFoundException("用户不存在");
        }
        //根据用户id进入user_role表中查询对应的角色id,存储到userRoles列表中
        List<UserRole> userRoles = userRoleMapper.selectList(user.getId()) ;
        //遍历userRoles集合
        for (UserRole ur : userRoles){
            //再根据用户id查到对应的role,此时就拿到了用户对应的角色
            Role role = roleMapper.selectOne1(ur.getRoleId());
            //将对应的角色存储到权限grantedAuthorities集合中
            GrantedAuthority grantedAuthority = new SimpleGrantedAuthority(role.getRole());
            grantedAuthorities.add(grantedAuthority);

        }
        //测试数据
        String naem = user.getUserName() ;
        //创建一个用户,用于判断权限,请注意此用户名和方法参数中的username一致;BCryptPasswordEncoder是用来演示加密使用。
        //            //这里主要是实现用户名和密码的核对,如果信息都正确才给开这个权限,这是一种安全策略
        return new org.springframework.security.core.userdetails.User("user", new BCryptPasswordEncoder().encode(user.getPassword()), grantedAuthorities);


    }


}
9. 接下来就是控制层UserController层实现了:
 @GetMapping("/admin/greeting")
    public String adminGreeting() {
        return "Hello,World!admin";
    }

    @GetMapping("/admin/login")
    public String adminLogin() {
        return "login!admin";
    }

    @GetMapping("/user/greeting")
    public String userGreeting() {
        return "Hello,World ! user";
    }

    @GetMapping("/user/login")
    public String userLogin() {
        return "login ! user";
    }

    @GetMapping("/superAdmin/greeting")
    public String superAdminGreeting() {
        return "Hello,World ! superAdmin";
    }

    @GetMapping("/superAdmin/login")
    public String superAdminLogin() {
        return "login ! superAdmin";
    }
三、代码编写完毕,接下来对前端传进来的角色进行查询和控制;
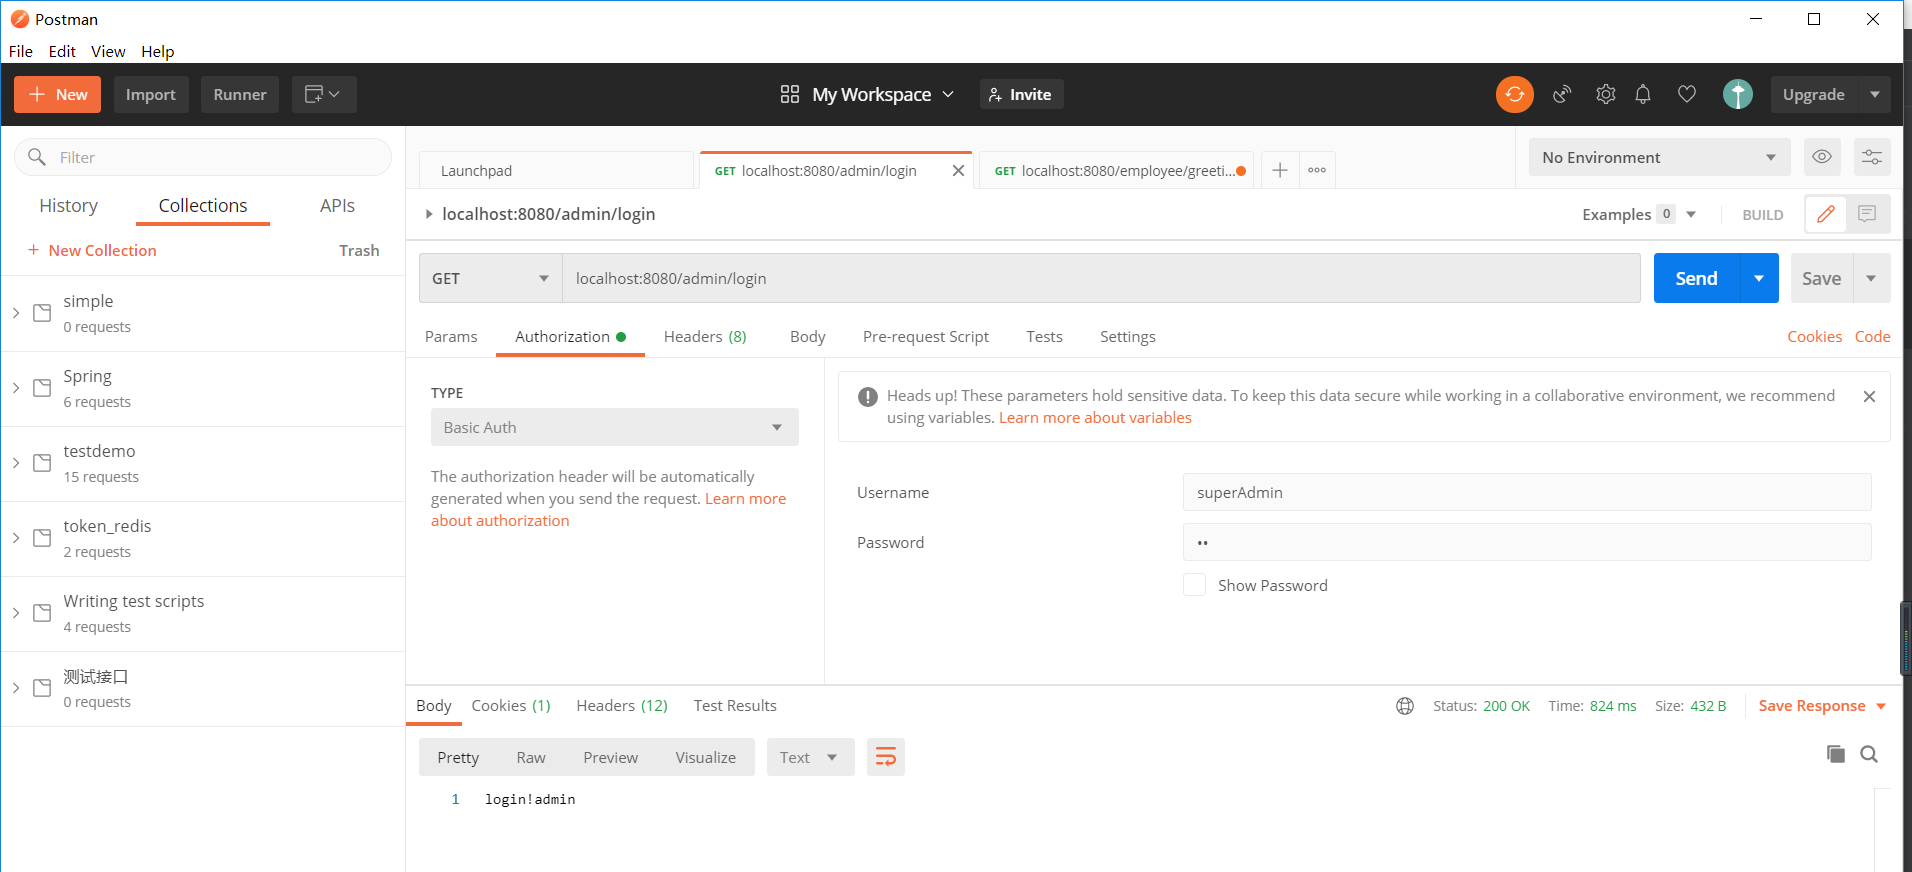
1. 超级管理员访问,可访问所有界面:
2. 管理员访问,可以访问admin和user页面
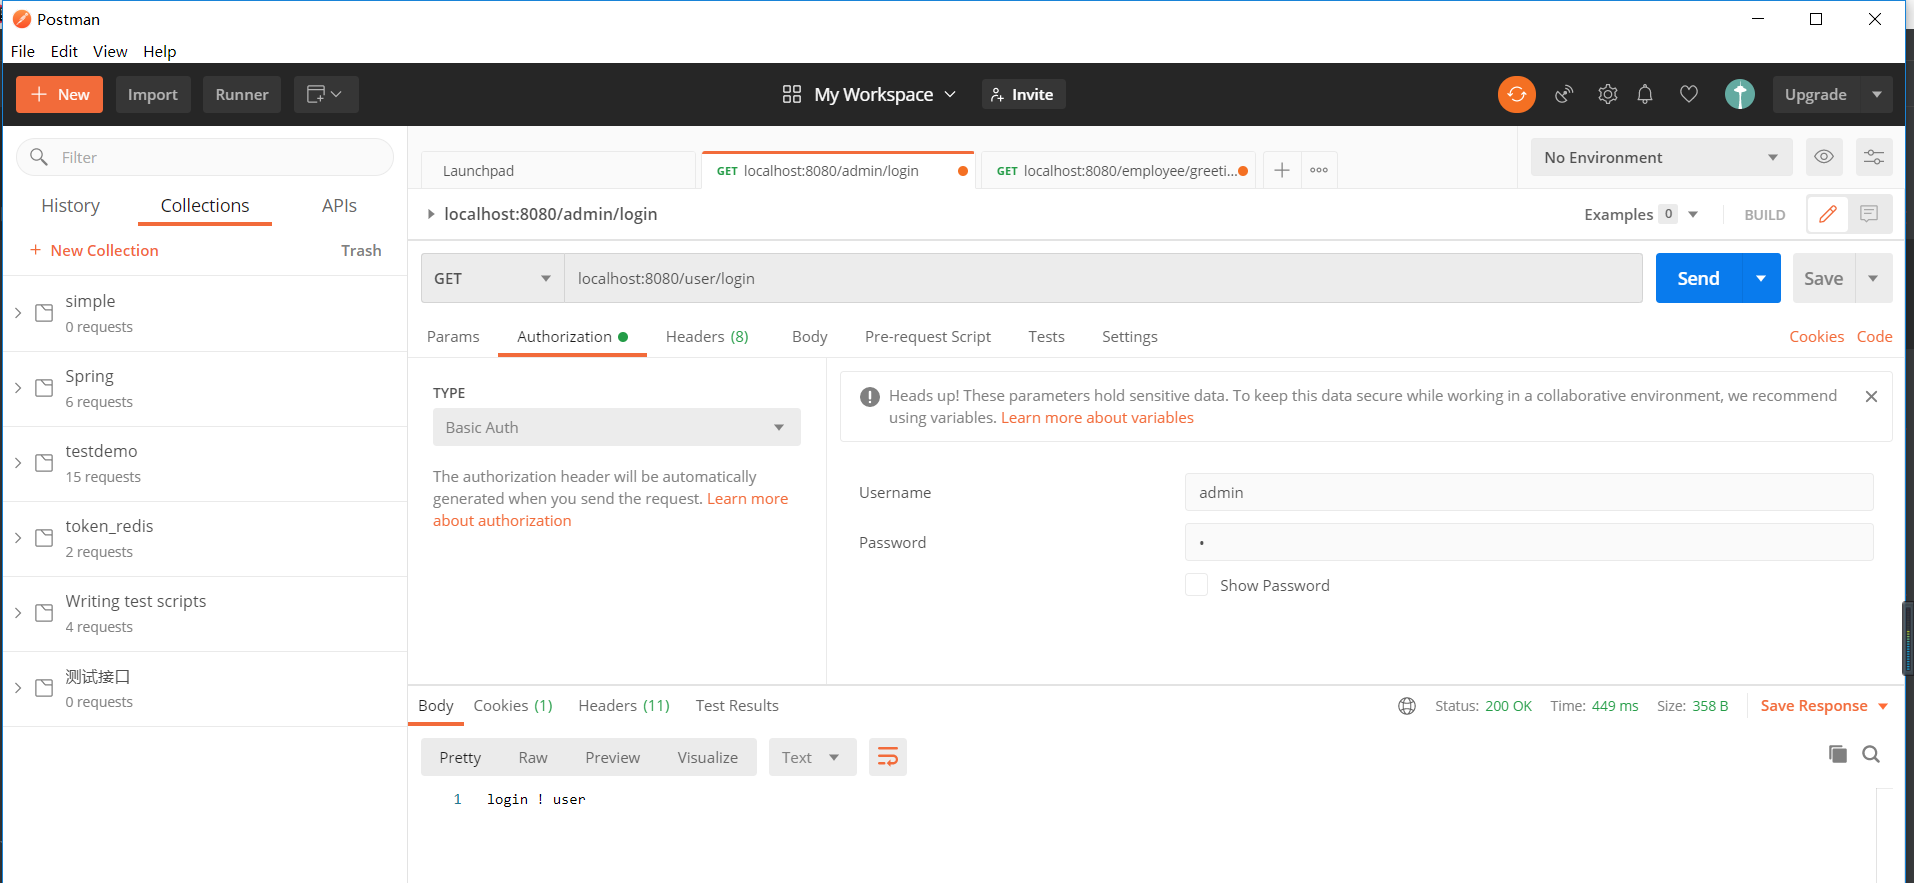
3. user也main可以任意访问。
这样一来,用户角色权限控制就介绍完了,我们后面回陆续对数据库查询进行优化,以及后面还会将相应访问接口存储如数据库,通过数据库访问的形式获取到对应角色对应权限,实现数据库的高效利用,持续更新中..............
至此,结束。

 浙公网安备 33010602011771号