
SpringBoot 集成Shiro
Shiro的由来?
对于一个真正为其存在提供良好案例的框架,以及因此您使用它的理由,它应该满足其他替代方案无法满足的需求。为了理解这一点,我们需要了解Shiro的历史以及创建时的替代方案。
在2008年进入Apache软件基金会之前,Shiro已经有5年的历史,之前被称为JSecurity项目,该项目始于2003年初。2003年,Java应用程序开发人员的通用安全替代方案并不多 - Java认证和授权服务,也称为JAAS。JAAS存在许多缺点 - 虽然其身份验证功能在某种程度上是可以容忍的,但授权方面使用起来很麻烦且令人沮丧。此外,JAAS严重依赖于虚拟机级安全性问题,例如,确定是否应允许在JVM中加载类。作为一名应用程序开发人员,我更关心应用程序最终用户可以做什么,而不是我的代码可以在JVM中做什么。
由于我当时正在使用的应用程序,我还需要访问一个干净的,与容器无关的会话机制。当时游戏中唯一的会话选择是HttpSessions,它需要一个Web容器,或EBJ 2.1 Stateful Session Beans,它需要一个EJB容器。我需要一些可以与容器分离的东西,可以在我选择的任何环境中使用。
最后,存在加密问题。有时候我们都需要保证数据安全,但除非你是加密专家,否则Java密码体系结构很难理解。API充满了检查异常,并且使用起来很麻烦。我希望有一个更清洁的开箱即用的解决方案,可以根据需要轻松加密和解密数据。
因此,从2003年初的安全状况来看,您可以很快意识到在单一,有凝聚力的框架中没有任何东西可以满足所有这些要求。正因为如此,JSecurity,以及后来的Apache Shiro诞生了。
什么是 Shiro?
Apache Shiro是一个功能强大且易于使用的Java安全框架,可执行身份验证,授权,加密和会话管理,并可用于保护任何应用程序 - 从命令行应用程序,移动应用程序到最大的Web和企业应用程序。
Shiro的特性?
Authentication(认证), Authorization(授权), Session Management(会话管理), Cryptography(加密)被 Shiro 框架的开发团队称之为应用安全的四大基石。
Authentication(认证):用户身份识别,通常被称为用户“登录”。
Authorization(授权):访问控制。比如某个用户是否具有某个操作的使用权限。
Session Management(会话管理):特定于用户的会话管理,甚至在非web 或 EJB 应用程序。
Cryptography(加密):在对数据源使用加密算法加密的同时,保证易于使用。y
表结构
user_info 用户表
sys_user_role 用户角色关联表 (一对多的关系,一个角色对应多个用户)
sys_permission 权限表
sys_role_permission 角色权限关联表 (多对多关系)
sys_role 角色表
SpringBoot 及集成Shiro开始搭建
pom文件
-
<dependencies>
-
<dependency>
-
<groupId>org.springframework.boot</groupId>
-
<artifactId>spring-boot-starter-data-jpa</artifactId>
-
</dependency>
-
<dependency>
-
<groupId>org.springframework.boot</groupId>
-
<artifactId>spring-boot-starter-thymeleaf</artifactId>
-
</dependency>
-
<dependency>
-
<groupId>net.sourceforge.nekohtml</groupId>
-
<artifactId>nekohtml</artifactId>
-
<version>1.9.22</version>
-
</dependency>
-
<dependency>
-
<groupId>org.springframework.boot</groupId>
-
<artifactId>spring-boot-starter-web</artifactId>
-
</dependency>
-
-
<!-- shiro 关键包-->
-
<dependency>
-
<groupId>org.apache.shiro</groupId>
-
<artifactId>shiro-spring</artifactId>
-
<version>1.4.0</version>
-
</dependency>
-
<dependency>
-
<groupId>mysql</groupId>
-
<artifactId>mysql-connector-java</artifactId>
-
<scope>runtime</scope>
-
</dependency>
-
</dependencies>
配置文件
-
spring.datasource.url=jdbc:mysql://localhost:3306/test?serverTimezone=UTC&useUnicode=true&characterEncoding=utf-8
-
spring.datasource.username=root
-
spring.datasource.password=root
-
spring.datasource.driver-class-name=com.mysql.jdbc.Driver
-
-
spring.jpa.properties.hibernate.hbm2ddl.auto=update
-
spring.jpa.properties.hibernate.dialect=org.hibernate.dialect.MySQL5InnoDBDialect
-
spring.jpa.show-sql= true
-
spring.thymeleaf.cache=false
实体类
用户类
-
-
public class UserInfo implements Serializable {
-
-
-
private Integer uid;
-
-
private String username;//帐号
-
private String name;//名称(昵称或者真实姓名,不同系统不同定义)
-
private String password; //密码;
-
private String salt;//加密密码的盐
-
private byte state;//用户状态,0:创建未认证(比如没有激活,没有输入验证码等等)--等待验证的用户 , 1:正常状态,2:用户被锁定.
-
-
-
private List<SysRole> roleList;// 一个用户具有多个角色
-
// 省略setget方法
-
-
}
角色类
-
-
public class SysRole {
-
-
private Integer id; // 编号
-
private String role; // 角色标识程序中判断使用,如"admin",这个是唯一的:
-
private String description; // 角色描述,UI界面显示使用
-
private Boolean available = Boolean.FALSE; // 是否可用,如果不可用将不会添加给用户
-
-
//角色 -- 权限关系:多对多关系;
-
-
-
private List<SysPermission> permissions;
-
-
// 用户 - 角色关系定义;
-
-
-
private List<UserInfo> userInfos;// 一个角色对应多个用户
-
// 省略setget方法
-
}
权限类
-
-
public class SysPermission implements Serializable {
-
-
private Integer id;//主键.
-
private String name;//名称.
-
-
private String resourceType;//资源类型,[menu|button]
-
private String url;//资源路径.
-
private String permission; //权限字符串,menu例子:role:*,button例子:role:create,role:update,role:delete,role:view
-
private Long parentId; //父编号
-
private String parentIds; //父编号列表
-
private Boolean available = Boolean.FALSE;
-
-
-
private List<SysRole> roles;
-
}
根据以上的代码会自动生成user_info(用户信息表)、sys_role(角色表)、sys_permission(权限表)、sys_user_role(用户角色表)、sys_role_permission(角色权限表)这五张表,为了方便测试我们给这五张表插入一些初始化数据:
-
INSERT INTO `user_info` (`uid`,`username`,`name`,`password`,`salt`,`state`) VALUES ('1', 'admin', '管理员', '9c77d6384a1d8a1cc581424e6f0e82d8','root30ea1b94d889ccadeb9f89af63317de2', 0);
-
INSERT INTO `sys_permission` (`id`,`available`,`name`,`parent_id`,`parent_ids`,`permission`,`resource_type`,`url`) VALUES (1,0,'用户管理',0,'0/','userInfo:view','menu','userInfo/userList');
-
INSERT INTO `sys_permission` (`id`,`available`,`name`,`parent_id`,`parent_ids`,`permission`,`resource_type`,`url`) VALUES (2,0,'用户添加',1,'0/1','userInfo:add','button','userInfo/userAdd');
-
INSERT INTO `sys_permission` (`id`,`available`,`name`,`parent_id`,`parent_ids`,`permission`,`resource_type`,`url`) VALUES (3,0,'用户删除',1,'0/1','userInfo:del','button','userInfo/userDel');
-
INSERT INTO `sys_role` (`id`,`available`,`description`,`role`) VALUES (1,0,'管理员','admin');
-
INSERT INTO `sys_role` (`id`,`available`,`description`,`role`) VALUES (2,0,'VIP会员','vip');
-
INSERT INTO `sys_role` (`id`,`available`,`description`,`role`) VALUES (3,1,'test','test');
-
INSERT INTO `sys_role_permission` VALUES ('1', '1');
-
INSERT INTO `sys_role_permission` (`permission_id`,`role_id`) VALUES (1,1);
-
INSERT INTO `sys_role_permission` (`permission_id`,`role_id`) VALUES (2,1);
-
INSERT INTO `sys_role_permission` (`permission_id`,`role_id`) VALUES (3,2);
-
INSERT INTO `sys_user_role` (`role_id`,`uid`) VALUES (1,1);
首先要配置的是ShiroConfig类,Apache Shiro 核心通过 Filter 来实现,就好像SpringMvc 通过DispachServlet 来主控制一样。
类介绍:
ShiroFilterFactoryBean:是个拦截器,在请求进入控制层前将其拦截,需要将安全管理器SecurityManager注入其中。
SecurityManager:安全管理器,需要将自定义realm注入其中,以后还可以将缓存、remeberme等注入其中
-
public interface AuthenticationToken extends Serializable {
-
-
Object getPrincipal();
-
-
Object getCredentials();
-
}
AuthenticationToken :
上面定义了接口源码,主要是两个接口,一个是获取委托人信息,一个是获取证明,常用的是用户名和密码的组合。
-
-
public class ShiroConfig {
-
-
public ShiroFilterFactoryBean shirFilter(SecurityManager securityManager) {
-
System.out.println("ShiroConfiguration.shirFilter()");
-
ShiroFilterFactoryBean shiroFilterFactoryBean = new ShiroFilterFactoryBean();
-
shiroFilterFactoryBean.setSecurityManager(securityManager);
-
//拦截器.
-
Map<String,String> filterChainDefinitionMap = new LinkedHashMap<String,String>();
-
// 配置不会被拦截的链接 顺序判断
-
filterChainDefinitionMap.put("/static/**", "anon");
-
//配置退出 过滤器,其中的具体的退出代码Shiro已经替我们实现了
-
filterChainDefinitionMap.put("/logout", "logout");
-
//<!-- 过滤链定义,从上向下顺序执行,一般将/**放在最为下边 -->:这是一个坑呢,一不小心代码就不好使了;
-
//<!-- authc:所有url都必须认证通过才可以访问; anon:所有url都都可以匿名访问-->
-
filterChainDefinitionMap.put("/**", "authc");
-
// 如果不设置默认会自动寻找Web工程根目录下的"/login.jsp"页面
-
shiroFilterFactoryBean.setLoginUrl("/login");
-
// 登录成功后要跳转的链接
-
shiroFilterFactoryBean.setSuccessUrl("/index");
-
-
//未授权界面;
-
shiroFilterFactoryBean.setUnauthorizedUrl("/403");
-
shiroFilterFactoryBean.setFilterChainDefinitionMap(filterChainDefinitionMap);
-
return shiroFilterFactoryBean;
-
}
-
-
-
public MyShiroRealm myShiroRealm(){
-
MyShiroRealm myShiroRealm = new MyShiroRealm();
-
return myShiroRealm;
-
}
-
-
-
-
public SecurityManager securityManager(){
-
DefaultWebSecurityManager securityManager = new DefaultWebSecurityManager();
-
securityManager.setRealm(myShiroRealm());
-
return securityManager;
-
}
-
}
自定义realm
MyShiroRealm继承 AuthorizingRealm,重写doGetAuthorizationInfo授权方法,和doGetAuthenticationInfo认证方法
-
package com.example.config;
-
-
import com.example.entity.SysPermission;
-
import com.example.entity.SysRole;
-
import com.example.entity.UserInfo;
-
import com.example.service.UserInfoService;
-
import org.apache.shiro.SecurityUtils;
-
import org.apache.shiro.authc.*;
-
import org.apache.shiro.authz.AuthorizationInfo;
-
import org.apache.shiro.authz.SimpleAuthorizationInfo;
-
import org.apache.shiro.realm.AuthorizingRealm;
-
import org.apache.shiro.subject.PrincipalCollection;
-
import org.apache.shiro.util.ByteSource;
-
-
import javax.annotation.Resource;
-
-
/**
-
* @ProjectName: springboot-shiro
-
* @Package: com.example.config
-
* @ClassName: MyShiroRealm
-
* @Description:
-
* @Author: Ni Shichao
-
* @Version: 1.0
-
*/
-
public class MyShiroRealm extends AuthorizingRealm {
-
-
private UserInfoService userInfoService;
-
-
protected AuthorizationInfo doGetAuthorizationInfo(PrincipalCollection principals) {
-
System.out.println("权限配置-->MyShiroRealm.doGetAuthorizationInfo()");
-
SimpleAuthorizationInfo authorizationInfo = new SimpleAuthorizationInfo();
-
UserInfo userInfo = (UserInfo)principals.getPrimaryPrincipal();
-
for(SysRole role:userInfo.getRoleList()){
-
authorizationInfo.addRole(role.getRole());
-
for(SysPermission p:role.getPermissions()){
-
authorizationInfo.addStringPermission(p.getPermission());
-
}
-
}
-
return authorizationInfo;
-
}
-
-
/*主要是用来进行身份认证的,也就是说验证用户输入的账号和密码是否正确。*/
-
-
protected AuthenticationInfo doGetAuthenticationInfo(AuthenticationToken token)
-
throws AuthenticationException {
-
System.out.println("MyShiroRealm.doGetAuthenticationInfo()");
-
// 获取用户的输入的账号.
-
String username = (String)token.getPrincipal();
-
// 获取用户的输入的密码
-
System.out.println(token.getCredentials());
-
//通过username从数据库中查找 User对象,如果找到,没找到.
-
//实际项目中,这里可以根据实际情况做缓存,如果不做,Shiro自己也是有时间间隔机制,2分钟内不会重复执行该方法
-
UserInfo userInfo = userInfoService.findByUsername(username);
-
System.out.println("----->>userInfo="+userInfo);
-
if(userInfo == null){
-
return null;
-
}
-
-
// 进行认证,将正确数据给shiro处理
-
// 密码不用自己比对,AuthenticationInfo认证信息对象,一个接口,new他的实现类对象SimpleAuthenticationInfo
-
/* 第一个参数随便放,可以放user对象,程序可在任意位置获取 放入的对象
-
* 第二个参数必须放密码,
-
* 第三个参数放 当前realm的名字,因为可能有多个realm*/
-
SimpleAuthenticationInfo authenticationInfo = new SimpleAuthenticationInfo(
-
userInfo, //用户名
-
userInfo.getPassword(), //密码
-
ByteSource.Util.bytes(userInfo.getSalt()),
-
getName() //realm name
-
);
-
//清除之前的授权信息
-
super.clearCachedAuthorizationInfo(authenticationInfo.getPrincipals());
-
// 存入用户对象
-
SecurityUtils.getSubject().getSession().setAttribute("login", userInfo);
-
// 返回给安全管理器,securityManager,由securityManager比对数据库查询出的密码和页面提交的密码
-
// 如果有问题,向上抛异常,一直抛到控制器
-
return authenticationInfo;
-
}
-
-
}
AuthenticationToken 说明
-
public interface AuthenticationToken extends Serializable {
-
-
Object getPrincipal();
-
-
Object getCredentials();
-
-
}
上面定义了接口源码,主要是两个接口,一个是获取委托人信息,一个是获取证明,常用的是用户名和密码的组合。
这里AuthenticationToken只提供接口,一般我们的实体类包含了get/set方法,但是这里抽出了get方法,方便用户自己扩展所需要的实现。
其中扩展接口HostAuthenticationToken提供了获取用户客户host的功能,源代码如下:
-
public interface HostAuthenticationToken extends AuthenticationToken {
-
String getHost();
-
}
RememberMeAuthenticationToken提供了记住用户的标识:
-
public interface RememberMeAuthenticationToken extends AuthenticationToken {
-
-
boolean isRememberMe();
-
-
}
Controller类说明
登录过程其实只是处理异常的相关信息,具体的登录验证交给shiro来处理
-
-
public class HomeController {
-
-
-
public String index(){
-
return"/index";
-
}
-
-
-
-
public String login(HttpServletRequest request, Map<String, Object> map) throws Exception{
-
System.out.println("HomeController.login()");
-
// 登录失败从request中获取shiro处理的异常信息。
-
// shiroLoginFailure:就是shiro异常类的全类名.
-
String exception = (String) request.getAttribute("shiroLoginFailure");
-
System.out.println("exception=" + exception);
-
String msg = "";
-
if (exception != null) {
-
if (UnknownAccountException.class.getName().equals(exception)) {
-
System.out.println("UnknownAccountException -- > 账号不存在:");
-
msg = "UnknownAccountException -- > 账号不存在:";
-
} else if (IncorrectCredentialsException.class.getName().equals(exception)) {
-
System.out.println("IncorrectCredentialsException -- > 密码不正确:");
-
msg = "IncorrectCredentialsException -- > 密码不正确:";
-
} else if ("kaptchaValidateFailed".equals(exception)) {
-
System.out.println("kaptchaValidateFailed -- > 验证码错误");
-
msg = "kaptchaValidateFailed -- > 验证码错误";
-
} else {
-
msg = "else >> "+exception;
-
System.out.println("else -- >" + exception);
-
}
-
}
-
map.put("msg", msg);
-
// 此方法不处理登录成功,由shiro进行处理
-
return "/login";
-
}
-
-
-
public String unauthorizedRole(){
-
System.out.println("------没有权限-------");
-
return "403";
-
}
-
}
其它dao层和service的代码就不贴出来了大家直接看代码。
页面说明
登录页面
-
-
<html lang="en">
-
<head>
-
<meta charset="UTF-8">
-
<title>Login</title>
-
</head>
-
<body>
-
错误信息:<h4 th:text="${msg}"></h4>
-
<form action="" method="post">
-
<p>账号:<input type="text" name="username" value="admin"/></p>
-
<p>密码:<input type="text" name="password" value="123456"/></p>
-
<p><input type="submit" value="登录"/></p>
-
</form>
-
</body>
-
</html>
index页面
-
-
<html lang="en">
-
<head>
-
<meta charset="UTF-8">
-
<title>index</title>
-
</head>
-
<body>
-
-
<div th:text="'欢迎你'+${session.login.username}"></div>
-
<a th:href="@{/logout}">退出登录</a>
-
</body>
-
</html>
添加用户过程
-
/**
-
* 添加用户
-
* @return
-
*/
-
-
-
public String userSave(UserInfo user){
-
userInfoService.save(user);
-
return "redirect:userList";
-
}
Service中的代码
-
public void save(UserInfo userInfo) {
-
String password = userInfo.getPassword();
-
String[] saltAndCiphertext = UserRegisteAndLogin.encryptPassword(userInfo.getUsername(),password);
-
userInfo.setSalt(saltAndCiphertext[0]);
-
userInfo.setPassword(saltAndCiphertext[1]);
-
userInfoDao.save(userInfo);
-
}
密码加密处理
-
/**
-
* 用户注册时加密用户的密码
-
* 输入密码明文 返回密文与盐值
-
* @param password
-
* @return 第一个是密文 第二个是密码盐值
-
*/
-
public static String[] encryptPassword(String username,String password)
-
{
-
String salt = new SecureRandomNumberGenerator().nextBytes().toHex(); //生成盐值
-
salt = username+salt;
-
int hashIterations = 2;//加密的次数
-
String hashAlgorithmName = "md5";//加密方式
-
Object simpleHash = new SimpleHash(hashAlgorithmName, password,
-
salt, hashIterations);
-
String[] strings = new String[]{salt, simpleHash.toString()};
-
return strings;
-
}
html页面
-
-
<html lang="en">
-
<head>
-
<meta charset="UTF-8">
-
<title>添加用户页面</title>
-
</head>
-
<body>
-
-
-
<form action="/userInfo/userSave" method="post">
-
<p>昵称:<input type="text" name="name" /></p>
-
<p>账号:<input type="text" name="username" /></p>
-
<p>密码:<input type="text" name="password" /></p>
-
<p><input type="submit" value="保存"/></p>
-
</form>
-
</body>
-
</html>
测试
http://localhost:8080/login 页面

![]()
登录成功跳转 index 页面
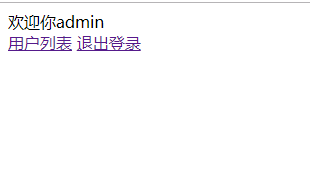
![]()
上面这些操作时候触发MyShiroRealm.doGetAuthorizationInfo()这个方面,也就是权限校验的方法。
可以在数据库中修改不同的权限进行测试,deml中有队用户的增删查改,就不展示了,大家可以下载demo自行测试。
github地址:
https://github.com/xiaonongOne/springboot-shiro
摘自:https://blog.csdn.net/qq_31984879/article/details/88366199
