爬虫:HTTP请求与HTML解析(爬取某乎网站)
1. 发送web请求
1.1 requests
用requests库的get()方法发送get请求,常常会添加请求头"user-agent",以及登录"cookie"等参数
1.1.1 user-agent
登录网站,将"user-agent"值复制到文本文件
1.1.2 cookie
登录网站,将"cookie"值复制到文本文件
1.1.3 测试代码
import requests
from requests.exceptions import RequestException

headers = {
    'cookie': '',
    'user-agent': 'Mozilla/5.0 (Windows NT 10.0; WOW64) AppleWebKit/537.36 (KHTML, like Gecko) Chrome/78.0.3904.108 Safari/537.36'
} # 替换为自己的cookie


def get_page(url):
    try:
        html = requests.get(url, headers=headers, timeout=5)
        if html.status_code == 200:
            print('请求成功')
            return html.text
        else:   # 这个else语句不是必须的
            return None
    except RequestException:
        print('请求失败')


if __name__ == '__main__':
    input_url = 'https://www.zhihu.com/hot'
    get_page(input_url)
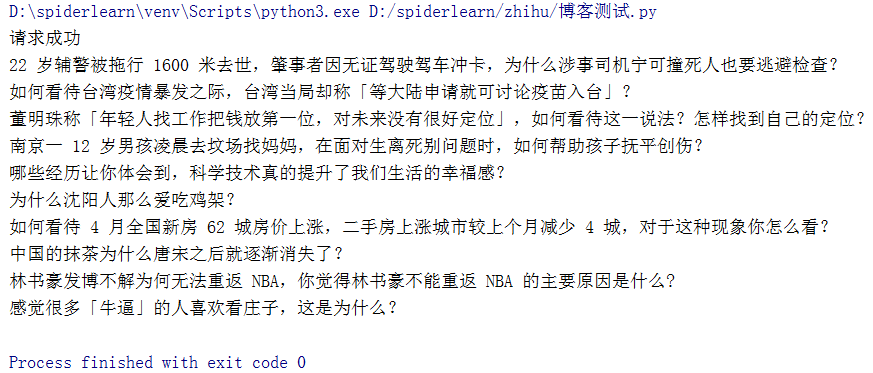
结果如下:

1.2 selenium
多数网站能通过window.navigator.webdriver的值识别selenium爬虫,因此selenium爬虫首先要防止网站识别selenium模拟浏览器。同样,selenium请求也常常需要添加请求头"user-agent",以及登录"cookie"等参数
1.2.1 移除Selenium中window.navigator.webdriver的值
在程序中添加如下代码(对应老版本谷歌)
from selenium.webdriver import Chrome
from selenium.webdriver import ChromeOptions


option = ChromeOptions()
option.add_experimental_option('excludeSwitches', ['enable-automation'])
driver = Chrome(options=option)
time.sleep(10)
1.2.2 user-agent
登录网站,将"user-agent"值复制到文本文件,执行如下代码将添加请求头
from selenium.webdriver import Chrome
from selenium.webdriver import ChromeOptions


option = ChromeOptions()
option.add_argument('user-agent="Mozilla/5.0 (Windows NT 10.0; Win64; x64) AppleWebKit/537.36 (KHTML, like Gecko) Chrome/79.0.3945.130 Safari/537.36"')
1.2.3 cookie
因为selenium要求cookie需要有"name","value"两个键以及对应的值的值,如果网站上面的cookie是字符串的形式,直接复制网站的cookie值将不符合selenium要求,可以用selenium中的get_cookies()方法获取登录"cookie"
from selenium.webdriver import Chrome
from selenium.webdriver import ChromeOptions
import time
import json

option = ChromeOptions()
option.add_experimental_option('excludeSwitches', ['enable-automation'])
option.add_argument('user-agent="Mozilla/5.0 (Windows NT 10.0; Win64; x64) AppleWebKit/537.36 (KHTML, like Gecko) Chrome/79.0.3945.130 Safari/537.36"')
driver = Chrome(options=option)
time.sleep(10)

driver.get('https://www.zhihu.com/signin?next=%2F')
time.sleep(30)
driver.get('https://www.zhihu.com/')
cookies = driver.get_cookies()
jsonCookies = json.dumps(cookies)

with open('cookies.txt', 'a') as f:  # 文件名和文件位置自己定义
    f.write(jsonCookies)
    f.write('\n')
1.2.4 测试代码示例
将上面获取到的cookie复制到下面程序中便可运行,
from selenium.webdriver import Chrome
from selenium.webdriver import ChromeOptions
import time

option = ChromeOptions()
option.add_experimental_option('excludeSwitches', ['enable-automation'])
driver = Chrome(options=option)
time.sleep(10)

driver.get('https://www.zhihu.com')
time.sleep(10)

driver.delete_all_cookies()   # 清除刚才的cookie
time.sleep(2)

cookie = {}  #  替换为自己的cookie
driver.add_cookie(cookie)
driver.get('https://www.zhihu.com/')
time.sleep(5)
for i in driver.find_elements_by_css_selector('div[itemprop="zhihu:question"] > a'):
    print(i.text)
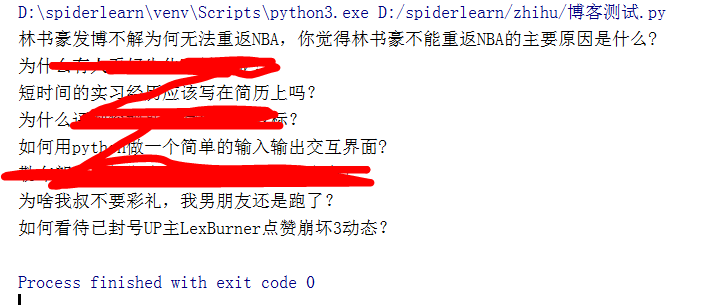
结果截图如下:
2. HTML解析(元素定位)
要爬取到目标数据首先要定位数据所属元素,BeautifulSoup和selenium都很容易实现对HTML的元素遍历
2.1 BeautifulSoup元素定位
下面代码BeautifulSoup首先定位到属性为"HotItem-title"的"h2"标签,然后再通过.text()方法获取字符串值
import requests
from bs4 import BeautifulSoup
from requests.exceptions import RequestException

headers = {
    'cookie': '',
    'user-agent': 'Mozilla/5.0 (Windows NT 10.0; WOW64) AppleWebKit/537.36 (KHTML, like Gecko) Chrome/78.0.3904.108 Safari/537.36'
}           # 替换为自己的cookie


def get_page(url):
    try:
        html = requests.get(url, headers=headers, timeout=5)
        if html.status_code == 200:
            print('请求成功')
            return html.text
        else:   # 这个else语句不是必须的
            return None
    except RequestException:
        print('请求失败')


def parse_page(html):
    html = BeautifulSoup(html, "html.parser")
    titles = html.find_all("h2", {'class': 'HotItem-title'})[:10]
    for title in titles:
        print(title.get_text())


if __name__ == '__main__':
    input_url = 'https://www.zhihu.com/hot'
    parse_page(get_page(input_url))
截图如下:

2.2 selenium元素定位
selenium元素定位语法形式与requests不太相同,下面代码示例(1.2.4 测试代码示例)采用了一种层级定位方法:'div[itemprop="zhihu:question"] > a',笔者觉得这样定位比较放心。
selenium获取文本值得方法是.text,区别于requests的.get_text()
from selenium.webdriver import Chrome
from selenium.webdriver import ChromeOptions
import time

option = ChromeOptions()
option.add_experimental_option('excludeSwitches', ['enable-automation'])
driver = Chrome(options=option)
time.sleep(10)

driver.get('https://www.zhihu.com')
time.sleep(10)

driver.delete_all_cookies()   # 清除刚才的cookie
time.sleep(2)

cookie = {}  #  替换为自己的cookie
driver.add_cookie(cookie)
driver.get('https://www.zhihu.com/')
time.sleep(5)
for i in driver.find_elements_by_css_selector('div[itemprop="zhihu:question"] > a'):
    print(i.text)


 浙公网安备 33010602011771号