
SpringBoot + SpringBatch + Quartz整合定时批量任务
来源:blog.csdn.net/zxd1435513775/article/details/99677223
一、引言
需求内容如下:
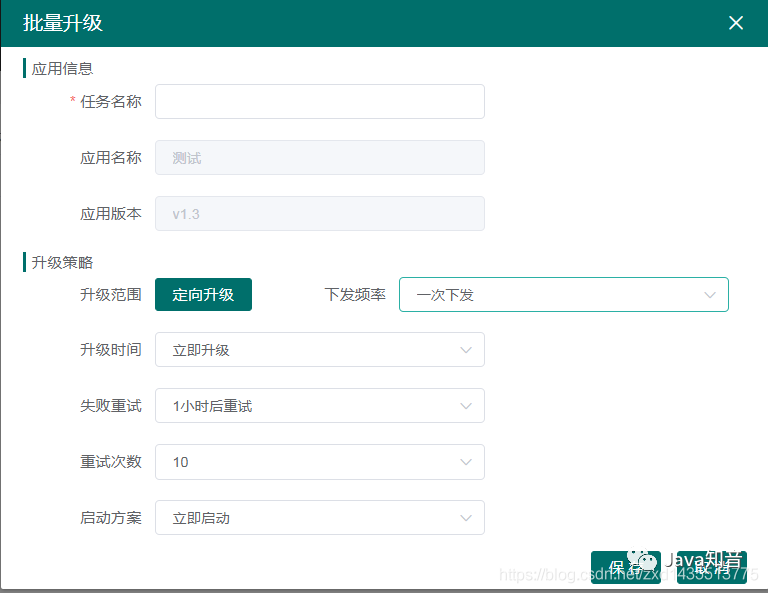
PC网页触发一条设备升级记录(下图),后台要定时批量设备更新。这里定时要用到Quartz,批量数据处理要用到SpringBatch,二者结合,可以完成该需求。
由于之前,没有用过SpringBatch,于是上网查了下资料,发现可参考的不是很多,于是只能去慢慢的翻看官方文档。
1 | https://docs.spring.io/spring-batch/4.1.x/reference/html/ |
二、代码具体实现
1、pom文件
1 2 3 4 5 6 7 8 9 10 11 12 13 14 15 16 17 18 19 20 21 22 | <dependencies> <dependency> <groupId>org.springframework.boot</groupId> <artifactId>spring-boot-starter-web</artifactId> </dependency> <dependency> <groupId>org.postgresql</groupId> <artifactId>postgresql</artifactId> </dependency> <dependency> <groupId>org.springframework.boot</groupId> <artifactId>spring-boot-starter-jdbc</artifactId> </dependency> <dependency> <groupId>org.projectlombok</groupId> <artifactId>lombok</artifactId> </dependency> <dependency> <groupId>org.springframework.boot</groupId> <artifactId>spring-boot-starter-batch</artifactId> </dependency></dependencies> |
2、application.yaml文件
1 2 3 4 5 6 7 8 9 10 11 12 13 14 15 16 17 | spring: datasource: username: thinklink password: thinklink url: jdbc:postgresql://172.16.205.54:5432/thinklink driver-class-name: org.postgresql.Driver batch: job: enabled: falseserver: port: 8073#upgrade-dispatch-base-url: http://172.16.205.125:8080/api/rpc/dispatch/command/upgrade-dispatch-base-url: http://172.16.205.211:8080/api/noauth/rpc/dispatch/command/# 每次批量处理的数据量,默认为5000batch-size: 5000 |
3、Service实现类,触发批处理任务的入口,执行一个job
1 2 3 4 5 6 7 8 9 10 11 12 13 14 15 16 17 18 19 20 21 22 23 | @Service("batchService")public class BatchServiceImpl implements BatchService { // 框架自动注入 @Autowired private JobLauncher jobLauncher; @Autowired private Job updateDeviceJob; /** * 根据 taskId 创建一个Job * @param taskId * @throws Exception */ @Override public void createBatchJob(String taskId) throws Exception { JobParameters jobParameters = new JobParametersBuilder() .addString("taskId", taskId) .addString("uuid", UUID.randomUUID().toString().replace("-","")) .toJobParameters(); // 传入一个Job任务和任务需要的参数 jobLauncher.run(updateDeviceJob, jobParameters); }} |
4、SpringBatch配置类,此部分最重要(☆☆☆☆☆)
1 2 3 4 5 6 7 8 9 10 11 12 13 14 15 16 17 18 19 20 21 22 23 24 25 26 27 28 29 30 31 32 33 34 35 36 37 38 39 40 41 42 43 44 45 46 47 48 49 50 51 52 53 54 55 56 57 58 59 60 61 62 63 64 65 66 67 68 69 70 71 72 73 74 75 76 77 78 79 80 81 82 83 84 85 86 87 88 89 90 91 92 93 94 95 96 97 98 99 100 101 102 103 104 105 106 107 108 109 110 111 112 113 114 115 116 117 118 119 120 121 122 123 124 125 126 127 128 129 130 131 132 133 134 135 136 137 138 139 140 141 142 143 144 145 146 147 148 149 150 151 152 153 154 155 156 157 158 159 160 161 162 163 164 165 166 167 168 169 170 171 172 173 174 175 176 177 178 179 180 181 182 183 184 185 186 187 188 189 190 191 192 193 194 195 196 197 198 199 200 201 202 | @Configurationpublic class BatchConfiguration { private static final Logger log = LoggerFactory.getLogger(BatchConfiguration.class); @Value("${batch-size:5000}") private int batchSize; // 框架自动注入 @Autowired public JobBuilderFactory jobBuilderFactory; // 框架自动注入 @Autowired public StepBuilderFactory stepBuilderFactory; // 数据过滤器,对从数据库读出来的数据,注意进行操作 @Autowired public TaskItemProcessor taskItemProcessor; // 接收job参数 public Map<String, JobParameter> parameters; public Object taskId; @Autowired private JdbcTemplate jdbcTemplate; // 读取数据库操作 @Bean @StepScope public JdbcCursorItemReader<DispatchRequest> itemReader(DataSource dataSource) { String querySql = " SELECT " + " e. ID AS taskId, " + " e.user_id AS userId, " + " e.timing_startup AS startTime, " + " u.device_id AS deviceId, " + " d.app_name AS appName, " + " d.compose_file AS composeFile, " + " e.failure_retry AS failureRetry, " + " e.tetry_times AS retryTimes, " + " e.device_managered AS deviceManagered " + " FROM " + " eiot_upgrade_task e " + " LEFT JOIN eiot_upgrade_device u ON e. ID = u.upgrade_task_id " + " LEFT JOIN eiot_app_detail d ON e.app_id = d. ID " + " WHERE " + " ( " + " u.device_upgrade_status = 0 " + " OR u.device_upgrade_status = 2" + " )" + " AND e.tetry_times > u.retry_times " + " AND e. ID = ?"; return new JdbcCursorItemReaderBuilder<DispatchRequest>() .name("itemReader") .sql(querySql) .dataSource(dataSource) .queryArguments(new Object[]{parameters.get("taskId").getValue()}) .rowMapper(new DispatchRequest.DispatchRequestRowMapper()) .build(); } // 将结果写回数据库 @Bean @StepScope public ItemWriter<ProcessResult> itemWriter() { return new ItemWriter<ProcessResult>() { private int updateTaskStatus(DispatchRequest dispatchRequest, int status) { log.info("update taskId: {}, deviceId: {} to status {}", dispatchRequest.getTaskId(), dispatchRequest.getDeviceId(), status); Integer retryTimes = jdbcTemplate.queryForObject( "select retry_times from eiot_upgrade_device where device_id = ? and upgrade_task_id = ?", new Object[]{ dispatchRequest.getDeviceId(), dispatchRequest.getTaskId()}, Integer.class ); retryTimes += 1; int updateCount = jdbcTemplate.update("update eiot_upgrade_device set device_upgrade_status = ?, retry_times = ? " + "where device_id = ? and upgrade_task_id = ?", status, retryTimes, dispatchRequest.getDeviceId(), dispatchRequest.getTaskId()); if (updateCount <= 0) { log.warn("no task updated"); } else { log.info("count of {} task updated", updateCount); } // 最后一次重试 if (status == STATUS_DISPATCH_FAILED && retryTimes == dispatchRequest.getRetryTimes()) { log.info("the last retry of {} failed, inc deviceManagered", dispatchRequest.getTaskId()); return 1; } else { return 0; } } @Override @Transactional public void write(List<? extends ProcessResult> list) throws Exception { Map taskMap = jdbcTemplate.queryForMap( "select device_managered, device_count, task_status from eiot_upgrade_task where id = ?", list.get(0).getDispatchRequest().getTaskId() // 我们认定一个批量里面,taskId都是一样的 ); int deviceManagered = (int)taskMap.get("device_managered"); Integer deviceCount = (Integer) taskMap.get("device_count"); if (deviceCount == null) { log.warn("deviceCount of task {} is null", list.get(0).getDispatchRequest().getTaskId()); } int taskStatus = (int)taskMap.get("task_status"); for (ProcessResult result: list) { deviceManagered += updateTaskStatus(result.getDispatchRequest(), result.getStatus()); } if (deviceCount != null && deviceManagered == deviceCount) { taskStatus = 2; //任务状态 0:待升级,1:升级中,2:已完成 } jdbcTemplate.update("update eiot_upgrade_task set device_managered = ?, task_status = ? " + "where id = ?", deviceManagered, taskStatus, list.get(0).getDispatchRequest().getTaskId()); } }; } /** * 定义一个下发更新的 job * @return */ @Bean public Job updateDeviceJob(Step updateDeviceStep) { return jobBuilderFactory.get(UUID.randomUUID().toString().replace("-", "")) .listener(new JobListener()) // 设置Job的监听器 .flow(updateDeviceStep)// 执行下发更新的Step .end() .build(); } /** * 定义一个下发更新的 step * @return */ @Bean public Step updateDeviceStep(JdbcCursorItemReader<DispatchRequest> itemReader,ItemWriter<ProcessResult> itemWriter) { return stepBuilderFactory.get(UUID.randomUUID().toString().replace("-", "")) .<DispatchRequest, ProcessResult> chunk(batchSize) .reader(itemReader) //根据taskId从数据库读取更新设备信息 .processor(taskItemProcessor) // 每条更新信息,执行下发更新接口 .writer(itemWriter) .build(); } // job 监听器 public class JobListener implements JobExecutionListener { @Override public void beforeJob(JobExecution jobExecution) { log.info(jobExecution.getJobInstance().getJobName() + " before... "); parameters = jobExecution.getJobParameters().getParameters(); taskId = parameters.get("taskId").getValue(); log.info("job param taskId : " + parameters.get("taskId")); } @Override public void afterJob(JobExecution jobExecution) { log.info(jobExecution.getJobInstance().getJobName() + " after... "); // 当所有job执行完之后,查询设备更新状态,如果有失败,则要定时重新执行job String sql = " SELECT " + " count(*) " + " FROM " + " eiot_upgrade_device d " + " LEFT JOIN eiot_upgrade_task u ON d.upgrade_task_id = u. ID " + " WHERE " + " u. ID = ? " + " AND d.retry_times < u.tetry_times " + " AND ( " + " d.device_upgrade_status = 0 " + " OR d.device_upgrade_status = 2 " + " ) "; // 获取更新失败的设备个数 Integer count = jdbcTemplate.queryForObject(sql, new Object[]{taskId}, Integer.class); log.info("update device failure count : " + count); // 下面是使用Quartz触发定时任务 // 获取任务时间,单位秒 // String time = jdbcTemplate.queryForObject(sql, new Object[]{taskId}, Integer.class); // 此处方便测试,应该从数据库中取taskId对应的重试间隔,单位秒 Integer millSecond = 10; if(count != null && count > 0){ String jobName = "UpgradeTask_" + taskId; String reTaskId = taskId.toString(); Map<String,Object> params = new HashMap<>(); params.put("jobName",jobName); params.put("taskId",reTaskId); if (QuartzManager.checkNameNotExist(jobName)) { QuartzManager.scheduleRunOnceJob(jobName, RunOnceJobLogic.class,params,millSecond); } } } }} |
5、Processor,处理每条数据,可以在此对数据进行过滤操作
1 2 3 4 5 6 7 8 9 10 11 12 13 14 15 16 17 18 19 20 21 22 23 24 25 26 27 28 29 30 31 32 33 34 35 36 37 38 39 40 41 42 43 44 45 46 47 48 49 50 51 52 53 54 55 56 57 58 59 60 61 62 63 64 65 66 67 68 | @Component("taskItemProcessor")public class TaskItemProcessor implements ItemProcessor<DispatchRequest, ProcessResult> { public static final int STATUS_DISPATCH_FAILED = 2; public static final int STATUS_DISPATCH_SUCC = 1; private static final Logger log = LoggerFactory.getLogger(TaskItemProcessor.class); @Value("${upgrade-dispatch-base-url:http://localhost/api/v2/rpc/dispatch/command/}") private String dispatchUrl; @Autowired JdbcTemplate jdbcTemplate; /** * 在这里,执行 下发更新指令 的操作 * @param dispatchRequest * @return * @throws Exception */ @Override public ProcessResult process(final DispatchRequest dispatchRequest) { // 调用接口,下发指令 String url = dispatchUrl + dispatchRequest.getDeviceId()+"/"+dispatchRequest.getUserId(); log.info("request url:" + url); RestTemplate restTemplate = new RestTemplate(); HttpHeaders headers = new HttpHeaders(); headers.setContentType(MediaType.APPLICATION_JSON_UTF8); MultiValueMap<String, String> params = new LinkedMultiValueMap<String, String>(); JSONObject jsonOuter = new JSONObject(); JSONObject jsonInner = new JSONObject(); try { jsonInner.put("jobId",dispatchRequest.getTaskId()); jsonInner.put("name",dispatchRequest.getName()); jsonInner.put("composeFile", Base64Util.bytesToBase64Str(dispatchRequest.getComposeFile())); jsonInner.put("policy",new JSONObject().put("startTime",dispatchRequest.getPolicy())); jsonInner.put("timestamp",dispatchRequest.getTimestamp()); jsonOuter.put("method","updateApp"); jsonOuter.put("params",jsonInner); } catch (JSONException e) { log.info("JSON convert Exception :" + e); }catch (IOException e) { log.info("Base64Util bytesToBase64Str :" + e); } log.info("request body json :" + jsonOuter); HttpEntity<String> requestEntity = new HttpEntity<String>(jsonOuter.toString(),headers); int status; try { ResponseEntity<String> response = restTemplate.postForEntity(url,requestEntity,String.class); log.info("response :" + response); if (response.getStatusCode() == HttpStatus.OK) { status = STATUS_DISPATCH_SUCC; } else { status = STATUS_DISPATCH_FAILED; } }catch (Exception e){ status = STATUS_DISPATCH_FAILED; } return new ProcessResult(dispatchRequest, status); }} |
6、封装数据库返回数据的实体Bean,注意静态内部类
1 2 3 4 5 6 7 8 9 10 11 12 13 14 15 16 17 18 19 20 21 22 23 24 25 26 27 28 29 30 31 32 33 34 35 36 | public class DispatchRequest { private String taskId; private String deviceId; private String userId; private String name; private byte[] composeFile; private String policy; private String timestamp; private String md5; private int failureRetry; private int retryTimes; private int deviceManagered; // 省略构造函数,setter/getter/tostring方法 //...... public static class DispatchRequestRowMapper implements RowMapper<DispatchRequest> { @Override public DispatchRequest mapRow(ResultSet resultSet, int i) throws SQLException { DispatchRequest dispatchRequest = new DispatchRequest(); dispatchRequest.setTaskId(resultSet.getString("taskId")); dispatchRequest.setUserId(resultSet.getString("userId")); dispatchRequest.setPolicy(resultSet.getString("startTime")); dispatchRequest.setDeviceId(resultSet.getString("deviceId")); dispatchRequest.setName(resultSet.getString("appName")); dispatchRequest.setComposeFile(resultSet.getBytes("composeFile")); dispatchRequest.setTimestamp(DateUtil.DateToString(new Date())); dispatchRequest.setRetryTimes(resultSet.getInt("retryTimes")); dispatchRequest.setFailureRetry(resultSet.getInt("failureRetry")); dispatchRequest.setDeviceManagered(resultSet.getInt("deviceManagered")); return dispatchRequest; } }} |
7、启动类上要加上注解
1 2 3 4 5 6 7 8 | @SpringBootApplication@EnableBatchProcessingpublic class Application { public static void main(String[] args) { SpringApplication.run(Application.class, args); }} |
三、小结
其实SpringBatch并没有想象中那么好用,当从数据库中每次取5000条数据后,进入processor中是逐条处理的,这个时候不能并行操作,等5000条数据处理完之后,再一次性执行ItemWriter方法。
在使用的过程中,最坑的地方是ItemReader和ItemWriter这两个地方,如何执行自定义的Sql,参考文中代码就行。
至于Quartz定时功能,很简单,只要定时创建SpringBatch里面的Job,让这个job启动就好了
分类:
spring boot


【推荐】国内首个AI IDE,深度理解中文开发场景,立即下载体验Trae
【推荐】编程新体验,更懂你的AI,立即体验豆包MarsCode编程助手
【推荐】抖音旗下AI助手豆包,你的智能百科全书,全免费不限次数
【推荐】轻量又高性能的 SSH 工具 IShell:AI 加持,快人一步
· winform 绘制太阳,地球,月球 运作规律
· 震惊!C++程序真的从main开始吗?99%的程序员都答错了
· AI与.NET技术实操系列(五):向量存储与相似性搜索在 .NET 中的实现
· 【硬核科普】Trae如何「偷看」你的代码?零基础破解AI编程运行原理
· 超详细:普通电脑也行Windows部署deepseek R1训练数据并当服务器共享给他人