
Liberty的初步使用
1、下载wlp.zip包:下载地址:https://developer.ibm.com/wasdev/downloads/#asset/runtimes-wlp-javaee8
2、解压
3、启动cmd命令:
进入 wlp/bin 目录:(cd path_to_liberty是我自己的目录)
-
Where path_to_liberty is the location you installed Liberty on your operating system.
- 执行以下命令(server_name是自己给自己的应用起的名字),创建的server在你liberty安装路径下的usr/services下面。


server create server_name比如:server create myServer
4、将项目打成war包,放置到创建的serverName路径下的dropins文件夹中。5、更改server.xml文件夹下的端口,与你的项目路径端口一致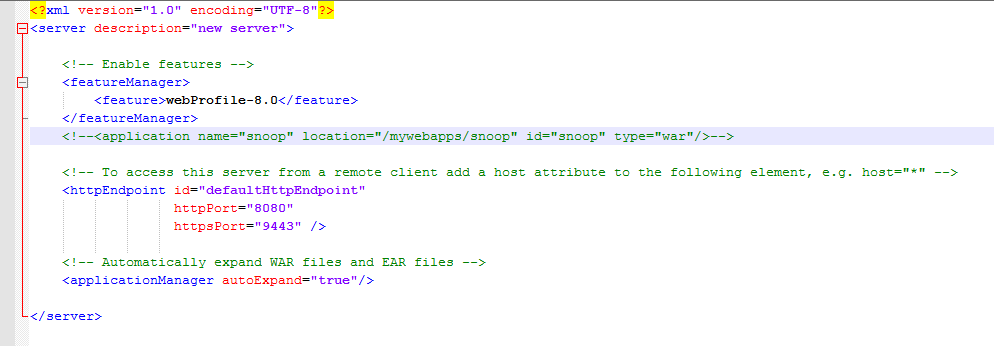
<?xml version="1.0" encoding="UTF-8"?>
<server description="new server">

    <!-- Enable features -->
    <featureManager>
        <feature>javaee-8.0</feature>
    </featureManager>

    <!-- This template enables security. To get the full use of all the capabilities, a keystore and user registry are required. -->

    <!-- For the keystore, default keys are generated and stored in a keystore. To provide the keystore password, generate an
         encoded password using bin/securityUtility encode and add it below in the password attribute of the keyStore element.
         Then uncomment the keyStore element. -->
    <!--
    <keyStore password=""/>
    -->

    <!--For a user registry configuration, configure your user registry. For example, configure a basic user registry using the
        basicRegistry element. Specify your own user name below in the name attribute of the user element. For the password,
        generate an encoded password using bin/securityUtility encode and add it in the password attribute of the user element.
        Then uncomment the user element. -->
    <basicRegistry id="basic" realm="BasicRealm">
        <!-- <user name="yourUserName" password="" />  -->
    </basicRegistry>

    <!-- To access this server from a remote client add a host attribute to the following element, e.g. host="*" -->

	<!--host目录代表配置的ip地址,如果不配置host的话,应用只能通过127.0.0.1访问 -->
    <httpEndpoint id="defaultHttpEndpoint"   host="*"
                  httpPort="9080"
                  httpsPort="9443" />

    <!-- Automatically expand WAR files and EAR files -->
<!--     <applicationManager autoExpand="true"/> -->

	<!--配置要发布的war包 localtion代表着war的位置,mo默认指向apps目录下面,
	如需要放在 apps/war目录下面的话,localtion则改为 war/Test.war -->
	<application id="Test" location="Test.war" name="Test" type="war"/>

</server>
6、在cmd中通过命令启动和停止服务:
server start serverName;
server stop serverName;
