
群晖虚拟openwrt做旁路由

群晖NAS安装openWRT旁路由保姆级教程
之前写过一篇用群晖做ikuai旁路由的教程,ikuai用来做网络行为管控相当不错,但其他服务和应用丰富度不如openWRT,比如有时候需要开全局加速什么的;家里有一台稳定的路由器,但基本没什么功能等等...所以今天抽空再出一篇群晖NAS安装openWRT旁路由的教程,感兴趣的朋友可以安装起来研究一下。
一、准备工作:
一台可以安装虚拟机的群晖NAS、单网口双网口皆可;
内存最少4GB,建议8GB及以上。
二、配置虚拟机:
本文以群晖DS923+ DSM7.2系统为例。
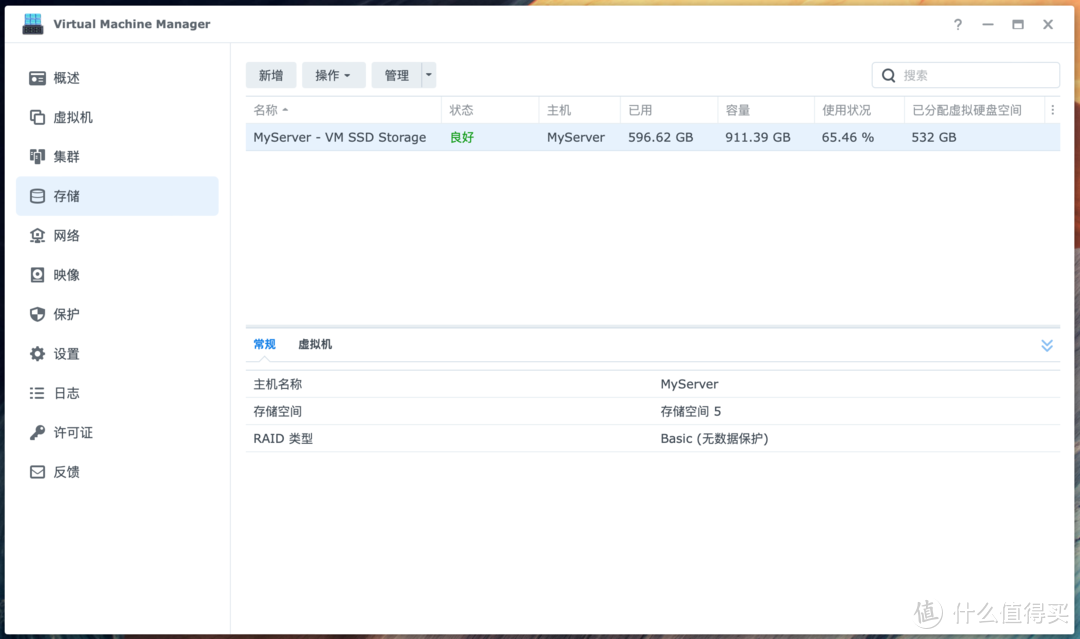
1.在DSM里安装好Virtual Machine Manager虚拟机套件,点击存储,确认已经给虚拟机分配了存储空间,优先建议在固态硬盘上跑虚拟机。
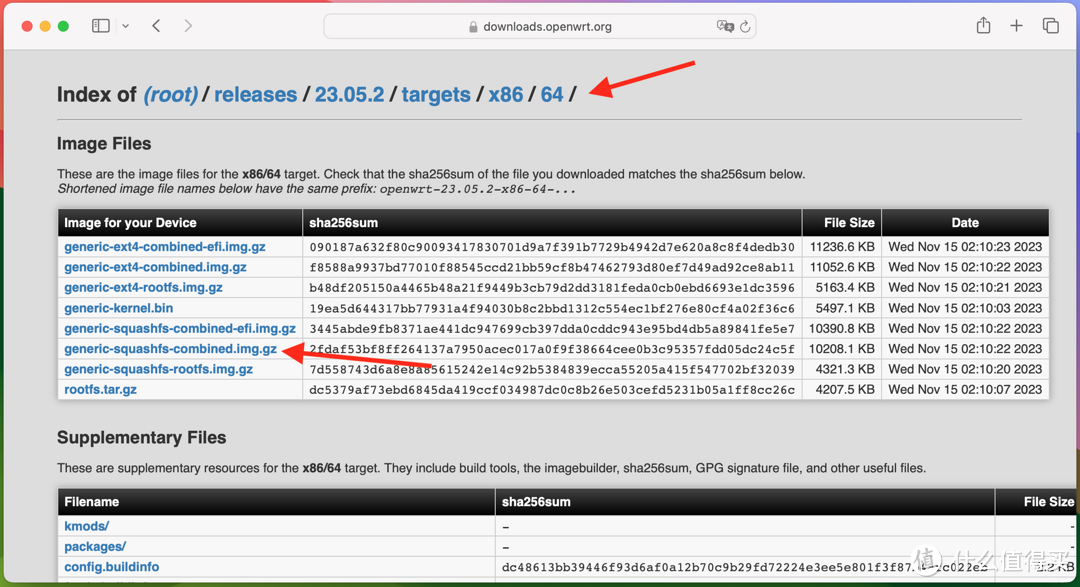
2.到openwrt官网下载镜像,注意要下x86/64机型里的generic-squashfs-combined.img.gz压缩包。官方镜像比较简洁,需要自己安装配置服务,我这里推荐安装定制版,评论区里提供了最新高大全openwrt和我长期使用的经典2022版,下载回去后用winrar等软件解压缩,放在电脑或者NAS上。本文以2023年12月的高大全定制版为例:
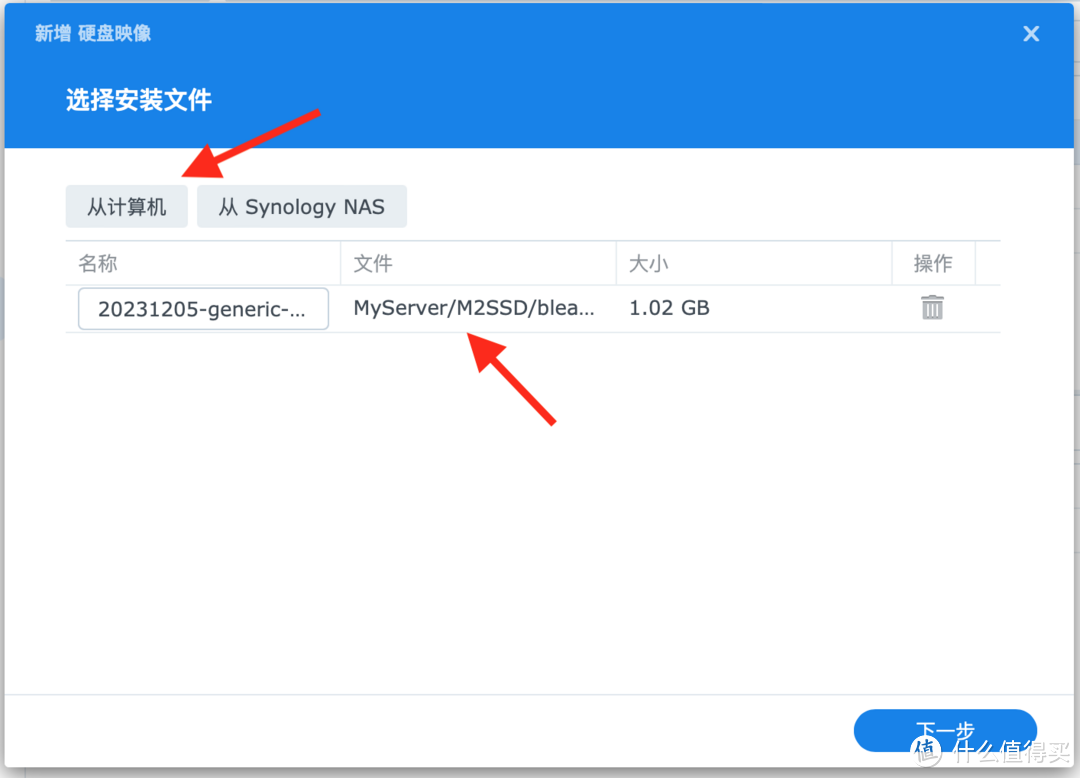
3.在VMM里点击映像、硬盘映像、新增:

根据你镜像存放位置,点击从计算机或者从NAS里选择img镜像,点击下一步:
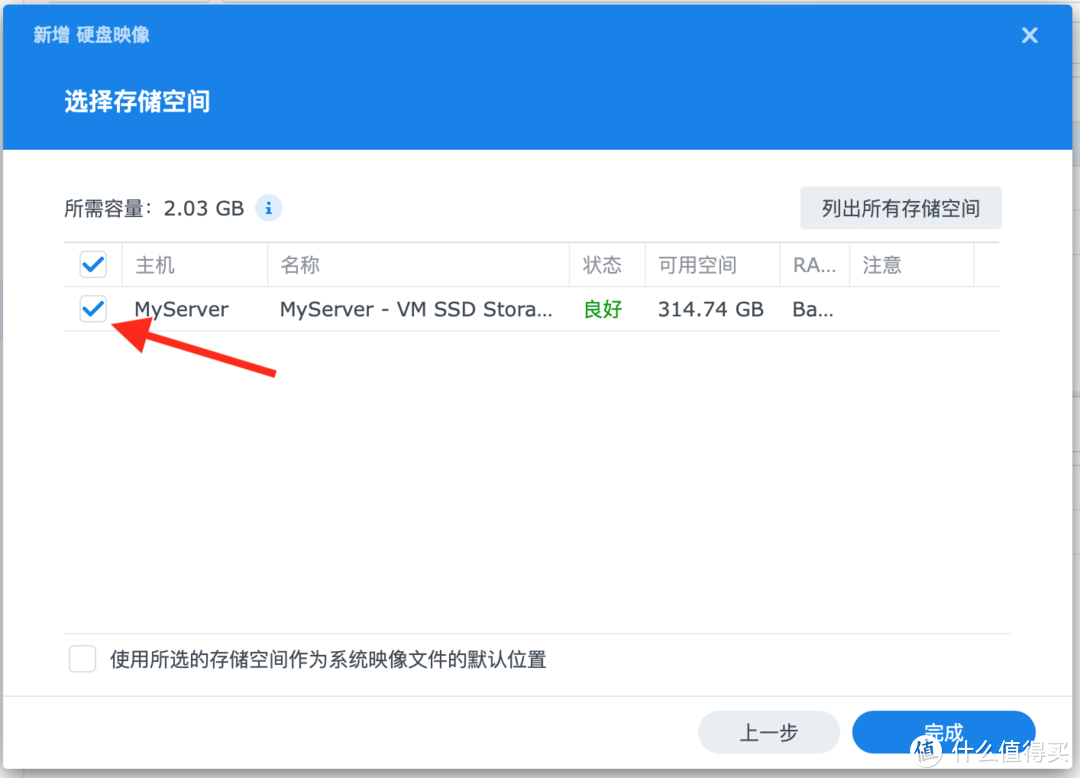
选择之前配置好的虚拟机存储空间,点击完成。
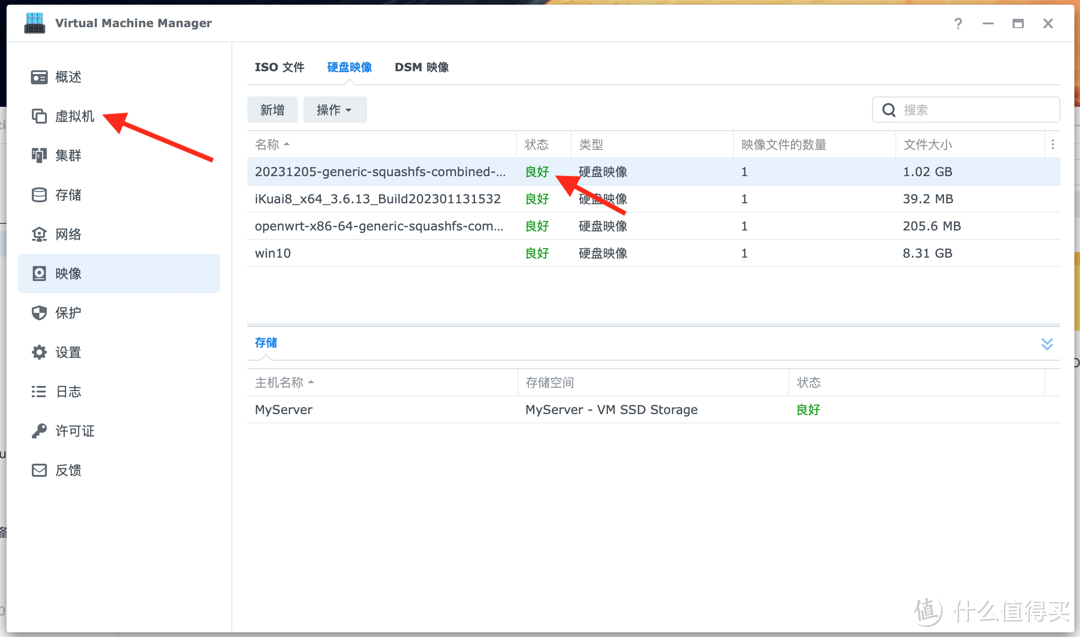
4.等待镜像上传完成,也就是新增的镜像状态显示为良好之后,点击左边的虚拟机:
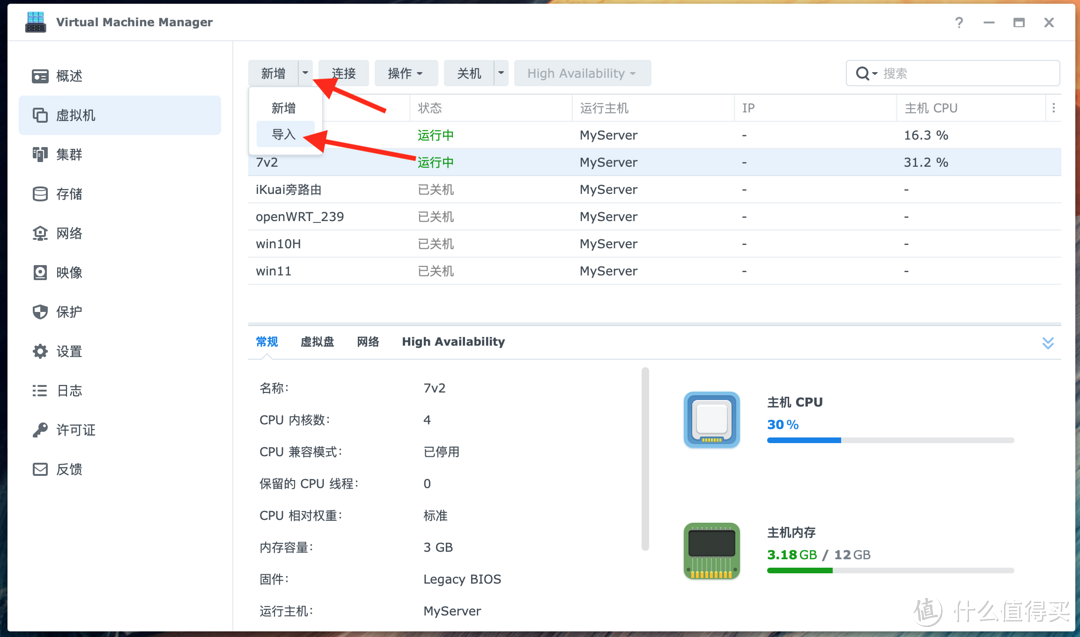
5.点击新增右边的箭头,选择导入:
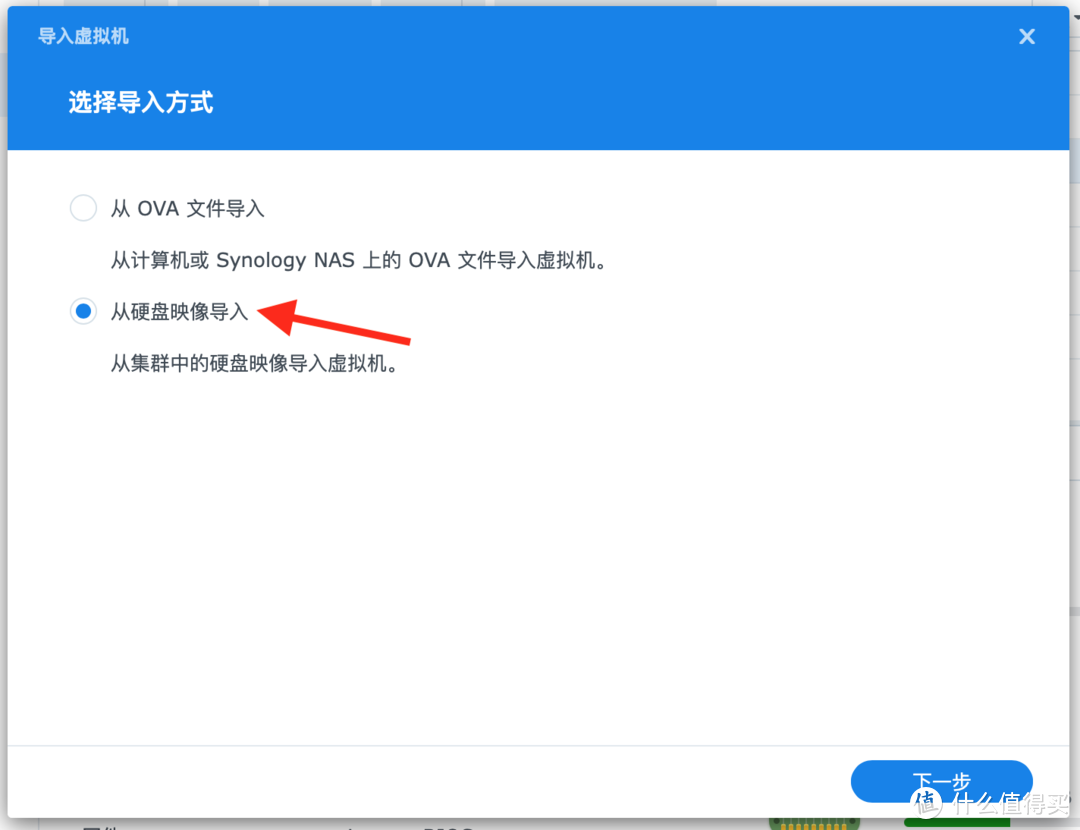
选择从硬盘映像导入:
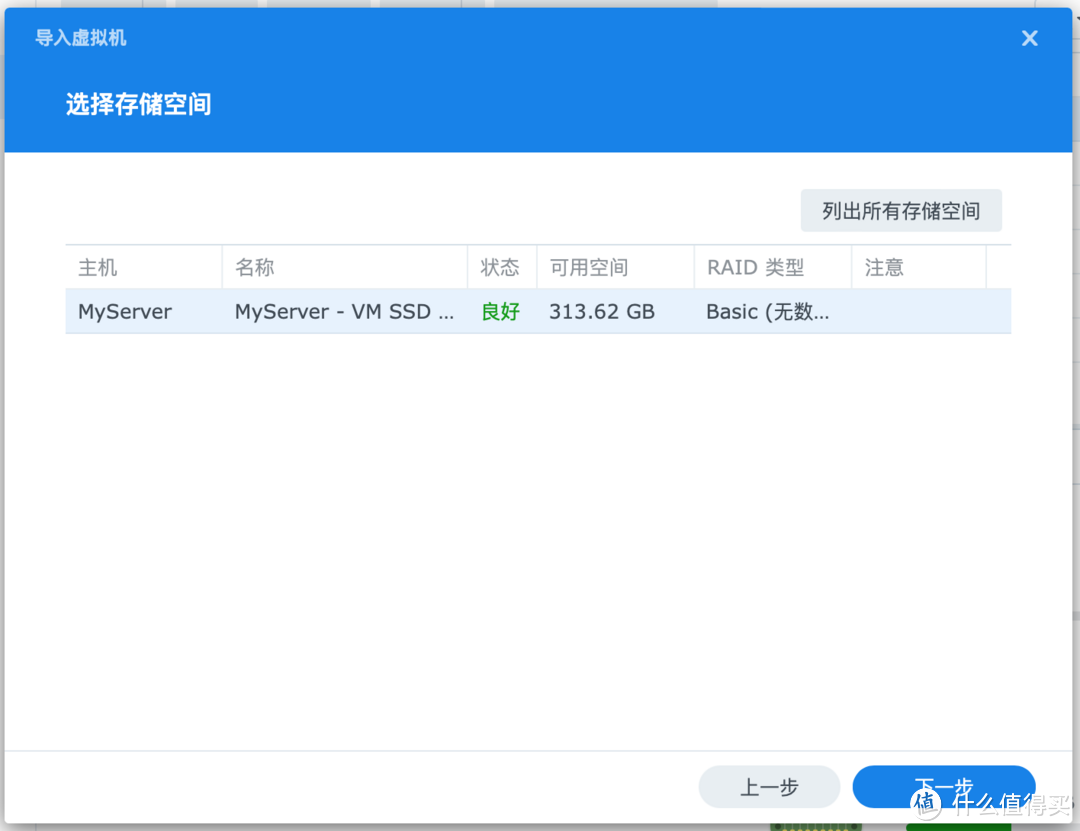
选择存储空间:
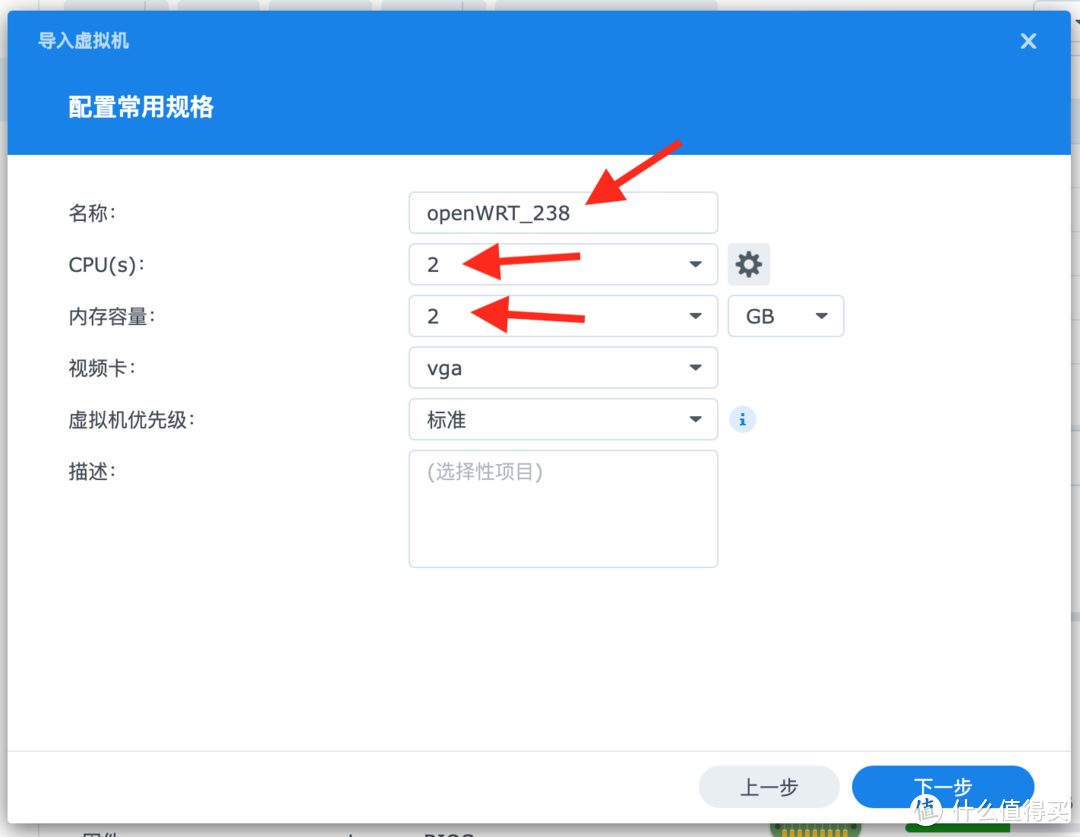
6.给虚拟机取个名字,cpu数量选择2,内存选2GB就够了,偶尔用用旁路由的话虚拟机优先级选标准,如果是做全局旁路由,那就设置为高。我把名称后面加上了ip地址最后一位,避免时间长了不用忘记了:
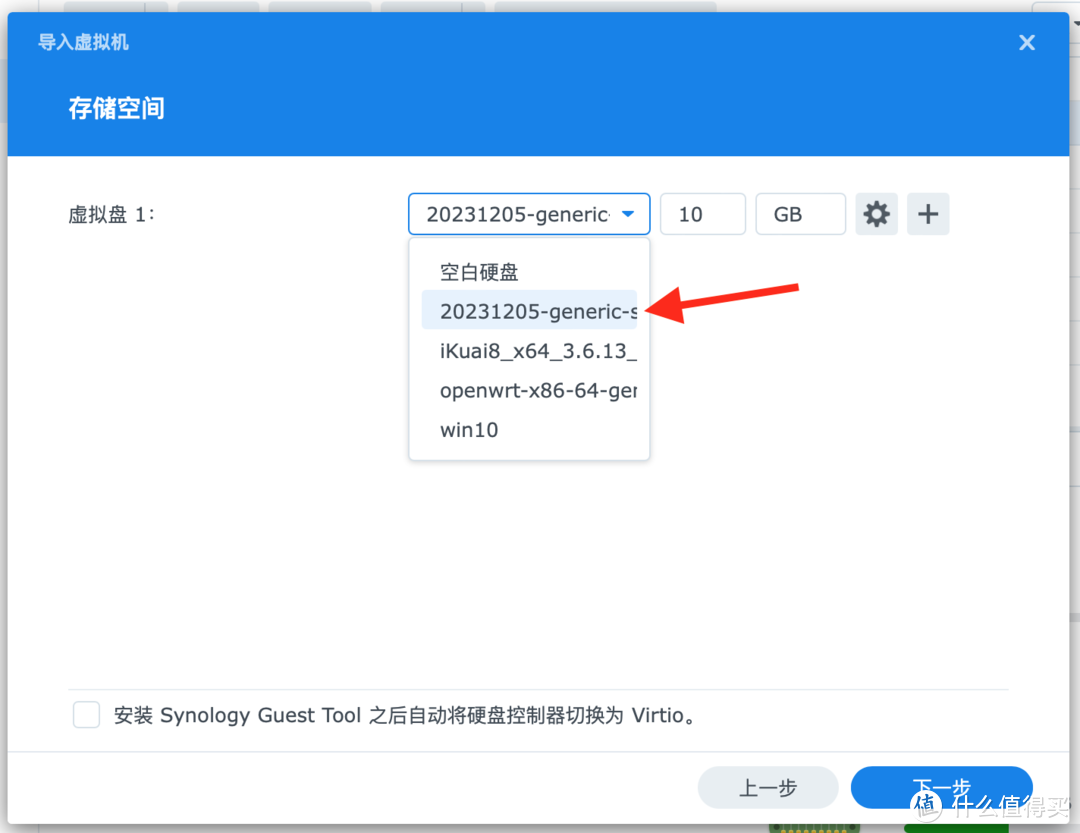
7.在虚拟盘里选择刚才上传的镜像,其他地方无需设置,点下一步:
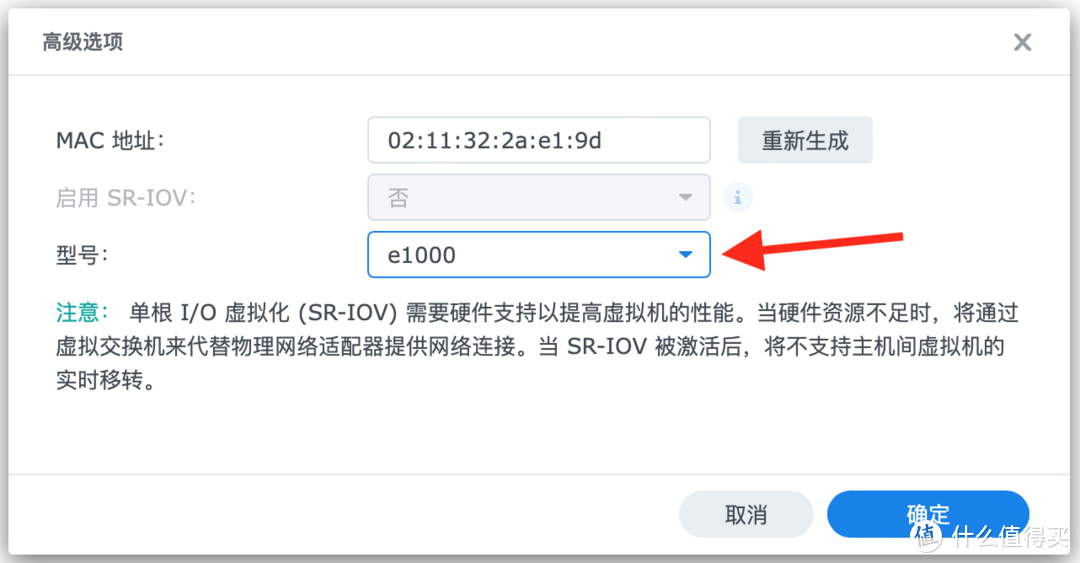
8.配置网络,点击网络后面的齿轮图标设置:
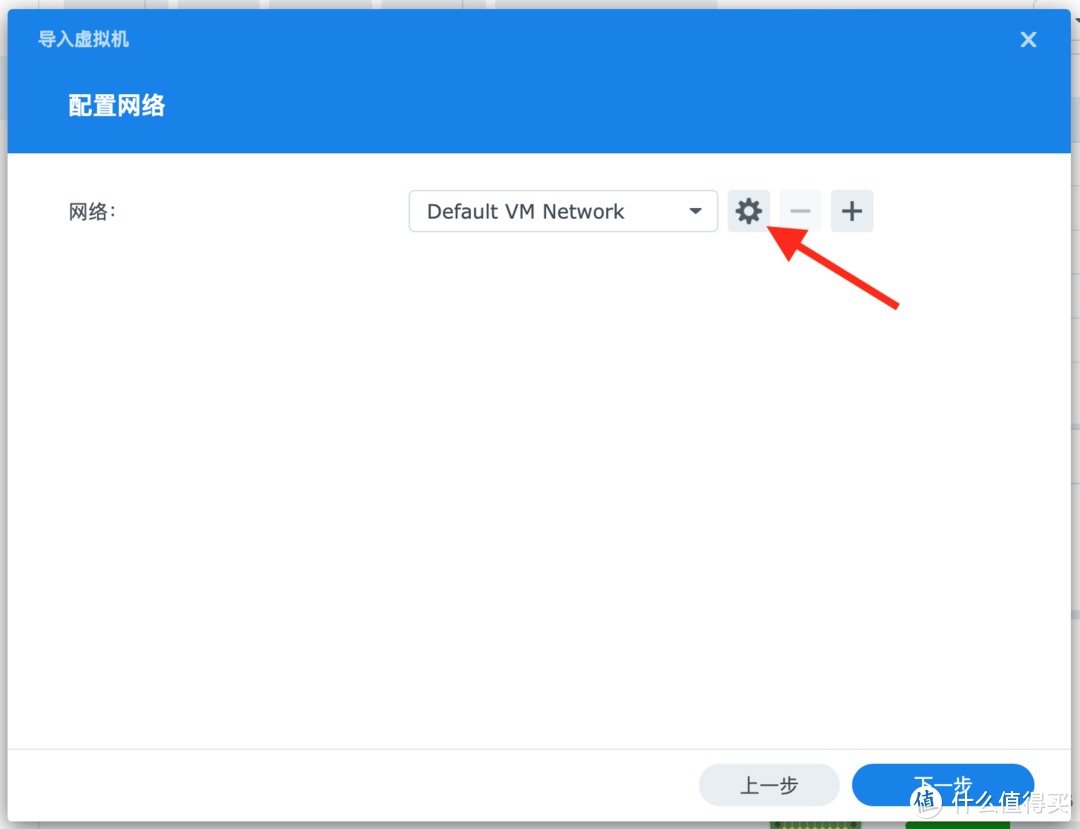
型号里选择e1000:
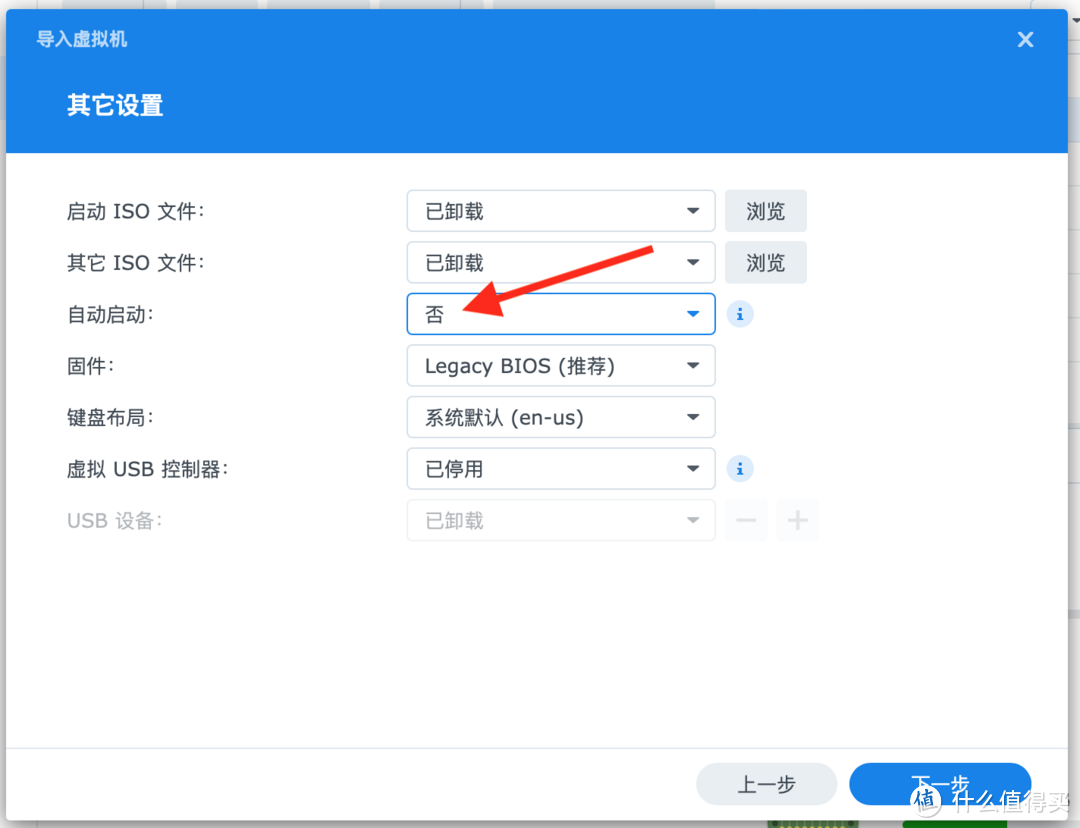
9.其他设置里,如果你用openWRT做全局路由,自动启动设置为是,否则设置为否,其他选项不动,点下一步:
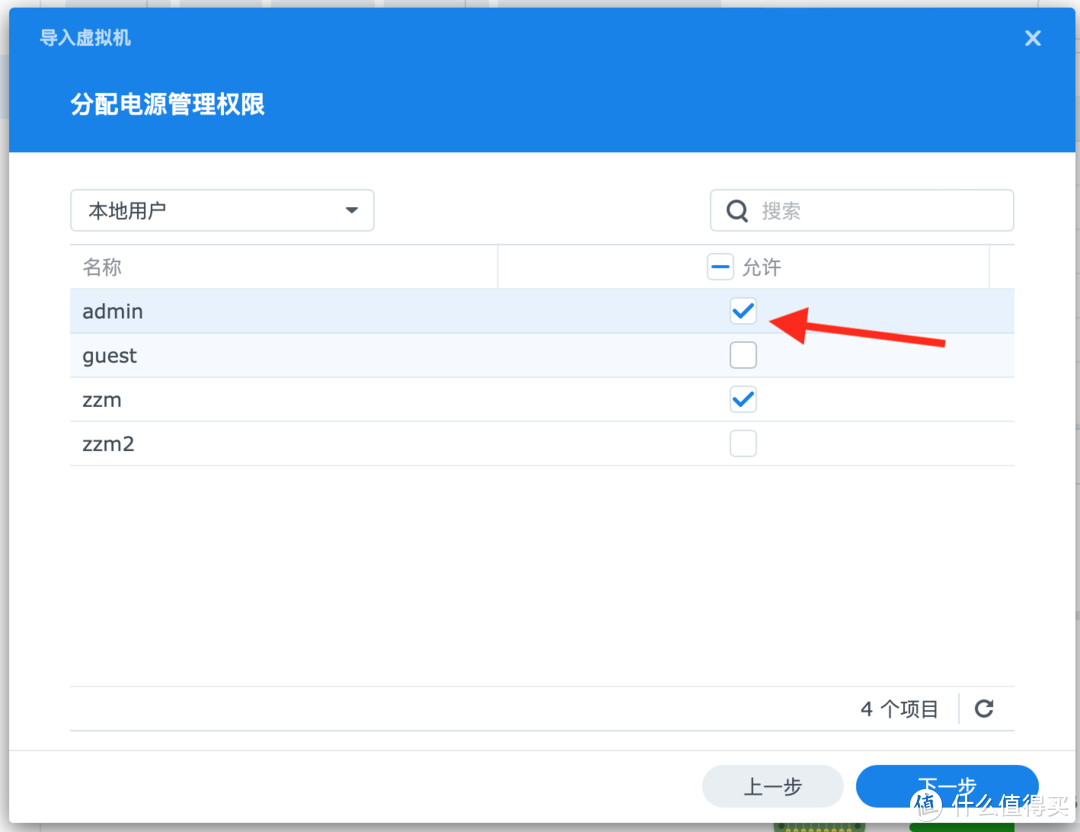
10.给允许操作虚拟机的用户打上勾,点击下一步:
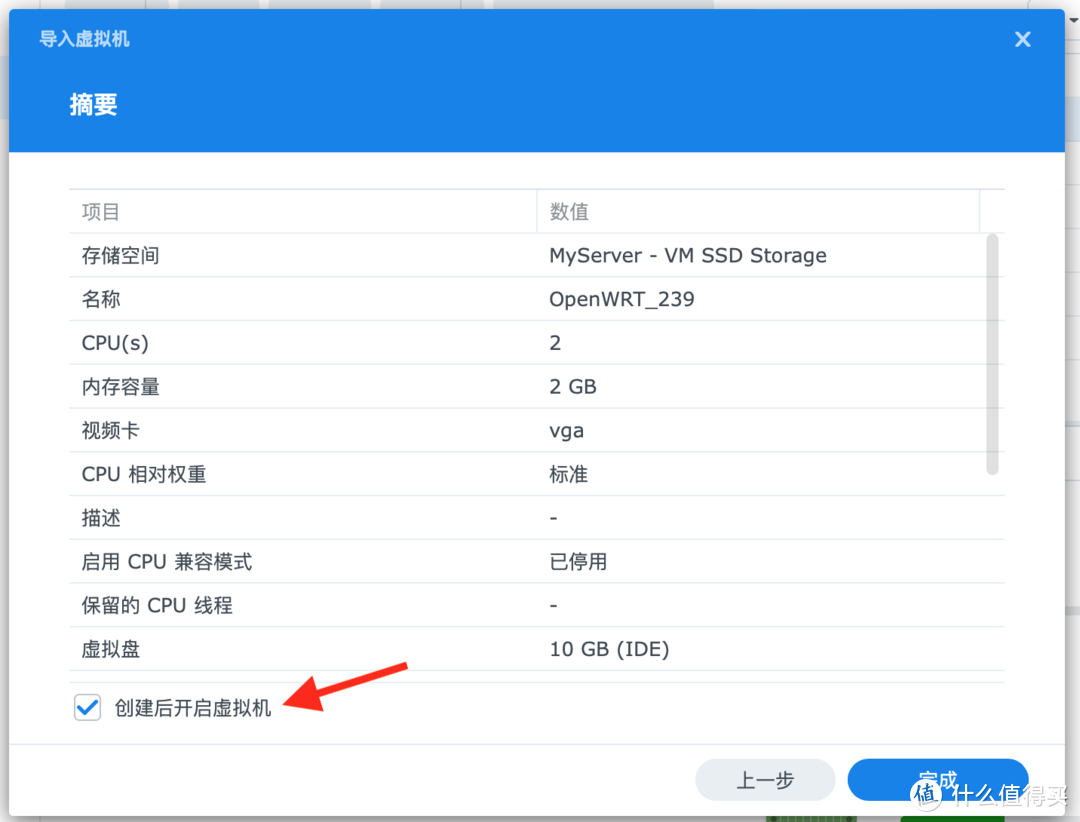
11.最后一步,勾选创建后开启虚拟机,也可以自己手动开机,点击完成:
三、配置openWRT
1.创建虚拟机之后,在VMM虚拟机界面选中刚才创建的openWRT虚拟机,点击连接:

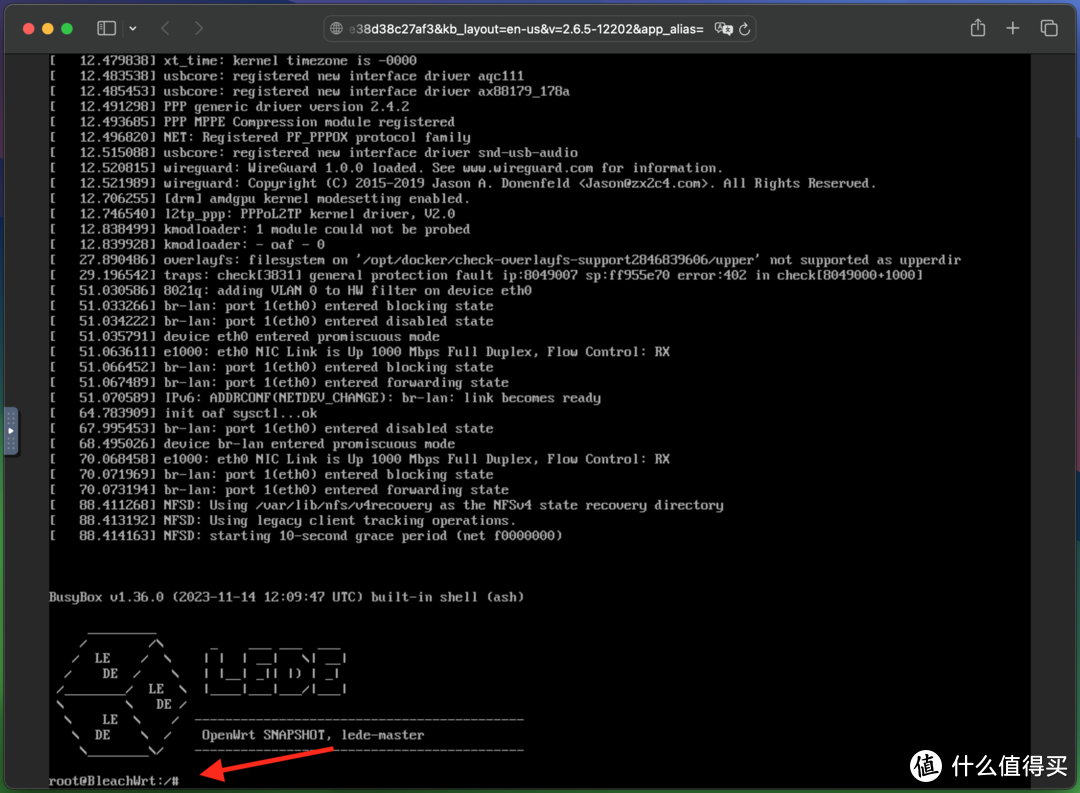
2.取决于运行速度和磁盘性能,第一次开机需要等待十几秒到一分钟时间,在远程连接窗口里按一下回车,如果出现LEDE画面和闪烁的光标,说明已经启动完成可以开始配置了:
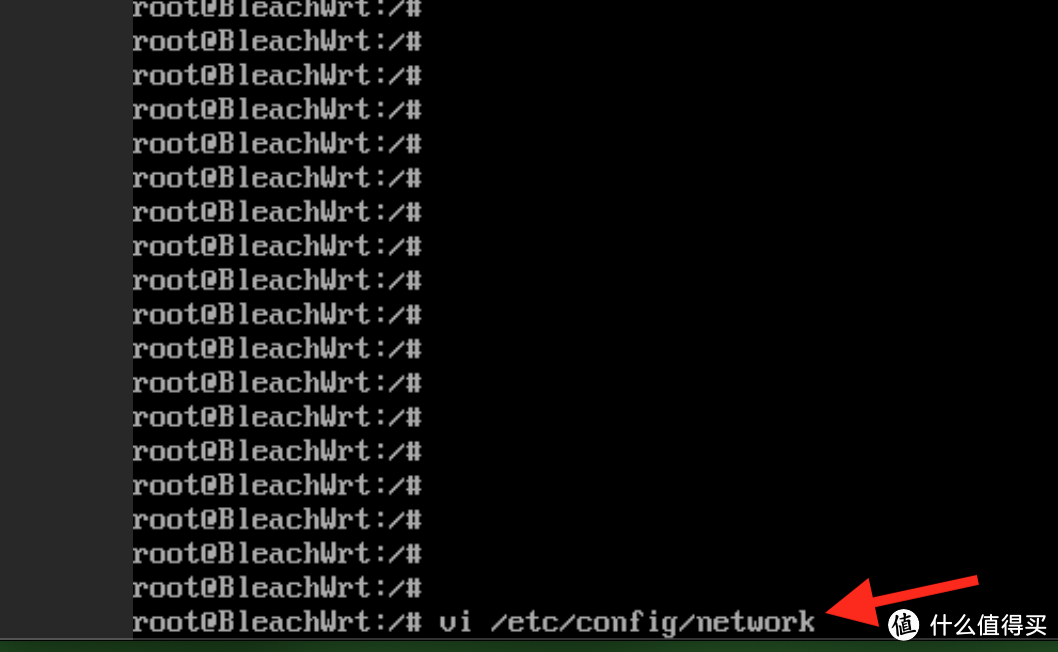
3.输入以下命令后回车,修改openwrt的默认ip地址:
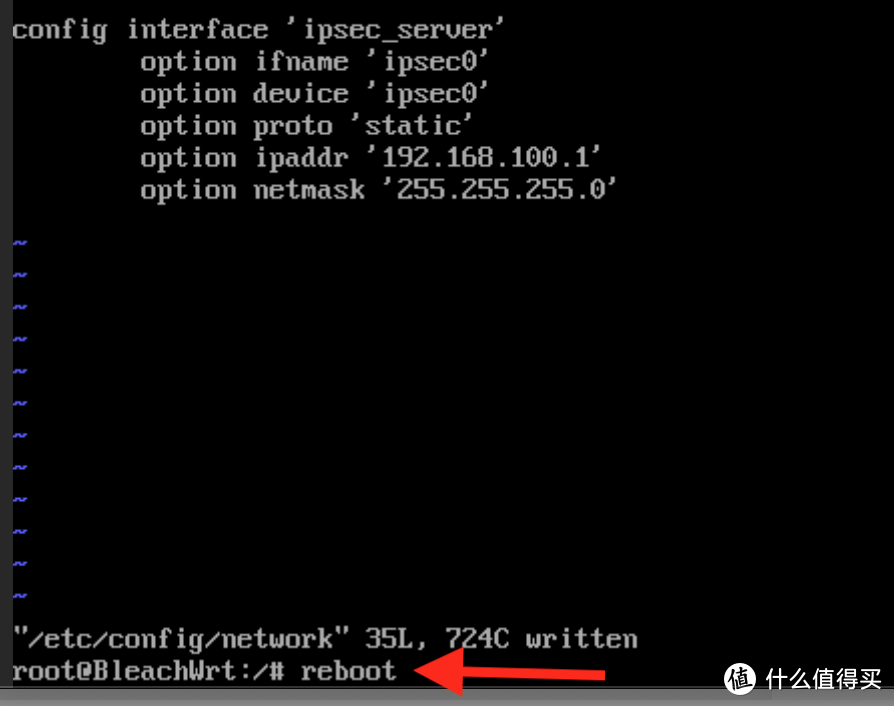
vi /etc/config/network
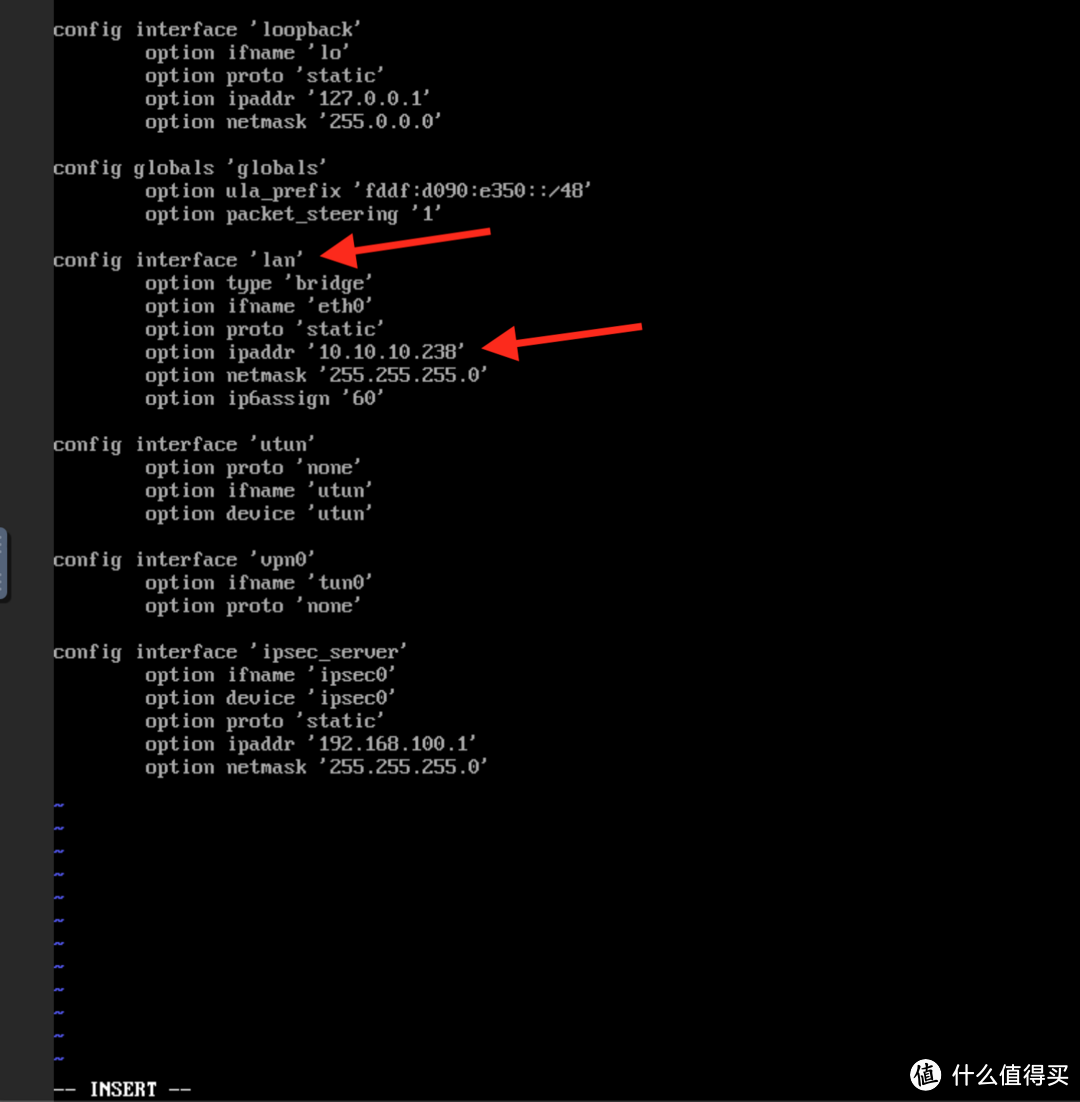
4.在命令行界面上按一下键盘上的i键进入修改,把config interface ‘lan’下边的option ipaddr从192.168.1.1改成你主路由同网断的ip,ip地址不要和其他设备重复了:
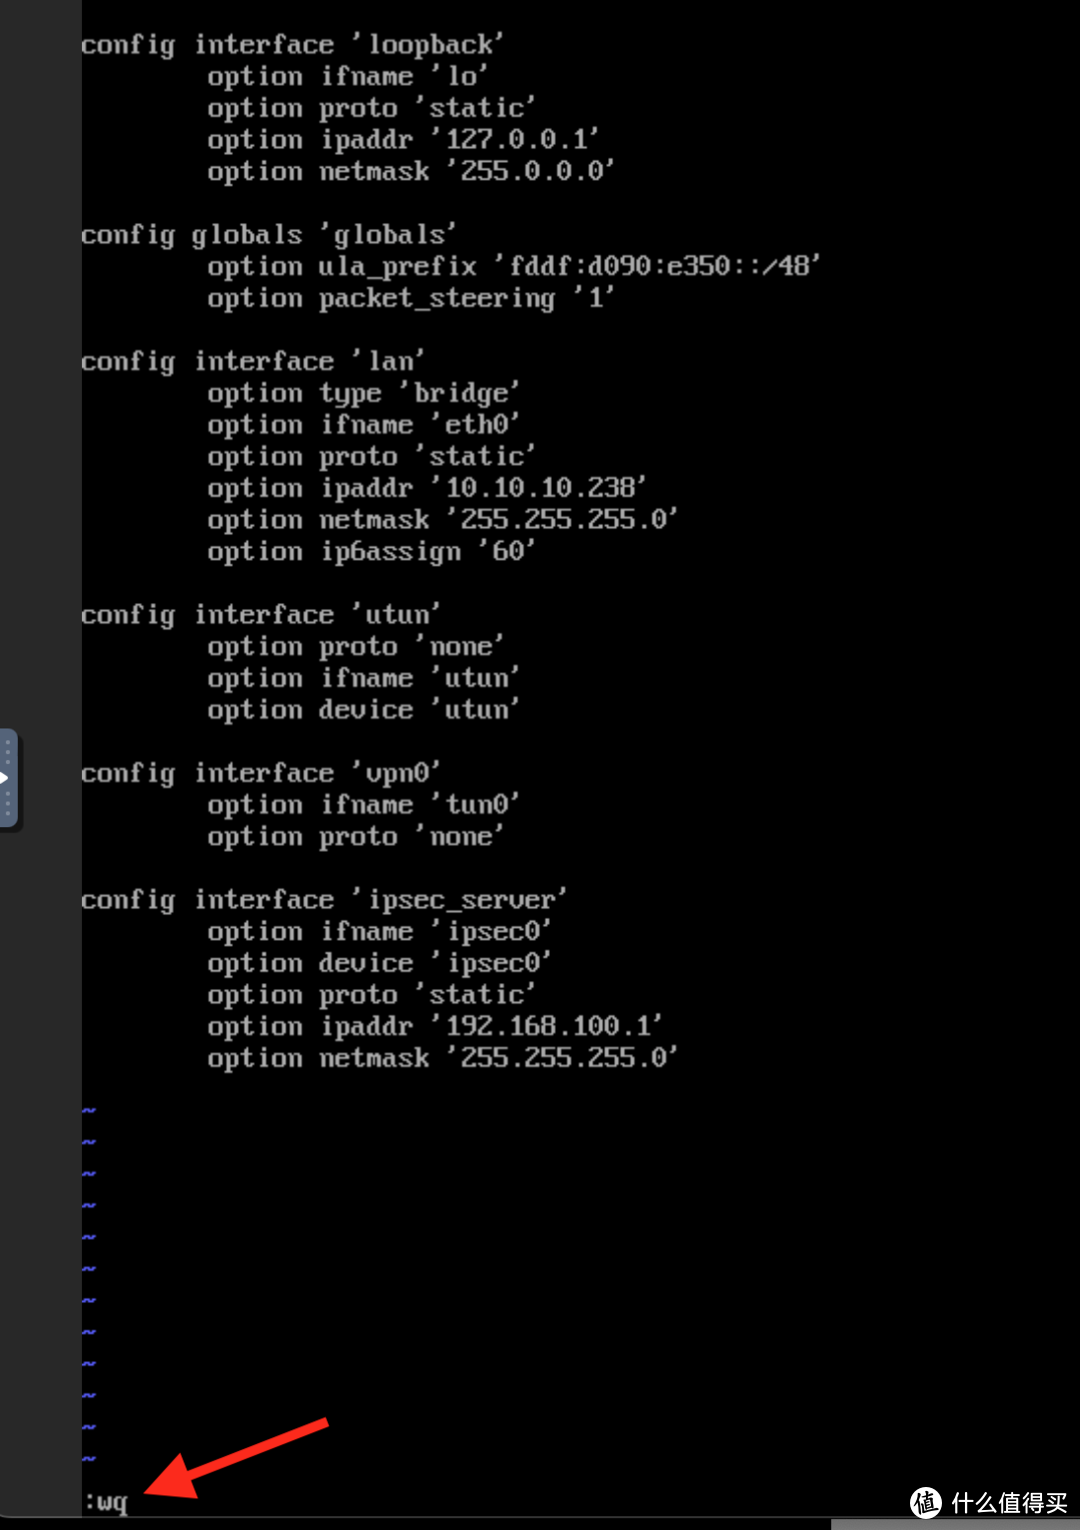
5.改完后按一下键盘上的esc键退出修改,再输入:wq回车保存修改并且退出:
6.输入reboot,回车,重启openwrt虚拟机:
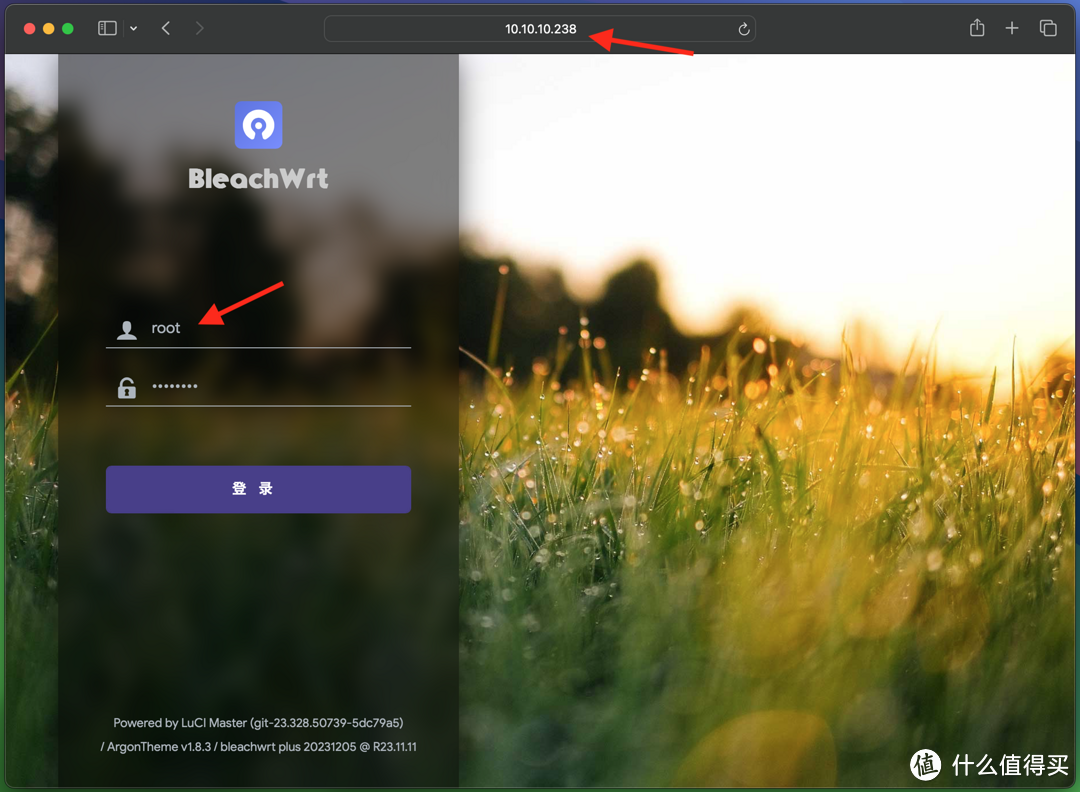
7.等待一段时间后重启完毕,在浏览器上输入你刚才改的ip地址,没问题的话就可以打开openwrt登录界面了,打不开的话有可能是还没完全启动,或者ip配置有问题,需要重复上面的步骤修改。输入默认用户名root,默认密码password,点击登录,之后记得改默认密码:
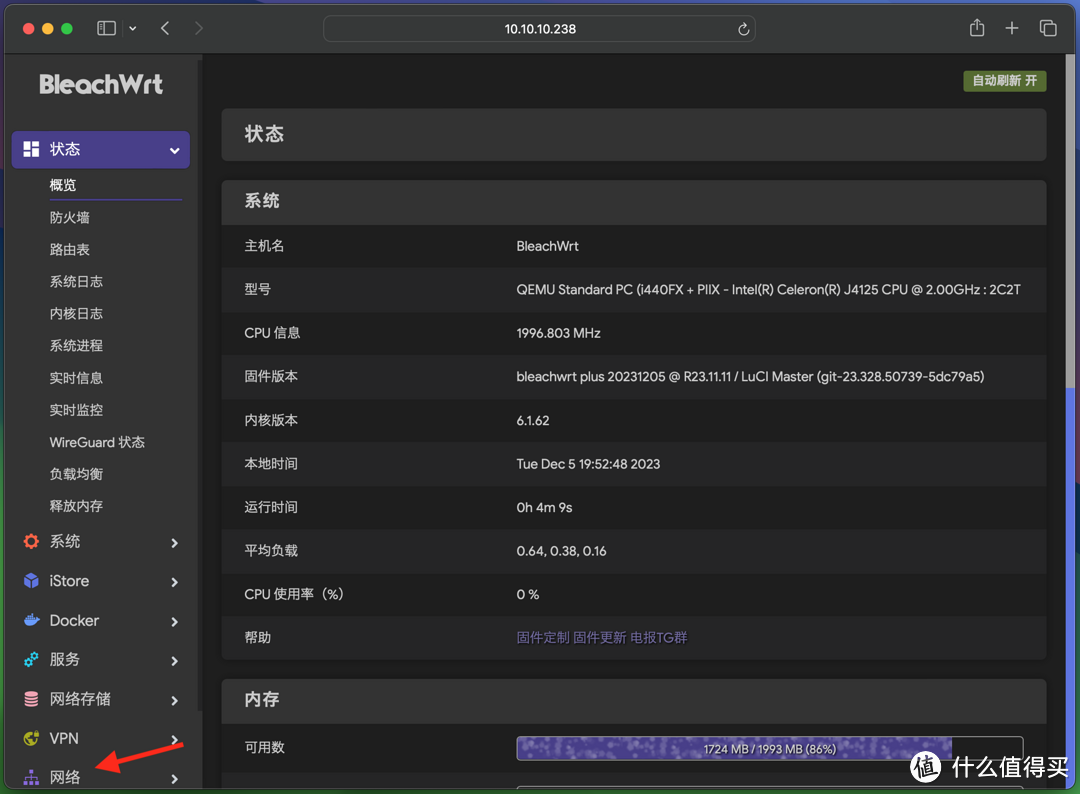
8.看到这个界面就离胜利不远了。点击左侧网络进一步配置网络:
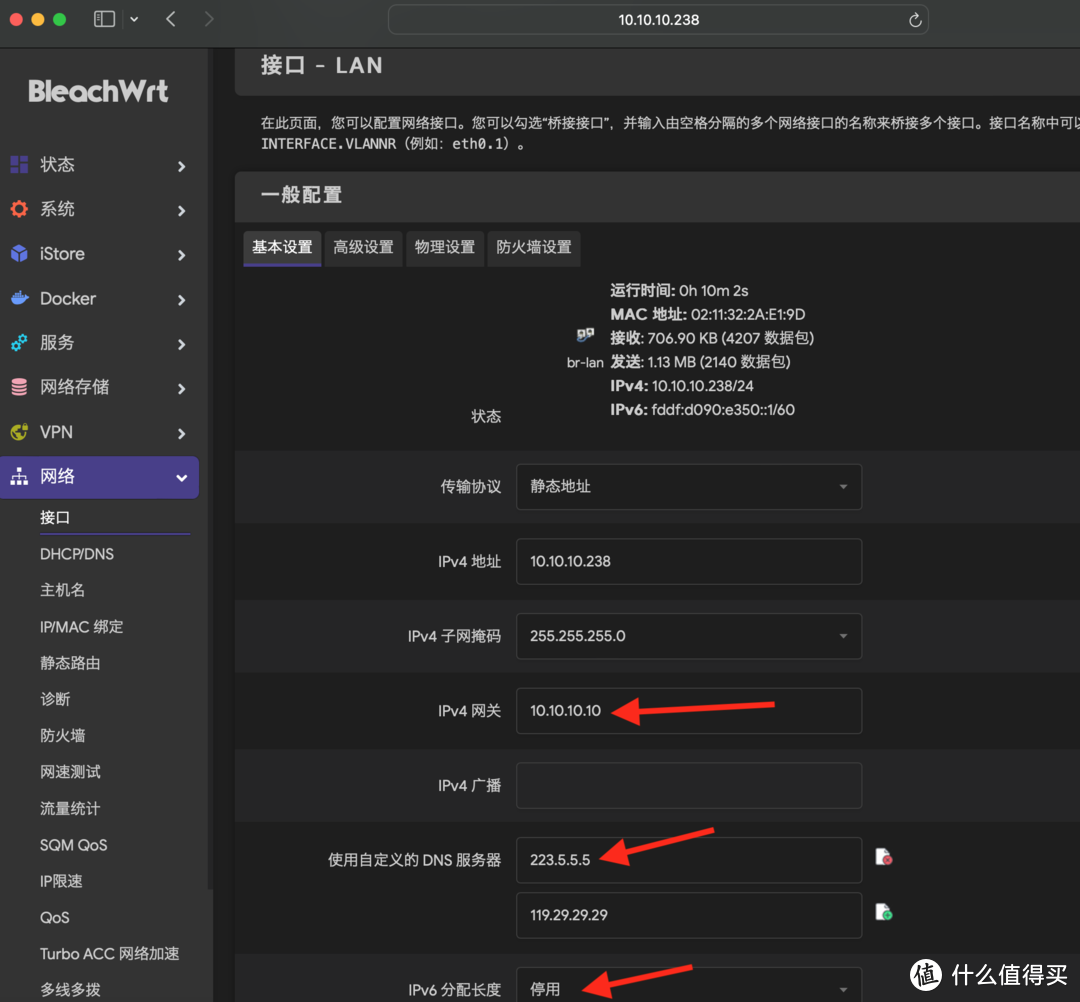
9.配置网络。点击网络下边的接口,点击LAN后面的修改:
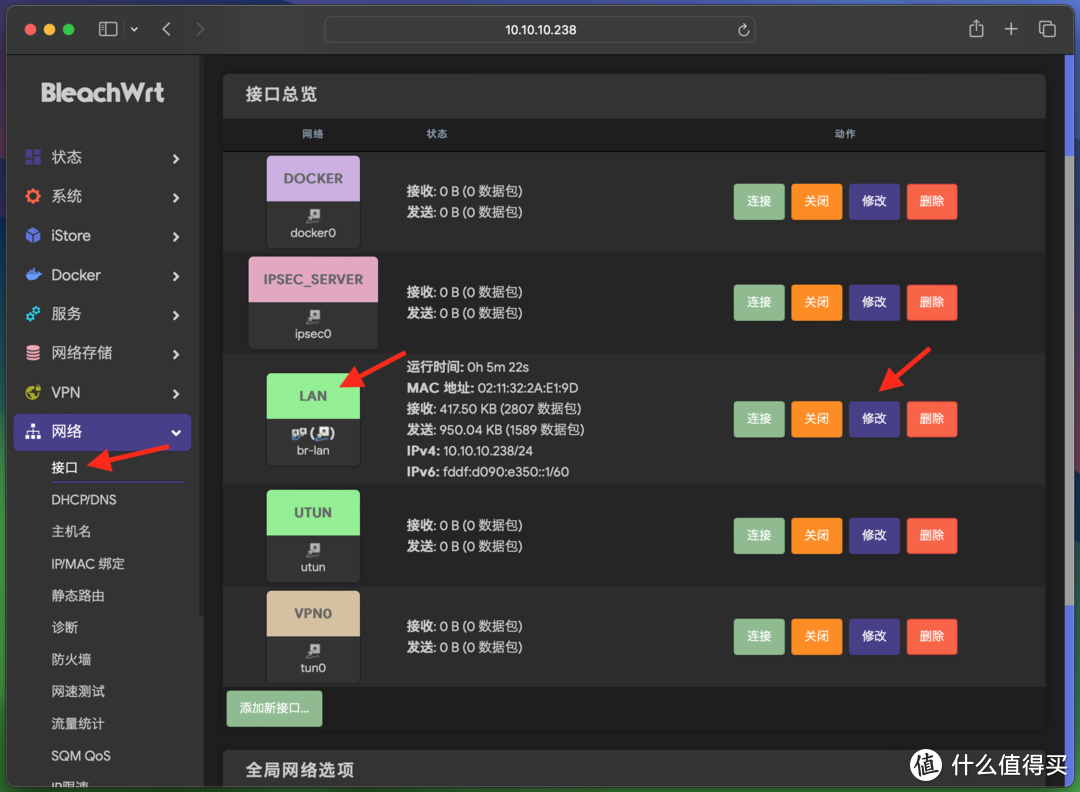
10.在IPV4网关处填入主路由器的IP地址,自定义DNS服务器不需要更改的话就也填入主路由器IP地址,我这里是填了两个公共DNS,IPV6分配长度选择停用:
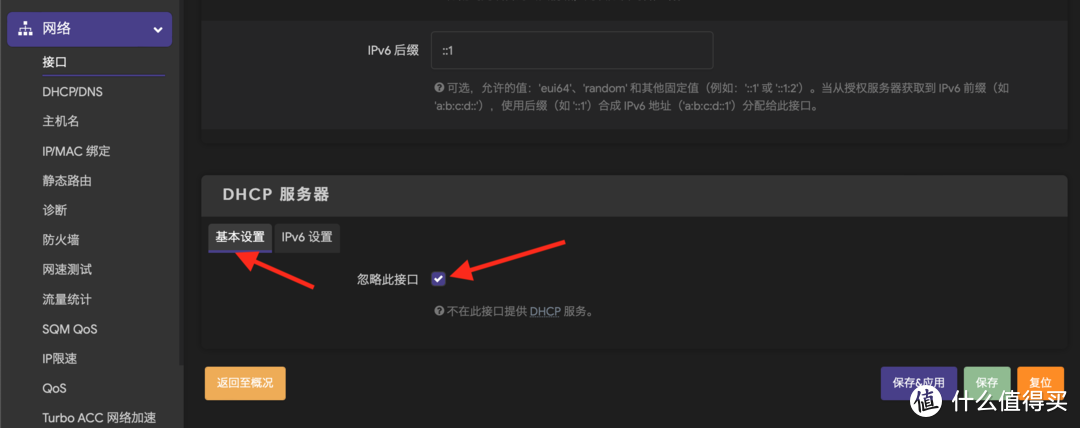
页面往下翻,在DHCP服务器下基本设置里,勾选忽略此接口,由于我们是做旁路由,DHCP服务由主路由提供比较合理,要不然旁路由关机后其他设备就无法获取IP联网了:
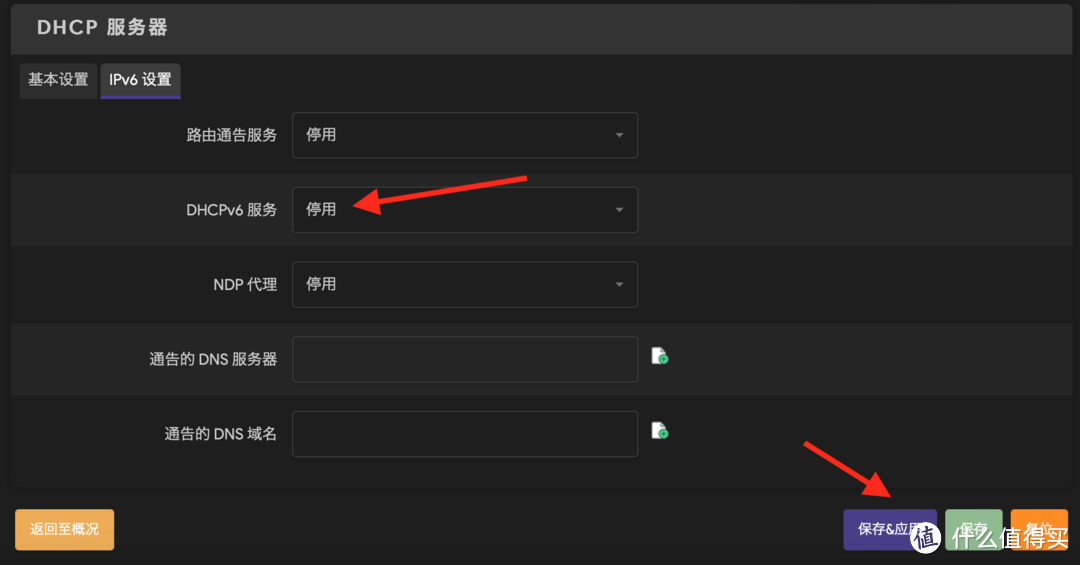
点击IPV6设置,把ipv6的DHCP服务也设置为停用,点击保存&应用:
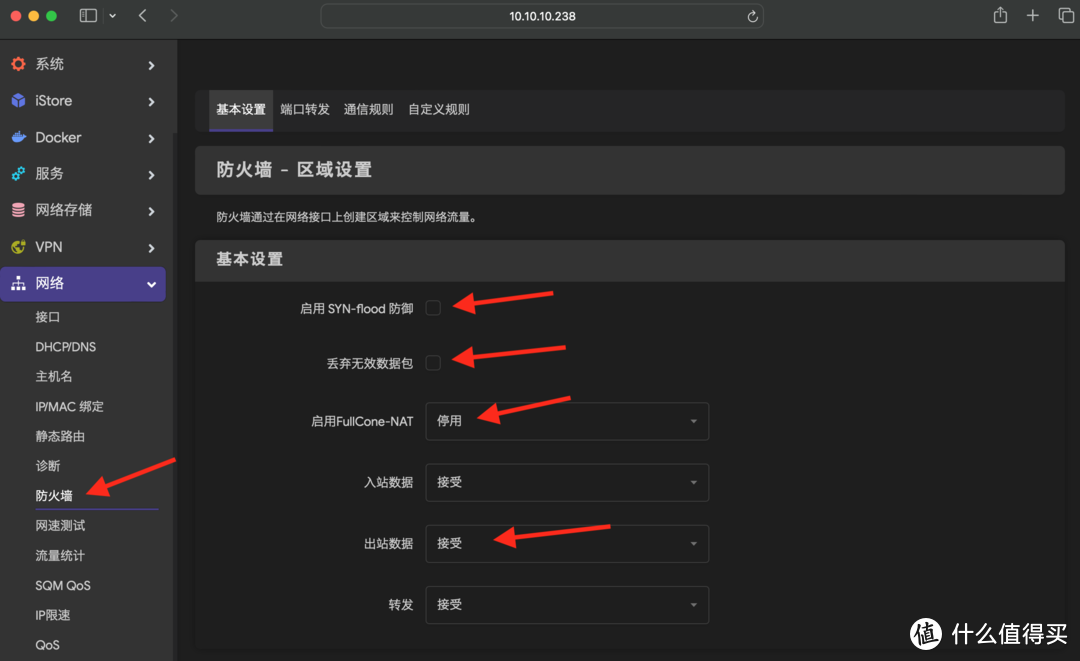
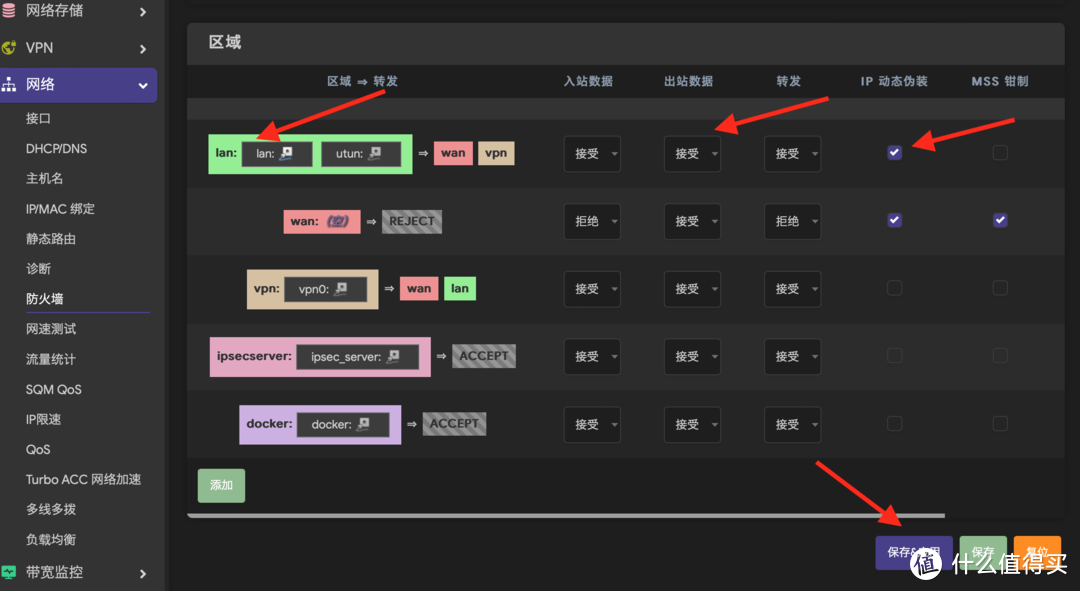
11.配置防火墙。点击网络下方的防火墙,像图上这样设置:把启动SYN-flood防御、丢弃无效数据包前面的勾都去掉,启用FullCone-NAT设置为停用,入站、出站、转发数据全部设置为接受:
往下翻,把LAN后面的IP动态伪装打上勾,全部设置为接受,点击保存&应用:
定制版openWRT已经装好了常用的服务,可直接使用,另外还可以安装其他第三方插件,具体你需要用到哪些插件和服务,具体怎么用就需要你自己去研究了。

四、配置为旁路由
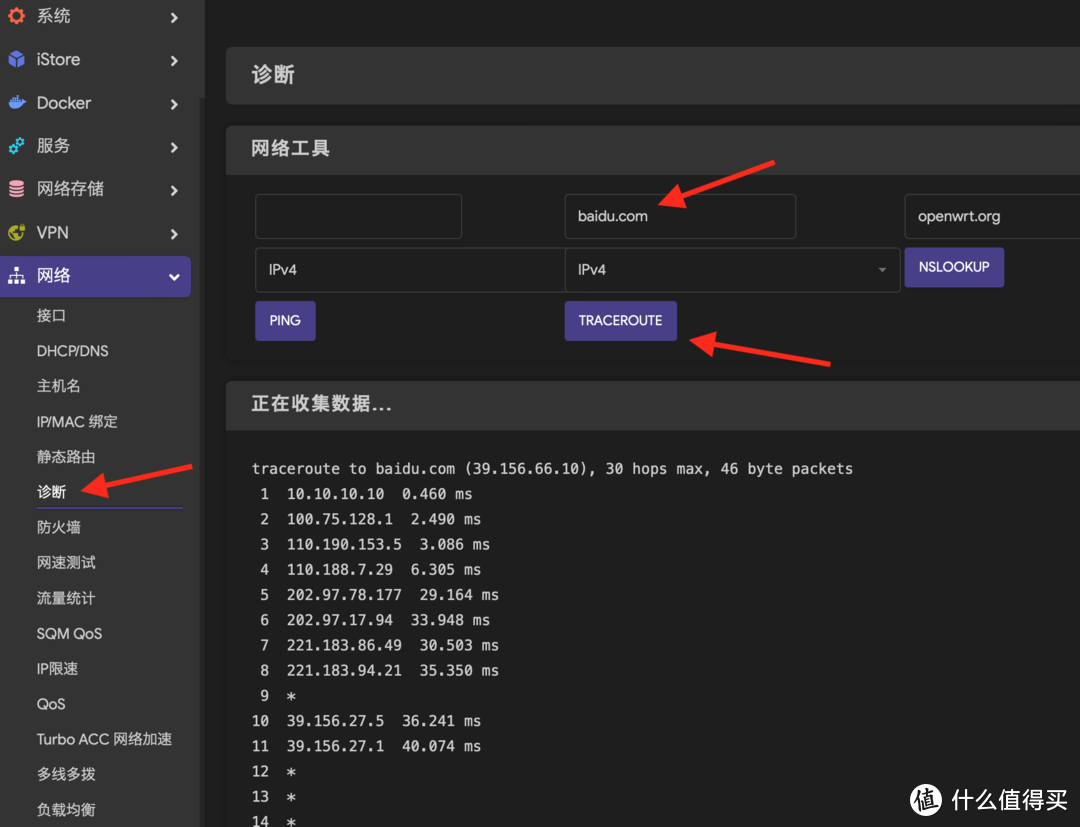
1.先简单的测试下网络配置有没有问题。点击网络下方的诊断,中间的框里输入一个知名网站的网址,点击下边的TRACEROUTE,如图,如果下方第一行是主路由IP地址,最终通过多次跳转,说明网络配置正确:
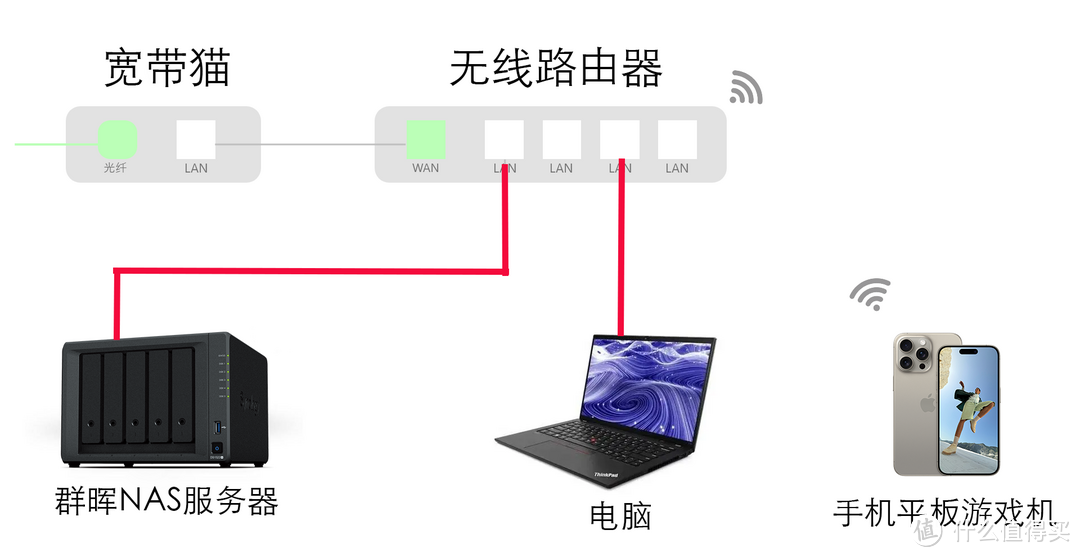
旁路由工作原理见文章开篇的第一图,比较灵活,可以长时间做全局路由,也可以临时单设备使用,这两种方式在不需要旁路由或者旁路由出现问题时都可以快速恢复正常连接,不至于让全屋网络瘫痪,可以根据你的需求选一设置:
全局旁路由:家里所有设备都经过openWRT,使用openWRT上的去广告、加速等服务,只需要在主路由器的局域网设置里把网关地址填写为openWRT的地址即可。以我的小米AX9000路由器为例,只需要进入局域网设置、把默认网关填写为我创建的openWRT地址保存,这样所有连接AX9000路由器的设备都会经过旁路由。但要注意这样的设置必须保证NAS 24小时不间断开机,不需要使用旁路由之前必须把默认网关改回:

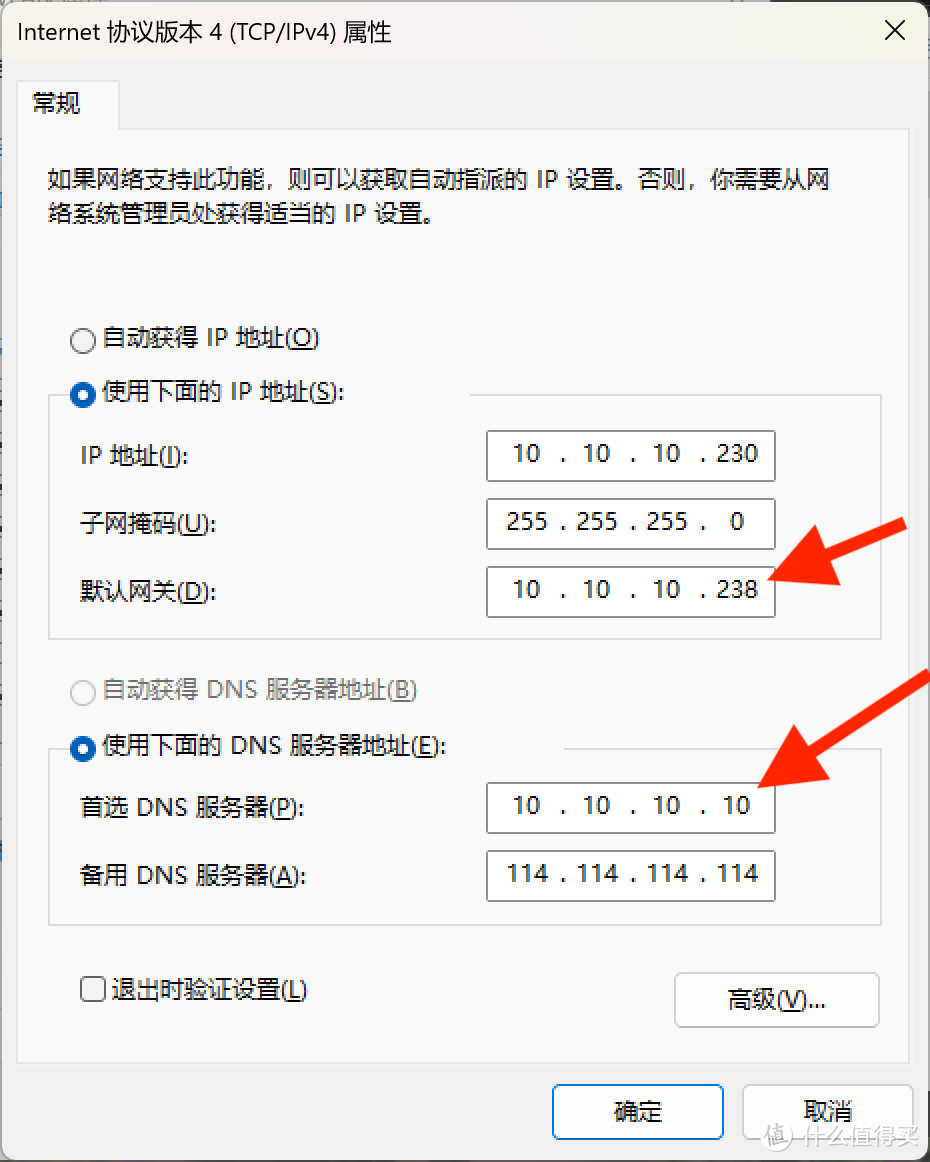
单设备使用旁路由:某些设备临时或者长期需要用到旁路由,就可以在设备上单独设置,即使旁路由关机或者失效,也不会影响到其他家里其他设备,设置方法就是在设备IP地址配置界面把网关填写为openWRT的ip地址即可。以电脑为例,在网卡的ipv4设置里,把默认网关设置成openwrt,dns设置成主路由,保存后正常可以访问网络就说明配置生效了。
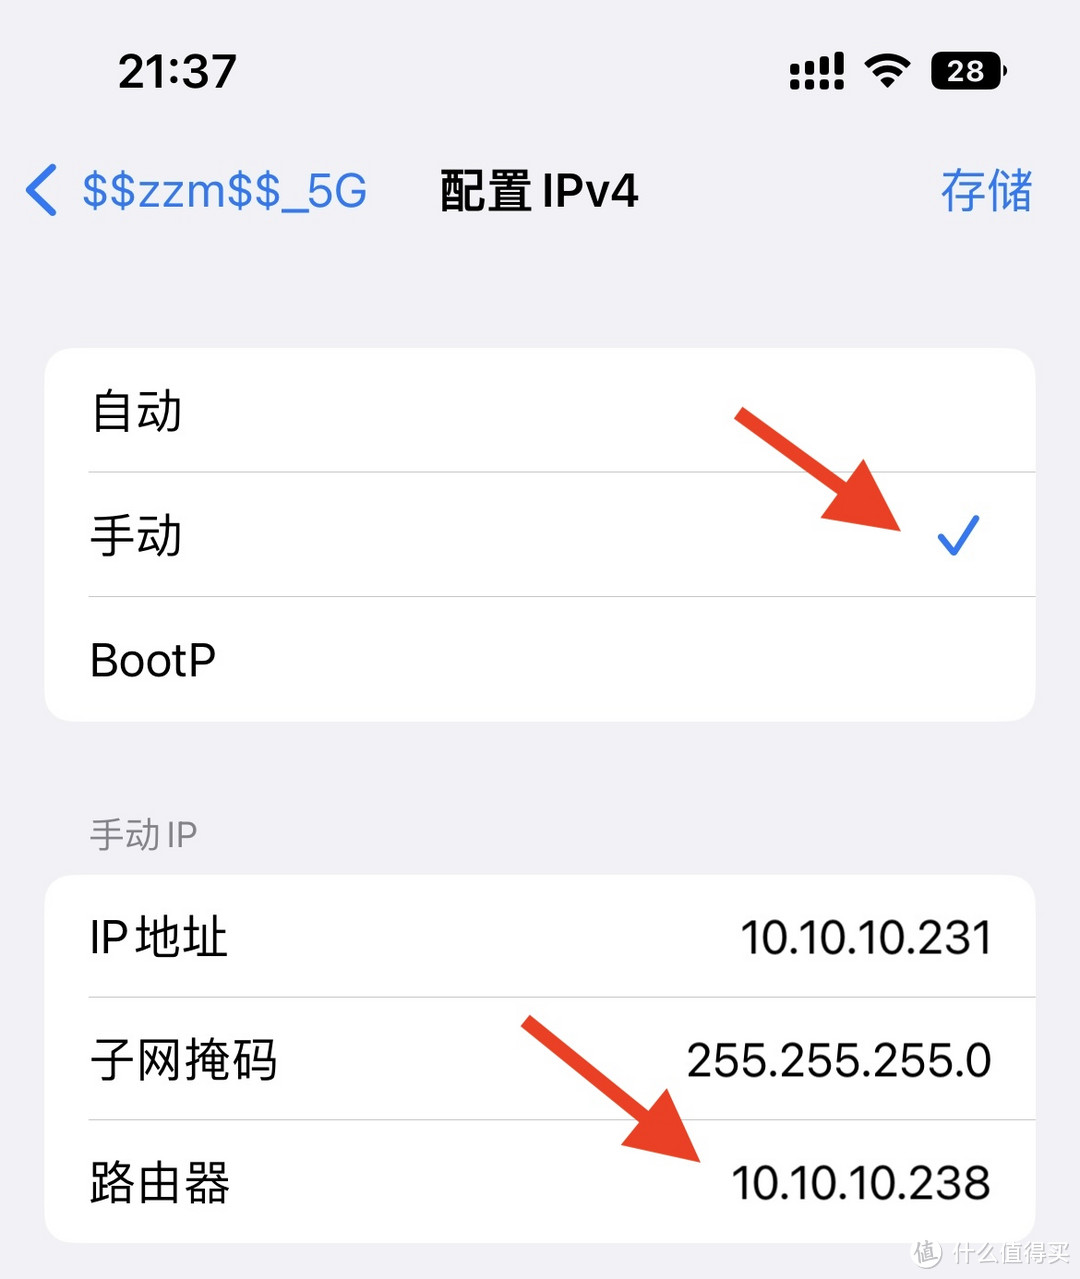
手机等移动设备同理,以iPhone为例,在无线连接属性里点配置IPv4,选择手动,路由器处输入openWRT旁路由ip即可:
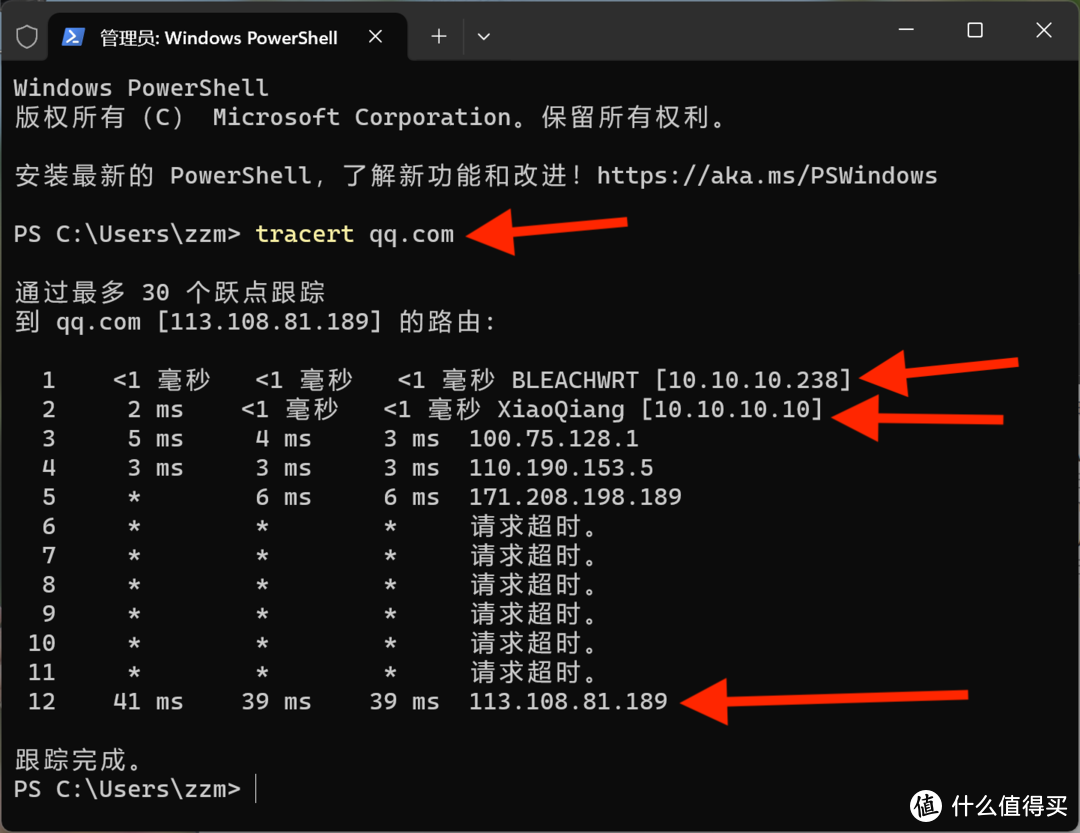
可以使用命令具体测试一下旁路由是否生效以及延迟情况,比如在windows或者linux主机Powershell里输入,网址可以切换成其他网站:
tracert qq.com
mac苹果系统上使用
traceroute qq.com
如图,路由跟踪结果第一行是openwrt的ip地址、第二行为主路由ip地址,并且最终连接到了目标,证明旁路由和配置完全正确,旁路由和主路由延迟都小于1ms,响应很快:
很简单吧,感兴趣的朋友可以去试试。


· 全网最简单!3分钟用满血DeepSeek R1开发一款AI智能客服,零代码轻松接入微信、公众号、小程
· .NET 10 首个预览版发布,跨平台开发与性能全面提升
· 《HelloGitHub》第 107 期
· 从文本到图像:SSE 如何助力 AI 内容实时呈现?(Typescript篇)
· 全程使用 AI 从 0 到 1 写了个小工具