源代码安装:
通过yum就不会有依赖关系(安装mysql是安装mysqlServer)。Rpm更新的时候,如果没有安装软件就回去安装。
应用程序和系统命令会放在不同的目录中(bin,sbin,usr/bin,usr/sbin),如果yum找不到并且也没有rpm包,就需要自己编译后安装。条件:
1.是否具备软件编译的环境。
首先查询操纵系统中是否安装了编译环境gcc:
$rpm -qa | grep gcc :如果找到libgcc,这个不是编译环境,只是一个库。
root@ubuntu:/# apt-get install gcc
2.应用程序源代码。
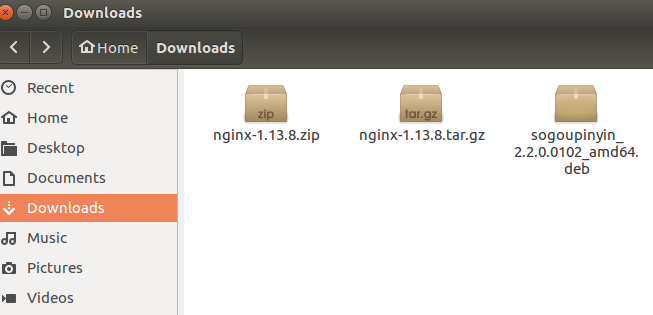
打开浏览器去下载nginx的源码(development开发版是比较新但是不稳定,stable是稳定版,beta是测试版)
![]()
Zip是windows,tar.gz是linux的。
root@ubuntu:/usr# find / -name nginx-1.13.8.tar.gz
/home/yw1989/Downloads/nginx-1.13.8.tar.gz
1.解压压缩包。
root@ubuntu:/home/yw1989/Downloads# tar zxf nginx-1.13.8.tar.gz
root@ubuntu:/home/yw1989/Downloads# cd nginx-1.13.8 :进入这个目录里面去
root@ubuntu:/home/yw1989/Downloads/nginx-1.13.8# ls
auto CHANGES.ru configure html man src
CHANGES conf contrib LICENSE README
root@ubuntu:/home/yw1989/Downloads/nginx-1.13.8# cd src :进入到源代码里面去
root@ubuntu:/home/yw1989/Downloads/nginx-1.13.8/src# ls
core event http mail misc os stream
core:是核心,linux里面很多方法都是用c语言写的。
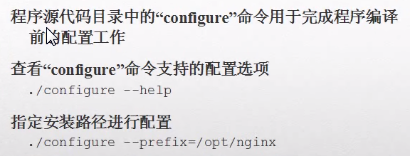
2.编译前的配置工作(检查工作)(安装到哪个目录,是否需要相关的依赖程序等)。
![]()
进入到nginx-1.13.8根目录之后都会有一个config文件,或者叫脚本,程序的编译都要基于config,所以config用于完成编译前的配置工作。
root@ubuntu:/home/yw1989/Downloads/nginx-1.13.8# ./configure --help

  --help                             print this message
  --prefix=PATH                      要把软件安装到哪个目录
  --sbin-path=PATH                   nginx执行程序安装到哪个目录
  --modules-path=PATH                set modules path
  --conf-path=PATH                   配置文件安装到哪里
  --error-log-path=PATH              错误日志设置到哪
  --pid-path=PATH                    进程文件pid设置到哪里
  --lock-path=PATH                   锁定文件放到哪里
root@ubuntu:/home/yw1989/Downloads/nginx-1.13.8# ./configure(都走默认配置,什么都不指定)
checking for OS
 + Linux 4.13.0-32-generic x86_64
checking for C compiler ... found
 + using GNU C compiler
 + gcc version: 5.4.0 20160609 (Ubuntu 5.4.0-6ubuntu1~16.04.4)
checking for gcc -pipe switch ... found
checking for -Wl,-E switch ... found
checking for gcc builtin atomic operations ... found

./configure: error: the HTTP rewrite module requires the PCRE library.  : 出错,缺少PCRE相关依赖库
You can either disable the module by using --without-http_rewrite_module
ubuntu安装nginx时提示error: the HTTP rewrite module requires the PCRE library
需要安装pcre包。
sudo apt-get update
sudo apt-get install libpcre3 libpcre3-dev
你可能还需要安装
sudo apt-get install openssl libssl-dev
root@ubuntu:/home/yw1989/Downloads/nginx-1.13.8# ./configure:再次configure(检查当前环境是否满足编译需求,满足才可以进行编译,)
Configuration summary
  + using system PCRE library
  + OpenSSL library is not used
  + using system zlib library

Configure只是一个检查的check的过程:
checking for PCRE library ... found :找到pcre库
checking for zlib library ... found
checking for sys/filio.h ... not found
checking for sys/param.h ... found
checking for sys/mount.h ... found
checking for sys/statvfs.h ... found
checking for crypt.h ... found

  nginx path prefix: "/usr/local/nginx"   :将会安装的路径
  nginx binary file: "/usr/local/nginx/sbin/nginx" :将会安装的nginx的执行文件
  nginx modules path: "/usr/local/nginx/modules"
  nginx configuration prefix: "/usr/local/nginx/conf" :将会安装的配置文件
  nginx configuration file: "/usr/local/nginx/conf/nginx.conf"
  nginx pid file: "/usr/local/nginx/logs/nginx.pid" :将会安装的pid文件
  nginx error log file: "/usr/local/nginx/logs/error.log" :将会安装的错误文件
  nginx http access log file: "/usr/local/nginx/logs/access.log"
  nginx http client request body temporary files: "client_body_temp"
  nginx http proxy temporary files: "proxy_temp"
  nginx http fastcgi temporary files: "fastcgi_temp"
  nginx http uwsgi temporary files: "uwsgi_temp"
  nginx http scgi temporary files: "scgi_temp"
1.编译。
make进行编译,make install进行安装。
root@ubuntu:/home/yw1989/Downloads/nginx-1.13.8# make
make -f objs/Makefile
make[1]: Entering directory '/home/yw1989/Downloads/nginx-1.13.8'
cc -c -pipe  -O -W -Wall -Wpointer-arith -Wno-unused-parameter -Werror -g  -I src/core -I src/event -I src/event/modules -I src/os/unix -I objs \
    -o objs/src/core/nginx.o \
2.编译后安装。
root@ubuntu:/home/yw1989/Downloads/nginx-1.13.8# make install
make -f objs/Makefile install
root@ubuntu:/usr/local# cd nginx/
root@ubuntu:/usr/local/nginx# ls
conf  html  logs  sbin
root@ubuntu:/usr/local/nginx# cd sbin
root@ubuntu:/usr/local/nginx/sbin# ls
Nginx  :这就是执行程序(windows上的exe主执行程序)

root@ubuntu:/usr/local/nginx/sbin# ps -ef | grep nginx
root      12420   3626  0 21:39 pts/2    00:00:00 grep --color=auto nginx :没有执行起来

root@ubuntu:/usr/local/nginx/sbin# ./nginx :运行起来nginx

root@ubuntu:/usr/local/nginx/sbin# ps -ef | grep nginx
root      12422   2571  0 21:39 ?        00:00:00 nginx: master process ./nginx :运行起来了,master process和worker process两个主进程都运行起来了
nobody    12423  12422  0 21:39 ?        00:00:00 nginx: worker process
root      12425   3626  0 21:39 pts/2    00:00:00 grep --color=auto nginx

安装软件可以通过yum,rpm,源代码3中方式安装。首先通过yum安装,yum找不到就用rpm,rpm不行就用源代码安装。
用户和组的管理:
Linux的账号分为用户账号和组账号2种。

用户账号:分为普通用户和超级用户,普通用户只能在特定文件夹下操作,超级用户可以对所有文件夹操作并且控制普通用户。

组账号:组是用户的集合,组分为私有组和公共组,建议一个用户不指定组就会创建一个和该用户同名的私有组(私有组和用户名称同名,并且只有用户一个人),标准组可以容纳多个用户。
root@ubuntu:/etc# vim passwd :存储的是系统创建出来的用户信息

每一行的列(用户名,登陆的名字 :口令,x是密文:id号码:组的标识号:描述:登陆之后进去的目录:命令解释器,root用户登陆进来就默认要使用bash解释器,/usr/sbin/nologin表示是系统内置的账号,有一些功能,是不能登陆系统的)

root :x:0:0:root:/root:/bin/bash
daemon:x:1:1:daemon:/usr/sbin:/usr/sbin/nologin
bin:x:2:2:bin:/bin:/usr/sbin/nologin
sys:x:3:3:sys:/dev:/usr/sbin/nologin
sync:x:4:65534:sync:/bin:/bin/sync
systemd-timesync:x:100:102:systemd Time Synchronization,,,:/run/systemd:/bin/false
systemd-network:x:101:103:systemd Network Management,,,:/run/systemd/netif:/bin/false
systemd-resolve:x:102:104:systemd Resolver,,,:/run/systemd/resolve:/bin/false
systemd-bus-proxy:x:103:105:systemd Bus Proxy,,,:/run/systemd:/bin/false
syslog:x:104:108::/home/syslog:/bin/false
_apt:x:105:65534::/nonexistent:/bin/false
messagebus:x:106:110::/var/run/dbus:/bin/false
uuidd:x:107:111::/run/uuidd:/bin/false
(x是密码,在passwd文件是看不到的,shadow存放的是用户密码)
root@ubuntu:/etc# vim shadow
(第二列是加密后的密码,*因为是不能登陆系统,所以没有密码,)
root:$6$dNWnW/HB$pvRspIT9gcaUqvTDIuhRyCCyoNDfw6utsfRzCO9cxLsQZmql77t9T6fFkibsOeS3C3RIcTa.t2akNS3b19Zn4/:17574:0:99999:7:::
daemon:*:17379:0:99999:7:::
bin:*:17379:0:99999:7:::
sys:*:17379:0:99999:7:::
sync:*:17379:0:99999:7:::
games:*:17379:0:99999:7:::
man:*:17379:0:99999:7:::
proxy:*:17379:0:99999:7:::
www-data:*:17379:0:99999:7:::
backup:*:17379:0:99999:7:::
list:*:17379:0:99999:7:::
irc:*:17379:0:99999:7:::
root@ubuntu:/etc# vim group :查看组的信息
(第一列是组名:第二列是组密码:第三列是组的表示号:最后一列是组里面有哪些用户)
root:x:0:
daemon:x:1:
bin:x:2:
sys:x:3:
adm:x:4:syslog,yw1989
tty:x:5:
disk:x:6:
kmem:x:15:
dialout:x:20:
cdrom:x:24:yw1989
floppy:x:25:
tape:x:26:
sudo:x:27:yw1989
查看组密码:(组密码保存的地方)
root@ubuntu:/etc# vim gshadow

root:*::
daemon:*::
bin:*::
sys:*::
adm:*::syslog,yw1989
tty:*::
disk:*::
lp:*::
mail:*::
news:*::
uucp:*::
man:*::
proxy:*::
------------------------------------------------------------------------------------------------------------------------

用的比较多的是passwd和group文件。
创建用户:root@ubuntu:/# useradd yw1
root@ubuntu:/# vim etc/passwd
yw1:x:1001:1001::/home/yw1:

root@ubuntu:/# useradd -c "shushi" yw2 :添加用户
root@ubuntu:/# vim etc/passwd
yw2:x:1002:1002:shushi:/home/yw2:

root@ubuntu:/# passwd yw1 :添加密码
Enter new UNIX password:
Retype new UNIX password:
passwd: password updated successfully

root@ubuntu:/# userdel yw2 :删除用户(删出用户的时候,私有组还在)
root@ubuntu:/# vim etc/passwd

创建用户的时候会创建一个同名的私有组出来(只能有一个用户,不能别的用户加进来),
root@ubuntu:/# vim etc/group
yw1:x:1001: :同名私有组
root@ubuntu:/# groupadd yw1group(创建的是标准组,其他用户可以加进来)
yw1group:x:1002:
root@ubuntu:/# groupdel  yw1group :删除组

root@ubuntu:/# useradd -G yw1group yw4 :用户yw4加入yw1group组(yw4是不存在的用户)
root@ubuntu:/# vim etc/group
yw1group:x:1002:yw4 :yw4用户在标准组里面
yw4:x:1005: :并且也会创建yw4的私有组
root@ubuntu:/# vim etc/passwd
yw4:x:1004:1005::/home/yw4:
Linux系统管理
Linux的用户必须要有密码,不然没法登陆系统。
Passwd:修改当前用户密码

root@ubuntu:/# vim etc/login.defs
PASS_MAX_DAYS   99999  : 密码最大天数
PASS_MIN_DAYS   0   :密码最小天数
PASS_WARN_AGE   7

su - root,su - yw1989 : 切换用户

sudo :是借用root账号权限做普通用户无法做的事

yw1989@ubuntu:~$ id  : 查看当前用户的uid,gid,groups
uid=1000(yw1989)
gid=1000(yw1989) groups=1000(yw1989),4(adm),24(cdrom),27(sudo),30(dip),46(plugdev),113(lpadmin),128(sambashare),999(docker)
yw1989@ubuntu:~$ groups  :  查看当前用户在哪个组
yw1989 adm cdrom sudo dip plugdev lpadmin sambashare docker

yw1989@ubuntu:~$ pwd  :查看当前目录
/home/yw1989


 浙公网安备 33010602011771号