Elasticsearch安装
安装Elasticsearch
1、拉取镜像
docker pull elasticsearch:7.7.0
2、启动
docker run --name elasticsearch -d -e ES_JAVA_OPTS="-Xms512m -Xmx512m" -e "discovery.type=single-node" -p 9200:9200 -p 9300:9300 elasticsearch:7.7.0

--name 表示容器名称
-d: 后台运行容器,并返回容器ID;
-e: 指定容器内的环境变量
-p: 指定端口映射,格式为:主机(宿主)端口:容器端口
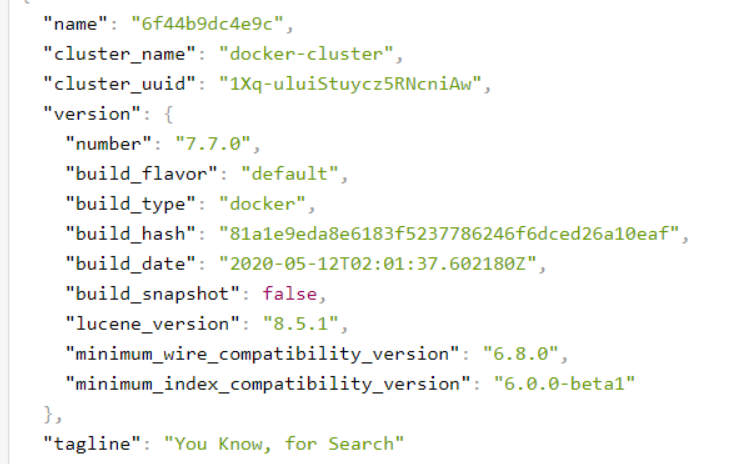
es默认端口为9200,只用ip地址+端口号直接访问,就会返回如下图。出现这个界面就表示你安装成功了。
3、添加账号密码
进入容器
docker exec -it elasticsearch /bin/bash

vi config/elasticsearch.yml

#添加如下内容
http.cors.enabled: true
http.cors.allow-origin: "*"
http.cors.allow-headers: Authorization
xpack.security.enabled: true
xpack.security.transport.ssl.enabled: true

#退出 重启容器
#再次进入容器 执行下面命令
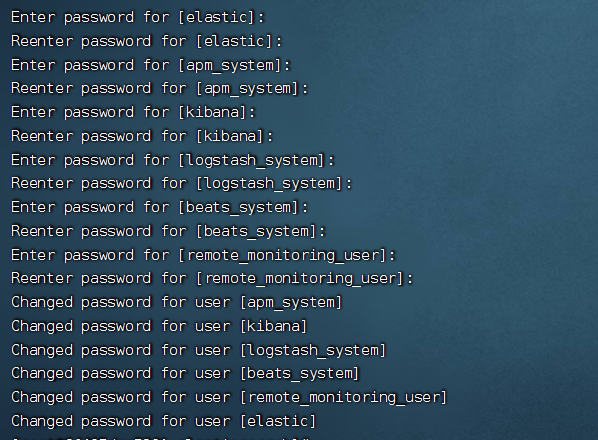
./bin/elasticsearch-setup-passwords interactive


给以下账号设置密码
elastic 、apm_system、kibana 、logstash_system 、beats_system 、remote_monitoring_user
安装ElasticSearch-Head
1、拉取镜像
docker pull mobz/elasticsearch-head:5
2、启动
docker run --name elasticsearch-head -p 9100:9100 -d mobz/elasticsearch-head:5
#没有密码 地址栏直接 ip:端口
http://192.168.31.128:9100

#有密码的 地址栏 http://IP:9100/?auth_user=用户名&auth_password=密码
http://192.168.31.128:9100/?auth_user=elastic&auth_password=162552

通过该url访问es-head,然后注正常填写es的地址即可


3、处理跨域
执行命令docker exec -it elasticsearch /bin/bash 进入到第一步创建的ElasticSearch容器中,修改配置文件vi config/elasticsearch.yml即可。
配置修改完后需执行命令exit退出容器,接着执行docker restart 容器ID重启容器即可。
docker exec -it elasticsearch /bin/bash
vi config/elasticsearch.yml
#添加
http.cors.enabled: true
http.cors.allow-origin: "*"
4、处理报406错误
只需要修改ElasticSearch-Head容器中的配置即可,将配置文件复制到宿主机进行修改。
执行docker cp 容器ID:/usr/src/app/_site/vendor.js /usr/local/ ,此命令会把docker容器中的文件复制到你的宿主机目录。
    --docker cp 容器ID:/usr/src/app/_site/vendor.js 宿主机目录
进入到/usr/local即可看到从容器中复制出来的文件vendor.js。
修改文件第6886、7574行,将"application/x-www-from-urlencodes"修改为"application/json;charset=UTF-8"即可
修改后再将文件复制到容器中,从容器复制文件到宿主机命令已经使用过了,
那么现在只不过是把俩个目录反过来即可执行docker cp /usr/local/vendor.js 容器ID:/usr/src/app/_site
    --docker cp /宿主机目录/vendor.js 容器ID:/usr/src/app/_site
最后一步重启ElasticSearch-Head容器就结束了。
安装kibana
项目场景:使用docker安装部署kibana
前提:已成功部署安装elasticsearch
1、拉取镜像
首先需要把Kibana从DockerHub上拉取下来:统一版本7.7.0
docker pull kibana:7.7.0
2、启动并且指定es IP
#运行kibana 注意IP一定不要写错
docker run --name kibana -e ELASTICSEARCH_HOSTS=http://192.168.31.128:9200 -p 5601:5601 -d kibana:7.7.0
3、配置中文显示(可选)
#进入容器
docker exec -it 容器ID /bin/sh

进入容器中找到/usr/share/kibana/config/kibana.yml
#使用vi 修改文件内容
vi /usr/share/kibana/config/kibana.yml
#将如下内容写到kibana.yml中,然后保存退出::wq
server.name: kibana
server.host: "0"
#elasticsearch.hosts: [ "http://elasticsearch:9200" ]
elasticsearch.hosts: [ "http://192.168.31.128:9200" ]
xpack.monitoring.ui.container.elasticsearch.enabled: true
#设置kibana中文显示
i18n.locale: zh-CN
# 配置登陆账号密码
elasticsearch.username: "elastic"
elasticsearch.password: "your_password"
4、访问
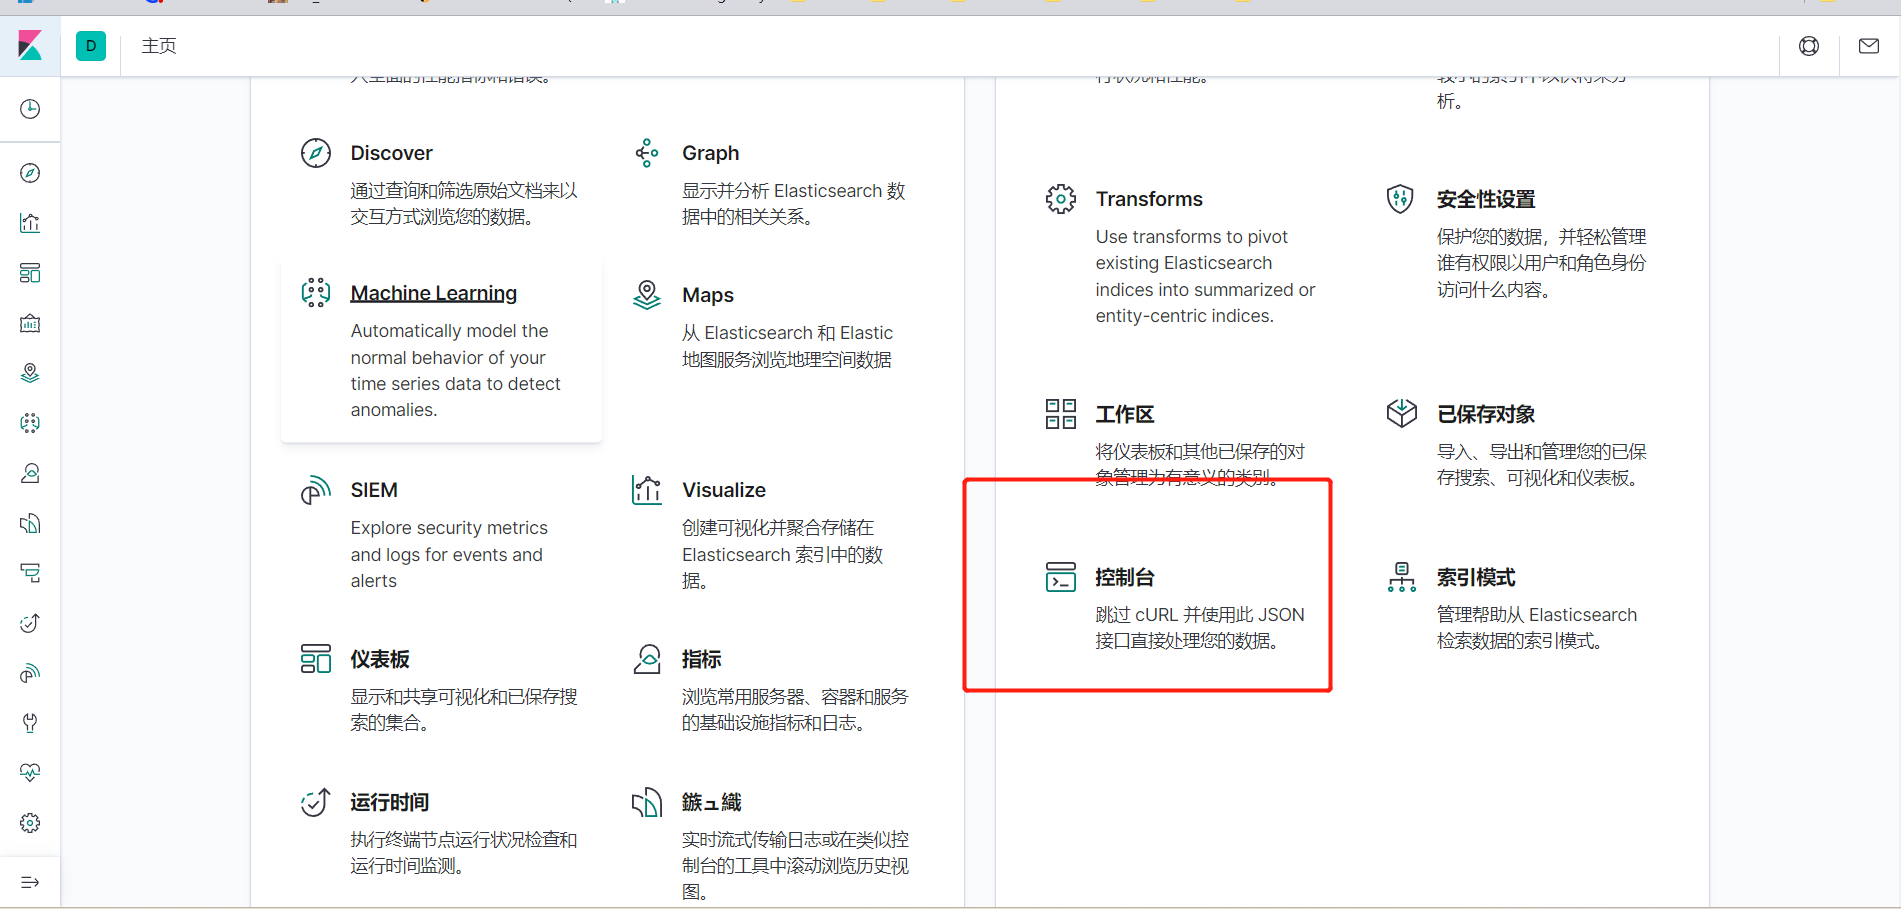
最后访问页面http://192.168.238.130:5601控制台 直接操作es

2、es添加数据
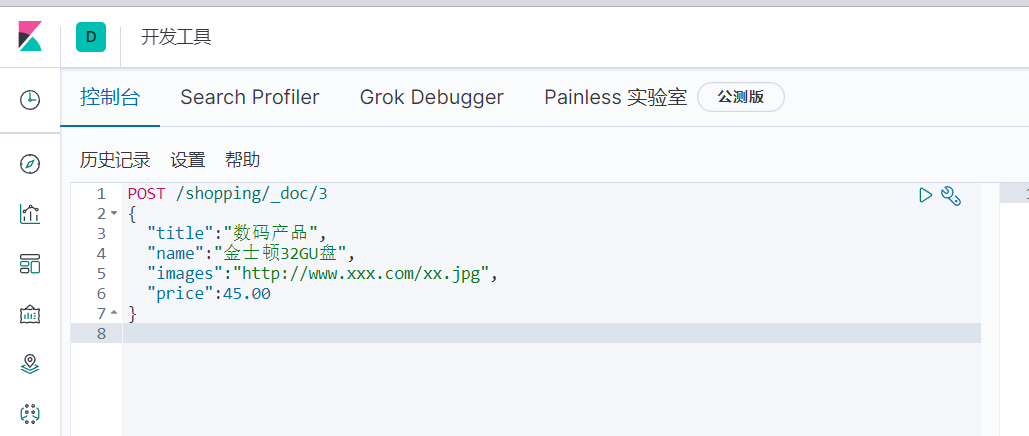
1、通过 kibana 添加
POST /shopping/_doc/3
{
  "title":"数码产品",
  "name":"金士顿32GU盘",
  "images":"http://www.xxx.com/xx.jpg",
  "price":45.00
}

2、通过curl
curl -XPOST "http://192.168.31.128:9200/phone/_doc/2" -H 'Content-Type: application/json' -d'{  "title":"手机",  "name":"华为mate40",  "images":"http://www.xxx.com/xx.jpg",  "price":7999.00}'
curl -XPOST "http://192.168.31.128:9200/phone/_doc/2" -H 'Content-Type: application/json' -d'{  "title":"手机",  "name":"华为mate41",  "images":"http://www.xxx.com/xx.jpg",  "price":6800.00}'
curl -XPOST "http://192.168.31.128:9200/phone/_doc/2" -H 'Content-Type: application/json' -d'{  "title":"手机",  "name":"华为mate42",  "images":"http://www.xxx.com/xx.jpg",  "price":3500.00}'
curl -XPOST "http://192.168.31.128:9200/phone/_doc/2" -H 'Content-Type: application/json' -d'{  "title":"手机",  "name":"华为mate43",  "images":"http://www.xxx.com/xx.jpg",  "price":5009.00}'
3、查看数据
通过ElasticSearch-Head
https://192.168.31.128:9200/?auth_user=elastic&auth_password=162552


 浙公网安备 33010602011771号