

|NO.Z.00011|——————————|^^ 配置 ^^|——|Hadoop&Spark.V11|——|Spark.v11|sparkcore|开发环境搭建IDEA&spark-core源码链接|
一、创建工程
### --- 创建一个maven工程:

~~~     Create New Project——>Maven——>Next——>Name:SparkBigData——>Finish——>END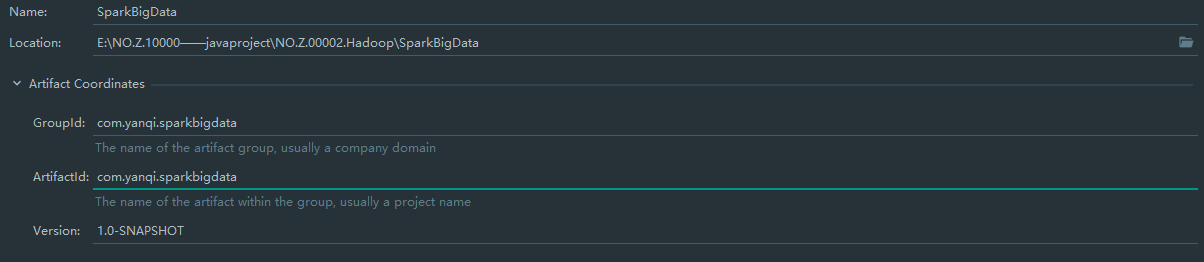
### --- 安装scala插件;能读写HDFS文件
### --- 导入依赖插件,写入pom.xml文件

<?xml version="1.0" encoding="UTF-8"?>
<project xmlns="http://maven.apache.org/POM/4.0.0"
         xmlns:xsi="http://www.w3.org/2001/XMLSchema-instance"
         xsi:schemaLocation="http://maven.apache.org/POM/4.0.0 http://maven.apache.org/xsd/maven-4.0.0.xsd">
    <modelVersion>4.0.0</modelVersion>

    <groupId>com.yanqi.sparkbigdata</groupId>
    <artifactId>com.yanqi.sparkbigdata</artifactId>
    <version>1.0-SNAPSHOT</version>

    <properties>
        <maven.compiler.source>1.8</maven.compiler.source>
        <maven.compiler.target>1.8</maven.compiler.target>
        <scala.version>2.12.10</scala.version>
        <spark.version>2.4.5</spark.version>
        <hadoop.version>2.9.2</hadoop.version>
        <encoding>UTF-8</encoding>
    </properties>

    <dependencies>
        <dependency>
            <groupId>org.scala-lang</groupId>
            <artifactId>scala-library</artifactId>
            <version>${scala.version}</version>
        </dependency>

        <dependency>
            <groupId>org.apache.spark</groupId>
            <artifactId>spark-core_2.12</artifactId>
            <version>${spark.version}</version>
        </dependency>

        <dependency>
            <groupId>org.apache.spark</groupId>
            <artifactId>spark-sql_2.12</artifactId>
            <version>${spark.version}</version>
        </dependency>

        <dependency>
            <groupId>joda-time</groupId>
            <artifactId>joda-time</artifactId>
            <version>2.9.7</version>
        </dependency>

        <dependency>
            <groupId>mysql</groupId>
            <artifactId>mysql-connector-java</artifactId>
            <version>5.1.44</version>
        </dependency>

        <dependency>
            <groupId>org.apache.spark</groupId>
            <artifactId>spark-hive_2.12</artifactId>
            <version>${spark.version}</version>
        </dependency>

    </dependencies>

    <build>
        <pluginManagement>
            <plugins>
                <!-- 编译scala的插件 -->
                <plugin>
                    <groupId>net.alchim31.maven</groupId>
                    <artifactId>scala-maven-plugin</artifactId>
                    <version>3.2.2</version>
                </plugin>
                <!-- 编译java的插件 -->
                <plugin>
                    <groupId>org.apache.maven.plugins</groupId>
                    <artifactId>maven-compiler-plugin</artifactId>
                    <version>3.5.1</version>
                </plugin>
            </plugins>
        </pluginManagement>
        <plugins>
            <plugin>
                <groupId>net.alchim31.maven</groupId>
                <artifactId>scala-maven-plugin</artifactId>
                <executions>
                    <execution>
                        <id>scala-compile-first</id>
                        <phase>process-resources</phase>
                        <goals>
                            <goal>add-source</goal>
                            <goal>compile</goal>
                        </goals>
                    </execution>
                    <execution>
                        <id>scala-test-compile</id>
                        <phase>process-test-resources</phase>
                        <goals>
                            <goal>testCompile</goal>
                        </goals>
                    </execution>
                </executions>
            </plugin>

            <plugin>
                <groupId>org.apache.maven.plugins</groupId>
                <artifactId>maven-compiler-plugin</artifactId>
                <executions>
                    <execution>
                        <phase>compile</phase>
                        <goals>
                            <goal>compile</goal>
                        </goals>
                    </execution>
                </executions>
            </plugin>

            <!-- 打jar插件 -->
            <plugin>
                <groupId>org.apache.maven.plugins</groupId>
                <artifactId>maven-shade-plugin</artifactId>
                <version>2.4.3</version>
                <executions>
                    <execution>
                        <phase>package</phase>
                        <goals>
                            <goal>shade</goal>
                        </goals>
                        <configuration>
                            <filters>
                                <filter>
                                    <artifact>*:*</artifact>
                                    <excludes>
                                        <exclude>META-INF/*.SF</exclude>
                                        <exclude>META-INF/*.DSA</exclude>
                                        <exclude>META-INF/*.RSA</exclude>
                                    </excludes>
                                </filter>
                            </filters>
                        </configuration>
                    </execution>
                </executions>
            </plugin>
        </plugins>
    </build>
</project>
二、编程代码
### --- 创建一个目录:scala

~~~     ——>main——>New:Directory——>New Directory:scala——>回车——>END
~~~     ——>创建包:cn.yanqi.sparkcore——>New Package——>
~~~     ——>增加scala Class——>SparkBigData——>Add Framework Support——>左侧:scala;右侧:scala-sdk-2.12.12——>ok
~~~     ——>创建一个class——>New:scala class——>Name:WordCount——>Object——>回车——>END
### --- 编程代码
package cn.yanqi.sparkcore
import org.apache.spark.rdd.RDD
import org.apache.spark.{SparkConf, SparkContext}
object WordCount {
def main(args: Array[String]): Unit = {
val conf = new SparkConf().setMaster("local").setAppName("WordCount")
val sc = new SparkContext(conf)
//使用本地文件
// val lines: RDD[String] = sc.textFile("data/wc.dat")
// 使用hdfs文件 -- 无配置文件
// val lines: RDD[String] = sc.textFile("hdfs://hadoop01:9000/wcinput/wc.txt")
// 使用资源文件调用hdfs --- 有配置文件:src/main/resources/core-site.xml
val lines: RDD[String] = sc.textFile( path="/wcinput/wc.txt")
lines.flatMap(_.split(" ")).map((_, 1)).reduceByKey(_+_).collect().foreach(println)
// 暂停时间,查看web界面
// Thread.sleep(100000)
sc.stop()
}
}三、编译打印,资源调用
### --- 调用本地文件

~~~     # 创建data文件,写入wc.txt文件
~~~     # 拷贝相对路径:data/wc.txt
hadoop mapreduce yarn
hdfs hadoop mapreduce
mapreduce yarn yanqi
yanqi mapreduce
yanqi mapreduce
~~~ # 编程代码
//使用本地文件
val lines: RDD[String] = sc.textFile("data/wc.dat")
// 使用hdfs文件 -- 无配置文件
// val lines: RDD[String] = sc.textFile("hdfs://hadoop01:9000/wcinput/wc.txt")
// 使用资源文件调用hdfs --- 有配置文件:src/main/resources/core-site.xml
// val lines: RDD[String] = sc.textFile( path="/wcinput/wc.txt")~~~ # 编译打印
(hadoop,2)
(yanqi,3)
(mapreduce,5)
(yarn,2)
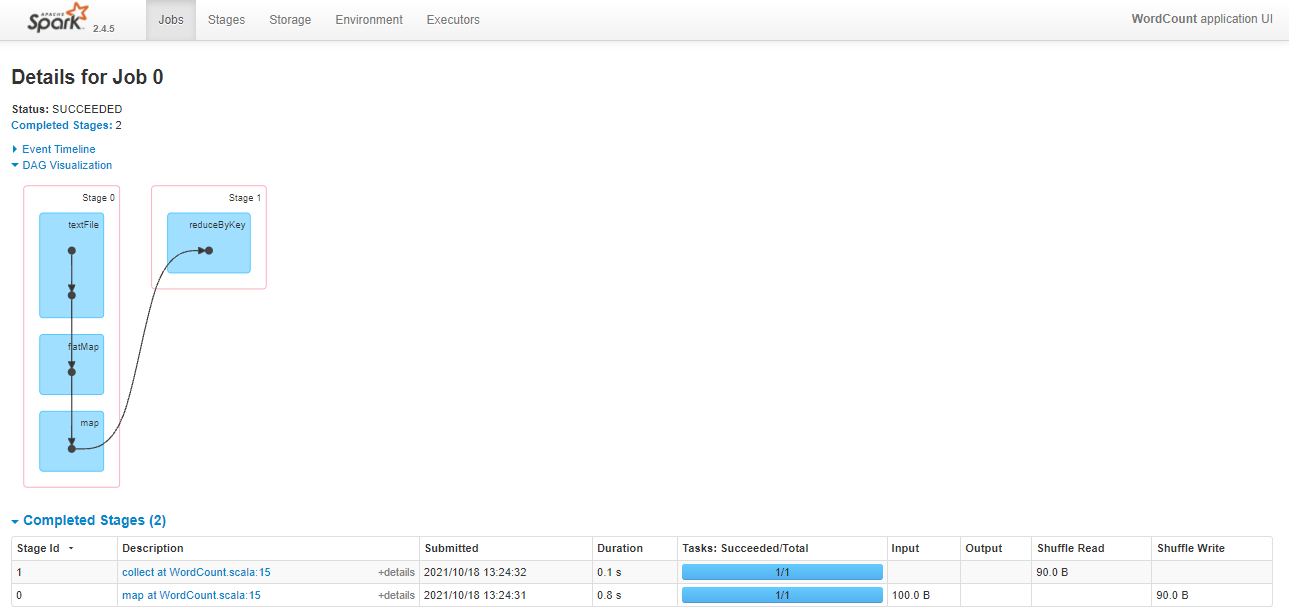
(hdfs,1)~~~ # web-UI的地址:http://windows10.microdone.cn:4040
~~~ 这个地址是很难捕捉到的;可以给它一个sleep值,让它等待在这个位置
~~~ # 通过Chrome访问地址:http://windows10.microdone.cn:4040
Thread.sleep(100000)
### --- 调用hdfs文件

~~~     # 编程代码
    //使用本地文件
    // val lines: RDD[String] = sc.textFile("data/wc.dat")

    // 使用hdfs文件 -- 无配置文件
    val lines: RDD[String] = sc.textFile("hdfs://hadoop01:9000/wcinput/wc.txt")

    // 使用资源文件调用hdfs --- 有配置文件:src/main/resources/core-site.xml
    // val lines: RDD[String] = sc.textFile( path="/wcinput/wc.txt")

    // 暂停时间,查看web界面
    // Thread.sleep(100000)
~~~ # 编译打印
(hadoop,2)
(#在文件中输入如下内容,1)
(yanqi,3)
(mapreduce,3)
(yarn,2)
(hdfs,1)三、通过配置文件调用hdfs上的资源参数
### --- 查看Hadoop集群上的core-site.xml资源参数
~~~     把查找到的资源文件内容,拷贝到IDEA的resources下的core-site.xml配置文件中

[root@hadoop01 ~]# cat $HADOOP_HOME/etc/hadoop/core-site.xml
### --- 在resources里创建hdfs的资源文件file:core-site.xml并写入配置参数
<configuration>
<!-- 指定HDFS中NameNode的地址 -->
<property>
<name>fs.defaultFS</name>
<value>hdfs://hadoop01:9000</value>
</property>
<!-- 指定Hadoop运行时产生文件的存储目录 -->
<property>
<name>hadoop.tmp.dir</name>
<value>/opt/yanqi/servers/hadoop-2.9.2/data/tmp</value>
</property>
<!-- HiveServer2 连不上10000;hadoop为安装用户 -->
<!-- root用户可以代理所有主机上的所有用户 -->
<property>
<name>hadoop.proxyuser.root.hosts</name>
<value>*</value>
</property>
<property>
<name>hadoop.proxyuser.root.groups</name>
<value>*</value>
</property>
</configuration>### --- 修改程序参数
//使用本地文件
// val lines: RDD[String] = sc.textFile("data/wc.dat")
// 使用hdfs文件 -- 无配置文件
// val lines: RDD[String] = sc.textFile("hdfs://hadoop01:9000/wcinput/wc.txt")
// 使用资源文件调用hdfs --- 有配置文件:src/main/resources/core-site.xml
val lines: RDD[String] = sc.textFile( path="/wcinput/wc.txt")### --- 编译运行程序
~~~ # 调用hdfs配置文件,并通过配置文件调用hdfs文件
(hadoop,2)
(#在文件中输入如下内容,1)
(yanqi,3)
(mapreduce,3)
(yarn,2)
(hdfs,1)四、spark-core:链接源码
### --- spark-core源码下载地址:https://archive.apache.org/dist/spark/spark-2.4.5/spark-2.4.5.tgz

~~~     ——>打开源码:ctrl+点击:sparkconf——>choose sources——>选择源码包地址:spark-2.4.5-src
附录一:报错处理一
### --- 报错现象:

INFO SparkContext: Created broadcast 0 from textFile at WordCount.scala:12
Exception in thread "main" org.apache.hadoop.mapred.InvalidInputException: Input path does not exist: file:/wcinput/wc.txt
### --- 报错分析:
~~~ # 错误提示是找不到这个文件
/wcinput/wc.txt### --- 解决方案:
~~~ # 方案一:
~~~ 调用hdfs失败:在resources里创建hdfs的资源文件file:core-site.xml并写入配置参数
~~~ # 方案二:
~~~ 把这个文件拷贝到本地调用Walter Savage Landor:strove with none,for none was worth my strife.Nature I loved and, next to Nature, Art:I warm'd both hands before the fire of life.It sinks, and I am ready to depart
——W.S.Landor
分类:
bdv016-spark.v01


【推荐】国内首个AI IDE,深度理解中文开发场景,立即下载体验Trae
【推荐】编程新体验,更懂你的AI,立即体验豆包MarsCode编程助手
【推荐】抖音旗下AI助手豆包,你的智能百科全书,全免费不限次数
【推荐】轻量又高性能的 SSH 工具 IShell:AI 加持,快人一步
· 无需6万激活码!GitHub神秘组织3小时极速复刻Manus,手把手教你使用OpenManus搭建本
· Manus爆火,是硬核还是营销?
· 终于写完轮子一部分:tcp代理 了,记录一下
· 别再用vector<bool>了!Google高级工程师:这可能是STL最大的设计失误
· 单元测试从入门到精通