

写随笔主要是当做日记,方便以后查看,遇到该问题时获取解决方法。
Spring3.0后就自带了定时任务功能,接下来记录 Spring如何配置定时器,定时器运行流程。
一、Spring配置定时器,开启定时调度功能。
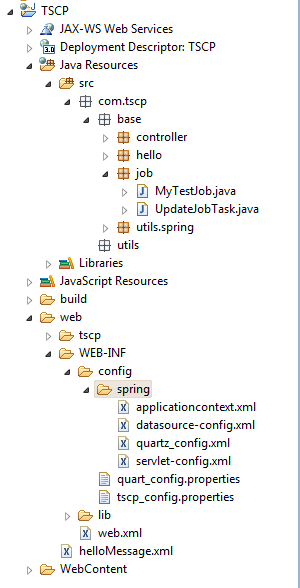
javaWeb 工程得先集成Spring框架,集成后在applicationcontext.xml文件同级目录下新建一个quartz_config.xml文件,工程目录如下:
quartz_config.xml代码如下(配置Spring定时任务所需信息,如果applicationcontext.xml文件中已经引入则不需要在配置该文件。):
<?xml version="1.0" encoding="UTF-8"?>
<beans xmlns="http://www.springframework.org/schema/beans"
    xmlns:xsi="http://www.w3.org/2001/XMLSchema-instance"
    xmlns:task="http://www.springframework.org/schema/task"
    xsi:schemaLocation="
            http://www.springframework.org/schema/beans
            http://www.springframework.org/schema/beans/spring-beans.xsd
            http://www.springframework.org/schema/task
            http://www.springframework.org/schema/task/spring-task-3.0.xsd">
    <task:annotation-driven></task:annotation-driven>

</beans>
二、创建定时执行方法。
后台创建一个MyTestJob.java类,创建一个定时执行的方法executeCalcReconFileData。
package com.tscp.base.job;

import org.springframework.scheduling.annotation.Scheduled;
import org.springframework.stereotype.Component;

import com.tscp.base.utils.spring.DateUtils;

/**
 * 定时器测试类
 *
 * @author yangmin
 * @since 1.0
 * @version 2017-11-18 yangmin
 */
@Component
public class MyTestJob {

    /**
     * 执行定时统计对账结果
     */
    @Scheduled(cron = "0/5 * * * * ?")
    public void executeCalcReconFileData() {
        String strNowTime = DateUtils.getTime();
        System.out.println("\n执行定时器,执行时间:" + strNowTime);
    }
}
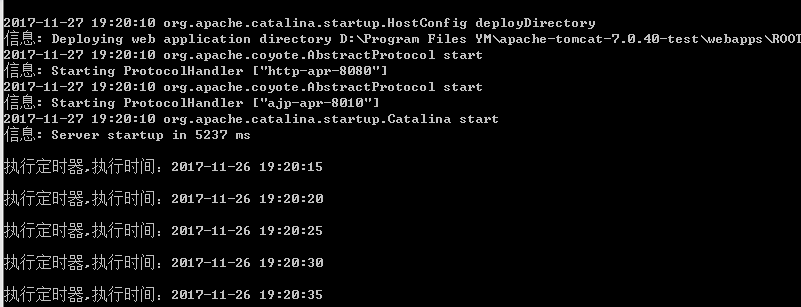
这里对方法使用Spring的Scheduled注解,配置定时器每五秒钟调用一次executeCalcReconFileData方法,cron表达式参考: http://rainbowdesert.iteye.com/blog/2107220。
程序运行结果:
三、通过配置文件获取定时器执行时间。
1、创建配置文件项目启动时将配置信息读取到容器中。
在config目录下创建一个quart_config.properties文件,用来配置定时器信息。在里面配置一个 job.test.taskTimeout=0/10 * * * * ? 的配置信息,既每10秒中执行一次。
#测试定时器
job.test.taskTimeout = 0/10 * * * * ?
2、项目启动加载配置到容器。
在后台创建一个PropertyPlaceholder类,继承PropertyPlaceholderConfigurer类。
package com.tscp.base.utils.spring;

import java.util.HashMap;
import java.util.Map;
import java.util.Properties;

import org.springframework.beans.BeansException;
import org.springframework.beans.factory.config.ConfigurableListableBeanFactory;
import org.springframework.beans.factory.config.PropertyPlaceholderConfigurer;

/**
 * 获取配置文件类
 *
 * @author yangmin
 * @since 1.0
 * @version 2017-11-18 yangmin
 */
public class PropertyPlaceholder extends PropertyPlaceholderConfigurer {

    /** 配置信息存在内存中 */
    private static Map<String, String> propertyMap;

    @Override
    protected void processProperties(ConfigurableListableBeanFactory beanFactoryToProcess, Properties props) throws BeansException {
        super.processProperties(beanFactoryToProcess, props);
        propertyMap = new HashMap<String, String>();
        for (Object key : props.keySet()) {
            String keyStr = key.toString();
            String value = props.getProperty(keyStr);
            propertyMap.put(keyStr, value);
        }
    }

    /**
     * 获得内存的配置信息
     *
     * @param name 配置项名称
     * @return String 配置的对象
     */
    public static String getProperty(String name) {
        return propertyMap.get(name);
    }
}
在applicationcontext.xml中配置项目启动加载PropertyPlaceholder的代码,配置在quartz_config.xml文件前,我的applicationcontext.xml文件如下:
<?xml version="1.0" encoding="UTF-8"?>
<beans xmlns="http://www.springframework.org/schema/beans"
    xmlns:xsi="http://www.w3.org/2001/XMLSchema-instance"
    xmlns:aop="http://www.springframework.org/schema/aop"
    xmlns:context="http://www.springframework.org/schema/context"
    xmlns:jpa="http://www.springframework.org/schema/data/jpa"
    xmlns:mvc="http://www.springframework.org/schema/mvc"
    xmlns:tx="http://www.springframework.org/schema/tx"
    xmlns:p="http://www.springframework.org/schema/p"
    xmlns:util="http://www.springframework.org/schema/util"
    xsi:schemaLocation="http://www.springframework.org/schema/beans
    http://www.springframework.org/schema/beans/spring-beans-4.0.xsd
    http://www.springframework.org/schema/aop http://www.springframework.org/schema/aop/spring-aop-4.0.xsd
    http://www.springframework.org/schema/context http://www.springframework.org/schema/context/spring-context-4.0.xsd
    http://www.springframework.org/schema/mvc http://www.springframework.org/schema/mvc/spring-mvc-4.0.xsd
    http://www.springframework.org/schema/tx http://www.springframework.org/schema/tx/spring-tx-4.0.xsd
    http://www.springframework.org/schema/util http://www.springframework.org/schema/util/spring-util-4.0.xsd">

    <!-- spring集成,注释掉 -->
    <context:component-scan base-package="com.tscp" />

    <!-- 将多个配置文件读取到容器中,交给Spring管理 -->
    <bean id="propertyConfigurer"
        class="com.tscp.base.utils.spring.PropertyPlaceholder">
        <property name="locations">
            <list>
                <value>/WEB-INF/config/*_config.properties</value>
            </list>
        </property>
    </bean>

    <import resource="quartz_config.xml" />

</beans>
这样项目每次启动时就会把quart_config.properties文件中的信息加载到容器中。
3、后台定时方法修改。
MyTestJob.executeCalcReconFileData方法之前是直接配置cron参数,现在直接去容器中的信息。
@Component
public class MyTestJob {

    /**
     * 执行定时统计对账结果
     */
    //@Scheduled(cron = "0/5 * * * * ?")
    @Scheduled(cron = "${job.test.taskTimeout}")
    public void executeCalcReconFileData() {
        String strNowTime = DateUtils.getTime();
        System.out.println("\n执行定时器,执行时间:" + strNowTime);
    }
}
现在的cron取额是quart_config.properties文件中的信息,启动项目定时器为每十秒钟执行一次。

三、定时器动态修改cron。
动态修改cron,需要修改定时器执行方法,新建一个UpdateJobTask.java类并实现SchedulingConfigurer接口:
package com.tscp.base.job;

import java.text.SimpleDateFormat;
import java.util.Date;

import org.springframework.context.annotation.Bean;
import org.springframework.scheduling.TaskScheduler;
import org.springframework.scheduling.Trigger;
import org.springframework.scheduling.TriggerContext;
import org.springframework.scheduling.annotation.EnableScheduling;
import org.springframework.scheduling.annotation.SchedulingConfigurer;
import org.springframework.scheduling.concurrent.ThreadPoolTaskScheduler;
import org.springframework.scheduling.config.ScheduledTaskRegistrar;
import org.springframework.scheduling.support.CronTrigger;
import org.springframework.stereotype.Component;

/**
 * 修改定时器任务执行时间
 *
 *
 * @author yangmin
 * @since 1.0
 * @version 2017-11-21 yangmin
 */
@Component(value = "updateJobTask")
@EnableScheduling
public class UpdateJobTask implements SchedulingConfigurer {

    /** FIXME */
    public static String cron = "0/5 * * * * ?";

    /** FIXME */
    public static ScheduledTaskRegistrar taskRegistrar;

    /** FIXME */
    int i = 0;

    /**
     * 修改执行时间
     *
     * @param cronExpression 表达式
     * @return 修改结果
     */
    public boolean setCron(String cronExpression) {
        UpdateJobTask.cron = cronExpression;
        return true;
    }

    /**
     * @param taskRegistrar ScheduledTaskRegistrar
     * @see org.springframework.scheduling.annotation.SchedulingConfigurer#configureTasks(org.springframework.scheduling.config.ScheduledTaskRegistrar)
     */
    @Override
    public void configureTasks(ScheduledTaskRegistrar taskRegistrar) {
        // taskRegistrar.setTaskScheduler(poolScheduler());

        taskRegistrar.addTriggerTask(new Runnable() {

            @Override
            public void run() {
                i++;
                // 任务逻辑
                System.out.println("第" + (i) + "次任务逻辑开始执行操作... " + "时间:【" + new SimpleDateFormat("yyyy-MM-dd hh:mm:ss.SSS").format(new Date()) + "】");
            }
        }, new Trigger() {

            @Override
            public Date nextExecutionTime(TriggerContext triggerContext) {
                // 任务触发,可修改任务的执行周期
                CronTrigger trigger = new CronTrigger(cron);
                Date nextExec = trigger.nextExecutionTime(triggerContext);
                System.out.println("第" + (i) + "次任务触发执行操作... " + "时间:【" + new SimpleDateFormat("yyyy-MM-dd hh:mm:ss.SSS").format(nextExec) + "】");
                return nextExec;
            }
        });
    }
}
定时方法configureTasks在项目启动时会被调用,Trigger一个多少时间之后执行的定时任务,在定时任务run后,会再去Trigger,依次循环。创建一个setCron方法用于改变cron参数,执行结果如下:
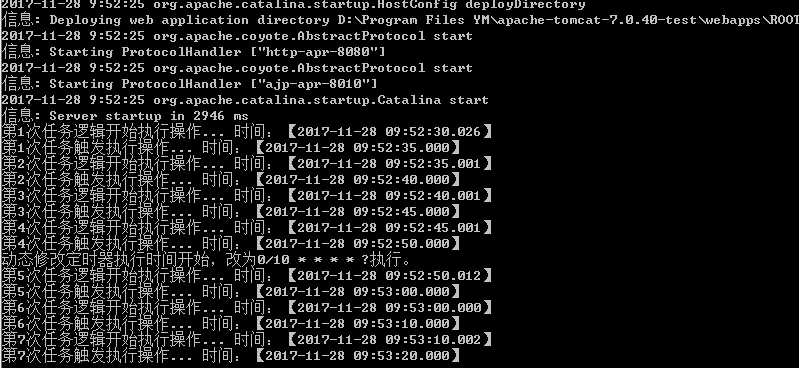
nextExecutionTime方法是从i=o开始执行,run从i=1开始执行,在第四次nextExecutionTime后执行了setCron方法,将cron改为10秒执行一次,而任务会在下一次run方法后才使用新的cron,也就是不会立即执行,如需立即执行,则使用Quartz。
javaWeb项目中经常会使用动态定时器,做一下倒计时之类的事务,下篇记录。
ps:好东西值得记录。
