202-ESP32_SDK开发-station模式配置模组连接路由器热点
<p><iframe name="ifd" src="https://mnifdv.cn/resource/cnblogs/LearnESP32" frameborder="0" scrolling="auto" width="100%" height="1500"></iframe></p>
官方提供的例程在这里


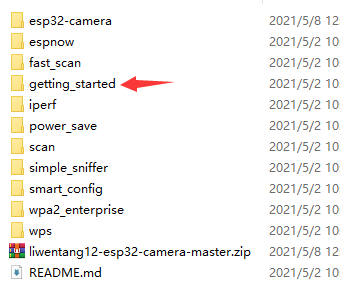

配置模块
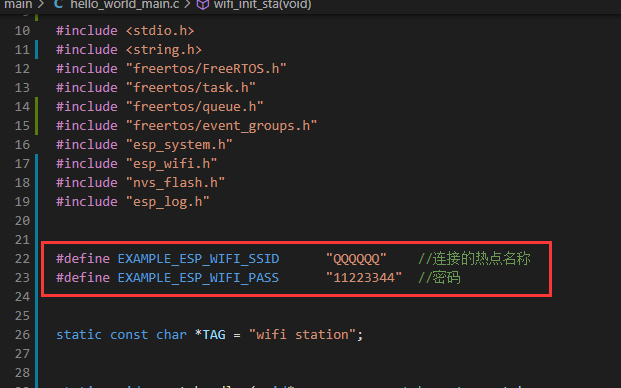
连接名称为 QQQQQQ 密码为 11223344 的热点
#include <stdio.h>
#include <string.h>
#include "freertos/FreeRTOS.h"
#include "freertos/task.h"
#include "freertos/queue.h"
#include "freertos/event_groups.h"
#include "esp_system.h"
#include "esp_wifi.h"
#include "nvs_flash.h"
#include "esp_log.h"


#define EXAMPLE_ESP_WIFI_SSID      "QQQQQQ"
#define EXAMPLE_ESP_WIFI_PASS      "11223344"


static const char *TAG = "wifi station";


static void event_handler(void* arg, esp_event_base_t event_base,
                                int32_t event_id, void* event_data)
{
    if (event_base == WIFI_EVENT && event_id == WIFI_EVENT_STA_START) {//配置好了wifi的STA模式
        esp_wifi_connect();//连接热点
    } else if (event_base == WIFI_EVENT && event_id == WIFI_EVENT_STA_DISCONNECTED) {//和路由器断开
        esp_wifi_connect();//连接热点
        ESP_LOGI(TAG,"connect to the AP fail");
    } else if (event_base == IP_EVENT && event_id == IP_EVENT_STA_GOT_IP) {//连接上路由器(获取到了分配的IP地址)
        ip_event_got_ip_t* event = (ip_event_got_ip_t*) event_data;
        ESP_LOGI(TAG, "got ip:" IPSTR, IP2STR(&event->ip_info.ip));
    }
}

void wifi_init_sta(void)
{
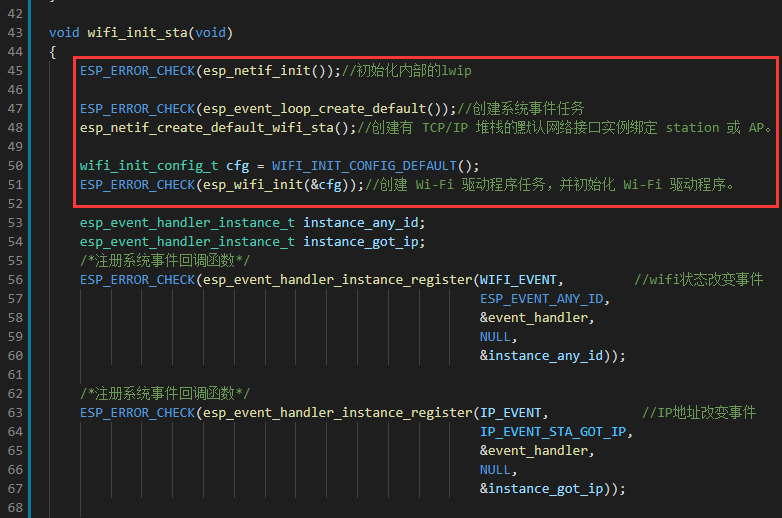
    ESP_ERROR_CHECK(esp_netif_init());//初始化内部的lwip

    ESP_ERROR_CHECK(esp_event_loop_create_default());//创建系统事件任务
    esp_netif_create_default_wifi_sta();//创建有 TCP/IP 堆栈的默认网络接口实例绑定 station 或 AP。

    wifi_init_config_t cfg = WIFI_INIT_CONFIG_DEFAULT();
    ESP_ERROR_CHECK(esp_wifi_init(&cfg));//创建 Wi-Fi 驱动程序任务,并初始化 Wi-Fi 驱动程序。

    esp_event_handler_instance_t instance_any_id;
    esp_event_handler_instance_t instance_got_ip;
    /*注册系统事件回调函数*/
    ESP_ERROR_CHECK(esp_event_handler_instance_register(WIFI_EVENT,         //wifi状态改变事件
                                                        ESP_EVENT_ANY_ID,
                                                        &event_handler,
                                                        NULL,
                                                        &instance_any_id));

    /*注册系统事件回调函数*/
    ESP_ERROR_CHECK(esp_event_handler_instance_register(IP_EVENT,            //IP地址改变事件
                                                        IP_EVENT_STA_GOT_IP,
                                                        &event_handler,
                                                        NULL,
                                                        &instance_got_ip));

    /*配置连接的热点参数*/
    wifi_config_t wifi_config = {
        .sta = {
            .ssid = EXAMPLE_ESP_WIFI_SSID,
            .password = EXAMPLE_ESP_WIFI_PASS,
            .threshold.authmode = WIFI_AUTH_WPA2_PSK,//加密方式
            /*配置pmf,当前最新加密技术*/
            .pmf_cfg = {
                .capable = true,  //告诉热点这边有能力使用PMF进行加密通信(防止窃听密码)
                .required = false //告诉热点这边不强制要求使用PMF进行加密通信(防止窃听密码)
            },
        },
    };
    ESP_ERROR_CHECK(esp_wifi_set_mode(WIFI_MODE_STA) );//设置STA模式
    ESP_ERROR_CHECK(esp_wifi_set_config(ESP_IF_WIFI_STA, &wifi_config) );//配置STA参数
    ESP_ERROR_CHECK(esp_wifi_start() );//启动


    /* 取消注册事件回调 */
    //ESP_ERROR_CHECK(esp_event_handler_instance_unregister(IP_EVENT, IP_EVENT_STA_GOT_IP, instance_got_ip));
    //ESP_ERROR_CHECK(esp_event_handler_instance_unregister(WIFI_EVENT, ESP_EVENT_ANY_ID, instance_any_id));
}

void app_main(void)
{
    //初始化 NVS(配置WiFi的参数存储需要用到NVS)
    esp_err_t ret = nvs_flash_init();
    if (ret == ESP_ERR_NVS_NO_FREE_PAGES || ret == ESP_ERR_NVS_NEW_VERSION_FOUND) {
      ESP_ERROR_CHECK(nvs_flash_erase());
      ret = nvs_flash_init();
    }
    ESP_ERROR_CHECK(ret);

    ESP_LOGI(TAG, "ESP_WIFI_MODE_STA");
    wifi_init_sta();
}
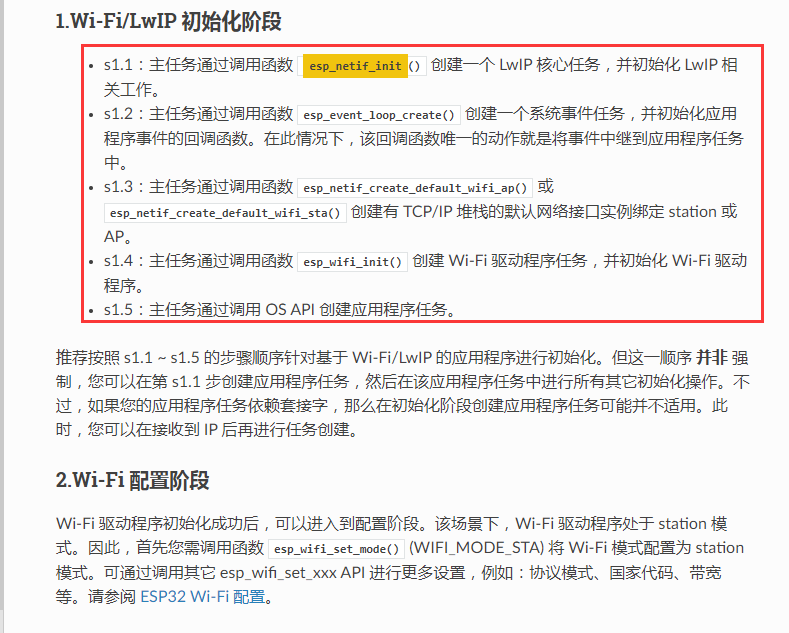
下面这个地方是标准的流程
https://docs.espressif.com/projects/esp-idf/zh_CN/latest/esp32/api-guides/wifi.html?highlight=esp_netif_init
测试
改为自己的路由器名称和密码
下载到开发板测试
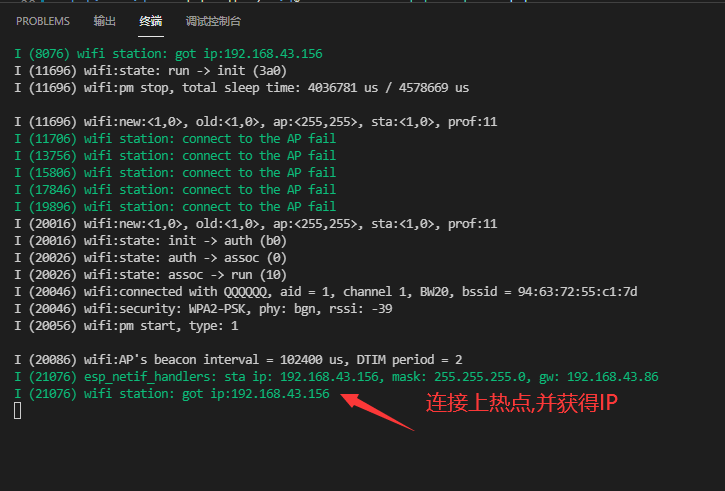
分类:
ESP32学习开发


【推荐】国内首个AI IDE,深度理解中文开发场景,立即下载体验Trae
【推荐】编程新体验,更懂你的AI,立即体验豆包MarsCode编程助手
【推荐】抖音旗下AI助手豆包,你的智能百科全书,全免费不限次数
【推荐】轻量又高性能的 SSH 工具 IShell:AI 加持,快人一步
· 开发者必知的日志记录最佳实践
· SQL Server 2025 AI相关能力初探
· Linux系列:如何用 C#调用 C方法造成内存泄露
· AI与.NET技术实操系列(二):开始使用ML.NET
· 记一次.NET内存居高不下排查解决与启示
· 阿里最新开源QwQ-32B,效果媲美deepseek-r1满血版,部署成本又又又降低了!
· 开源Multi-agent AI智能体框架aevatar.ai,欢迎大家贡献代码
· Manus重磅发布:全球首款通用AI代理技术深度解析与实战指南
· 被坑几百块钱后,我竟然真的恢复了删除的微信聊天记录!
· AI技术革命,工作效率10个最佳AI工具
2016-09-03 当年参加飞思卡尔自己写的双线识别算法
2016-09-03 TTL,COMS,USB,232,422,485电平之详细介绍及使用