Struts2基础学习(三)—Result和数据封装
一、Result
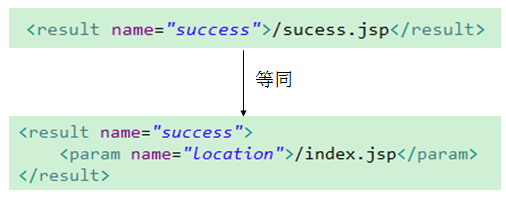
Action处理完用户请求后,将返回一个普通的字符串,整个普通字符串就是一个逻辑视图名,Struts2根据逻辑视图名,决定响应哪个结果,处理结果使用<result>元素配置。
局部结果: 将<result>作为<action>子元素配置。
全局结果: 将<result>作为<global-results>元素的子元素配置。
配置<result>元素要指定两个属性。
name: 该属性指定配置逻辑视图名。
type: 指定结果类型。
1.全局结果
当多个action中都使用到了相同result,这时我们应该把result定义为全局结果。
	<package name="user" extends="struts-default" >

		<!-- 配置全局的结果 -->
		<global-results>
			<result name="error">/index.jsp</result>
		</global-results>

		<action name="resultAction" class="com.kiwi.action.ResultAction">

		</action>

	</package>
2.结果类型
        <result-types>
            <result-type name="chain" class="com.opensymphony.xwork2.ActionChainResult"/>
            <result-type name="dispatcher" class="org.apache.struts2.dispatcher.ServletDispatcherResult" default="true"/>
            <result-type name="freemarker" class="org.apache.struts2.views.freemarker.FreemarkerResult"/>
            <result-type name="httpheader" class="org.apache.struts2.dispatcher.HttpHeaderResult"/>
            <result-type name="redirect" class="org.apache.struts2.dispatcher.ServletRedirectResult"/>
            <result-type name="redirectAction" class="org.apache.struts2.dispatcher.ServletActionRedirectResult"/>
            <result-type name="stream" class="org.apache.struts2.dispatcher.StreamResult"/>
            <result-type name="velocity" class="org.apache.struts2.dispatcher.VelocityResult"/>
            <result-type name="xslt" class="org.apache.struts2.views.xslt.XSLTResult"/>
            <result-type name="plainText" class="org.apache.struts2.dispatcher.PlainTextResult" />
        </result-types>
(1)dispatcher
请求转发到一个页面。dispatcher结果类型是最常用的结果类型,也是Struts2默认的结果类型。该结果类型有一个location的参数,它是默认的参数。
(2)redirect
请求重定向到一个页面。redirect 结果类型将把响应重定向到另一个资源, 而不是转发给该资源。
(3)chain
请求转发到另一个Action。
redirectAction 结果类型接受下面这些参数:
actionName: 指定"目的地"Action的名字。它是默认属性。
namespace: 用来指定"目的地"Action的命名空间. 如果没有配置该参数, Struts 会把当前 Action 所在的命名空间作为 "目的地"的命名空间。
如果想转发到另一包而且那个包有namespace时,可以这样写。
	<package name="user" extends="struts-default">

		<action name="act1" class="com.kiwi.action.ResultAction">

			<result name="success" type="chain">
				<param name="namespace">/test</param>
				<param name="actionName">act2</param>
			</result>

		</action>

	</package>

	<package name="server" namespace="/test" extends="struts-default">

		<action name="act2">
			<result name="success">/success.jsp</result>
		</action>

	</package>
(4)redirectAction
请求重定向到另一个Action,同上。
(5)stream
下载用的,以后再说。
(6)plainText
以纯文本的形式展现内容。
二、数据的封装
为什么要使用数据的封装?
(1)作为MVC框架,必须要负责解析HTTP请求参数,并将其封装到Model对象中。
(2)封装数据为开发提供了很多方便。
(3)Struts2框架提供了很强大的数据封装的功能,不再需要使用Servlet的API完成手动的封装了。
Struts2提供了两类的数据封装方式: 属性驱动和模型驱动,其中属性驱动根据是否封装到JavaBean又分为两类。
1.属性驱动:不封装到JavaBean
提供对应属性的setXxx()方法进行数据的封装。
(1)表单的哪些属性需要封装数据,那么在对应的Action类中提供该属性的set方法即可。
(1)表单中的数据提交,最终找到Action类中的setXxx方法,最后赋值给全局变量。
注意:
(1)Struts2的框架采用的拦截器完成的数据的封装。
(2)这种方式不是很好,因为属性特别多,需要提供特别多的set方法,而且需要手动的将数据存入的对象中。
(3)这种情况,Action类相当于一个JavaBean,没有体现出MVC的思想,Action又封装数据,又接收请求处理,耦合性高。
index.jsp
<form action="${pageContext.request.contextPath}/personAction" method="post">

        用户名: <input type="text" name="username"/><br>
        密 码: <input type="password" name="password" /><br>
        年 龄: <input type="text" name="age"/><br>

        <input type="submit" value="提交"/>
</form>
struts.xml
		<action name="personAction"  class="com.kiwi.action.PersonAction">
			<result name="success">/success.jsp</result>
		</action>
PersonAction.java
public class PersonAction extends ActionSupport{

	private String username;
	private String password;
	private int age;

	@Override
	public String execute() throws Exception{

		System.out.println("username = " + username + "\npassword = " + password + "\nage = " + age);

		return SUCCESS;
	}

	public void setUsername(String username){
		this.username = username;
	}

	public void setPassword(String password){
		this.password = password;
	}

	public void setAge(int age){
		this.age = age;
	}
}
结果:
2.属性驱动:封装到JavaBean中
在页面上,使用OGNL表达式进行数据封装。
(1)在页面使用OGNL表达式进行数据的封装,可以直接把属性封装到某一个JavaBean的对象中。
(2)在Action类中定义一个JavaBean对象,并且提供set和get方法。
(3)页面中的编写发生了变化,需要使用OGNL的方式,表单的写法: <input type="text" name="person.username"/>
注意:
(1)只提供一个set方法还不够,还得必须提供get方法。
(2)先调用get方法,判断是否有person对象,如果没有,调用set方法把拦截器创建的对象注入进来。
index.jsp
<form action="${pageContext.request.contextPath}/personAction" method="post">

        用户名: <input type="text" name="person.username"/><br>
        密 码: <input type="password" name="person.password" /><br>
        年 龄: <input type="text" name="person.age"/><br>

        <input type="submit" value="提交"/>

</form>
Person.java
public class Person{

	private String username;
	private String password;
	private int age;

	//getXxx setXxx......
}
PersonAction.java
public class PersonAction extends ActionSupport{

	private Person person;

	@Override
	public String execute() throws Exception{

		System.out.println("username = " + person.getUsername() + "\npassword = " + person.getPassword() + "\nage = " + person.getAge());

		return SUCCESS;
	}

	public Person getPerson(){
		return person;
	}

	public void setPerson(Person person){
		this.person = person;
	}
}
结果:
3.模型驱动
(1)必须手动实例化JavaBean。
(2)必须实现ModelDriven<T>接口,实现getModel()方法。
inedx.jsp
<form action="${pageContext.request.contextPath}/personAction" method="post">

        用户名: <input type="text" name="username"/><br>
        密 码: <input type="password" name="password" /><br>
        年 龄: <input type="text" name="age"/><br>

        <input type="submit" value="提交"/>

</form>
PersonAction.java
public class PersonAction extends ActionSupport implements ModelDriven<Person>{

	//一定要手动实例化
	private Person person = new Person();

	@Override
	public String execute() throws Exception{

		System.out.println("username = " + person.getUsername() + "\npassword = " + person.getPassword() + "\nage = " + person.getAge());

		return SUCCESS;
	}

	//先执行getModel()方法
	@Override
	public Person getModel(){
		return person;
	}

	public Person getPerson(){
		return person;
	}

	public void setPerson(Person person){
		this.person = person;
	}
}
结果:
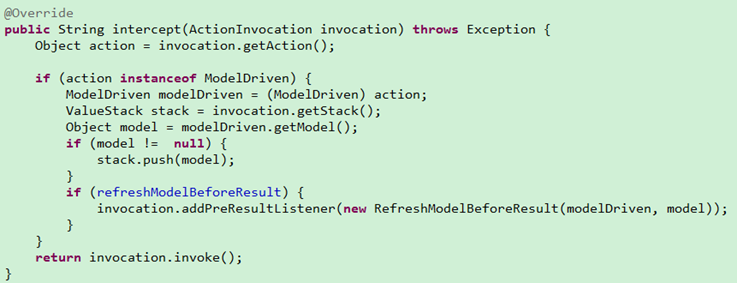
实际上是一个名字为modelDriven拦截器完成的。该拦截器会在调用动作方法前,调用getModel(),得到模型对象,它接着把该模型对象压到了值栈的栈顶。


