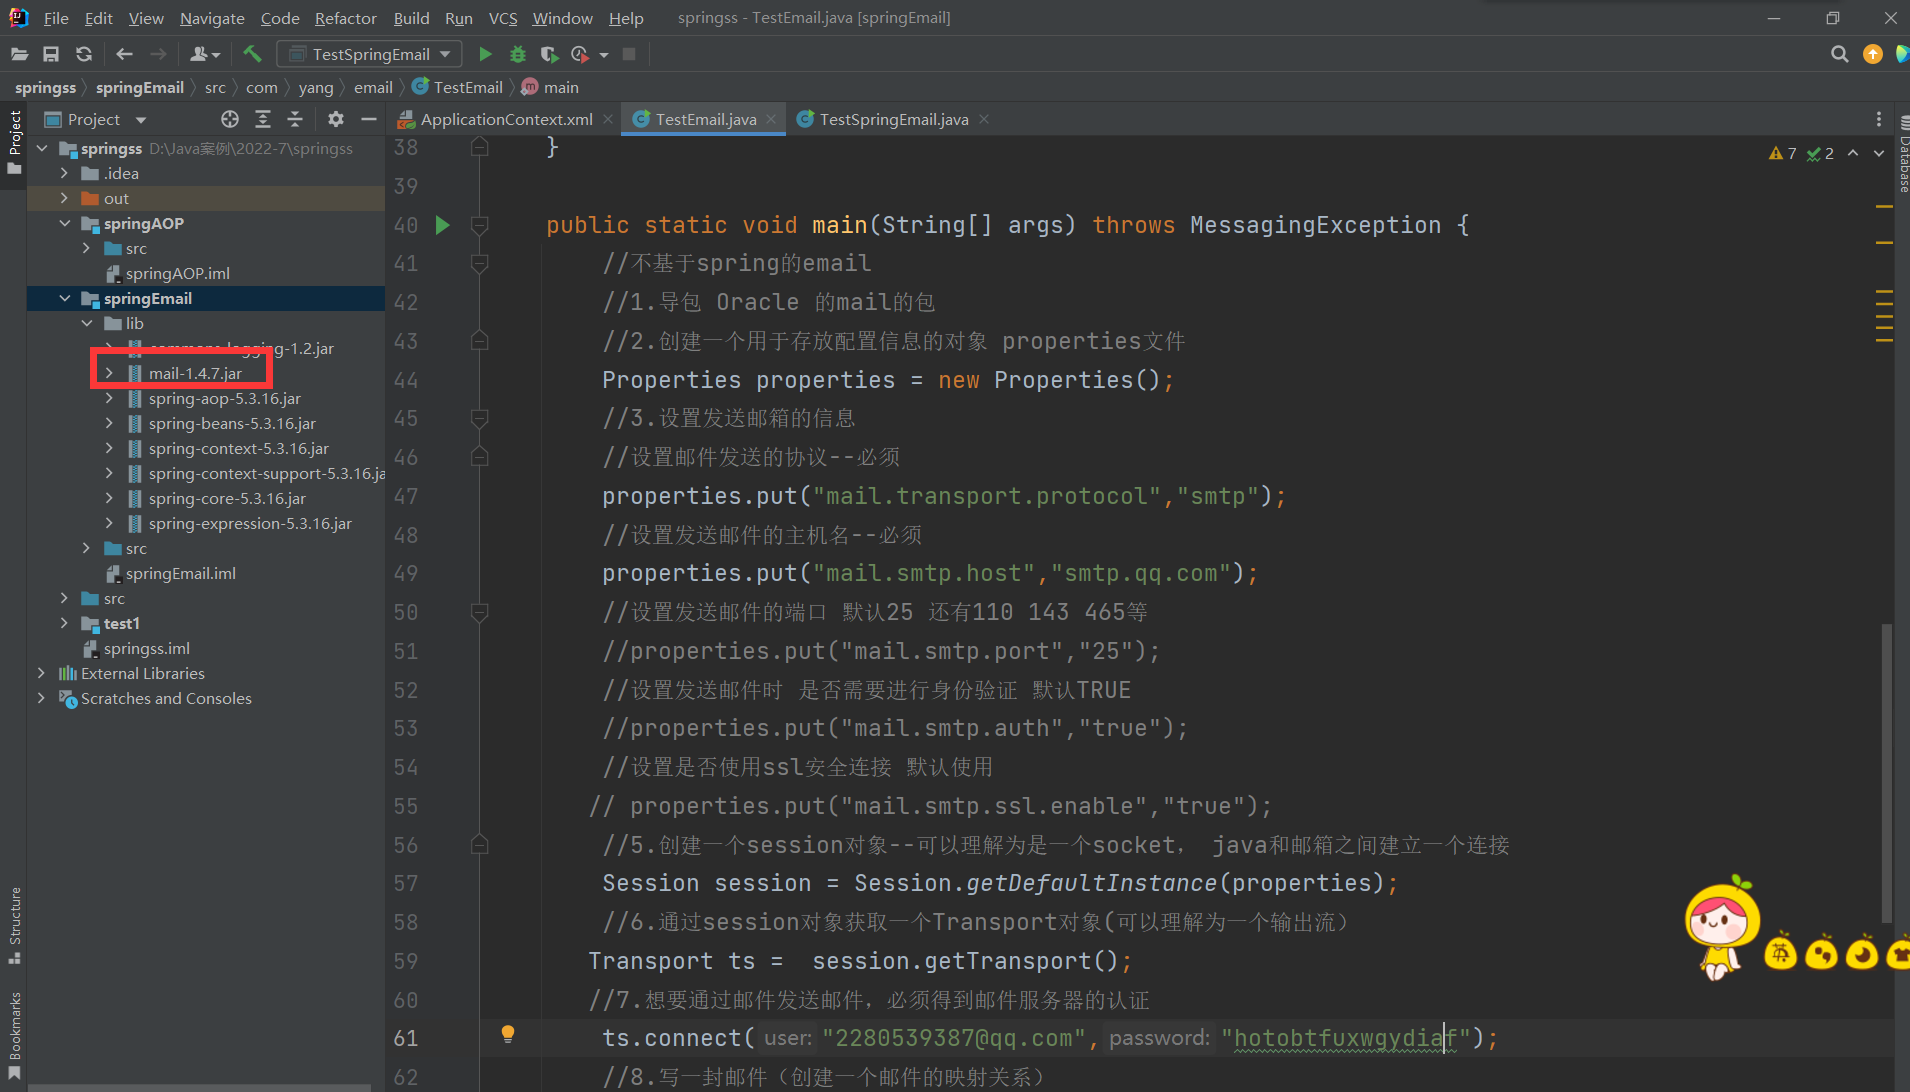
1.基于Oracle提供的mail.jar实现发送email的方式
package com.yang.email;

import javax.mail.*;
import javax.mail.internet.AddressException;
import javax.mail.internet.InternetAddress;
import javax.mail.internet.MimeMessage;
import java.util.Date;
import java.util.Properties;

public class TestEmail {

    //设计一个方法 创建一个邮件对象
    private static Message createMessage(Session session) throws MessagingException {
        //创建一个邮件对象
        Message message = new MimeMessage(session);
        //设置邮件的基本信息
        //发送人
        message.setFrom(new InternetAddress("2280539387@qq.com"));
        //接收人   收件人TO 抄送人CC 密送、暗送 BBC
        message.setRecipient(Message.RecipientType.TO,new InternetAddress("2280539387@qq.com"));
        //设置发送邮件的时间  默认是当前时间
        //message.setSentDate(new Date());
        //设置邮件主题
        message.setSubject("这是邮件主题");
        //设置邮件正题
        message.setText("这是邮件正文");

        //以上所有的设置需要保存才能生效
        message.saveChanges();
        return message;
    }

    public static void main(String[] args) throws MessagingException {
        //不基于spring的email
        //1.导包 Oracle 的mail的包
        //2.创建一个用于存放配置信息的对象 properties文件
        Properties properties = new Properties();
        //3.设置发送邮箱的信息
        //设置邮件发送的协议--必须
        properties.put("mail.transport.protocol","smtp");
        //设置发送邮件的主机名--必须
        properties.put("mail.smtp.host","smtp.qq.com");
        //设置发送邮件的端口 默认25 还有110 143 465等
        //properties.put("mail.smtp.port","25");
        //设置发送邮件时 是否需要进行身份验证 默认TRUE
        //properties.put("mail.smtp.auth","true");
        //设置是否使用ssl安全连接 默认使用
       // properties.put("mail.smtp.ssl.enable","true");
        //5.创建一个session对象--可以理解为是一个socket, java和邮箱之间建立一个连接
        Session session = Session.getDefaultInstance(properties);
        //6.通过session对象获取一个Transport对象(可以理解为一个输出流)
       Transport ts =  session.getTransport();
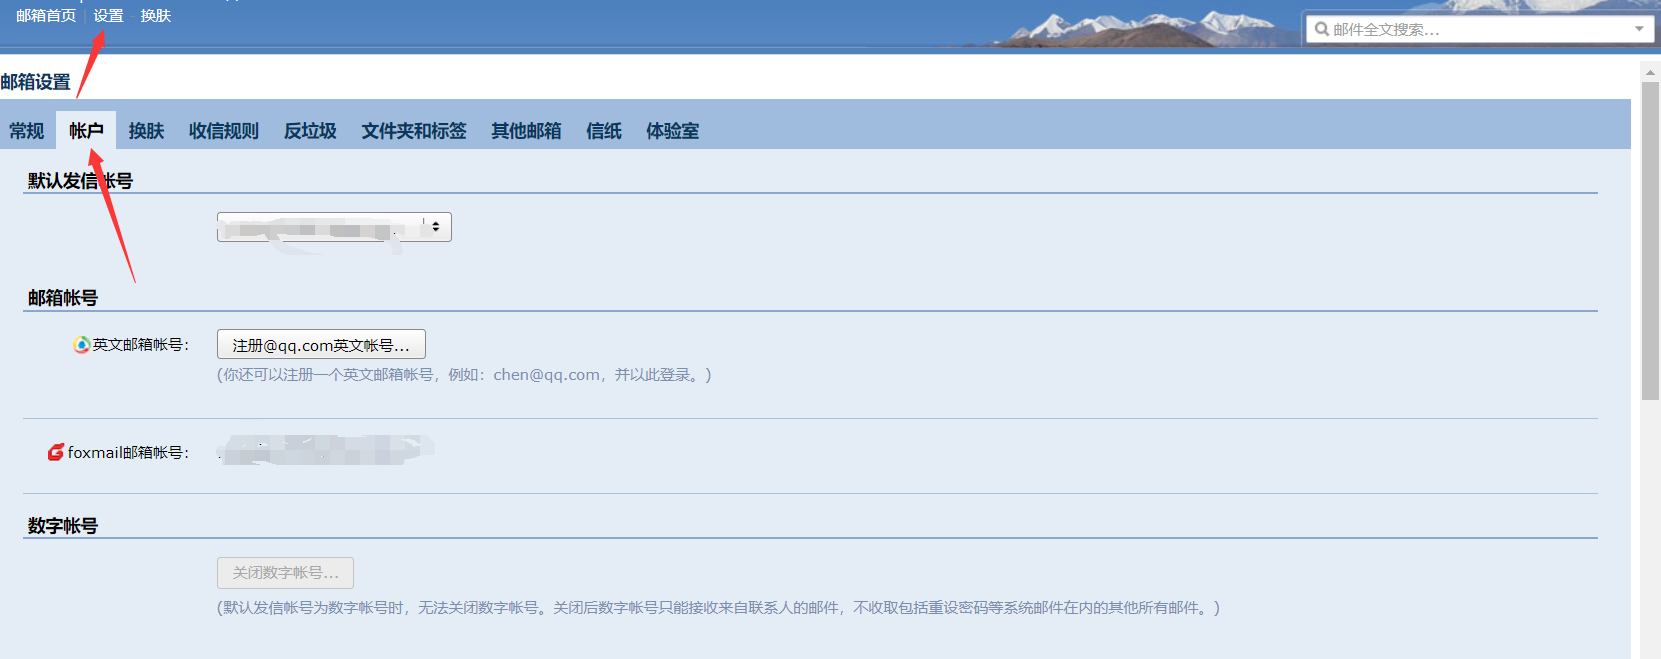
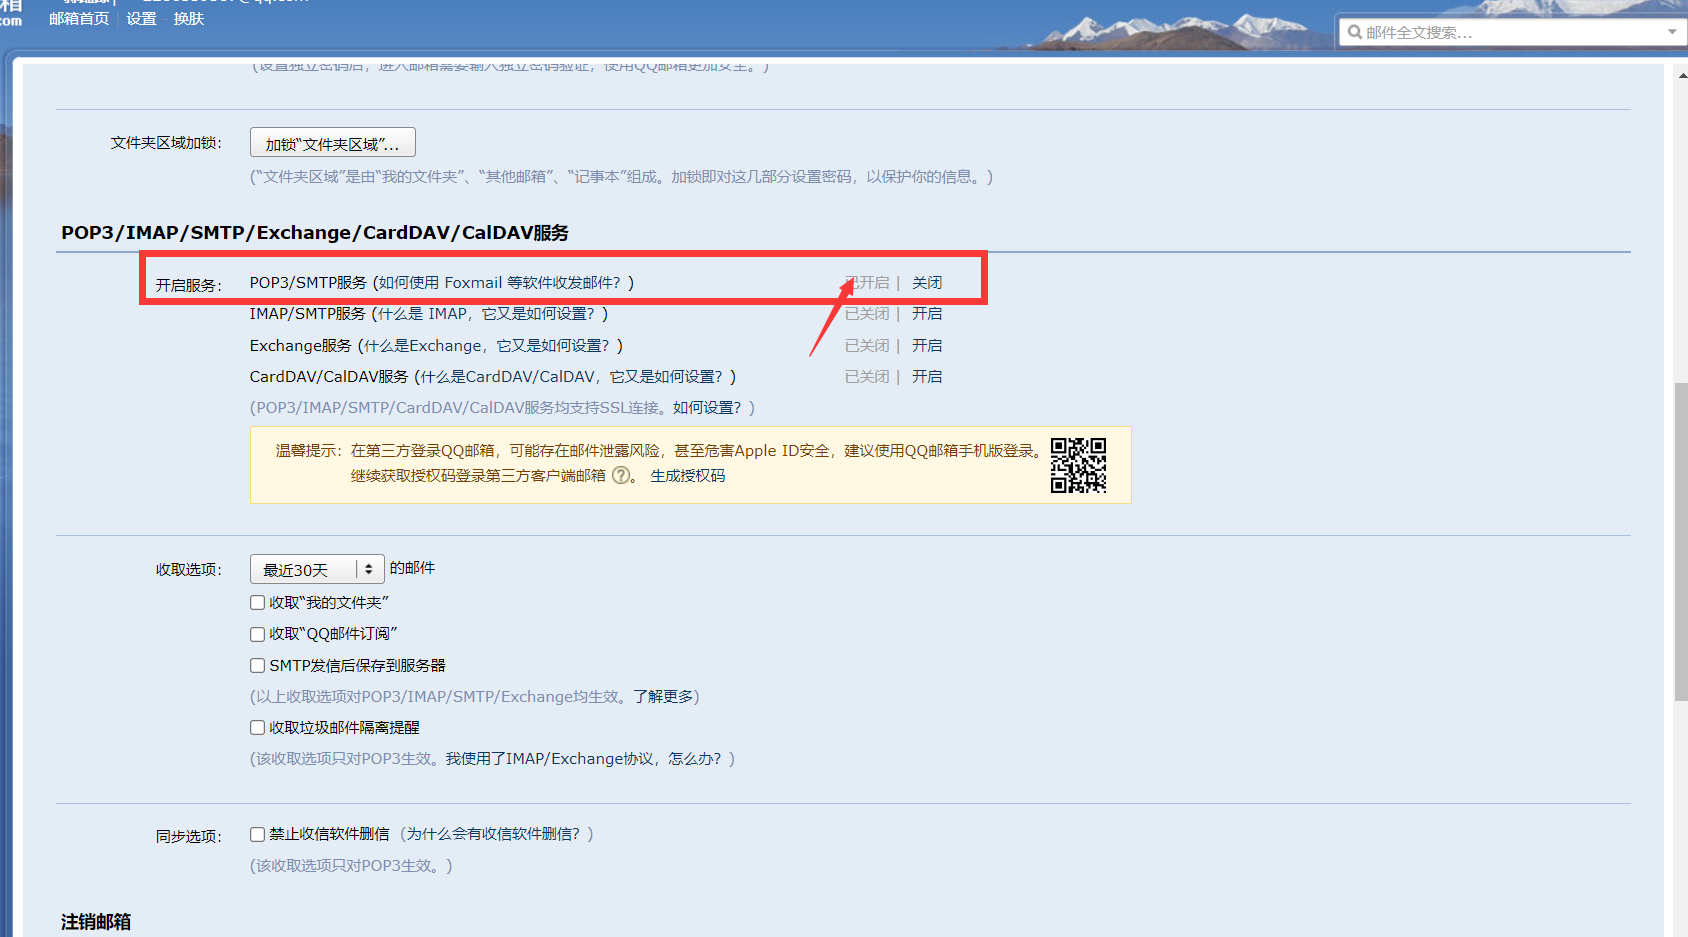
       //7.想要通过邮件发送邮件,必须得到邮件服务器的认证(该认证密码在QQ邮箱的 设置--账户--POP3/IMAP/SMTP/Exchange/CardDAV/CalDAV服务--点击开启服务--需要发送一条短信进行安全验证即可得到认证码)
        ts.connect("2280539387@qq.com","hotobtfuxwgydiaf");
        //8.写一封邮件(创建一个邮件的映射关系)
       Message message =  createMessage(session);
       //9.发送邮件(方法中需要一个message对象和 接收人的信息)
        ts.sendMessage(message,message.getAllRecipients());
        //发送是流的形式 需要关闭
        ts.close();
        System.out.println("发送完毕1");
    }
}

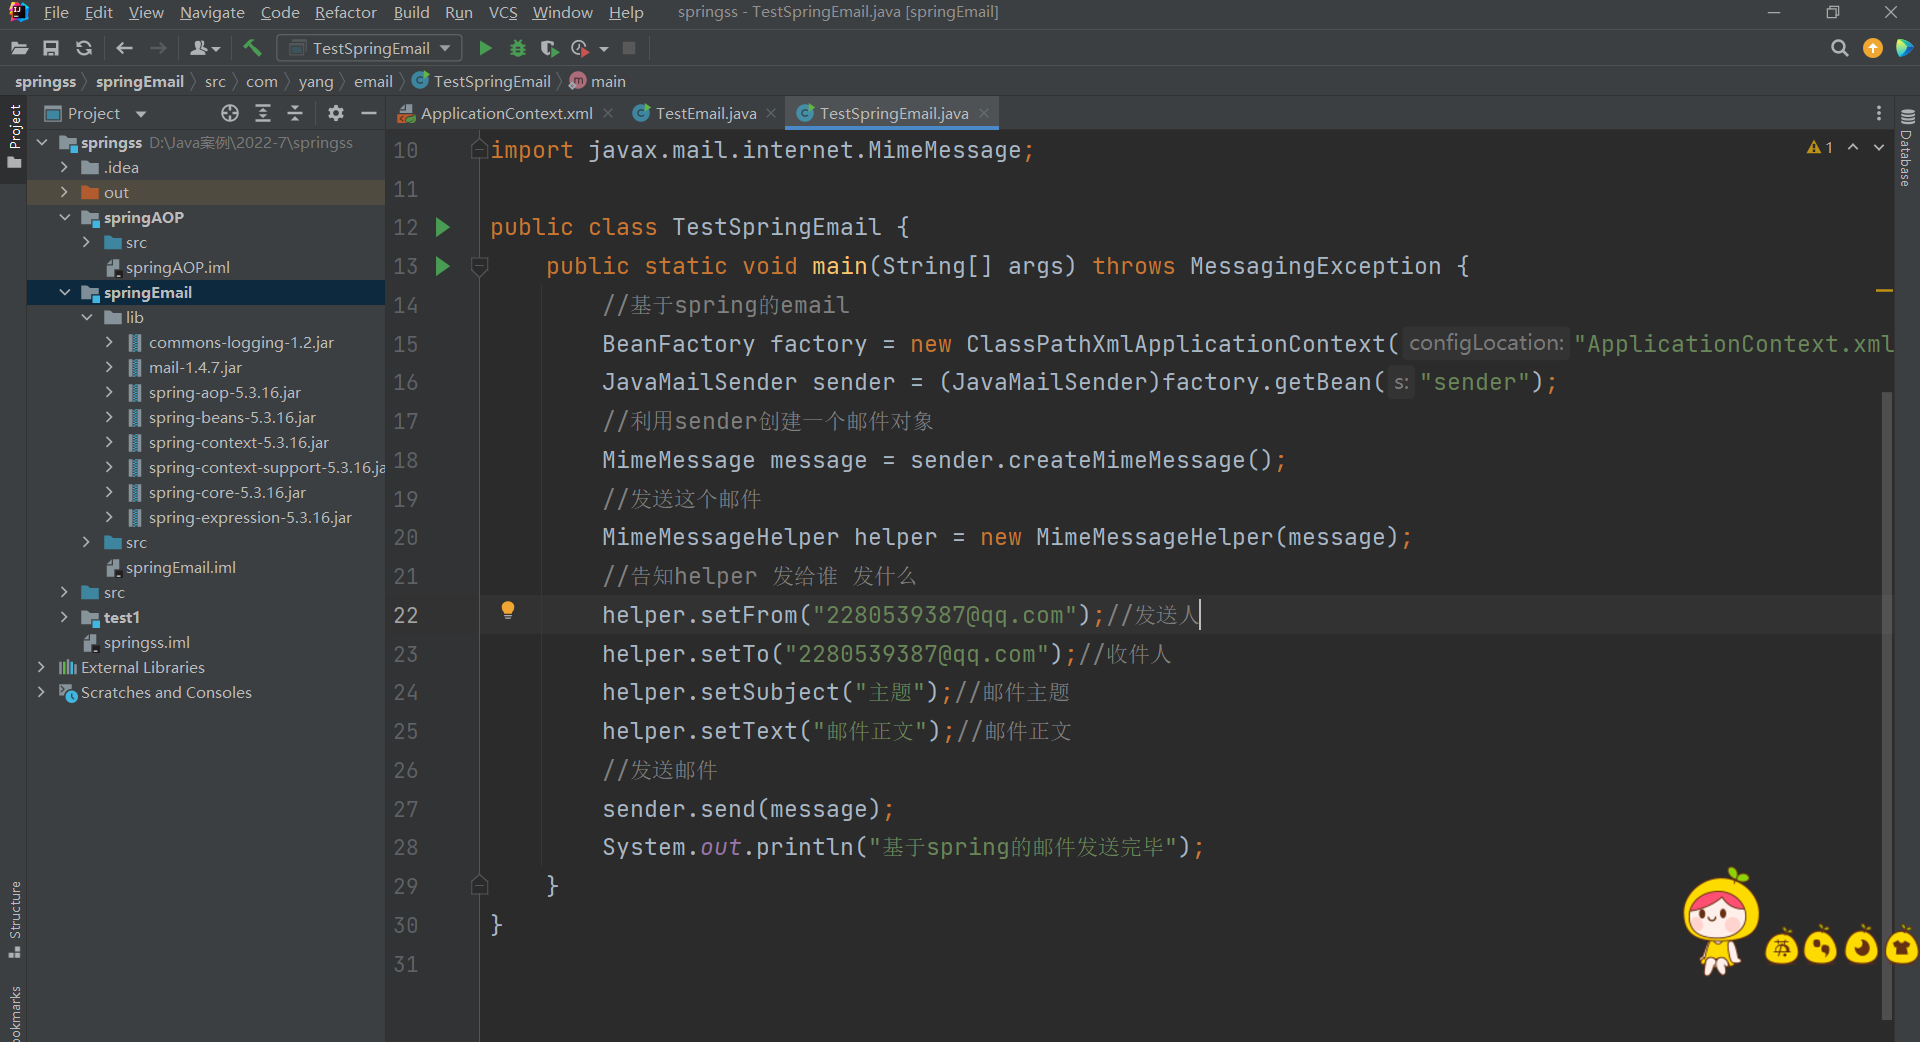
2.基于spring的提供的spring-context-support.jar 实现的邮件发送
spring的配置文件
<?xml version="1.0" encoding="UTF-8"?>
<beans xmlns="http://www.springframework.org/schema/beans"
       xmlns:context="http://www.springframework.org/schema/context"
       xmlns:xsi="http://www.w3.org/2001/XMLSchema-instance"
       xmlns:aop="http://www.springframework.org/schema/aop"
       xsi:schemaLocation=
               "http://www.springframework.org/schema/beans http://www.springframework.org/schema/beans/spring-beans.xsd
               http://www.springframework.org/schema/context http://www.springframework.org/schema/context/spring-context.xsd
               http://www.springframework.org/schema/aop https://www.springframework.org/schema/aop/spring-aop.xsd">

    <bean id="sender" class="org.springframework.mail.javamail.JavaMailSenderImpl">
        <property name="host" value="smtp.qq.com"></property>
        <property name="username" value="2280539387@qq.com"></property>
        <property name="password" value="hotobtfuxwgydiaf"></property>
        <property name="defaultEncoding" value="UTF-8"></property>
        <property name="javaMailProperties" >
            <props>
                <prop key="mail.smtp.auth">true</prop>
            </props>
        </property>

    </bean>

</beans>
测试类
package com.yang.email;

import org.springframework.beans.factory.BeanFactory;
import org.springframework.context.support.ClassPathXmlApplicationContext;
import org.springframework.mail.javamail.JavaMailSender;
import org.springframework.mail.javamail.MimeMailMessage;
import org.springframework.mail.javamail.MimeMessageHelper;

import javax.mail.MessagingException;
import javax.mail.internet.MimeMessage;

public class TestSpringEmail {
    public static void main(String[] args) throws MessagingException {
        //基于spring的email
        BeanFactory factory = new ClassPathXmlApplicationContext("ApplicationContext.xml");
        JavaMailSender sender = (JavaMailSender)factory.getBean("sender");
        //利用sender创建一个邮件对象
        MimeMessage message = sender.createMimeMessage();
        //发送这个邮件
        MimeMessageHelper helper = new MimeMessageHelper(message);
        //告知helper 发给谁 发什么
        helper.setFrom("2280539387@qq.com");//发送人
        helper.setTo("2280539387@qq.com");//收件人
        helper.setSubject("主题");//邮件主题
        helper.setText("邮件正文");//邮件正文
        //发送邮件
        sender.send(message);
        System.out.println("基于spring的邮件发送完毕");
    }
}

小提示:认证码获取


