基于consul+polly+oclet+identityserver4+cap实现微服务
基于consul+polly+oclet+identityserver4+cap实现微服务
前言
前面章节介绍了网关Oclet,授权认证IdentityServer4及服务注册Consul和分布式事务Cap,接下来就可以结合他们做个简单的微服务了。实践例子也是把前面的例子合并而成。
环境
l Win10
l VS2022
l .NET5.0
l DotNetCore.CAP 5.0.1
l DotNetCore.CAP.RabbitMQ 5.0.1
l DotNetCore.CAP.SqlServer 5.0.1
l CAP.Dashboard 5.0.0
l Microsoft.EntityFrameworkCore.Design 5.0.0
l SQLserver2012
l Ocelot 17.0.0
微服务介绍
微服务架构诞生在SOA时代,在移动互联网时代蓬勃发展并崛起,从早期的互联网公司开始,快速过渡到现在的移动互联网公司,都在大量使用微服务架构,包括大家熟悉的淘宝、微博、微信、抖音等平台,都是很典型的代表。微服务架构很重要的特点就是:快速响应需求变化,业务迭代非常快,每月甚至每周都会有大量的改版信息。
之前在采用单体巨型非微服务架构有个问题,系统里面的业务模块非常多,大家一起发布、修改、编译很难进行协调,可能是几千人的开发团队,很难做到敏捷开发、发布、上线。
使用微信、微博、淘宝、抖音超过5年会感受到,迭代非常快,而且经常上线新功能,比如支付宝之前只有支付担保交易,现在可以在上面交水电费、做地铁、城市健康码功能等。淘宝的各种新功能,比如生鲜、直播等。抖音之前只做短视频,现在也开始做电商,可以评论、加好友等等。
总的来说,之前单体巨型架构模式,已经无法适应快速变化的业务发展需求。快速响应需求变化是微服务架构的重要特点。
微服务优点:
① 开发简单;
② 技术栈灵活;
③ 协议简单;
④ 服务独立无依赖;
⑤ 独立按需扩展;
⑥ 可用性高;
⑦ 高伸缩性;
⑧ 易于维护单一服务。
微服务的缺点:
① 架构复杂;
② 多服务运维难度;
③ 系统部署依赖;
④ 服务间通信成本;
⑤ 数据一致性;
⑥ 系统集成测试;
⑦ 重复工作;
⑧ 性能监控。
项目实践
把前面的“CAP+RabbitMQ+SqlServer之商品订单”https://www.cnblogs.com/yakniu/p/16211455.html
项目举例,和前面的“Ocelot之结合IdentityServer4认证二”https://www.cnblogs.com/yakniu/p/16127848.html项目举例结合在一起。代码合并后如下:
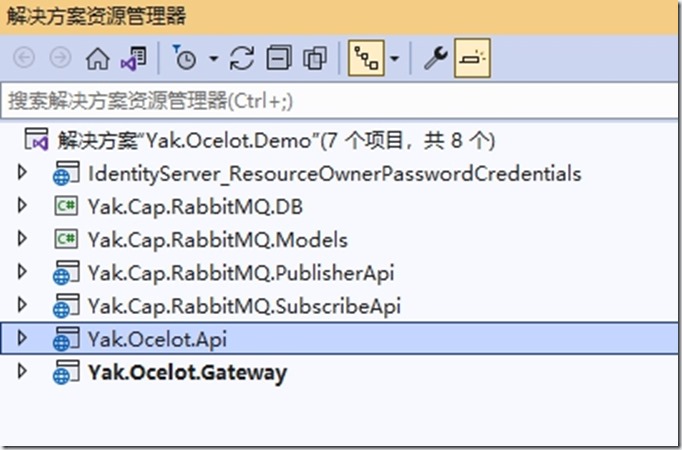
项目介绍
合并后一共包含有7个项目
l DB项目:“Yak.Cap.RabbitMQ.DB”
l 模型项目:“Yak.Cap.RabbitMQ.Models”
l 发布接口项目:“Yak.Cap.RabbitMQ.PublisherApi”
l 订阅接口项目“Yak.Cap.RabbitMQ.SubscribeApi”
l 认证服务项目:“IdentityServer_ResourceOwnerPasswordCredentials”
l 网关测试项目“Yak.Ocelot.Api”
l 网关项目“Yak.Ocelot.Gateway”
其中网关测试项目是以前测试的项目,可以忽略。项目的创建可以参考前面章节,这里不复述了。
认证服务项目
修改IdentityServer_ResourceOwnerPasswordCredentials的Config文件,因为现在增加了两个接口。代码如下:
public static class Config { public static IEnumerable<ApiScope> ApiScopes => new ApiScope[] { new ApiScope("Yak.Ocelot.Api", "My API"), new ApiScope("Yak.Cap.RabbitMQ.SubscribeApi", "Product API"), new ApiScope("Yak.Cap.RabbitMQ.PublisherApi", "Order API") }; public static List<TestUser> GetUsers() { return new List<TestUser> { new TestUser { SubjectId = "1", Username = "alice", Password = "password" }, new TestUser { SubjectId = "2", Username = "bob", Password = "password" }, new TestUser { SubjectId = "3", Username = "yak", Password = "yakpassword" } }; } public static IEnumerable<IdentityResource> GetIdentityResources() { return new IdentityResource[] { new IdentityResources.OpenId(),//未添加导致scope错误 new IdentityResources.Profile() }; } public static IEnumerable<Client> GetClients() { return new List<Client> { new Client { ClientId = "yakclient", AllowedGrantTypes = GrantTypes.ResourceOwnerPassword, ClientSecrets = { new Secret("yaksecret".Sha256()) }, AllowedScopes = new []{ "Yak.Ocelot.Api", "Yak.Cap.RabbitMQ.SubscribeApi", "Yak.Cap.RabbitMQ.PublisherApi", IdentityServerConstants.StandardScopes.OpenId, IdentityServerConstants.StandardScopes.Profile }//需要额外添加 } }; } } |
修改网关项目
修改网关项目Yak.Ocelot.Gateway的配置文件ocelot.json,因为现在对增加的接口路由配置。代码如下:
{ "Routes": [ { "DownstreamPathTemplate": "/Consumer", "DownstreamScheme": "http", "ServiceName": "service-subscribe", "UseServiceDiscovery": true, "UpstreamPathTemplate": "/Consumer", "UpstreamHttpMethod": [ "Get" ], "LoadBalancerOptions": { "Type": "RoundRobin" }, //鉴权 "AuthenticationOptions": { "AuthenticationProviderKey": "Gatewaykey", "AllowedScopes": [ "Yak.Cap.RabbitMQ.SubscribeApi" ] } }, { "DownstreamPathTemplate": "/{url}", "DownstreamScheme": "http", "ServiceName": "service-publisher", "UseServiceDiscovery": true, "UpstreamPathTemplate": "/{url}", "UpstreamHttpMethod": [ "Get" ], "LoadBalancerOptions": { "Type": "RoundRobin" } }, { "DownstreamPathTemplate": "/Publish", "DownstreamScheme": "http", "ServiceName": "service-publisher", "UseServiceDiscovery": true, "UpstreamPathTemplate": "/Publish", "UpstreamHttpMethod": [ "Get" ], "LoadBalancerOptions": { "Type": "RoundRobin" }, //鉴权 "AuthenticationOptions": { "AuthenticationProviderKey": "Gatewaykey", "AllowedScopes": [ "Yak.Cap.RabbitMQ.PublisherApi" ] } }, { "DownstreamPathTemplate": "/Publish/Create", "DownstreamScheme": "http", "ServiceName": "service-publisher", "UseServiceDiscovery": true, "UpstreamPathTemplate": "/Publish/Create", "UpstreamHttpMethod": [ "Post" ], "LoadBalancerOptions": { "Type": "RoundRobin" }, //鉴权 "AuthenticationOptions": { "AuthenticationProviderKey": "Gatewaykey", "AllowedScopes": [ "Yak.Cap.RabbitMQ.PublisherApi" ] } }, { "DownstreamPathTemplate": "/WeatherForecast", //WeatherForecast "DownstreamScheme": "http", "ServiceName": "service-a", "UseServiceDiscovery": true, "UpstreamPathTemplate": "/Weather", //Weather "UpstreamHttpMethod": [ "Get" ], "LoadBalancerOptions": { "Type": "RoundRobin" }, //鉴权 "AuthenticationOptions": { "AuthenticationProviderKey": "Gatewaykey", "AllowedScopes": [ "Yak.Ocelot.Api" ] } }, { "DownstreamPathTemplate": "/connect/token", "DownstreamScheme": "http", "DownstreamHostAndPorts": [ { "Host": "localhost", "Port": 8000 } ], "UpstreamPathTemplate": "/connect/token", "UpstreamHttpMethod": [ "Get", "Post" ], "LoadBalancerOptions": { "Type": "RoundRobin" } } ], "GlobalConfiguration": { "BaseUrl": "http://localhost:5000", "ServiceDiscoveryProvider": { "Scheme": "http", "Host": "localhost", "Port": 8500, "Type": "Consul" }, "RateLimitOptions": { "DisableRateLimitHeaders": false, "QuotaExceededMessage": "too many requests...", "HttpStatusCode": 999, "ClientIdHeader": "Test" }, //熔断器Polly "QoSOptions": { "ExceptionsAllowedBeforeBreaking": 3, //打开断路器之前允许的多少个异常请求 "DurationOfBreak": 60000, // 熔断时间 "TimeoutValue": 1000 //请求超时时间(毫秒) } } } |
调试
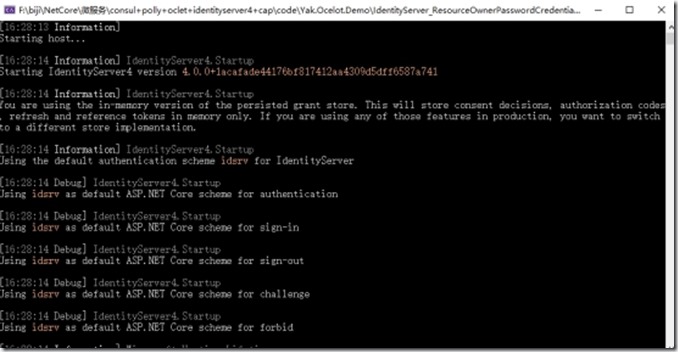
Step1:启动认证服务项目。
Step2:启动发布消息接口和订阅消息接口。
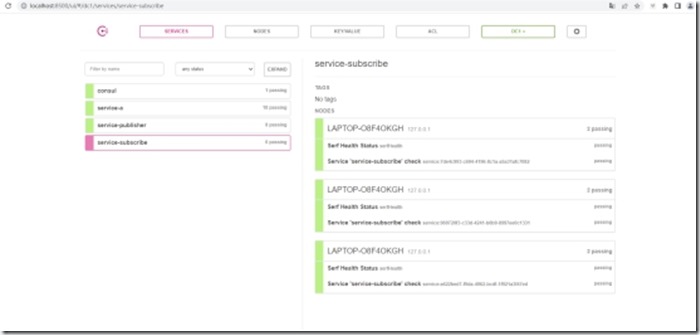
Step3:启动网关项目,查看接口服务已经注册到Consul中。
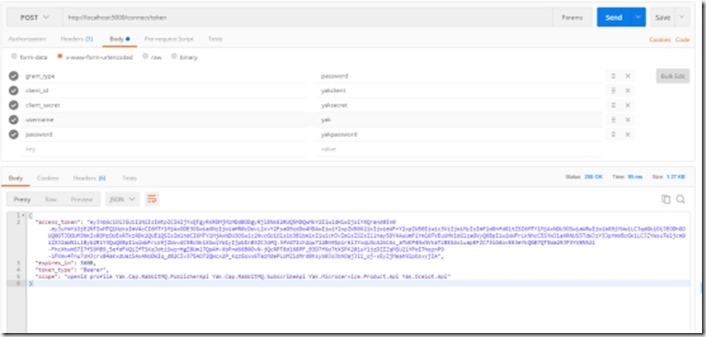
Step4:通过网关获取Token,地址:http://localhost:5000/connect/token
参数:
grant_type:password
client_id:yakclient
client_secret:yaksecret
username:yak
password:yakpassword
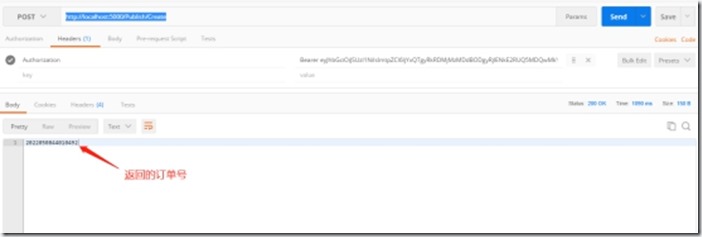
Step5:创建订单,地址:http://localhost:5000/Publish/Create,当然要带上Token访问了。
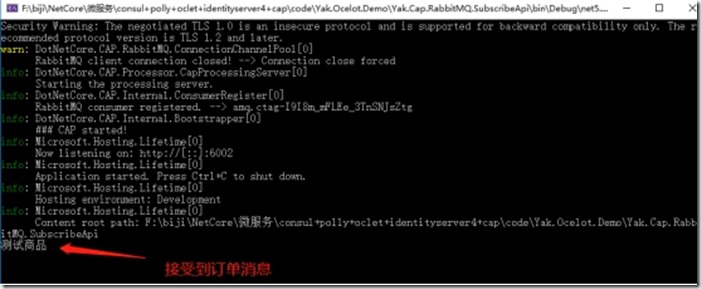
Step6:接受订单并进行减少库存处理。
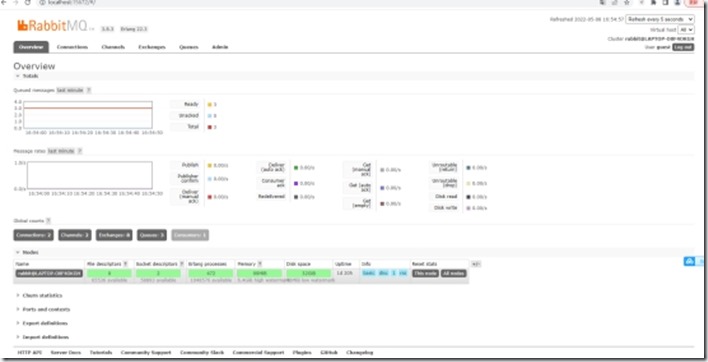
Step7:访问http://localhost:5000/cap,打开CAP面板。
访问http://localhost:15672/#/,打开RabbitMQ面板。
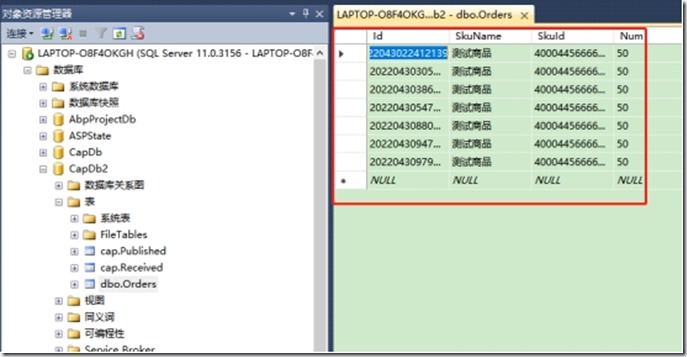
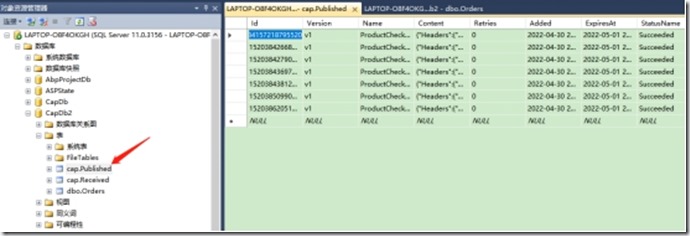
数据库中新建了订单
总结
在创建订单后,商品服务接受到消息,减去库存,当然库存可以存放在另外一个数据库中。通过这次项目实践,可以看出使用.NET Core实现微服务也很简单。
鸣谢
https://zhuanlan.zhihu.com/p/403246497
源码
https://github.com/yandaniugithub/MicroService
本文来自博客园,作者:{春光牛牛,yak},转载请注明原文链接:https://www.cnblogs.com/yakniu/p/16247370.html
欢迎各位大佬们评论指正
QQ讨论群:610129902





【推荐】国内首个AI IDE,深度理解中文开发场景,立即下载体验Trae
【推荐】编程新体验,更懂你的AI,立即体验豆包MarsCode编程助手
【推荐】抖音旗下AI助手豆包,你的智能百科全书,全免费不限次数
【推荐】轻量又高性能的 SSH 工具 IShell:AI 加持,快人一步
· 被坑几百块钱后,我竟然真的恢复了删除的微信聊天记录!
· 没有Manus邀请码?试试免邀请码的MGX或者开源的OpenManus吧
· 【自荐】一款简洁、开源的在线白板工具 Drawnix
· 园子的第一款AI主题卫衣上架——"HELLO! HOW CAN I ASSIST YOU TODAY
· Docker 太简单,K8s 太复杂?w7panel 让容器管理更轻松!