
IdentityServer4之ClientCredentials(客户端凭据许可)
IdentityServer4之ClientCredentials(客户端凭据许可)
1. 创建IdentityServer4服务
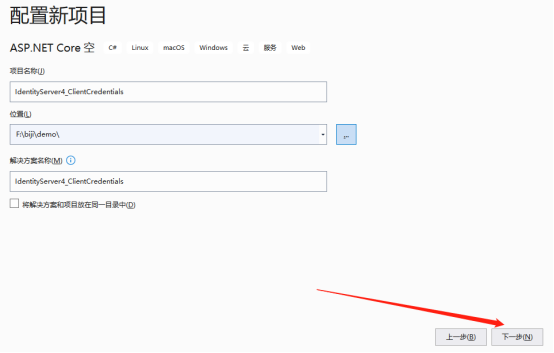
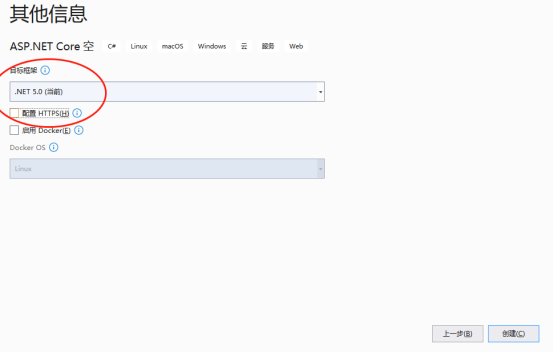
这里使用VS2019创建.net5.0框架下的IdentityServer4服务项目,命名为“IdentityServer4_ClientCredentials”,端口设置为5001。
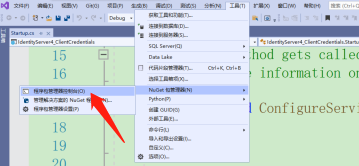
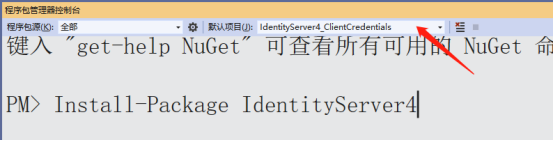
通过Nuget安装IdentityServer4命令如下,记得程序包管理控制套,上面的项目选择刚刚创建的IdentityServer项目,代码如下:
1 | Install-Package IdentityServer4 |

2. 配置身份服务器
Defining an API Scope
API 是系统中要保护的资源。资源定义可以通过多种方式加载,用于创建上述项目的模板显示了如何使用“代码即配置”方法。
创建Config.cs文件,代码如下所示:
1 2 3 4 5 6 7 8 9 10 11 12 13 14 15 16 17 18 19 20 21 22 23 24 25 26 27 28 29 30 31 32 33 34 35 36 37 38 39 40 41 42 43 44 45 46 47 48 49 50 51 52 53 54 55 56 57 | public static class Config { public static IEnumerable<IdentityResource> IdentityResources => new IdentityResource[] { new IdentityResources.OpenId(), new IdentityResources.Profile() }; // v4新增 public static IEnumerable<ApiScope> ApiScopes => new ApiScope[] { new ApiScope("OrderApi","Order Api") }; public static IEnumerable<Client> Clients => new Client[] { //客户端的唯一标识 此模式可用于前端 new Client { // 客户端的唯一标识 ClientId="client", // 客户端认证密码 ClientSecrets = { new Secret("ordersecret".Sha256()) }, // 指定授权模式,这里指定为客户端凭据模式 AllowedGrantTypes = GrantTypes.ClientCredentials, // 指定客户端获取的Token能访问到的作用域 AllowedScopes={ "OrderApi" } }};} |
引用命名空间:
using IdentityServer4.Models;
3. 配置身份服务器
修改Startup.cs文件。
加载加载资源和客户端:代码如下:
1 2 3 4 5 6 7 8 9 10 11 12 13 14 15 16 17 18 19 20 21 22 23 24 25 26 27 28 29 30 31 32 33 | public void ConfigureServices(IServiceCollection services) { // uncomment, if you want to add an MVC-based UI //services.AddControllersWithViews(); var builder = services.AddIdentityServer(options => { // see https://identityserver4.readthedocs.io/en/latest/topics/resources.html options.EmitStaticAudienceClaim = true; }) .AddInMemoryIdentityResources(Config.IdentityResources) .AddInMemoryApiScopes(Config.ApiScopes) .AddInMemoryClients(Config.Clients); // not recommended for production - you need to store your key material somewhere secure builder.AddDeveloperSigningCredential(); } |
身份验证服务添加到 DI(依赖注入)并将身份验证中间件添加到管道中
1 | app.UseIdentityServer(); |
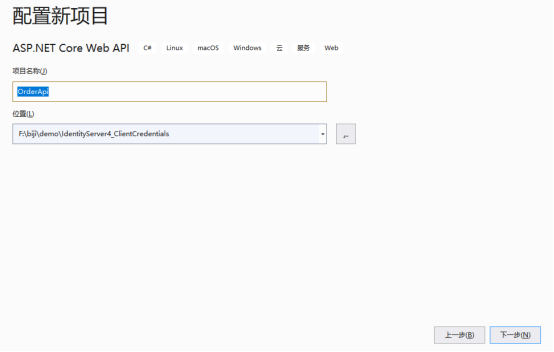
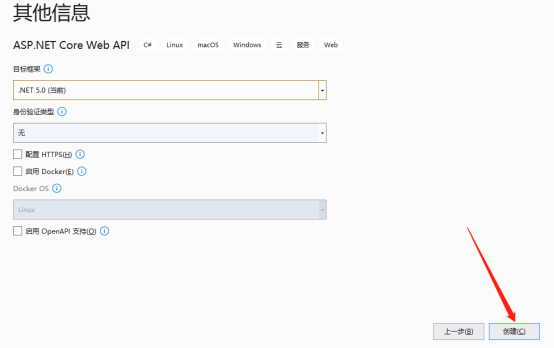
4. 创建WebAPI服务
这里创建一个订单服务,命名为OrderApi,端口为62274。
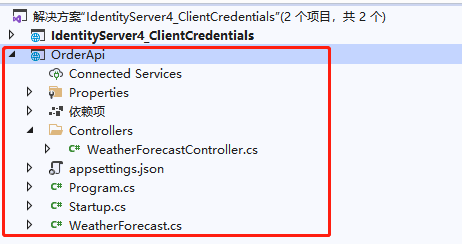
为控制器添加授权要求:
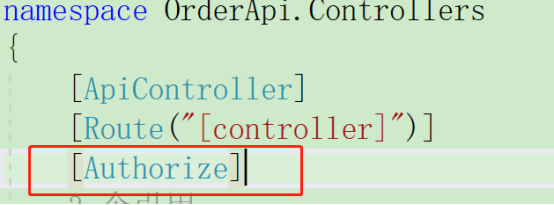
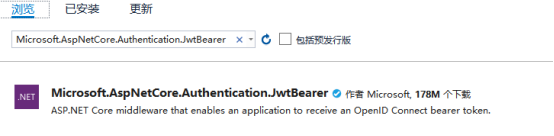
添加Microsoft.AspNetCore.Authentication.JwtBearer引用
注册认证相关组件和配置defaultScheme为Bearer,代码:
1 2 3 4 5 6 7 8 9 10 11 12 13 14 15 16 17 18 19 20 21 22 23 24 25 26 27 | services.AddAuthentication("Bearer") .AddJwtBearer("Bearer", options => { // 指定要接入的授权服务器地址 options.Authority = "http://localhost:5000"; // 在验证token时,不验证Audience options.TokenValidationParameters = new TokenValidationParameters { ValidateAudience = false }; // 不适用Https options.RequireHttpsMetadata = false; }); |
Setup的Configure方法中添加认证和授权中间件,代码:
1 2 3 4 5 6 7 | // 注册认证过滤器,在授权过滤器前面 app.UseAuthentication(); // 注册授权过滤器 app.UseAuthorization(); |
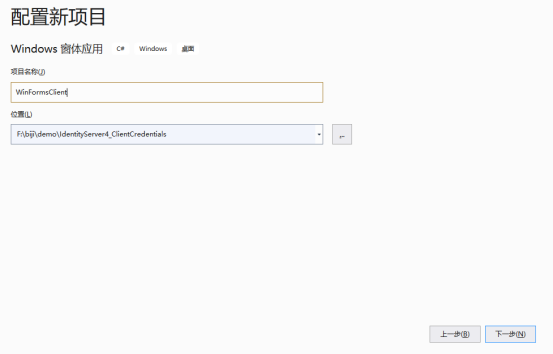
5. 创建客户端
创建WinFrom客户端,命名为WinFormsClient,在默认的Form1窗体中添加按钮和文本框用于调用接口和查看接口返回值,这里直接调用自带的温度接口。
代码如下:
1 2 3 4 5 6 7 8 9 10 11 12 13 14 15 16 17 18 19 20 21 22 23 24 25 26 27 28 29 30 31 32 33 34 35 36 37 38 39 40 41 42 43 44 45 46 47 48 49 50 51 52 53 54 55 56 57 58 59 60 61 62 63 64 65 66 67 68 69 70 71 72 73 74 75 76 77 78 79 80 81 82 83 84 85 86 87 88 89 90 91 92 93 94 95 96 97 98 99 100 101 102 103 104 105 106 107 | private async void button1_Click(object sender, EventArgs e) { await Post(); } private async Task Post() { // 1. 创建一个HttpClient用于请求 var client = new HttpClient(); // 2. 获取授权服务器的相关信息,IdentityModel已经将其封装好了 var disco = await client.GetDiscoveryDocumentAsync("http://localhost:5000"); // 3. 检查是否请求错误 if (disco.IsError) { // 错误就打印错误信息,然后直接返回 textBox1.Text = disco.Error; return; } // 4. 通过授权服务分配的标识,向授权服务器请求AccessToken var tokenResp = await client.RequestClientCredentialsTokenAsync(new ClientCredentialsTokenRequest { // 指定获取token的地址,IdentityModel进行封装,直接使用即可 Address = disco.TokenEndpoint, // 指定授权服务器分配的客户端标识 ClientId = "client", // 指定授权服务器分的客户端密码 ClientSecret = "ordersecret" }); // 5. 检查获取Token是否成功 if (tokenResp.IsError) { // 如果失败,打印错误消息并返回 textBox1.Text = tokenResp.Error; return; } // 6. 创建一个请求API资源的HttpClient var apiClient = new HttpClient(); // 7. 将获取到的Token以Bearer的方案设置在请求头中 apiClient.SetBearerToken(tokenResp.AccessToken); // 8. 向资源服务器中请求受保护的API var contentResp = await apiClient.GetAsync("http://localhost:62274/weatherforecast"); // 9. 打印对应的消息 if (contentResp.IsSuccessStatusCode) { var content = await contentResp.Content.ReadAsStringAsync(); textBox1.Text = content; } else { textBox1.Text = contentResp.StatusCode.ToString(); } } |
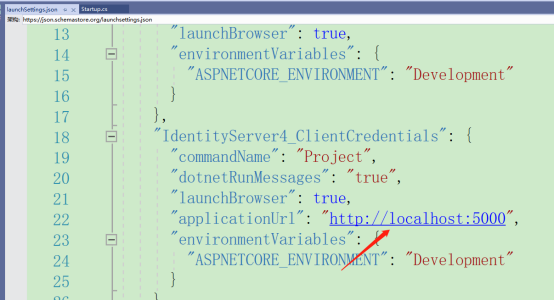
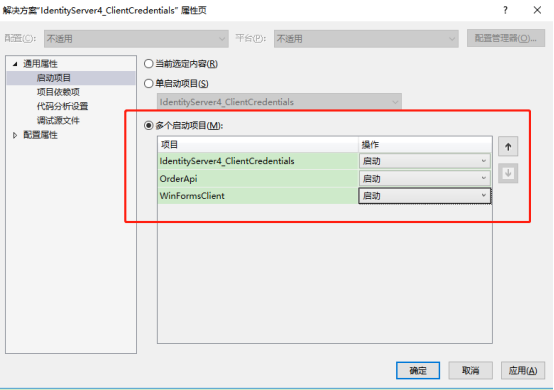
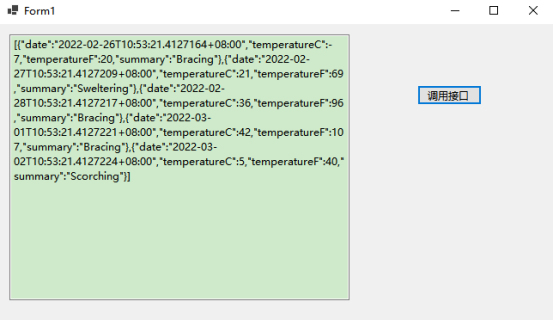
6.调用接口
设置多启动项目,运行。
点击调用接口按钮:
鸣谢:
https://github.com/IdentityServer
https://www.cnblogs.com/ccmonsor/p/15529183.html
https://www.cnblogs.com/ddrsql/p/7789064.html
https://mp.weixin.qq.com/s/5B22Q9yBYqFFDBzOWxeP7w
源码
https://github.com/yandaniugithub/NETCore

本文来自博客园,作者:{春光牛牛,yak},转载请注明原文链接:https://www.cnblogs.com/yakniu/p/16175739.html
欢迎各位大佬们评论指正
QQ讨论群:610129902


【推荐】国内首个AI IDE,深度理解中文开发场景,立即下载体验Trae
【推荐】编程新体验,更懂你的AI,立即体验豆包MarsCode编程助手
【推荐】抖音旗下AI助手豆包,你的智能百科全书,全免费不限次数
【推荐】轻量又高性能的 SSH 工具 IShell:AI 加持,快人一步
· TypeScript + Deepseek 打造卜卦网站:技术与玄学的结合
· 阿里巴巴 QwQ-32B真的超越了 DeepSeek R-1吗?
· 【译】Visual Studio 中新的强大生产力特性
· 10年+ .NET Coder 心语 ── 封装的思维:从隐藏、稳定开始理解其本质意义
· 【设计模式】告别冗长if-else语句:使用策略模式优化代码结构