
Ocelot之配置管理
Ocelot之配置管理
前言
上章节介绍了Ocelot之结合IdentityServer4认证二,本节介绍Ocelot中的配置管理,Ocelot网关的配置可以通过API接口进行修改。
Ocelot的路由设置是基于配置文件的,同样在Ocelot中使用Consul做服务发现时,也是基于配置文件,当我们修改路由或者需要往Consul中添加ServiceName的时候,需要修改配置文件,网关服务也需要重启,这当然不是我们想要的。
环境
Win10+VS2022 +.NET5.0 + Ocelot17.0.0.0 + Consul 1.6.1.1+IDS4
1 Administration介绍
配置管理允许在Api网关运行时动态通过Api查看和修改当前配置。由于该功能权限很高,所以需要授权才能进行相关操作。有两种方式来认证,外部Identity Server和内部Identity Server。
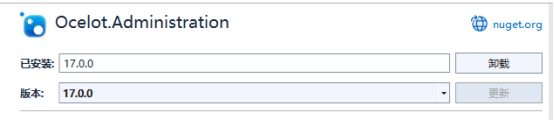
首先需要添加Ocelot.Administration依赖。
Ocelot提供了一组后台管理的API, 从前三篇文章可以看出,Ocelot主要也就是配置文件的管理,所以API主要也就是管理配置
- 获取管理后台的token
POST {adminPath}/connect/token - 获取配置
GET {adminPath}/configuration - 创建/修改配置
POST {adminPath}/configuration - 删除缓存
DELETE {adminPath}/outputcache/{region}
其中Token获取API只在使用内部Identity Server时有效。
2 项目验证
在上节“Ocelot之结合IdentityServer4认证二”的项目实现上继续改造。
2.1 修改网关
1.添加Ocelot.Administration依赖
添加后所有的依赖有:
|
<PackageReference Include="Microsoft.AspNetCore.Authentication.JwtBearer" Version="5.0.0" /> <PackageReference Include="Ocelot" Version="17.0.0" /> <PackageReference Include="Ocelot.Administration" Version="17.0.0" /> <PackageReference Include="Ocelot.Cache.CacheManager" Version="17.0.0" /> <PackageReference Include="Ocelot.Provider.Consul" Version="17.0.0" /> <PackageReference Include="Ocelot.Provider.Polly" Version="17.0.0" /> |
1. 添加内部Identity Server
修改Startup文件,代码如下:
|
public void ConfigureServices(IServiceCollection services) {
void options(IdentityServerAuthenticationOptions o) { o.Authority = "http://localhost:8000"; o.RequireHttpsMetadata = false; o.ApiName = "Yak.Ocelot.Api"; }
services .AddOcelot() .AddConsul() .AddPolly() .AddAdministration("/administration", "yaksecret");
services .AddAuthentication(JwtBearerDefaults.AuthenticationScheme) .AddIdentityServerAuthentication("Gatewaykey", options);
services.AddControllers();
} |
2.2 调试
1. 启动接口服务
因为使用的是内部Identity Server,只运行网关项目即可。
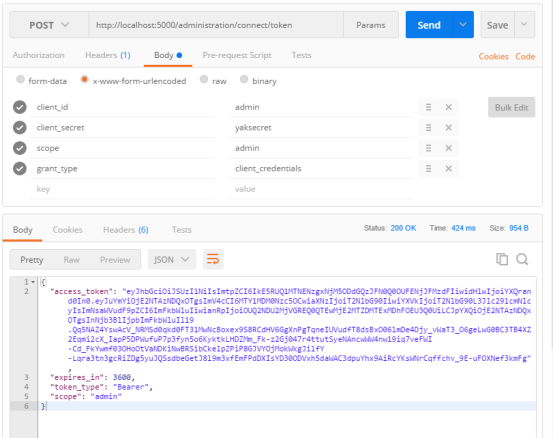
2. 取Token
启动IDS4服务,通过Postman工具获取Token,
地址:http://localhost:5000/administration/connect/token
参数:
client_id:admin
client_secret:yaksecret
scope:admin
grant_type:client_credentials
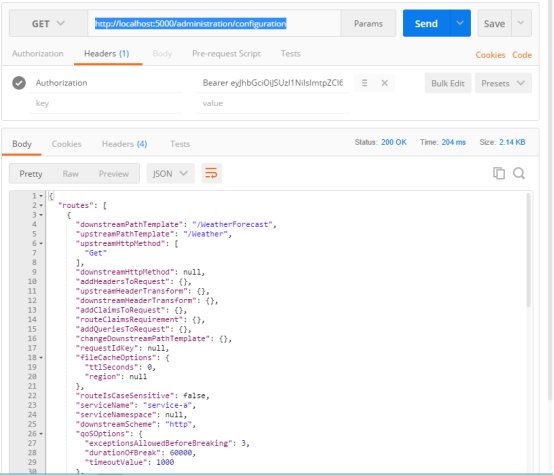
3. 获取网关配置
通过网关地址http://localhost:5000/administration/configuration
获取网关配置。注意需要刚才获取的Token
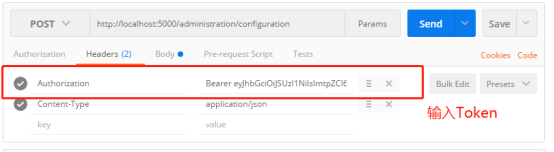
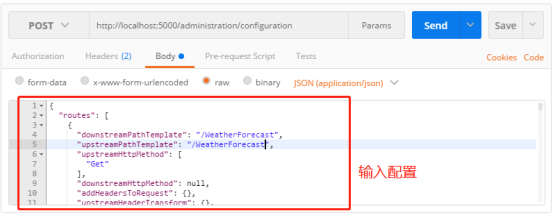
4.修改网关配置
通过网关地址http://localhost:5000/administration/configuration
提交网关配置。注意需要刚才获取的Token
将“Weather”修改为“WeatherForecast”提交的配置如下:
|
{ "routes": [ { "downstreamPathTemplate": "/WeatherForecast", "upstreamPathTemplate": "/WeatherForecast", "upstreamHttpMethod": [ "Get" ], "downstreamHttpMethod": null, "addHeadersToRequest": {}, "upstreamHeaderTransform": {}, "downstreamHeaderTransform": {}, "addClaimsToRequest": {}, "routeClaimsRequirement": {}, "addQueriesToRequest": {}, "changeDownstreamPathTemplate": {}, "requestIdKey": null, "fileCacheOptions": { "ttlSeconds": 0, "region": null }, "routeIsCaseSensitive": false, "serviceName": "service-a", "serviceNamespace": null, "downstreamScheme": "http", "qoSOptions": { "exceptionsAllowedBeforeBreaking": 3, "durationOfBreak": 60000, "timeoutValue": 1000 }, "loadBalancerOptions": { "type": "RoundRobin", "key": null, "expiry": 0 }, "rateLimitOptions": { "clientWhitelist": [], "enableRateLimiting": false, "period": null, "periodTimespan": 0, "limit": 0 }, "authenticationOptions": { "authenticationProviderKey": "Gatewaykey", "allowedScopes": [] }, "httpHandlerOptions": { "allowAutoRedirect": false, "useCookieContainer": false, "useTracing": false, "useProxy": true, "maxConnectionsPerServer": 2147483647 }, "downstreamHostAndPorts": [], "upstreamHost": null, "key": null, "delegatingHandlers": [], "priority": 1, "timeout": 0, "dangerousAcceptAnyServerCertificateValidator": false, "securityOptions": { "ipAllowedList": [], "ipBlockedList": [] }, "downstreamHttpVersion": null } ], "dynamicRoutes": [], "aggregates": [], "globalConfiguration": { "requestIdKey": null, "serviceDiscoveryProvider": { "scheme": null, "host": null, "port": 0, "type": null, "token": null, "configurationKey": null, "pollingInterval": 0, "namespace": null }, "rateLimitOptions": { "clientIdHeader": "ClientId", "quotaExceededMessage": null, "rateLimitCounterPrefix": "ocelot", "disableRateLimitHeaders": false, "httpStatusCode": 429 }, "qoSOptions": { "exceptionsAllowedBeforeBreaking": 0, "durationOfBreak": 0, "timeoutValue": 0 }, "baseUrl": "http://localhost:5000", "loadBalancerOptions": { "type": null, "key": null, "expiry": 0 }, "downstreamScheme": null, "httpHandlerOptions": { "allowAutoRedirect": false, "useCookieContainer": false, "useTracing": false, "useProxy": true, "maxConnectionsPerServer": 2147483647 }, "downstreamHttpVersion": null } } |
5.查看是否已经修改
通过网关地址http://localhost:5000/administration/configuration
查询。
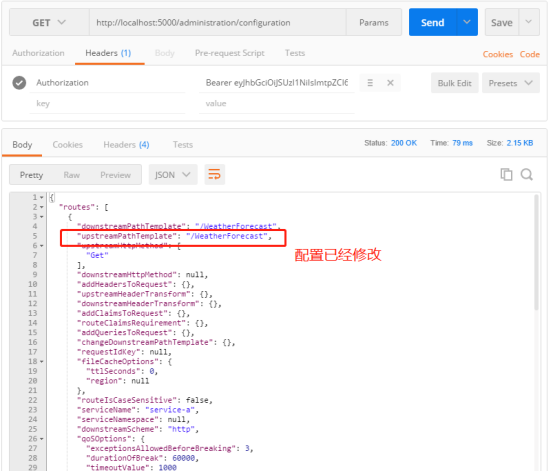
配置文件也已经修改。
可能在开发时会遇到修改完配置之后,下次调试时配置又回到了原来,是因为 configuration.json 选择成了总是复制,所以每次开始调试的时候都会替换 configuration.development.json 中的内容。
如果Ocelot Api网关程序没有读写文件的权限也会遇到修改配置失败的情况。
3 总结
这节例子讲述了通过Ocelot提供的API接口管理相关网关配置,首先获取Token,再进行修改和查询,减少了人工修改配置文件麻烦。
4 鸣谢
https://www.jianshu.com/p/9e2fa5783211
https://blog.csdn.net/weixin_30651273/article/details/98674546
https://blog.51cto.com/lhxsoft/3182325
5 源码
https://github.com/yandaniugithub/NETCore

本文来自博客园,作者:{春光牛牛,yak},转载请注明原文链接:https://www.cnblogs.com/yakniu/p/16165624.html
欢迎各位大佬们评论指正
QQ讨论群:610129902


【推荐】国内首个AI IDE,深度理解中文开发场景,立即下载体验Trae
【推荐】编程新体验,更懂你的AI,立即体验豆包MarsCode编程助手
【推荐】抖音旗下AI助手豆包,你的智能百科全书,全免费不限次数
【推荐】轻量又高性能的 SSH 工具 IShell:AI 加持,快人一步
· 阿里最新开源QwQ-32B,效果媲美deepseek-r1满血版,部署成本又又又降低了!
· AI编程工具终极对决:字节Trae VS Cursor,谁才是开发者新宠?
· 开源Multi-agent AI智能体框架aevatar.ai,欢迎大家贡献代码
· Manus重磅发布:全球首款通用AI代理技术深度解析与实战指南
· 被坑几百块钱后,我竟然真的恢复了删除的微信聊天记录!