
Ocelot之配置Swagger权限验证
Ocelot之配置Swagger权限验证
前言
上章节介绍了“Ocelot之网关中统一配置Swagger”,通常一个接口服务时权限验证在自己的Swagger上,但是在做微服务的时候,多个接口服务时,通过在Ocelot网关下的Swagger进行权限验证。
环境
Win10+VS2022 +.NET5.0 + Ocelot17.0.0.0 + Consul 1.6.1.1+IDS4
1 项目实现
这节在上节“Ocelot之网关中统一配置Swagger”的项目实现上继续改造。
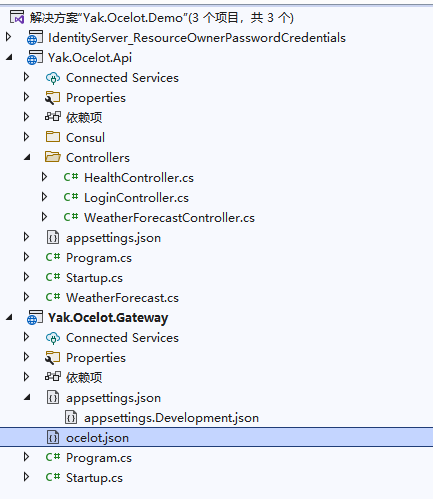
项目结构如下:
运行结果:

1.1 修改接口
1.修改Startup文件,添加Swagger验证的部分代码
|
public void ConfigureServices(IServiceCollection services) {
services.AddSwaggerGen(c => { c.SwaggerDoc("Yak.Ocelot.Api", new OpenApiInfo { Title = "天气预报服务", Version = "v1" }); c.DocInclusionPredicate((docName, description) => true); var baseDirectory = AppDomain.CurrentDomain.BaseDirectory; //此处为API的项目描述文件名 var commentsFileName = "Yak.Ocelot.Api.xml"; var commentsFile = Path.Combine(baseDirectory, commentsFileName); c.IncludeXmlComments(commentsFile);
//这里是给Swagger添加验证的部分 //Bearer 的scheme定义 var securityScheme = new OpenApiSecurityScheme() { Description = "JWT Authorization header using the Bearer scheme. Example: \"Authorization: Bearer {token}\"", Name = "Authorization", //参数添加在头部 In = ParameterLocation.Header, //使用Authorize头部 Type = SecuritySchemeType.Http, //内容为以 Bearer开头 Scheme = "Bearer", BearerFormat = "JWT" }; //把所有方法配置为增加bearer头部信息 var securityRequirement = new OpenApiSecurityRequirement { { new OpenApiSecurityScheme { Reference = new OpenApiReference { Type = ReferenceType.SecurityScheme, Id = "bearerAuth" } }, new string[] {} } }; //注册到swagger中 c.AddSecurityDefinition("bearerAuth", securityScheme); c.AddSecurityRequirement(securityRequirement); });
services.AddSingleton(Configuration.GetSection("Consul").Get<ConsulOption>()); services.AddControllers(); }
// This method gets called by the runtime. Use this method to configure the HTTP request pipeline. public void Configure(IApplicationBuilder app, IWebHostEnvironment env, IHostApplicationLifetime lifetime, ConsulOption consulOption) { if (env.IsDevelopment()) { app.UseDeveloperExceptionPage(); } //启用中间件服务生成Swagger作为JSON终结点 app.UseSwagger(c => { c.RouteTemplate = "{documentName}/swagger.json"; }); //启用中间件服务对swagger-ui,指定Swagger JSON终结点/swagger/ app.UseSwaggerUI(c => c.SwaggerEndpoint("/Yak.Ocelot.Api/swagger.json", "Yak.Ocelot.Api v1")); // 注册 app.RegisterConsul(lifetime, consulOption); app.UseRouting();
app.UseAuthorization();
app.UseEndpoints(endpoints => { endpoints.MapControllers(); }); } |
1.2 修改网关
1. 修改Startup文件
|
public void ConfigureServices(IServiceCollection services) { var identityBuilder = services.AddAuthentication(); IdentityServerConfig identityServerConfig = new IdentityServerConfig();
IdentityModelEventSource.ShowPII = true; var authenticationProviderKey = "Gatewaykey"; services.AddAuthentication().AddJwtBearer(authenticationProviderKey, x => { x.Authority = "http://localhost:8000"; x.RequireHttpsMetadata = false; x.TokenValidationParameters = new TokenValidationParameters { ValidateAudience = false }; }); services.AddControllers();
services.AddOcelot(Configuration).AddConsul().AddPolly();
}
// This method gets called by the runtime. Use this method to configure the HTTP request pipeline. public void Configure(IApplicationBuilder app, IWebHostEnvironment env) { if (env.IsDevelopment()) { app.UseDeveloperExceptionPage(); }
app.UseRouting(); app.UseAuthentication();//先鉴权,没有鉴权,授权是没有意义的
app.UseAuthorization();//后授权 app.UseEndpoints(endpoints => { endpoints.MapGet("/", async context => { await context.Response.WriteAsync("我是Ocelot网关!"); }); }); var apis = new List<string> { "Yak.Ocelot.Api" }; app.UseSwagger(); app .UseSwaggerUI(options => { apis.ForEach(m => { options.SwaggerEndpoint($"/{m}/swagger.json", m); }); }); app.UseOcelot(); } } |
2. 修改ocelot配置
|
{ "Routes": [ { "DownstreamPathTemplate": "/Yak.Ocelot.Api/swagger.json", "DownstreamScheme": "http", "ServiceName": "service-a", "LoadBalancer": "RoundRobin", "UseServiceDiscovery": true, "UpstreamPathTemplate": "/Yak.Ocelot.Api/swagger.json", "UpstreamHttpMethod": [ "GET", "POST", "DELETE", "PUT" ] }, { "DownstreamPathTemplate": "/WeatherForecast", "DownstreamScheme": "http", "ServiceName": "service-a", "UseServiceDiscovery": true, "UpstreamPathTemplate": "/WeatherForecast", "UpstreamHttpMethod": [ "Get" ], "LoadBalancerOptions": { "Type": "RoundRobin" }, //熔断器Polly "QoSOptions": { "ExceptionsAllowedBeforeBreaking": 3, //打开断路器之前允许的多少个异常请求 "DurationOfBreak": 60000, // 熔断时间 "TimeoutValue": 1000 //请求超时时间(毫秒) }, //鉴权 "AuthenticationOptions": { "AuthenticationProviderKey": "Gatewaykey", "AllowedScopes": [ "Yak.Ocelot.Api" ] } } ], "GlobalConfiguration": { "BaseUrl": "http://localhost:5000" } } |
1.3 启动Consul
这里是Win10系统,下载相应的Consul后,在文件夹下创建启动BAT文件用于启动Consul,双击启动。
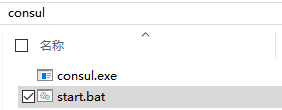
Start的BAT文件内容:
|
consul agent -dev |
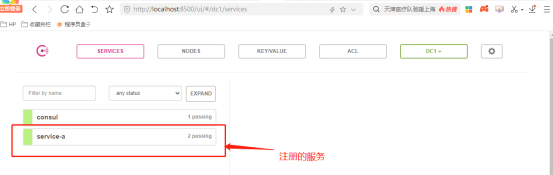
1.4 服务发现
启动“Yak.Ocelot.Api”项目,查看到服务已经注册到Consul中。
1.5 调试
- 运行接口
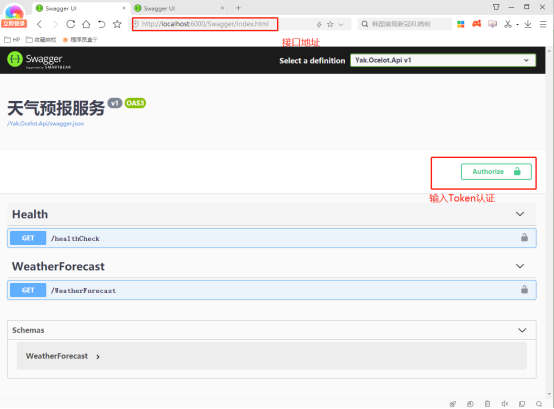
运行网关项目“Yak.Ocelot.Api”,通过网关地址访问SwaggerUI。
地址:http://localhost:6000/Swagger/index.html
2.运行网关
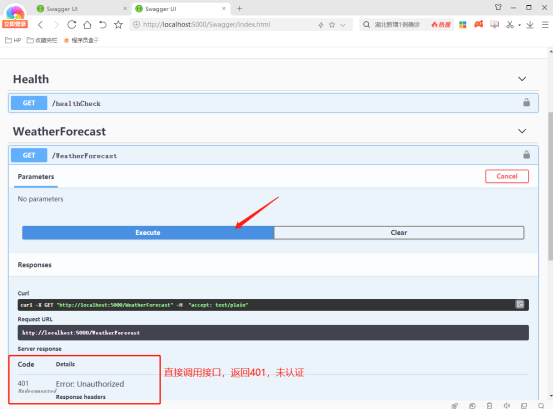
运行网关项目“Yak.Ocelot.Gateway”,通过网关地址访问SwaggerUI。
地址:http://localhost:5000/Swagger/index.html

直接掉用接口,返回401码,表示为授权。
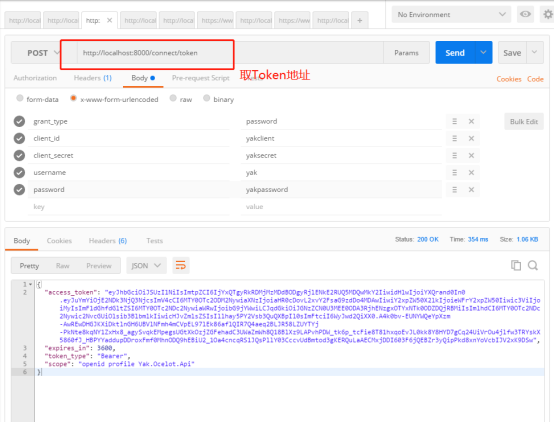
3. 使用PostMan工具取Token
参数:
grant_type:password
client_id:yakclient
client_secret:yaksecret
username:yak
password:yakpassword
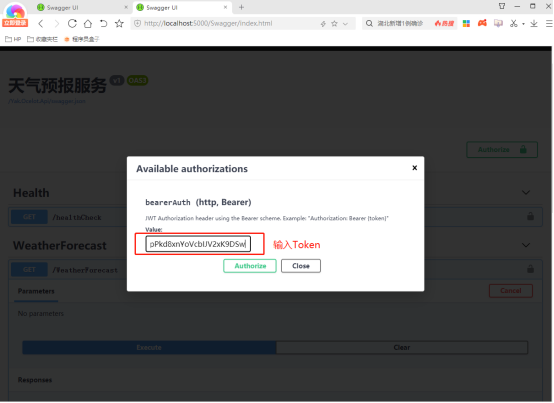
输入Token
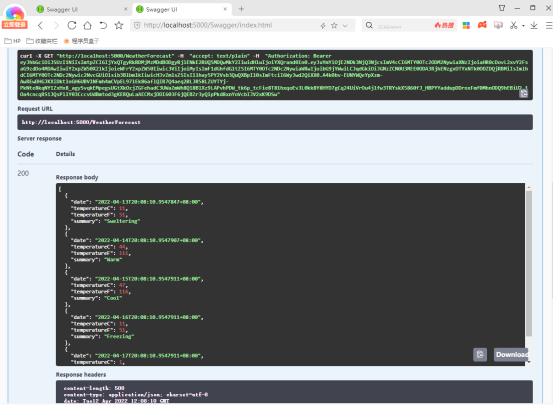
调用接口,成功返回天气预报数据。
2 总结
这节主要介绍了在Ocelot网关下Swagger带权限验证模式下访问接口。
3 鸣谢
https://www.cnblogs.com/axzxs2001/p/9253495.html
4 源码
https://github.com/yandaniugithub/NETCore

本文来自博客园,作者:{春光牛牛,yak},转载请注明原文链接:https://www.cnblogs.com/yakniu/p/16137155.html
欢迎各位大佬们评论指正
QQ讨论群:610129902


【推荐】国内首个AI IDE,深度理解中文开发场景,立即下载体验Trae
【推荐】编程新体验,更懂你的AI,立即体验豆包MarsCode编程助手
【推荐】抖音旗下AI助手豆包,你的智能百科全书,全免费不限次数
【推荐】轻量又高性能的 SSH 工具 IShell:AI 加持,快人一步
· winform 绘制太阳,地球,月球 运作规律
· TypeScript + Deepseek 打造卜卦网站:技术与玄学的结合
· Manus的开源复刻OpenManus初探
· 写一个简单的SQL生成工具
· AI 智能体引爆开源社区「GitHub 热点速览」