libuv多线程简单应用示范
#include <stdio.h>
#include <uv.h>

// 声明回调函数
void asyncCallback(uv_async_t* handle);

void thread_func_1(void *arg);
void thread_func_2(void *arg);

// 定时器回调函数
void timer_callback(uv_timer_t* handle)
{
    // 定时器触发后执行的操作
    printf("Timer triggered!\n");
    fflush(stdout);
}


int main()
{
    // 创建事件循环
    uv_loop_t *loop = uv_default_loop();

    // 创建线程
    uv_thread_t thread_1, thread_2;

    if(uv_thread_create(&thread_1, thread_func_1, loop))
    {
        printf("create thread1 fail!\n");
        fflush(stdout);
    }

    if(uv_thread_create(&thread_2, thread_func_2, loop))
    {
        printf("create thread2 fail!\n");
        fflush(stdout);
    }

    // 等待线程执行结束
    uv_thread_join(&thread_1);
    uv_thread_join(&thread_2);

    // 清理并关闭事件循环
    uv_loop_close(loop);

    return 0;
}

// 实现回调函数
void asyncCallback(uv_async_t* handle)
{
    printf("asyncCallback\n");
    fflush(stdout);
}

void thread_func_1(void *arg)
{
    uv_loop_t *loop_v = arg;
    uv_timer_t timer;

    // 初始化定时器句柄
    uv_timer_init(loop_v, &timer);
    // 启动定时器
    uv_timer_start(&timer, timer_callback, 0, 5000);  // 每隔1s触发一次定时器

    // 启动事件循环
    uv_run(loop_v, UV_RUN_DEFAULT);

    printf("uv_run\n");
    fflush(stdout);
}

void thread_func_2(void *arg)
{
    uv_loop_t *loop_v = arg;
// 定义异步处理器结构体
    uv_async_t async;

    if(uv_loop_alive(loop_v))
    {
        uv_async_init(loop_v, &async, asyncCallback);
        // 发送异步事件
        uv_async_send(&async);
    }

    printf("thread_func_2\n");
    fflush(stdout);
}
注:uv_async_init()和uv_async_send()放在一个线程中
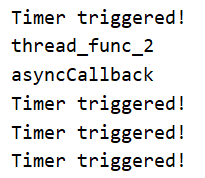
运行结果: