Android UI开发第十五篇——分享一个登录缓冲界面
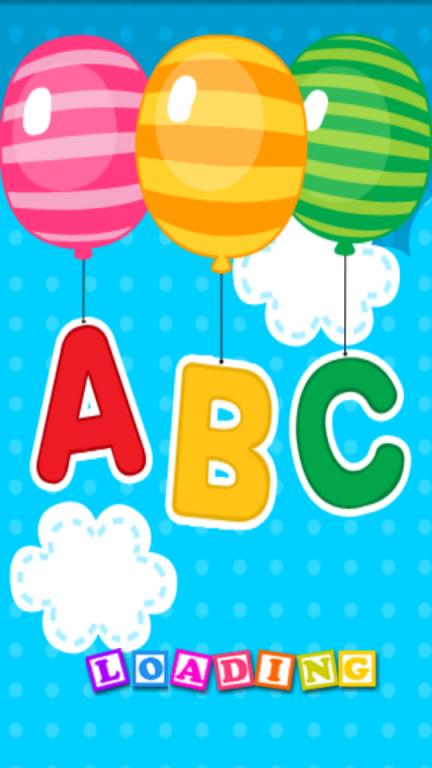
今天在网上发现了一个很漂亮的缓冲界面,在这里分享一下。主要还是用的android Anim。
java code:
public class Main extends Activity {
	private Animation anm;
	private int marginsTop;
	public List<ImageView> images;
	public LinearLayout ll;
    @Override
    public void onCreate(Bundle savedInstanceState) {
        super.onCreate(savedInstanceState);

		getWindow().setFlags(WindowManager.LayoutParams.FLAG_FULLSCREEN, WindowManager.LayoutParams.FLAG_FULLSCREEN);

		requestWindowFeature(Window.FEATURE_NO_TITLE);

		DisplayMetrics dm = this.getResources().getDisplayMetrics();

		int height = dm.heightPixels;
		marginsTop = height - 100;
		anm = AnimationUtils.loadAnimation(this, R.anim.myanim);
		ll = new LinearLayout(this);
		ll.setBackgroundResource(R.drawable.background);

		images = new ArrayList<ImageView>();
		initImage(ll);
		playAnimation();
		setContentView(ll);
    }
    private void playAnimation(){
    		new Thread(){
    			@Override
    			public void run()
    			{
    				try {
						Thread.sleep(1000);
					} catch (InterruptedException e) {
						e.printStackTrace();
					}
					int runcount=0;
    				while(true)
    				{
    					if(runcount<2)
    					{
	    					for(int i=0;i<=6;i++)
	    					{
	    						handler.sendEmptyMessage(i);
	    						try {
	    							Thread.sleep(400);
	    						} catch (InterruptedException e) {
	    							e.printStackTrace();
	    						}
	    					}
	    					runcount++;
    					}else
    					{
    						handler.sendEmptyMessage(99);
    						runcount=0;
    					}


    				}

    			}

    		}.start();
    	}


    Handler handler=new Handler(){

    			@Override
    			public void handleMessage(Message msg) {
    				switch(msg.what)
    				{
    				case 0:
    					images.get(0).setImageDrawable(Main.this.getResources().getDrawable(R.drawable.l));
    					images.get(0).startAnimation(anm);

    					break;
    				case 1:
    					images.get(1).setImageDrawable(Main.this.getResources().getDrawable(R.drawable.o));
    					images.get(1).startAnimation(anm);
    					break;
    				case 2:
    					images.get(2).setImageDrawable(Main.this.getResources().getDrawable(R.drawable.a));
    					images.get(2).startAnimation(anm);
    					break;
    				case 3:
    					images.get(3).setImageDrawable(Main.this.getResources().getDrawable(R.drawable.d));
    					images.get(3).startAnimation(anm);
    					break;
    				case 4:
    					images.get(4).setImageDrawable(Main.this.getResources().getDrawable(R.drawable.i));
    					images.get(4).startAnimation(anm);
    					break;
    				case 5:
    					images.get(5).setImageDrawable(Main.this.getResources().getDrawable(R.drawable.n));
    					images.get(5).setAnimation(anm);
    					break;
    				case 6:
    					images.get(6).setImageDrawable(Main.this.getResources().getDrawable(R.drawable.g));
    					images.get(6).setAnimation(anm);
    					break;
    				case 99:
    					clearImage();
    					break;
    				}
    			}
    		};
    private void clearImage()
    {
    	for(ImageView image:images)
    	{
    		image.setImageDrawable(null);
    		image.destroyDrawingCache();
    	}
    }
    private void initImage(LinearLayout layout) {

    	layout.setGravity(Gravity.CENTER_HORIZONTAL);
		LinearLayout.LayoutParams param = new LinearLayout.LayoutParams(40, 40);
		param.setMargins(30, marginsTop, 0, 0);

		LinearLayout.LayoutParams param2 = new LinearLayout.LayoutParams(40, 40);
		param2.setMargins(-5, marginsTop, 0, 0);

		ImageView l = new ImageView(this);
		l.setLayoutParams(param);
		layout.addView(l);
		images.add(l);

		ImageView o = new ImageView(this);
		o.setLayoutParams(param2);
		layout.addView(o);
		images.add(o);


		ImageView a = new ImageView(this);
		a.setLayoutParams(param2);
		layout.addView(a);
		images.add(a);

		ImageView d = new ImageView(this);
		d.setLayoutParams(param2);
		layout.addView(d);
		images.add(d);

		ImageView i = new ImageView(this);
		i.setLayoutParams(param2);
		layout.addView(i);
		images.add(i);

		ImageView n = new ImageView(this);
		n.setLayoutParams(param2);
		layout.addView(n);
		images.add(n);

		ImageView g = new ImageView(this);
		g.setLayoutParams(param2);
		layout.addView(g);
		images.add(g);
	}
}
anim code:
<?xml version="1.0" encoding="utf-8"?>

<set xmlns:android="http://schemas.android.com/apk/res/android"
	android:shareInterpolator="false">
	<scale android:interpolator="@android:anim/accelerate_interpolator"
		android:fromXScale="0.5"
		android:toXScale="1.2"
		android:fromYScale="0.5"
		android:toYScale="1.2"
		android:pivotX="50%"
		android:pivotY="50%"
		android:fillAfter="false"
		android:startOffset="-50"
		android:duration="100"
/>
</set>

代码地址:http://www.devdiv.com/thread-101608-1-1.html
/*** @author 张兴业
* 邮箱:xy-zhang#163.com
* android开发进阶群:278401545
*
*/


