计算回形针方向
摘要
本篇来用OpenCV实现Halcon中一个计算回形针方向的实例clip.hdev,并构建了计算角度函数和画箭头函数,得到的角度与halcon例程相差无多。
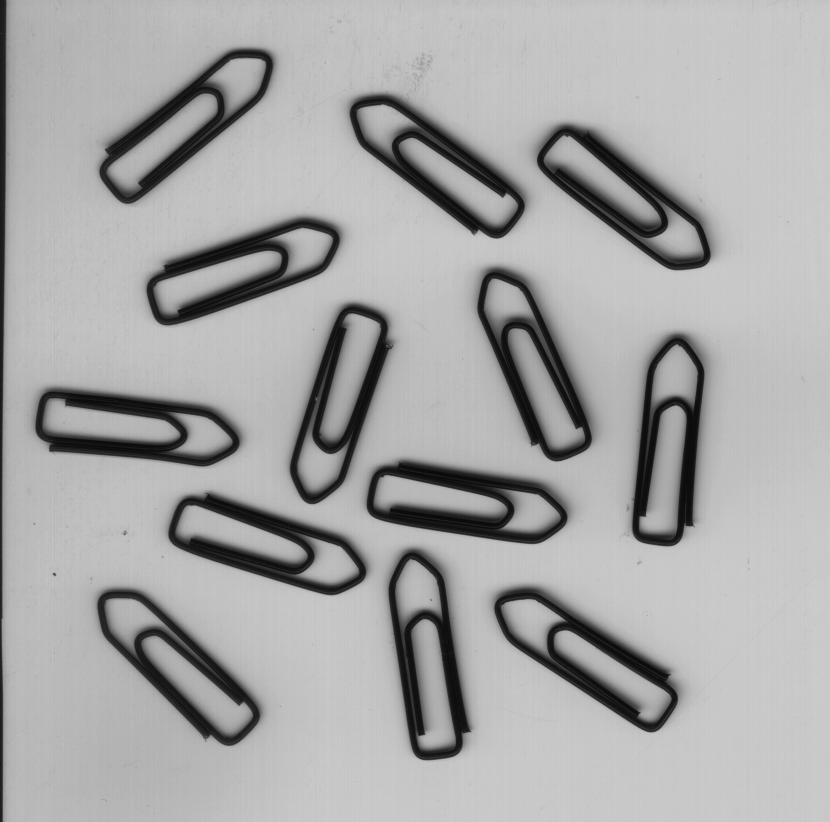
原图如下:
Halcon代码比较简单,这里也贴出来:
dev_update_window ('off')
read_image (Clip, 'clip')
get_image_size (Clip, Width, Height)
dev_close_window ()
dev_open_window (0, 0, Width / 2, Height / 2, 'black', WindowID)
dev_display (Clip)
set_display_font (WindowID, 14, 'mono', 'true', 'false')
disp_continue_message (WindowID, 'black', 'true')
stop ()
binary_threshold (Clip, Dark, 'max_separability', 'dark', UsedThreshold)
connection (Dark, Single)
select_shape (Single, Selected, 'area', 'and', 5000, 10000)
dev_set_draw ('fill')
dev_set_colored (12)
dev_display (Selected)
disp_continue_message (WindowID, 'black', 'true')
stop ()
dev_display (Clip)
dev_set_color ('green')
dev_display (Selected)
orientation_region (Selected, Phi)
area_center (Selected, Area, Row, Column)
dev_set_line_width (3)
dev_set_draw ('margin')
Length := 80
dev_set_color ('blue')
disp_arrow (WindowID, Row, Column, Row - Length * sin(Phi), Column + Length * cos(Phi), 4)
disp_message (WindowID, deg(Phi)$'3.1f' + ' deg', 'image', Row, Column - 100, 'black', 'false')
dev_update_window ('on')
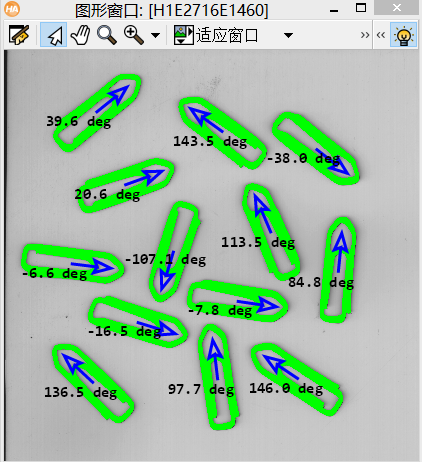
可以看到halcon的思路是:
① 读取图像
② 二值化
③ 根据面积剔除非回形针的region
④ 计算每个region的方向和中心
⑤ 画箭头,结果输出
但是opencv中没有计算角度的函数和画箭头的函数,因此需要我们自己定义。
opecv实现:
(一)构建角度计算函数
double calLineAngle(Point&ptStrat, Point&ptEnd)
{
    const double PI = 3.1415926;
    double angle = 0;
    if (ptStrat.x==ptEnd.x)
    {
        angle = 90;
    }
    else if (ptStrat.y==ptEnd.y)
    {
        angle = 0;
    }
    else
    {
        angle = atan((double)(ptEnd.y - ptStrat.y) / (ptEnd.x - ptStrat.x))*(180 / PI);
        if (angle<0)
        {
            angle = abs(angle);
        }
        else if (angle>0)
        {
            angle = 180 - angle;
        }
        if (ptEnd.y-ptStrat.y>0&&ptEnd.x-ptStrat.x)
        {
            angle = angle - 180;
        }

    }
    return angle;
}
atan 和 atan2 都是求反正切函数,如:有两个点 point(x1,y1), 和 point(x2,y2);那么这两个点形成的斜率的角度计算方法分别是:
- float angle = atan( (y2-y1)/(x2-x1) );
- float angle = atan2( y2-y1, x2-x1 );
atan 和 atan2 区别:
1:参数的填写方式不同;
2:atan2 的优点在于 如果 x2-x1等于0 依然可以计算,但是atan函数就会导致程序出错;
(二)构建画箭头函数
void drawArrow(Mat&img, Point pStart, Point pEnd, int len, int alpha, Scalar color, int thickness, int lineType)
{
    const double PI = 3.1415926;
    Point arrow;
    //计算theat角
    double angel = atan2((double)(pStart.y - pEnd.y), (double)(pStart.x - pEnd.x));
    line(img, pStart, pEnd, color, thickness, lineType);
    //计算箭角边的另一端的端点位置(上面的还是下面的要看箭头的指向,即pStart和pEnd的位置)
    arrow.x = pEnd.x + len * cos(angel + PI * alpha / 180);
    arrow.y = pEnd.y + len * sin(angel + PI * alpha / 180);
    line(img, pEnd, arrow, color, thickness, lineType);
    arrow.x = pEnd.x + len * cos(angel - PI * alpha / 180);
    arrow.y = pEnd.y + len * sin(angel - PI * alpha / 180);
    line(img, pEnd, arrow, color, thickness, lineType);
}
(三)主函数
int main(int argc, char** argv)
{
    double pointToLineDist(Point&pt, Point&lineStart, Point&lineEnd);
    double calLineAngle(Point&ptStrat, Point&ptEnd);
    void drawArrow(Mat&img, Point pStart, Point pEnd, int len, int alpha, Scalar color, int thickness, int lineType);


    Mat src = imread("D:/opencv练习图片/回形针方向.png");
    imshow("输入图像", src);
    Mat gray, binary;
    cvtColor(src, gray, COLOR_BGR2GRAY);
    //阈值处理
    threshold(gray, binary, 150, 255, THRESH_BINARY_INV);
    imshow("二值化", binary);
    //寻找轮廓
    vector<vector<Point> > contours;
    findContours(binary, contours,  RETR_EXTERNAL, CHAIN_APPROX_NONE,Point());
    cout << contours.size() << endl;
    //轮廓分析,找到工件
    for (size_t i = 0; i < contours.size(); ++i)
    {
        //计算轮廓大小
        double area = contourArea(contours[i]);
        if (area < 12000)continue;
        double    max_dist = 0;
        Moments mm = moments(contours[i],false);
        Point ptCenter = Point(mm.m10 / mm.m00, mm.m01 / mm.m00);
        Point ptFarthest;
        for (int j = 0; j < contours[i].size(); j++)
        {
            double distance = sqrt(pow(contours[i][j].x - ptCenter.x, 2) + pow(contours[i][j].y - ptCenter.y, 2));
            if (distance>max_dist)
            {
                ptFarthest = Point(contours[i][j].x, contours[i][j].y);
                max_dist = distance;
            }
        }
        cout << max_dist << endl;
        drawContours(src, contours, i, Scalar(0, 0, 255), 5, 8);
        drawArrow(src, ptCenter, ptFarthest, 25, 30, Scalar(255,0,255), 3, 8);
        double angle = calLineAngle(ptCenter, ptFarthest);
        cout << angle << endl;
        char strAngle[20];
        sprintf_s(strAngle, "%0.1fdegree", angle);
        putText(src, strAngle, ptCenter, FONT_HERSHEY_SIMPLEX, 0.8, Scalar(0, 255, 255), 2, 8);
    }
    imshow("结果", src);
    waitKey(0);
    return 0;
}

参考于:OpenCV与AI深度学习

 浙公网安备 33010602011771号