


vue学习-day02(自定义指令,生命周期)
1、案例:品牌管理
2、Vue-devtools的两种安装方式
3、过滤器,自定义全局或私有过滤器
4、鼠标按键事件的修饰符
5、自定义全局指令:让文本框获取焦点
6、自定义指令,修改元素的样式
7、自定义指令函数的简写
8、生命周期函数-组件创建期间的4个钩子函数
9、生命周期函数-组件运行和销毁阶段的钩子函数
10、vue-resource发起get、post、jsonp请求
11、结合Node手写JSONP服务器剖析JSONP原理
1、案例:品牌管理 <--返回目录
最终效果:
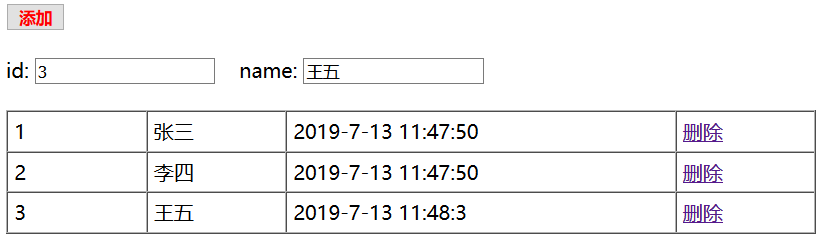
需求1:当点击"添加"按钮,会根据输入框数据新增一条记录,添加到列表
实现原理:
1)在vm(vue实例)定义三个属性id、name和userList,并且与上图中表单和列表进行绑定;
2)由于数据的双向绑定,当表单输入框id和name输入了值,Model中的字段id和name也随着变化,并且等于表单输入的值;
3)由于数据的双向绑定,当userList增加一个对象,vue会重新渲染;
4)所以,基于vue的双向绑定,我们只要操作Model层的数据即可(只要关心业务),无需关心DOM操作。
需求2:点击"删除",删除对应的记录
实现原理:根据对应id,删除Model中的userList的记录
代码:
<!DOCTYPE html> <html> <head> <title>标题</title> <meta charset="utf-8"> <meta name="viewport" content="width=device-width, initial-scale=1.0"> <meta http-equiv="X-UA-Compatible" content="ie=edge"> <!-- 导入vue的包 --> <script type="text/javascript" src="vue2.js"></script> <!-- <script src="https://cdn.jsdelivr.net/npm/vue/dist/vue.js"></script> --> <style type="text/css"> table td{ width: 100px; padding: 5px; } td:nth-of-type(3) { width: 300px; } </style> </head> <body> <div id="app"> <input type="button" value="添加" @click="add"><br/><br/> id: <input type="text" v-model="id"> name: <input type="text" v-model="name"><br/><br/> <table border="1" cellspacing='0'> <tr v-for="item in userList" :key="item.id"> <td>{{item.id}}</td> <td>{{item.name}}</td> <td>{{item.time}}</td> <td><a href="" @click.prevent="del(item.id)">删除</a></td> </tr> </table> </div> <script type="text/javascript"> //创建一个vue实例 var vm = new Vue({ el: '#app', data: { id: '', name: '', time: '', userList: [{id:1,name:'张三',time:new Date()}, {id:2,name:'李四',time:new Date()}] }, methods: { // 需求1:当点击"添加"按钮,会根据输入框数据新增一条记录,添加到列表 // 由于数据的双向绑定,当表单输入框id和name输入了值,Model中的字段id和name也随着变化,并且等于表单输入的值 // 由于数据的双向绑定,当userList增加一个对象,vue会重新渲染 add: function () { var newUser = {id:this.id,name:this.name,time:new Date()}; this.userList.push(newUser); }, // 需求2:点击"删除",删除对应的记录 del: function (id) { // this.userList.some((item, index) => { // if(item.id == id) { // this.userList.splice(index, 1); // return true; // } // }) var index = this.userList.findIndex(item => { if(item.id == id) { return true; } }); this.userList.splice(index, 1); } } }); </script> </body> </html>
需求3:根据关键字实现数组的过滤
<!DOCTYPE html> <html> <head> <title>标题</title> <meta charset="utf-8"> <meta name="viewport" content="width=device-width, initial-scale=1.0"> <meta http-equiv="X-UA-Compatible" content="ie=edge"> <!-- 导入vue的包 --> <script type="text/javascript" src="vue2.js"></script> <!-- <script src="https://cdn.jsdelivr.net/npm/vue/dist/vue.js"></script> --> <style type="text/css"> table td{ width: 100px; padding: 5px; } td:nth-of-type(3) { width: 300px; } </style> </head> <body> <div id="app"> <input type="button" value="添加" @click="add"><br/><br/> id: <input type="text" v-model="id"> name: <input type="text" v-model="name"> 搜索: <input type="text" placeholder="Search" v-model="keyword"><br/><br/> <table border="1" cellspacing='0'> <!-- <tr v-for="item in userList" :key="item.id"> --> <!-- 表格渲染的数据来源:search(keyword) --> <tr v-for="item in search(keyword)" :key="item.id"> <td>{{item.id}}</td> <td>{{item.name}}</td> <td>{{item.time}}</td> <td><a href="" @click.prevent="del(item.id)">删除</a></td> </tr> </table> </div> <script type="text/javascript"> //创建一个vue实例 var vm = new Vue({ el: '#app', data: { id: '', name: '', time: '', keyword: '', // 搜索框输入的关键字 userList: [{id:1,name:'张三',time:new Date()}, {id:2,name:'李四',time:new Date()}] }, methods: { // 需求1:当点击"添加"按钮,会根据输入框数据新增一条记录,添加到列表 // 由于数据的双向绑定,当表单输入框id和name输入了值,Model中的字段id和name也随着变化,并且等于表单输入的值 // 由于数据的双向绑定,当userList增加一个对象,vue会重新渲染 add: function () { var newUser = {id:this.id,name:this.name,time:new Date()}; this.userList.push(newUser); // 表格渲染的数据来源改为了:search(keyword) //this.search(keyword); }, // 需求2:点击"删除",删除对应的记录 del: function (id) { // this.userList.some((item, index) => { // if(item.id == id) { // this.userList.splice(index, 1); // return true; // } // }) var index = this.userList.findIndex(item => { if(item.id == id) { return true; } }); this.userList.splice(index, 1); }, // 需求3:根据关键字实现数组的过滤 search: function () { // var newUserList = []; // this.userList.forEach(item => { // if(item.name.indexOf(this.keyword.trim()) != -1) { // 如果keyword为'',indexOf()结果是0 // newUserList.push(item); // } // }); // return newUserList; return this.userList.filter(item => { if(item.name.includes(this.keyword)) { return item; } }); } } }); </script> </body> </html>
2、Vue-devtools的两种安装方式 <--返回目录
3、过滤器,自定义全局或私有过滤器 <--返回目录
vue.js允许自定义过滤器,用来做一些常见的文本格式化。过滤器可以用在两个地方:差值表达式和v-bind表达式。
定义全局过滤器:
<!DOCTYPE html>
<html>
<head>
    <title>标题</title>
    <meta charset="utf-8">
    <script type="text/javascript" src="vue2.js"></script>
</head>
<body>
    <div id="app">
        {{ msg | msgFormat('abc', '123') }}
    </div>

    <script type="text/javascript">
        // 定义全局过滤器的语法
        // Vue.filter('过滤器的名称', function() {});
        // function()的第一个参数:过滤器管道符 "|" 前面传来的数据
        // function()第二个参数及后面参数:调用该过滤器传递的参数
        Vue.filter('msgFormat', function(data, arg1, arg2) {
            return data.replace('学习', 'study').replace(/天/g,'day ')
                .replace('向上', 'up')
                .replace(/好/g,'good ')
                .replace('~', arg1 + arg2);
        });

        //创建一个vue实例
        var vm = new Vue({
            el: '#app',
            data: {
                msg: '好好学习,天天向上 ~'
            },
            methods: {
            }
        });
    </script>
</body>
</html>
定义私有过滤器:
<!DOCTYPE html>
<html>
<head>
    <title>标题</title>
    <meta charset="utf-8">
    <script type="text/javascript" src="vue2.js"></script>
</head>
<body>
    <div id="app">
        {{ msg | msgFormat('abc', '123') }} <br/>
        {{ date | dateFormat }}
    </div>

    <script type="text/javascript">
        // 定义全局过滤器
        // Vue.filter('过滤器的名称', function() {});
        // function()的第一个参数:过滤器管道符 "|" 前面传来的数据
        // function()第二个参数及后面参数:调用该过滤器传递的参数
        Vue.filter('msgFormat', function(data, arg1, arg2) {
            return data.replace('学习', 'study').replace(/天/g,'day ')
                .replace('向上', 'up')
                .replace(/好/g,'good ')
                .replace('~', arg1 + arg2);
        });

        //创建一个vue实例
        var vm = new Vue({
            el: '#app',
            data: {
                msg: '好好学习,天天向上 ~',
                date: new Date()
            },
            methods: {
            },
            filters: {   //定义私有的(局部)过滤器
                dateFormat: function(data) {
                    var date = new Date(data);
                    var y = date.getFullYear();
                    var m = (date.getMonth() + 1).toString().padStart('2', '0');
                    var d = date.getDate().toString().padStart('2', '0');
                    var hh = date.getHours().toString().padStart('2', '0');
                    var mm = date.getMinutes().toString().padStart('2', '0');
                    var ss = date.getSeconds().toString().padStart('2', '0');
                    return  y + "-" + m + "-" + d + " " +hh + ":" + mm + ":" + ss;
                }
            }
        });
    </script>
</body>
</html>
4、鼠标按键事件的修饰符 <--返回目录
@keyup.enter: 监听键盘"回车键"的弹起事件
- vue提供的按键修饰符:.enter、.tab、.delete、.esc、.space、.up、.down、.left、.right
<!DOCTYPE html>
<html>
<head>
    <title>标题</title>
    <meta charset="utf-8">
    <script type="text/javascript" src="vue2.js"></script>
</head>
<body>
    <div id="app">
        <p>{{ msg }}</p>
        <!-- @keyup.enter: 监听键盘"回车键"的弹起事件 -->
        <input type="text" name="msg" v-model="msg" @keyup.enter="printMsg">
    </div>

    <script type="text/javascript">
        //创建一个vue实例
        var vm = new Vue({
            el: '#app',
            data: {
                msg: '好好学习,天天向上'
            },
            methods: {
                printMsg () {
                    alert(this.msg);
                }
            },
            filters: {   //定义私有的(局部)过滤器
            }
        });
    </script>
</body>
</html>
自定义按键修饰符
js键盘事件对应的键码:https://www.cnblogs.com/wuhua1/p/6686237.html
<!DOCTYPE html>
<html>
<head>
    <title>标题</title>
    <meta charset="utf-8">
    <script type="text/javascript" src="vue2.js"></script>
</head>
<body>
    <div id="app">
        <p>{{ msg }}</p>
        <!-- @keyup.113: 监听键盘"f2"的弹起事件 -->
        <!-- <input type="text" name="msg" v-model="msg" @keyup.113="printMsg"> -->
        <input type="text" name="msg" v-model="msg" @keyup.f2="printMsg">

    </div>

    <script type="text/javascript">
        // 自定义全局的键盘修饰符 f2 (给键盘码113定义一个别名,就叫f2)
        Vue.config.keyCodes.f2 = 113;//enter键的键盘码为13,f2为113
        //Vue.directive('on').keyCodes.f2 = 113;//Vue1.X版本使用

        //创建一个vue实例
        var vm = new Vue({
            el: '#app',
            data: {
                msg: '好好学习,天天向上'
            },
            methods: {
                printMsg () {
                    alert(this.msg);
                }
            },
            filters: {   //定义私有的(局部)过滤器
            }
        });
    </script>
</body>
</html>
5、自定义全局指令:让文本框获取焦点 <--返回目录
js原生代码:document.getElementById("search").focus(); // 让文本框获取焦点
现在想自定义一个指令 v-focus :如果某个input包含了v-focus 属性,就会自动获取焦点
<!DOCTYPE html>
<html>
<head>
    <title>标题</title>
    <meta charset="utf-8">
    <script type="text/javascript" src="vue2.js"></script>
</head>
<body>
    <div id="app">
        <input type="text" name="msg" v-model="msg" id="search" v-focus>
    </div>

    <script type="text/javascript">
        // 注册一个全局自定义指令 `v-focus`, 定义时"v-"省略
        Vue.directive('focus', {
            // 当被绑定的元素插入到 DOM 中时
            inserted: function (el) {
                el.focus();// 聚焦元素
          }
        });

        //创建一个vue实例
        var vm = new Vue({
            el: '#app',
            data: {
                msg: '好好学习,天天向上'
            },
            methods: {
                printMsg () {
                    alert(this.msg);
                }
            },
            filters: { //定义私有的(局部)过滤器
            }
        });

        // document.getElementById("search").focus(); // 让文本框获取焦点
    </script>
</body>
</html>
钩子函数:
Vue.directive('focus', {
    // 钩子函数
    bind: function(el) { // 每当指令绑定到元素时,会立即执行这个bind函数,只执行一次
        // el:就是绑定了指令的元素,是元素js对象
        // 元素刚绑定指令时,还没有插入到DOM中。此时调用focus方法没有作用
        // el.focus();
    },
    inserted: function() { // inserted表示元素插入到DOM中的时候,会执行inserted函数(触发一次)
        el.focus();
    },
    updated: function() { // 当VNode更新时,会执行updated,可能会多次触发
    }
});
6、自定义指令,修改元素的样式 <--返回目录
自定义全局指定:使用钩子函数的第二个binding参数拿到传递的值
//自定义全局指定,指令名字叫v-fontweight。注意:指令名全部小写
Vue.directive('fontweight',{
    bind: function(el, binding) {
        el.style.fontWeight = binding.value;
    }
});
定义私有的指令:使用钩子函数的第二个binding参数拿到传递的值
//定义私有的指令,指令名为v-color
directives: {
    'color': {  //注意:指令名全部小写
        bind: function(el, binding) {
            el.style.color = binding.value;
        }
    }
}
7、自定义指令函数的简写 <--返回目录
大多数情况下,我们可能是想在bind和update钩子上做重复动作,并且不关心其他的钩子函数,可以这样写:
Vue.directive('color-swatch', function(el, binding) {
    el.style.backgroundColor = binding.value;
})
或
directives: {
    'color': function(el, binding) { //相当于bind和update都写了这个function函数
        el.style.color = binding.value;
    }
}
8、生命周期函数-组件创建期间的4个钩子函数 <--返回目录
<!DOCTYPE html>
<html>
<head>
    <title>标题</title>
    <meta charset="utf-8">
    <!-- 导入vue的包 -->
    <script type="text/javascript" src="vue2.js"></script>
    <!-- <script src="https://cdn.jsdelivr.net/npm/vue/dist/vue.js"></script> -->
    <style type="text/css"></style>
</head>
<body>
    <div id="app">
        <h2 id="h2">{{ msg }}</h2>
    </div>
    <script type="text/javascript">
        //创建一个vue实例
        var vm = new Vue({
            el: '#app',
            data: {
                msg: 'helloworld'
            },
            methods: {
                show: function () {
                    console.log("执行了show方法");
                }
            },
            beforeCreate() {//第一个生命周期函数,实例完全创建出来之前,会执行它
                //执行beforeCreate函数时,data和methods中的数据还没有初始化
                console.log("beforeCreate: " + this.msg);
            },
            created() {
                //执行created函数时,data和methods中的数据初始化完毕了
                console.log("created: " + this.msg);
            },
            beforeMount() {
                //执行该函数时,模板已经在内存总编译完毕,但是尚未把模板渲染到页面中
                //此时,页面中的元素还没有被替换过来,只是之前写的一些模板字符串
                console.log("beforeMount: " + document.getElementById("h2").innerText);
            },
            mounted() {
                //内存中的模板已经挂载到了页面,用户可以看到渲染好的页面了
                //当执行完该函数,表示实例已经完全创建好了。
                console.log("mounted: " + document.getElementById("h2").innerText);
            }
        });
    </script>
</body>
</html>
9、生命周期函数-组件运行和销毁阶段的钩子函数 <--返回目录
1)如果要通过某些插件操作页面上的DOM节点,最早要在mounted函数中进行
2)只有执行完了mounted函数,就表示Vue实例已经完全初始化完毕;此时,组件已经脱离了创建阶段,进入了运行阶段
3)组件的运行阶段的生命周期函数有:beforeUpdate() updated()
- when data changes触发这两个函数
- 当执行beforeUpdate()函数时,页面还没有更新,但是data里面的数据更新了
- 当执行updated()函数时,页面更新完毕
4)组件销毁阶段的生命周期函数:beforeDestroy() destroyed()
- 当执行beforeDestroy()时,组件中的data、methods、过滤器、指令等还可用
- 当执行destroyed(),组件中的ata、methods、过滤器、指令等不可用了
10、vue-resource发起get、post、jsonp请求 <--返回目录
除了vue-resource之外,还可以使用axios的第三方包来实现数据的请求
vue-resource发起get请求
- 导包<script src="vue-resource-1.3.4.js"/>
- vue-resource依赖vue,所以要先导入vue.js
- this.$http.get("url",[options]).then(successcallback,[errorcallback]);
** .then说明该方法是用promiss封装的
** options选项,该参数可选
** errorcallback,该参数可选
- this.$http.get("url").then(function(result) {
console.log(result.body);//服务器返回的数据,推荐使用body
console.log(result.data);//服务器返回的数据
});
vue-resource发起post请求
- this.$http.post(""url,body,[options]).then();
** body传递给服务器的参数
** options选项,该参数可选
- this.$http.post("url",{},{emulateJSON:true}).then(result=>{
console.log(result.body);//服务器返回的数据,推荐使用body
console.log(result.data);//服务器返回的数据
});//手动发起的post请求,默认没有表单application/x-www-form-urlencoded格式,有的服务器处理不了
11、结合Node手写JSONP服务器剖析JSONP原理 <--返回目录
posted on 2019-07-13 12:11 wenbin_ouyang 阅读(327) 评论(0) 编辑 收藏 举报
