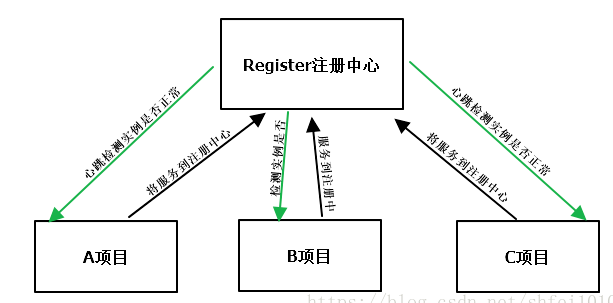
spring-cloud - 基础环境搭建
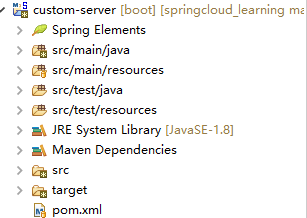
创建好的目录层次结构:
pom文件:

 1 <project xmlns="http://maven.apache.org/POM/4.0.0"
 2     xmlns:xsi="http://www.w3.org/2001/XMLSchema-instance"
 3     xsi:schemaLocation="http://maven.apache.org/POM/4.0.0 http://maven.apache.org/xsd/maven-4.0.0.xsd">
 4     <modelVersion>4.0.0</modelVersion>
 5     <groupId>custom-server</groupId>
 6     <artifactId>custom-server</artifactId>
 7     <version>0.0.1-SNAPSHOT</version>
 8     <!-- 引入spring boot的依赖 -->
 9     <parent>
10         <groupId>org.springframework.boot</groupId>
11         <artifactId>spring-boot-starter-parent</artifactId>
12         <version>2.0.7.RELEASE</version>
13     </parent>
14     <dependencies>
15         <!-- Eureka-server依赖 -->
16         <dependency>
17             <groupId>org.springframework.cloud</groupId>
18             <artifactId>spring-cloud-starter-netflix-eureka-server</artifactId>
19         </dependency>
20         <!-- 密码配置依赖 -->
21         <dependency>
22             <groupId>org.springframework.boot</groupId>
23             <artifactId>spring-boot-starter-security</artifactId>
24         </dependency>
25     </dependencies>
26     <!-- 引入spring cloud的依赖,不能少,主要用来管理Spring Cloud生态各组件的版本 -->
27     <dependencyManagement>
28         <dependencies>
29             <dependency>
30                 <groupId>org.springframework.cloud</groupId>
31                 <artifactId>spring-cloud-dependencies</artifactId>
32                 <version>Finchley.SR2</version>
33                 <type>pom</type>
34                 <scope>import</scope>
35             </dependency>
36         </dependencies>
37     </dependencyManagement>
38
39     <!-- 添加spring-boot的maven插件,不能少,打jar包时得用 -->
40     <build>
41         <plugins>
42             <plugin>
43                 <groupId>org.springframework.boot</groupId>
44                 <artifactId>spring-boot-maven-plugin</artifactId>
45             </plugin>
46         </plugins>
47     </build>
48
49 </project>
这里使用的是Finchley.SR2版本,这是在网上找了许多后选择了一个相对较新的版本。
security库不用理会,后面写注册中心时会有说明,其他spring-boot、eureka、spring-cloud都是必须的库
在resources编写application.yml配置文件:
server:
  port: 8080
spring:
eureka:
  instance:
    hostname: localhost
  client:
    # 是否要注册到其他Eureka Server实例
    register-with-eureka: false
    # 是否要从其他Eureka Server实例获取数据
    fetch-registry: false
    service-url:
      # 下面俩种方式随便一种都可以,但是后缀【eureka】必不可少
      #defaultZone: http://{hostname}:{server.port}/eureka/
      defaultZone: http://localhost:8080/eureka/
spring.security.user.name跟password先不用理会,后面讲述注册中心会有提到。
建包编写入口类(入口类必须放在顶级的包下面,否则会无法扫描自动注入):
package com.server;

import org.springframework.boot.SpringApplication;
import org.springframework.boot.autoconfigure.SpringBootApplication;
import org.springframework.cloud.netflix.eureka.server.EnableEurekaServer;

@SpringBootApplication    //    spring-boot启动注解
@EnableEurekaServer        //    eureka组件服务注解
public class ServerApplication {

    public static void main(String[] args) {
        SpringApplication.run(ServerApplication.class, args);
    }

}
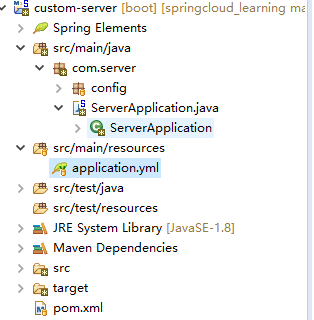
编写好后的注册中心整体结构:
运行ServerApplication后,访问localhost:8080如果看到下面画面就说明注册中心搭建好了:
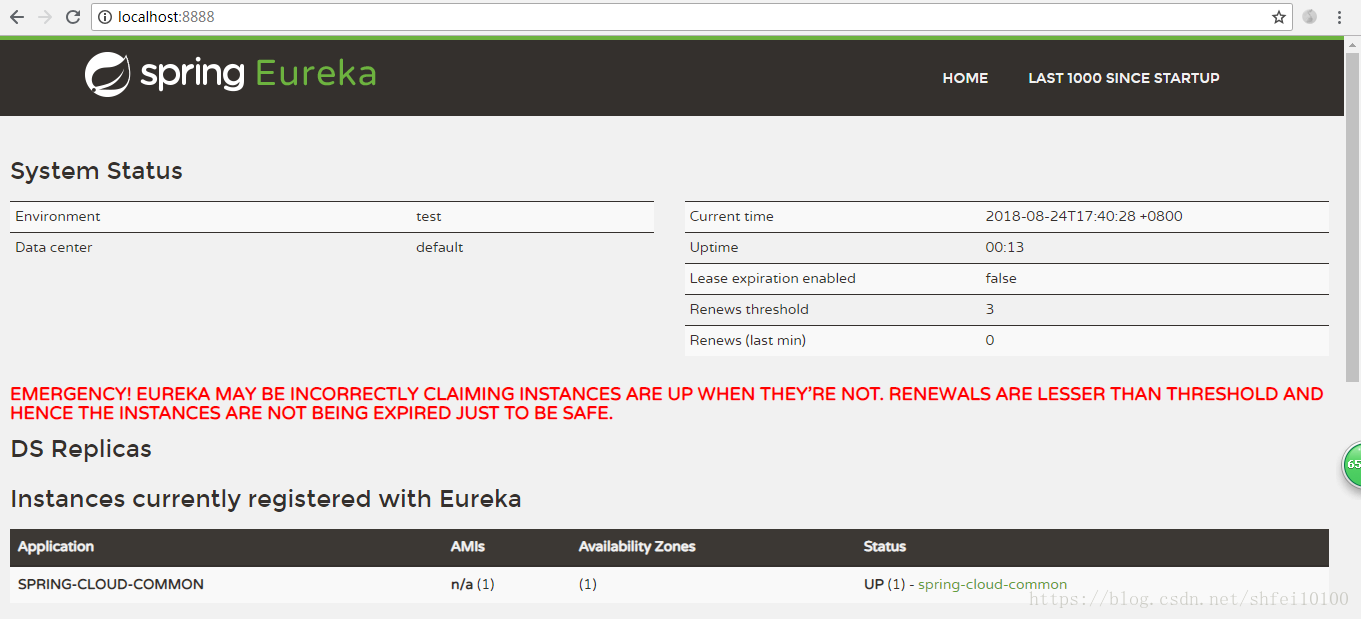
红色字体先不用理会,现在没有使用账号跟密码,任何服务都能注册到注册中心,下面创建一个服务注册到注册中心。
二、搭建一个服务注册到注册中心:
同样创建一个名为custom-client的maven-project
pom文件:

 1 <project xmlns="http://maven.apache.org/POM/4.0.0"
 2     xmlns:xsi="http://www.w3.org/2001/XMLSchema-instance"
 3     xsi:schemaLocation="http://maven.apache.org/POM/4.0.0 http://maven.apache.org/xsd/maven-4.0.0.xsd">
 4     <modelVersion>4.0.0</modelVersion>
 5     <groupId>custom-client</groupId>
 6     <artifactId>custom-client</artifactId>
 7     <version>0.0.1-SNAPSHOT</version>
 8     <!-- 引入spring boot的依赖 -->
 9     <parent>
10         <groupId>org.springframework.boot</groupId>
11         <artifactId>spring-boot-starter-parent</artifactId>
12         <version>2.0.7.RELEASE</version>
13     </parent>
14     <properties>
15         <project.build.sourceEncoding>UTF-8</project.build.sourceEncoding>
16         <java.version>1.8</java.version>
17     </properties>
18     <dependencies>
19         <dependency>
20             <groupId>org.springframework.boot</groupId>
21             <artifactId>spring-boot-starter-web</artifactId>
22         </dependency>
23         <!-- eureka服务组件 -->
24         <dependency>
25             <groupId>org.springframework.cloud</groupId>
26             <artifactId>spring-cloud-starter-netflix-eureka-client</artifactId>
27         </dependency>
28     </dependencies>
29     <!-- 引入spring cloud的依赖,不能少,主要用来管理Spring Cloud生态各组件的版本 -->
30     <dependencyManagement>
31         <dependencies>
32             <dependency>
33                 <groupId>org.springframework.cloud</groupId>
34                 <artifactId>spring-cloud-dependencies</artifactId>
35                 <version>Finchley.SR2</version>
36                 <type>pom</type>
37                 <scope>import</scope>
38             </dependency>
39         </dependencies>
40     </dependencyManagement>
41
42     <!-- 添加spring-boot的maven插件,不能少,打jar包时得用 -->
43     <build>
44         <plugins>
45             <plugin>
46                 <groupId>org.springframework.boot</groupId>
47                 <artifactId>spring-boot-maven-plugin</artifactId>
48             </plugin>
49         </plugins>
50     </build>
51 </project>
application.yml:

 1 server:
 2   port: 8001
 3 spring:
 4   application:
 5     # 指定注册到eureka server上的服务名称
 6     name: custom-client
 7 eureka:
 8   client:
 9     service-url:
10       # 指定eureka server通信地址,注意/eureka/小尾巴不能少
11       defaultZone: http://localhost:8080/eureka/
12   instance:
13     # 是否注册IP到eureka server,如不指定或设为false,那就会注册主机名到eureka server
14     prefer-ip-address: true
*Application.java:

 1 package com.client;
 2
 3 import org.springframework.boot.SpringApplication;
 4 import org.springframework.boot.autoconfigure.SpringBootApplication;
 5 import org.springframework.context.annotation.Bean;
 6 import org.springframework.web.client.RestTemplate;
 7
 8 @SpringBootApplication
 9 @EnableEurekaClient    //    eurekaClient注解
10 public class UserClientApplication {
11
12
13     public static void main(String[] args) {
14         SpringApplication.run(UserClientApplication.class, args);
15     }
16 }
编写完成好启动UserClientApplication类,然后访问注册中心,查看服务是否注册到了中心,访问localhost:8080:
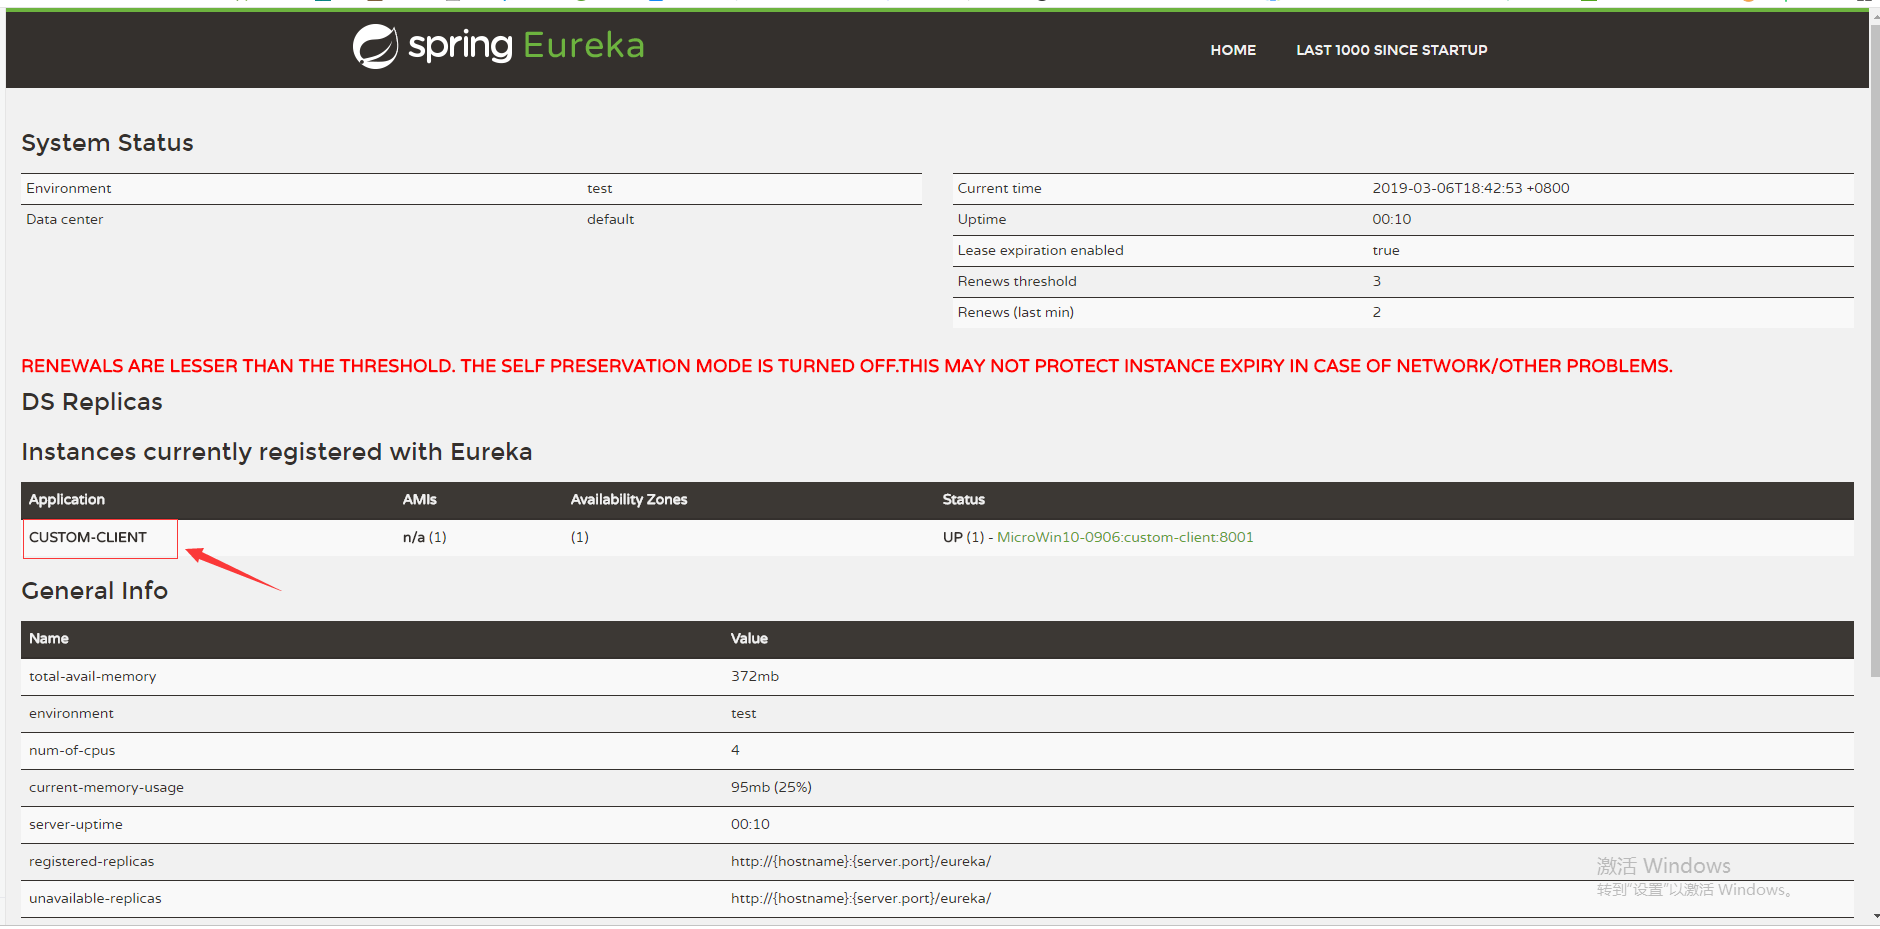
图上标注的就是刚才启动并注册的服务,一个最基本的架构已经完成了,后面陆续添加其他微服务的基础篇章,大家一起学习、一起进步。


