【APP逆向09】Java基础之数据类型(Map)
-
1.Map是一个接口,常见实现这个接口的有两个类,用于存储键值对。
- HashMap,无序。
- TreeMap,默认根据key排序。(常用)
-
2.实例
- 2.1:HashMap
import java.util.HashMap;

public class Demo7 {
    public static void main(String[] args) {
        HashMap h1 = new HashMap();
        h1.put("name","xwl");
        h1.put("age",18);
        h1.put("hhh","男");
        System.out.println(h1); // {name=xwl, hhh=男, age=18}

        HashMap<String,String> h2 = new HashMap<String,String>();
        h2.put("name","xwl");
        h2.put("age","18");
        h2.put("hhh","男");
        System.out.println(h2); // {name=xwl, hhh=男, age=18}
    }
}
- 2.2:TreeMap
import java.util.*;

public class Demo7 {

    public static void main(String[] args) {
        TreeMap h1 = new TreeMap(); // 改为了TreeMap
        h1.put("name","xwl");
        h1.put("age",18);
        h1.put("hhh","男");
        System.out.println(h1); // {age=18, hhh=男, name=xwl}

        TreeMap<String,String> h2 = new TreeMap<String,String>();
        h2.put("name","xwl");
        h2.put("age","18");
        h2.put("hhh","男");
        System.out.println(h2); // {age=18, hhh=男, name=xwl}

        Map h4 = new TreeMap();
        h4.put("name","xwl");
        h4.put("age",18);
        h4.put("hhh","男");
        System.out.println(h4); // {age=18, hhh=男, name=xwl}
    }
}
- 3.常见操作
import java.util.*;

public class Demo7 {

    public static void main(String[] args) {
        TreeMap h1 = new TreeMap(); // 改为了TreeMap
        h1.put("name", "xwl");
        h1.put("age", "18");
        h1.put("hhh", "男");
        h1.put("hhh", "女人");

        h1.remove("age");
        int size = h1.size();

        Object value = h1.get("name"); // 不存在,返回null
        System.out.println(value);

        boolean existsKey = h1.containsKey("age");
        boolean existsValue = h1.containsValue("xwl");

        h1.replace("name", "李杰");
        System.out.println(h1);


        // 循环: 示例1
        // {  ("name", "xwl"),("age", "18"),  }
        Set<Map.Entry<String, String>> s1 = h1.entrySet();
        Iterator it1 = s1.iterator();
        while (it1.hasNext()) {
            // ("name", "xwl")
            Map.Entry<String, String> entry = (Map.Entry<String, String>) it1.next();
            String k = (String) entry.getKey();
            String v = (String) entry.getValue();
        }

        // 循环: 示例2
        Set s2 = h1.entrySet();
        Iterator it2 = s2.iterator();
        while (it2.hasNext()) {
            Map.Entry entry = (Map.Entry) it2.next();
            String k = (String) entry.getKey();
            String v = (String) entry.getValue();
        }

        // 循环: 示例3
        TreeMap<String, String> h2 = new TreeMap<String, String>(); // 改为了TreeMap
        h2.put("name", "xwl");
        h2.put("age", "18");
        for (Map.Entry<String, String> entry : h2.entrySet()) {
            String k = entry.getKey();
            String v = entry.getValue();
        }

        // 循环: 示例4
        TreeMap h3 = new TreeMap(); // 改为了TreeMap
        h3.put("name", "xwl");
        h3.put("age", 18);

        for (Object entry : h3.entrySet()) {
            Map.Entry<String, Object> entryMap = (Map.Entry<String, Object>) entry;
            String k = entryMap.getKey();
            Object v = entryMap.getValue(); // 18   "xwl"

            if (v instanceof Integer) {
                System.out.println("数字:" + Integer.toString((Integer) v));
            } else if (v instanceof String) {
                System.out.println("字符串:" + (String) v);
            } else {
                System.out.println("未知类型:" + v.toString());
            }
        }
    }
}
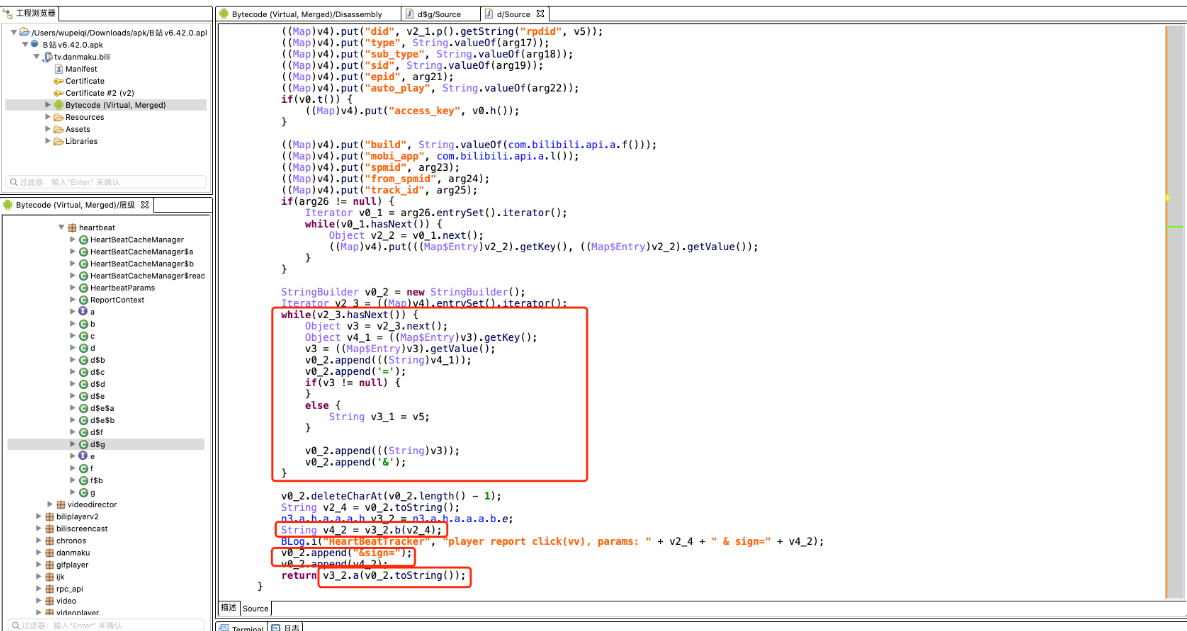
- 4.注意点,我们在逆向中看到TreeMap,在使用python还原时一定要注意他的排序,如下图示例

- 当我们在反编译代码中找到TreeMap,需要在python中自己处理排序
v4 = {
	"aid":123,
	"xx":999,
	"wid":888
}

# 1.根据key进行排序
# data = ["{}={}".format(key,v4[key])  for key in sorted(v4.keys())]
# 2.再进行拼接
# result = "&".join(data)

result = "&".join(["{}={}".format(key,v4[key])  for key in sorted(v4.keys())])


