cubietruck制作刷新lubuntu-kernel
一:安装交叉编译工具链以及相应的工具(系统最好是ubutnu-64位-server)
sudo apt-get install g++
sudo apt-get install libncurses5-dev
sudo apt-get install zlib1g-dev
sudo apt-get install bison
sudo apt-get install flex
sudo apt-get install unzip
sudo apt-get install autoconf
sudo apt-get install gawk
sudo apt-get install make
sudo apt-get install gettext
sudo apt-get install gcc
sudo apt-get install binutils
sudo apt-get install patch
sudo apt-get install bzip2
sudo apt-get install libz-dev
sudo apt-get install asciidoc
sudo apt-get install subversion
sudo apt-get install sphinxsearch
sudo apt-get install libtool
sudo apt-get install sphinx-common
sudo apt-get install libssl-dev
sudo apt-get install libssl0.9.8
sudo apt-get install wget
sudo apt-get install gcc-arm-linux-gnueabihf
二:解压源码
tar zxvf kernel-source.tar.gz
三:配置kernel的配置文件
cp cubietruck_defconfig kernel-source/.config
四:裁剪kernel
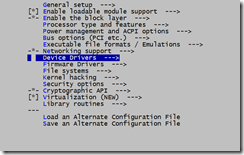
1. make ARCH=arm menucofnig
2.按下enter键,就会进入对应的选项,可以尝试裁剪掉led和pwm
driver –> Misc device –> < > Sunxi PWM Driver (pwm-sunxi) ( 注:不选中pwm)
driver –> LED Support -> < >LED Support for sunxi platform (注: 不选中)
4.按下Esc键,会返回到上层
按Esc遇到以下图标时就表示退出裁剪配置,选择yes则保存裁剪配置
五:编译kernel
make -j5 ARCH=arm CROSS_COMPILE=arm-linux-gnueabihf- uImage modules
六:刷新kernel
1.在开发板上操作,挂载nanda分区到/mnt
mount /dev/nanda /mnt/
2.copy pc机上新编译的uImage到开发板/mnt
可以通过以太网连接copy
3.reboot 重启, 发现led没了


