macos 借用 ntfs-3g, 使得macos 支持 ntfs 文件系统 读写;Mac 挂载NTFS移动硬盘 原生方式;
macos 支持 ntfs文件系统,有商业软件给予支持如:Paragon NTFS for Mac 和 Microsoft NTFS for Mac by Tuxera,但是都是收费产品;
下面这个方案是基于Tuxera 公司贡献的开源版本 ntfs-3g 来进行实现;改方案对系统有一定的修改,但是基于开源实现,所以为免费的解决方案;
红色部分,如果不是很懂,请谨慎修改,并且当系统大版本更新的时候,上述软连接可能被清除,而使用原生的mount_ntfs命令;
- 安装osxfuse最新版:https://github.com/osxfuse/osxfuse/releases;
- 安装ntfs-3g开源实现:brew install ntfs-3g
- 进入macos 恢复模式(启动时使用Command+R);
- csrutil disable; 关闭mac 系统完整性保护;
- 重启,进入正常模式;csrutil status 检查是否关闭系统完整性保护;
- 重新挂载根目录,使得系统关键目录可写:sudo mount -uw /
- 备份原有mount_ntfs命令:sudo mv /sbin/mount_ntfs /sbin/mount_ntfs.original
- 创建软链接,指向ntfs-3g命令:sudo ln -s /usr/local/sbin/mount_ntfs /sbin/mount_ntfs
- 重新,进入恢复模式,重新开启系统完整性保护:csrutil enable
- 重新进入正常模式;重新插入U盘,即可可读可写;
- mount 查看挂载情况:状态正常。
/dev/disk2s1 on /Volumes/U盘 (osxfuse, local, nodev, nosuid, synchronous, noatime)
参考链接:Enabling NTFS write in macOS 10.15 Catalina the Open source way
当然,也有人推荐:https://mounty.app;
# 2021年10月08日11:06:17补充,使用macos 原生命令进行挂载:
ls -l /Volumes/   # 查看硬盘, 找到自己的移动硬盘的挂载点;
diskutil info /Volumes/移动硬盘 # 查看硬盘对应信息
Device Node: /dev/disk2s1 # 找到设备号
hdiutil eject /Volumes/移动硬盘 # 弹出设备
mkdir /Users/xxx/myMobileDisk # 创建挂载目录
sudo mount_ntfs -o rw,nobrowse /dev/disk2s1 /Users/xxx/myMobileDisk # 以读写权限进行挂载磁盘
# 2022年01月24日23:58:59补充:macos monterey 系统;
mount | grep 硬盘挂载点,也可以看到对应的磁盘路径或者说是设备号,如下图中的 /dev/disk4s1; 也可以使用 diskutil list 命令看到;


但是在最新版本的macos monterey系统中,上述命令会调用 kmutil 命令,到时ntfs硬盘还是以只读的方式进行挂载;
可以考虑免费软件:https://mounty.app/;但我看最近 mounty 软件也面临上述问题,可以等一等软件的更新,下面是mounty软件的介绍:
Mounty for NTFS comes without any decorations.
No additional driver will be installed. It simply makes use of the build-in mechanisms already provided by macOS - no strings attached.
# 2022年01月25日16:17:03 对于最新的mac 一种开源的方案,还是最开头的:
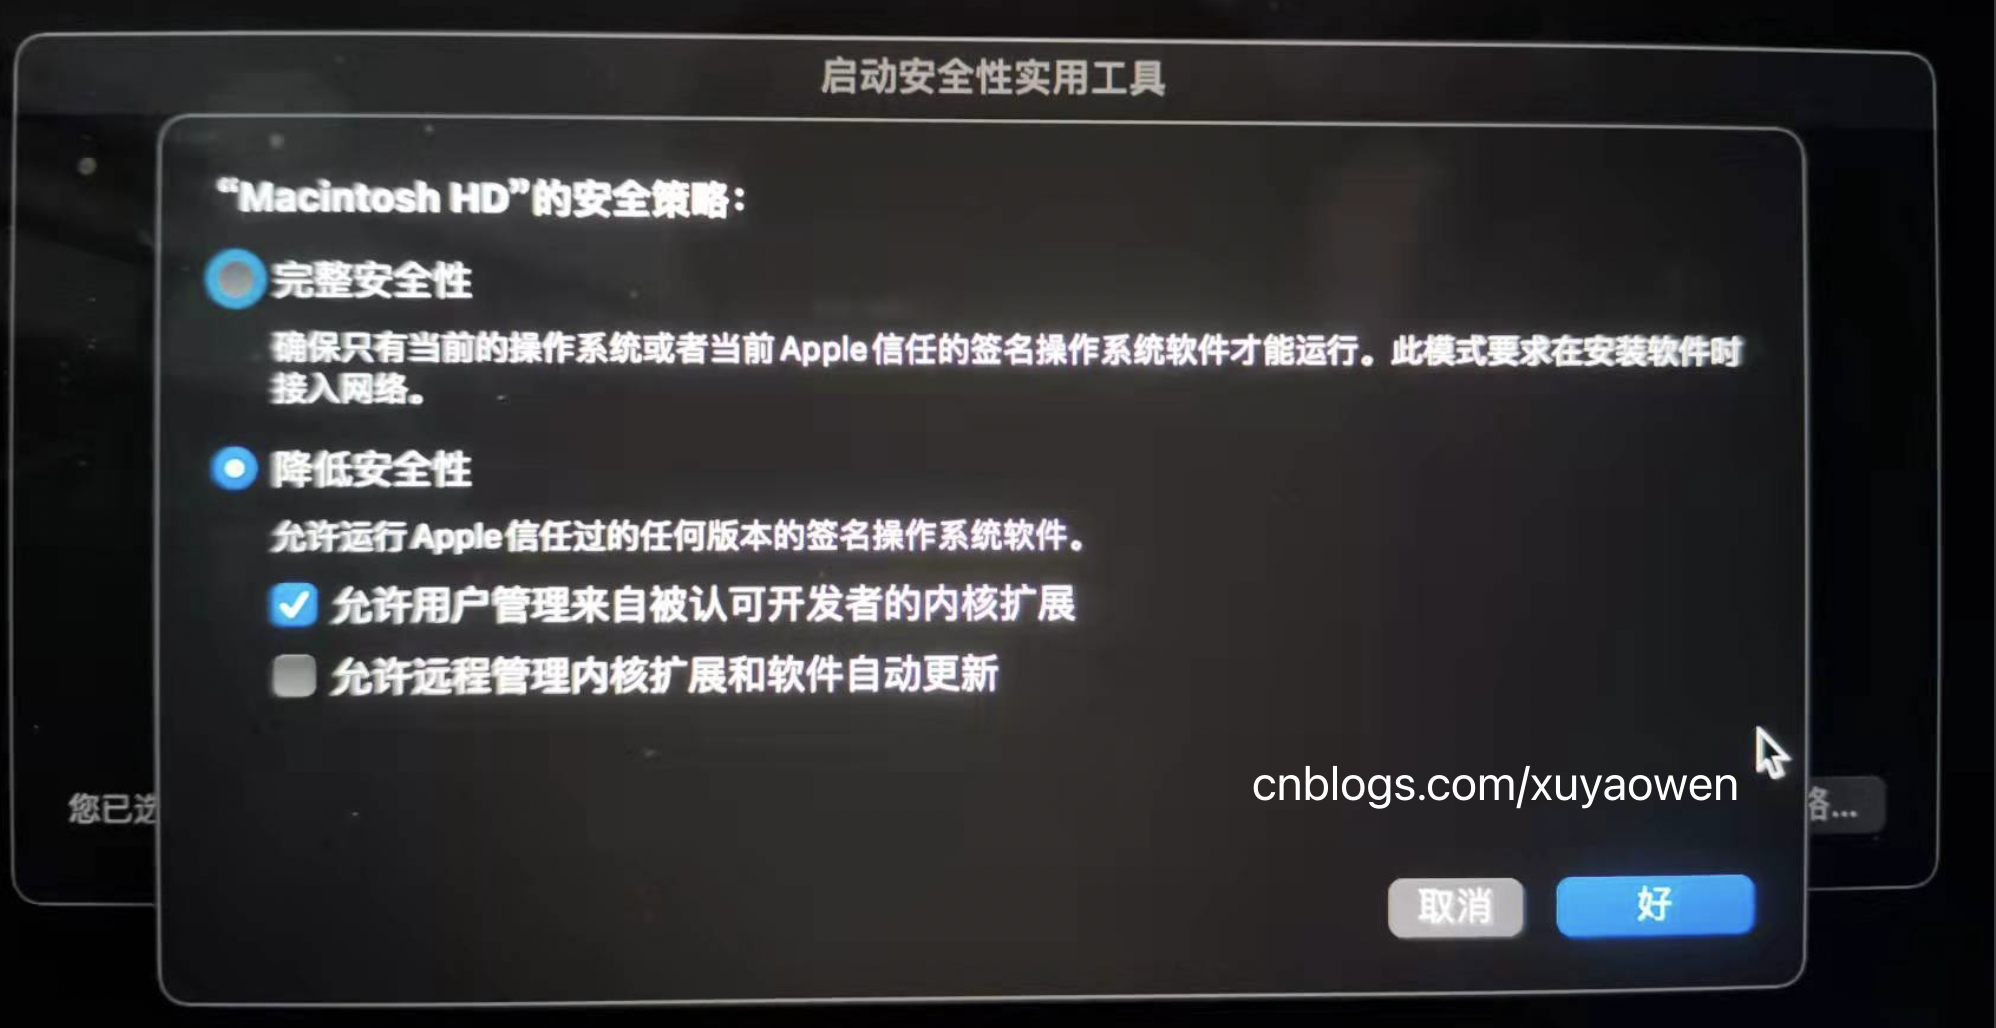
osxfuse + ntfs-3g 的开源方案,只不过需要请将系统关机,然后按住触控ID或电源按钮以开启“启动安全性实用工具”。
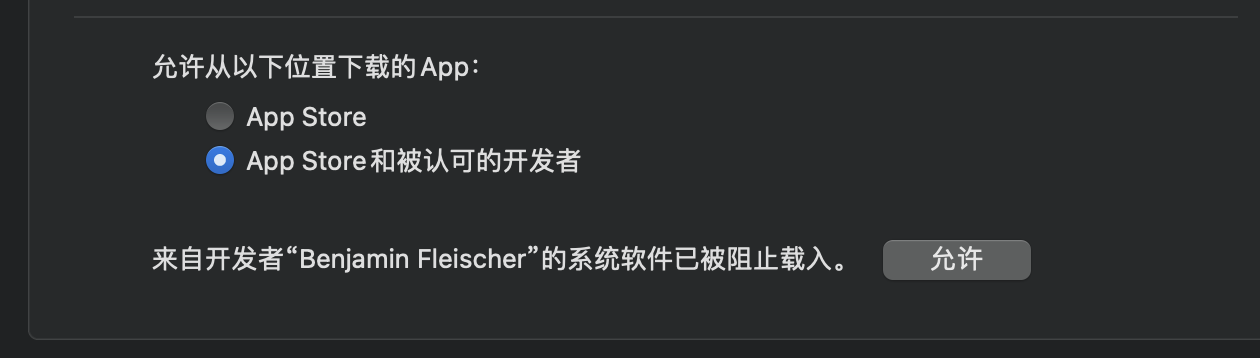
在“启动安全性实用工具”中,从“安全策略”按钮中启用内核扩展。
这种方案也是 linux 中使用ntfs-3g常用的方案,使用用户态文件系统来进行实现,下面是对ntfs-3g进行的简单介绍;https://github.com/tuxera/ntfs-3g
NTFS-3G is an open source cross-platform implementation of the Microsoft Windows NTFS file system with read-write support.
Install NTFS-3G from Homebrew by opening a Terminal and entering the following commands.
brew tap gromgit/homebrew-fuse
brew install ntfs-3g-mac
After installing NTFS-3G you can manually mount NTFS volumes in read-write mode by executing the following commands in Terminal. Replace /dev/disk1s1 with the actual NTFS partition you want to mount. You can find the partition name using diskutil list.
# unmount if necessary
sudo diskutil unmount /dev/disk4s1
# mount with ntfs-3g
sudo mkdir /Users/yaowen/Documents/Removable-SSD
sudo /opt/homebrew/bin/ntfs-3g /dev/disk4s1 /Users/yaowen/Documents/Removable-SSD -o local -o allow_other -o auto_xattr -o auto_cache
# alternatively...
sudo /opt/homebrew/sbin/mount_ntfs /dev/disk4s1 /Users/yaowen/Documents/Removable-SSD
商业版的Tuxera,似乎也是用这个原理,只不过其通过app实现整个流程,更为友好一点;

参考链接:2022年01月25日16:42:40
https://github.com/osxfuse/osxfuse/wiki
https://github.com/osxfuse/osxfuse/wiki/NTFS-3G
https://github.com/osxfuse/osxfuse/wiki/SSHFS
保持更新;更多内容请关注 cnblogs.com/xuyaowen;

