WEB服务与NGINX(10)-NGINX访问控制功能
1.NGINX访问控制功能
nginx的访问控制有两种方式:
- 基于ip进行限制,由ngx_http_access_module模块提供;
- 对特定网页进行用户名密码认证,由ngx_http_auth_basic_module模块提供;
1.1 基于ip地址的访问控制
-
allow address | CIDR | unix: | all;
允许访问指定的网络或地址,如果指定unix:,表示运行UNIX-domain所有套接字
支持环境:http, server, location, limit_except
-
deny address | CIDR | unix: | all;
允许访问指定的网络或地址
支持环境:http, server, location, limit_except
匹配规则为:自上而下检查,一旦匹配,将生效,不再向下匹配所以条件严格的置前。
-
场景一:只允许指定的来源IP访问/imags目录
[root@nginx01 ~]# vim /etc/nginx/conf.d/virtualhost.conf server { listen 80; server_name www.nginx01.com; location / { root /data/nginx/html/web1; index index.html; } location /image { root /data/nginx/html/web1/ allow 172.0.0.1; allow 192.168.20.0/24; deny all; } } -
场景二:禁止特定客户端IP访问/images目录,其他IP允许访问
[root@nginx01 ~]# vim /etc/nginx/conf.d/virtualhost.conf
server {
	listen 80;
	server_name www.nginx01.com;

	location / {
		root /data/nginx/html/web1;
		index index.html;
	}
	location /image {
		root /data/nginx/html/web1/
		deny 172.16.0.0/16;
		allow all;
	}
}
1.2 基于用户名密码的认证
-
auth_basic string | off;
启用使用“HTTP基本身份验证”协议验证用户名和密码,默认为off,string为提示信息。
支持环境:http, server, location, limit_except
-
auth_basic_user_file file;
指定以下列格式保存用户名和密码的文件进行验证
支持环境:http, server, location, limit_except
-
用户口令文件格式:
明文文本:格式name:password:comment
# comment
name1:password1
name2:password2:comment
name3:password3
加密文本:由htpasswd命令实现,命令由httpd-tools所提供。
-
htpasswd命令的用法如下:
htpasswd [options] /PATH/HTTPD_PASSWD_FILE username
选项
-c 自动创建文件,仅首次时使用,再次使用会覆盖
-p 明文密码
-d CRYPT格式加密,默认
-m md5格式加密
-s sha格式加密
D 删除指定用户
-b:批模式添加用户,类似于passwd –stdin,多用于脚本。
-
场景示例:为/login或/admin目录下的内容提供用户认证保护:
#1.nginx的配置文件如下:
[root@nginx01 ~]# vim /etc/nginx/conf.d/virtualhost.conf
server {
	listen 80;
	server_name www.nginx01.com;
	charset utf-8,gbk;

	location / {
		root /data/nginx/html/web1;
		index index.html;
	}

	location ~* /(admin|login) {
		root /data/nginx/html/web1/;
		auth_basic "please login!";            <==提示信息
		auth_basic_user_file /etc/nginx/.nginxuser;   <==密码文件
	}
}

#2.重启nginx服务
[root@nginx01 web1]# systemctl reload nginx.service

#3.建立admin,login相关目录
[root@nginx01 ~]# cd /data/nginx/html/web1/
[root@nginx01 web1]# mkdir admin
[root@nginx01 web1]# mkdir login
[root@nginx01 web1]# echo "admin area" > admin/index.html
[root@nginx01 web1]# echo "login area" > login/index.html

#4.使用htpasswd工具建立密码文件
[root@nginx01 web1]# yum install httpd-tools -y

#首次创建文件使用-c选项
[root@nginx01 web1]# htpasswd -c -b /etc/nginx/.nginxuser user1 123456
Adding password for user user1

[root@nginx01 web1]# htpasswd -b /etc/nginx/.nginxuser user2 123456
Adding password for user user2

[root@nginx01 web1]# cat /etc/nginx/.nginxuser
user1:$apr1$xTEjRg/g$6IbW.lOB0Y2vXGjpB9zL70
user2:$apr1$Ukqm8pEa$2VgnSmA0sfkxdkuyusTxr.

#5.客户端测试:
#不输入用户密码会返回401
[root@xuzhichao ~]# curl http://www.nginx01.com/admin
<html>
<head><title>401 Authorization Required</title></head>
<body>
<center><h1>401 Authorization Required</h1></center>
<hr><center>nginx/1.20.1</center>
</body>
</html>

#输入用户名密码可以正常访问
[root@xuzhichao ~]# curl --user user1:123456 http://www.nginx01.com/admin/
admin area
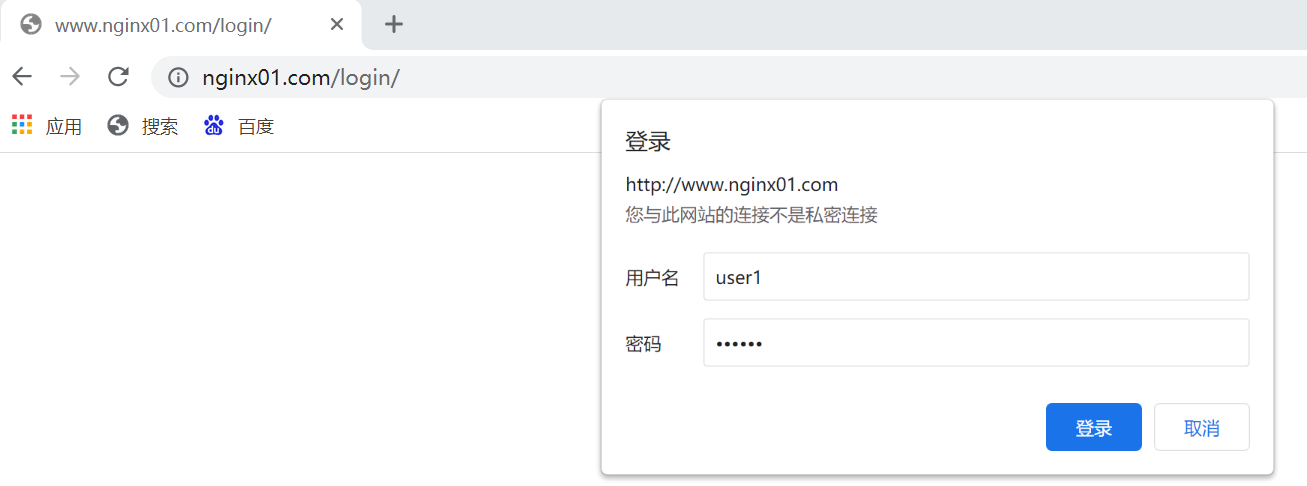
客户端web测试:


