


Spring Integration实现分布式锁
学习本篇之前,可以先看下文章 什么是分布式锁,了解下基本概念。
之前都是手写一个分布式锁,其实Spring早就提供了分布式锁的实现。早期,分布式锁的相关代码存在于Spring Cloud的子项目Spring Cloud Cluster中,后来被迁移到Spring Integration中。
Spring Integration提供的全局锁,目前为这几种存储提供了实现:Gemfire、JDBC、Redis、Zookeeper
它们使用相同的API抽象--这正是Spring最擅长的。这意味着,不论使用哪种存储,你的编码体验都是一样的,有一天想更换实现,只需要修改依赖和配置就可以了,无需修改代码
下面以Redis为例,讲解Spring Integration如何使用分布式锁。
1、增加依赖:

<dependency>
    <!-- spring integration -->
    <groupId>org.springframework.boot</groupId>
    <artifactId>spring-boot-starter-integration</artifactId>
</dependency>
<dependency>
    <!-- spring integration与redis结合,实现redis分布式锁 -->
    <groupId>org.springframework.integration</groupId>
    <artifactId>spring-integration-redis</artifactId>
</dependency>
<dependency>
    <!-- redis -->
    <groupId>org.springframework.boot</groupId>
    <artifactId>spring-boot-starter-data-redis</artifactId>
</dependency>
2、配置文件增加redis配置:
spring:
  redis:
    port: 6379
    host: localhost
3、增加RedisLock的配置类:
@Configuration
public class RedisLockConfiguration {

    @Bean
    public RedisLockRegistry redisLockRegistry(RedisConnectionFactory redisConnectionFactory) {
        return new RedisLockRegistry(redisConnectionFactory, "spring-cloud");
    }

}
4、增加测试方法:
@RestController
@RequestMapping("redis")
public class RedisController {

    @Autowired
    private RedisLockRegistry redisLockRegistry;

    private int num = 20;

    /**
     * 测试redis分布式锁(没有锁)
     */
    @GetMapping("testUnLock")
    public void testUnLock() throws InterruptedException {
        String s = Thread.currentThread().getName();
        if (num > 0) {
            System.out.println(s + "排号成功,号码是:" + num);
            num--;
        } else {
            System.out.println(s + "排号失败,号码已经被抢光");
        }
    }

    /**
     * 测试redis分布式锁(有锁)
     */
    @GetMapping("testLock")
    public void testLock() throws InterruptedException {
        Lock lock = redisLockRegistry.obtain("lock");
        boolean isLock = lock.tryLock(1, TimeUnit.SECONDS);
        String s = Thread.currentThread().getName();
        if (num > 0 && isLock) {
            System.out.println(s + "排号成功,号码是:" + num);
            num--;
        } else {
            System.out.println(s + "排号失败,号码已经被抢光");
        }
        lock.unlock();
    }

}
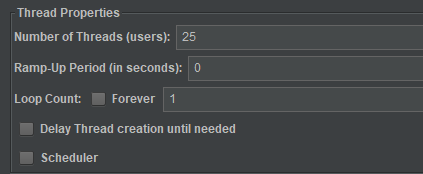
使用压测工具(如:JMeter),开启25个线程,循环一次:
先测试一下没有加锁,会出现什么结果。请求 http://localhost:18081/redis/testUnLock:
http-nio-18081-exec-22排号成功,号码是:20
http-nio-18081-exec-28排号成功,号码是:19
http-nio-18081-exec-16排号成功,号码是:18
http-nio-18081-exec-30排号成功,号码是:17
http-nio-18081-exec-26排号成功,号码是:16
http-nio-18081-exec-15排号成功,号码是:15
http-nio-18081-exec-15排号成功,号码是:14
http-nio-18081-exec-3排号成功,号码是:14
http-nio-18081-exec-26排号成功,号码是:12
http-nio-18081-exec-15排号成功,号码是:11
http-nio-18081-exec-3排号成功,号码是:10
http-nio-18081-exec-15排号成功,号码是:9
http-nio-18081-exec-30排号成功,号码是:8
http-nio-18081-exec-26排号成功,号码是:7
http-nio-18081-exec-3排号成功,号码是:6
http-nio-18081-exec-15排号成功,号码是:5
http-nio-18081-exec-3排号成功,号码是:4
http-nio-18081-exec-26排号成功,号码是:3
http-nio-18081-exec-15排号成功,号码是:2
http-nio-18081-exec-3排号成功,号码是:1
http-nio-18081-exec-30排号失败,号码已经被抢光
http-nio-18081-exec-22排号成功,号码是:14
http-nio-18081-exec-28排号成功,号码是:14
http-nio-18081-exec-15排号成功,号码是:1
http-nio-18081-exec-16排号成功,号码是:12
从上面结果可以看到,num变量的有些值被多个线程同时获取,导致20个号被24个线程获取
再来试下加锁的,请求 http://localhost:18081/redis/testLock:
http-nio-18081-exec-2排号成功,号码是:20
http-nio-18081-exec-142排号成功,号码是:19
http-nio-18081-exec-141排号成功,号码是:18
http-nio-18081-exec-171排号成功,号码是:17
http-nio-18081-exec-152排号成功,号码是:16
http-nio-18081-exec-159排号成功,号码是:15
http-nio-18081-exec-154排号成功,号码是:14
http-nio-18081-exec-156排号成功,号码是:13
http-nio-18081-exec-142排号成功,号码是:12
http-nio-18081-exec-158排号成功,号码是:11
http-nio-18081-exec-172排号成功,号码是:10
http-nio-18081-exec-161排号成功,号码是:9
http-nio-18081-exec-160排号成功,号码是:8
http-nio-18081-exec-164排号成功,号码是:7
http-nio-18081-exec-162排号成功,号码是:6
http-nio-18081-exec-171排号成功,号码是:5
http-nio-18081-exec-170排号成功,号码是:4
http-nio-18081-exec-152排号成功,号码是:3
http-nio-18081-exec-165排号成功,号码是:2
http-nio-18081-exec-157排号成功,号码是:1
http-nio-18081-exec-168排号失败,号码已经被抢光
http-nio-18081-exec-159排号失败,号码已经被抢光
http-nio-18081-exec-166排号失败,号码已经被抢光
http-nio-18081-exec-163排号失败,号码已经被抢光
http-nio-18081-exec-177排号失败,号码已经被抢光
从上面结果可以看到,20个号挨个被20个线程获取,剩下5个线程将获取不到。说明锁起作用了~
知识改变世界
分类:
SpringBoot


【推荐】国内首个AI IDE,深度理解中文开发场景,立即下载体验Trae
【推荐】编程新体验,更懂你的AI,立即体验豆包MarsCode编程助手
【推荐】抖音旗下AI助手豆包,你的智能百科全书,全免费不限次数
【推荐】轻量又高性能的 SSH 工具 IShell:AI 加持,快人一步
· 基于Microsoft.Extensions.AI核心库实现RAG应用
· Linux系列:如何用heaptrack跟踪.NET程序的非托管内存泄露
· 开发者必知的日志记录最佳实践
· SQL Server 2025 AI相关能力初探
· Linux系列:如何用 C#调用 C方法造成内存泄露
· Manus爆火,是硬核还是营销?
· 终于写完轮子一部分:tcp代理 了,记录一下
· 别再用vector<bool>了!Google高级工程师:这可能是STL最大的设计失误
· 单元测试从入门到精通
· 震惊!C++程序真的从main开始吗?99%的程序员都答错了
2018-04-11 elasticsearch java使用
2018-04-11 elasticsearch-head的使用
2018-04-11 elasticsearch环境搭建