
SpringCloud的学习记录(3)
这一章节讲搭建config-server的项目.
在我们生成的Demo项目上右键点击New->Module->spring Initializr, 然后next, 填写Group和Artifact等信息,
这里Artifact填写configserver, 再次next,
这里选择的Web下的web和Cloud Discovery下的Eureka Discovery, 同时选择Cloud Config下的Config Server.
最后在Module Name中填写config-server.
生成的pom.xml文件如下:
<?xml version="1.0" encoding="UTF-8"?> <project xmlns="http://maven.apache.org/POM/4.0.0" xmlns:xsi="http://www.w3.org/2001/XMLSchema-instance" xsi:schemaLocation="http://maven.apache.org/POM/4.0.0 http://maven.apache.org/xsd/maven-4.0.0.xsd"> <modelVersion>4.0.0</modelVersion> <parent> <groupId>org.springframework.boot</groupId> <artifactId>spring-boot-starter-parent</artifactId> <version>2.1.3.RELEASE</version> <relativePath/> <!-- lookup parent from repository --> </parent> <groupId>com.xum</groupId> <artifactId>config-server</artifactId> <version>0.0.1-SNAPSHOT</version> <name>config-server</name> <description>Demo project for Spring Boot</description> <properties> <java.version>1.8</java.version> <spring-cloud.version>Greenwich.RELEASE</spring-cloud.version> </properties> <dependencies> <dependency> <groupId>org.springframework.cloud</groupId> <artifactId>spring-cloud-config-server</artifactId> </dependency> <dependency> <groupId>org.springframework.cloud</groupId> <artifactId>spring-cloud-starter-netflix-eureka-client</artifactId> </dependency> <dependency> <groupId>org.springframework.boot</groupId> <artifactId>spring-boot-starter-test</artifactId> <scope>test</scope> </dependency> </dependencies> <dependencyManagement> <dependencies> <dependency> <groupId>org.springframework.cloud</groupId> <artifactId>spring-cloud-dependencies</artifactId> <version>${spring-cloud.version}</version> <type>pom</type> <scope>import</scope> </dependency> </dependencies> </dependencyManagement> <build> <plugins> <plugin> <groupId>org.springframework.boot</groupId> <artifactId>spring-boot-maven-plugin</artifactId> </plugin> </plugins> </build> <repositories> <repository> <id>spring-milestones</id> <name>Spring Milestones</name> <url>https://repo.spring.io/milestone</url> </repository> </repositories> </project>
在src->main->resources下建立application.yml文件, 内容如下
eureka:
  client:
    serviceUrl:
      defaultZone: http://localhost:8761/eureka/    // 这里依然是注册到eureka-server中
server:
  port: 8765
spring:
  application:
    name: config-server
  cloud:
    config:
      server:
        git:
          uri: https://github.com/xxx 你的git仓库地址
          searchPaths: repos
          username: 你的git用户名
          password: 你的git密码
      label: master
在ConfigServerApplication.java里的内容如下, 要加上@EnableConfigServer这个注解
package com.xum.configserver;

import org.springframework.boot.SpringApplication;
import org.springframework.boot.autoconfigure.SpringBootApplication;
import org.springframework.cloud.netflix.eureka.EnableEurekaClient;
import org.springframework.cloud.config.server.EnableConfigServer;

@EnableEurekaClient
@EnableConfigServer
@SpringBootApplication
public class ConfigServerApplication {
    public static void main(String[] args) {
        SpringApplication.run(ConfigServerApplication.class, args);
    }
}
这样Config-server项目搭建完成,
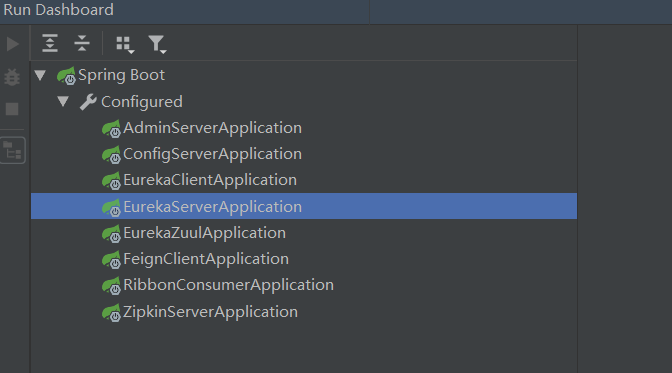
用Run DashBoard顺序启动如下项目:
1. eureka-server
2. config-server
3. eureka-client
然后再次运行上一章节的几条api就可以看到效果了
先在浏览器中输入http://localhost:8762/testone/test, 显示如下
port是eureka-client的端口

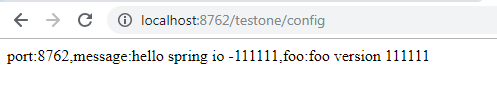
然后在浏览器中输入http://localhost:8762/testone/config, 显示如下
port是eureka-client的端口, message和foo是从git仓库中获取的, 是通过config-server项目获取的.
下一章节讲如何在改变git上的值后, eureka-client能及时的更新.
努力做一个伪程序员, 不管道路有多么的艰苦......


 浙公网安备 33010602011771号