Java操作ElasticSearch(一、索引库的操作)
创建maven项目并导入依赖
<?xml version="1.0" encoding="UTF-8"?>
<project xmlns="http://maven.apache.org/POM/4.0.0"
         xmlns:xsi="http://www.w3.org/2001/XMLSchema-instance"
         xsi:schemaLocation="http://maven.apache.org/POM/4.0.0 http://maven.apache.org/xsd/maven-4.0.0.xsd">
    <modelVersion>4.0.0</modelVersion>

    <groupId>org.example</groupId>
    <artifactId>es-api-demo</artifactId>
    <version>1.0-SNAPSHOT</version>

    <dependencies>
        <!-- Junit单元测试 -->
        <dependency>
            <groupId>junit</groupId>
            <artifactId>junit</artifactId>
            <version>4.12</version>
        </dependency>
        <!--elastic客户端-->
        <dependency>
            <groupId>org.elasticsearch.client</groupId>
            <artifactId>elasticsearch-rest-high-level-client</artifactId>
            <version>7.4.2</version>
        </dependency>
        <!--数据库驱动-->
        <dependency>
            <groupId>mysql</groupId>
            <artifactId>mysql-connector-java</artifactId>
            <version>5.1.47</version>
        </dependency>
        <!--mybatis-->
        <dependency>
            <groupId>org.mybatis</groupId>
            <artifactId>mybatis</artifactId>
            <version>3.5.2</version>
        </dependency>
        <!--lombok-->
        <dependency>
            <groupId>org.projectlombok</groupId>
            <artifactId>lombok</artifactId>
            <version>1.18.8</version>
        </dependency>
        <!--JSON工具-->
        <dependency>
            <groupId>com.alibaba</groupId>
            <artifactId>fastjson</artifactId>
            <version>1.2.49</version>
        </dependency>
        <!--common工具-->
        <dependency>
            <groupId>org.apache.commons</groupId>
            <artifactId>commons-lang3</artifactId>
            <version>3.8.1</version>
        </dependency>
    </dependencies>
    <build>
        <plugins>
            <plugin>
                <groupId>org.apache.maven.plugins</groupId>
                <artifactId>maven-compiler-plugin</artifactId>
                <version>3.2</version>
                <configuration>
                    <source>1.8</source>
                    <target>1.8</target>
                    <encoding>UTF-8</encoding>
                </configuration>
            </plugin>
        </plugins>
    </build>

</project>
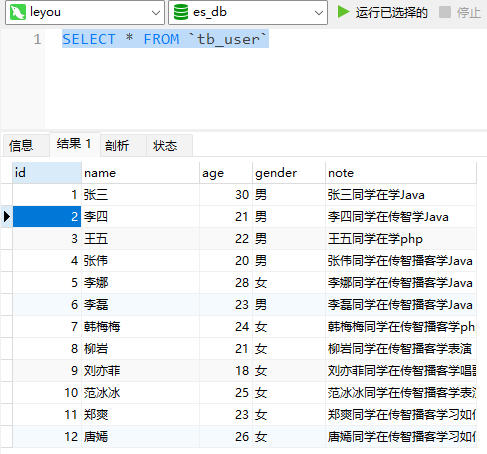
执行sql
-- ----------------------------
-- Table structure for tb_user
-- ----------------------------
DROP TABLE IF EXISTS `tb_user`;
CREATE TABLE `tb_user`  (
  `id` bigint(20) UNSIGNED NOT NULL AUTO_INCREMENT,
  `name` varchar(100) CHARACTER SET utf8 COLLATE utf8_general_ci NOT NULL DEFAULT '' COMMENT '姓名',
  `age` int(10) UNSIGNED NOT NULL DEFAULT 0 COMMENT '年龄',
  `gender` varchar(2) CHARACTER SET utf8 COLLATE utf8_general_ci NOT NULL DEFAULT '男' COMMENT '性别',
  `note` varchar(255) CHARACTER SET utf8 COLLATE utf8_general_ci NULL DEFAULT '' COMMENT '备注',
  PRIMARY KEY (`id`) USING BTREE
) ENGINE = InnoDB AUTO_INCREMENT = 13 CHARACTER SET = utf8 COLLATE = utf8_general_ci ROW_FORMAT = Compact;

-- ----------------------------
-- Records of tb_user
-- ----------------------------
INSERT INTO `tb_user` VALUES (1, '张三', 30, '男', '张三同学在学Java');
INSERT INTO `tb_user` VALUES (2, '李四', 21, '男', '李四同学在传智学Java');
INSERT INTO `tb_user` VALUES (3, '王五', 22, '男', '王五同学在学php');
INSERT INTO `tb_user` VALUES (4, '张伟', 20, '男', '张伟同学在传智播客学Java');
INSERT INTO `tb_user` VALUES (5, '李娜', 28, '女', '李娜同学在传智播客学Java');
INSERT INTO `tb_user` VALUES (6, '李磊', 23, '男', '李磊同学在传智播客学Java');
INSERT INTO `tb_user` VALUES (7, '韩梅梅', 24, '女', '韩梅梅同学在传智播客学php');
INSERT INTO `tb_user` VALUES (8, '柳岩', 21, '女', '柳岩同学在传智播客学表演');
INSERT INTO `tb_user` VALUES (9, '刘亦菲', 18, '女', '刘亦菲同学在传智播客学唱歌');
INSERT INTO `tb_user` VALUES (10, '范冰冰', 25, '女', '范冰冰同学在传智播客学表演');
INSERT INTO `tb_user` VALUES (11, '郑爽', 23, '女', '郑爽同学在传智播客学习如何装纯');
INSERT INTO `tb_user` VALUES (12, '唐嫣', 26, '女', '唐嫣同学在传智播客学习如何耍酷');

SET FOREIGN_KEY_CHECKS = 1;
新建实体类
package com.it.learn.pojo;

import lombok.Data;

@Data
public class User {
    private Long id;

    private String name;// 姓名

    private Integer age;// 年龄

    private String gender;// 性别

    private String note;// 备注
}
引入mybatis配置
db.properties
jdbc.url=jdbc:mysql://192.168.206.99:3306/es_db?useUnicode=true&characterEncoding=utf8&allowMultiQueries=true&useSSL=false
jdbc.driver=com.mysql.jdbc.Driver
jdbc.username=root
jdbc.password=root
log4j.properties
### 设置Logger输出级别和输出目的地 ###
log4j.rootLogger=debug, stdout

### 把日志信息输出到控制台 ###
log4j.appender.stdout=org.apache.log4j.ConsoleAppender
log4j.appender.stdout.Target=System.out
log4j.appender.stdout.layout=org.apache.log4j.SimpleLayout
mybatisConfig.xml
<?xml version="1.0" encoding="UTF-8" ?>
<!DOCTYPE configuration
        PUBLIC "-//mybatis.org//DTD Config 3.0//EN"
        "http://mybatis.org/dtd/mybatis-3-config.dtd">
<configuration>
    <!-- 加载指的properties配置文件,获取连接数据库的基本信息 -->
    <properties resource="db.properties"></properties>
    <!-- 别名配置:给类的全限定名起别名 -->
    <typeAliases>
        <package name="com.it.learn.pojo"></package>
    </typeAliases>
    <!-- 配置连接数据库的基本信息和连接池 -->
    <environments default="default">
        <environment id="default">
            <transactionManager type="JDBC"/>
            <dataSource type="POOLED">
                <property name="driver" value="${jdbc.driver}"/>
                <property name="url" value="${jdbc.url}"/>
                <property name="username" value="${jdbc.username}"/>
                <property name="password" value="${jdbc.password}"/>
            </dataSource>
        </environment>
    </environments>
    <!-- 加载其他的sql映射文件 -->
    <mappers>
        <!-- TODO:直接配包
             要求:
                1.sql映射文件的名称必须要和接口名称保持一致
                2.sql映射文件的路径必须要和接口所在的路径保持一致
         -->
        <package name="com.it.learn.mapper"></package>
    </mappers>
</configuration>
编写mapper
package com.it.learn.mapper;

import com.it.learn.pojo.User;
import org.apache.ibatis.annotations.Select;

import java.util.List;

public interface UserMapper {
    @Select("select * from tb_user where id = #{id}")
    User findById(Long id);

    @Select("select * from tb_user")
    List<User> findAll();
}
编写service
package com.it.learn.service;

import com.it.learn.mapper.UserMapper;
import com.it.learn.pojo.User;
import org.apache.ibatis.session.SqlSessionFactory;
import org.apache.ibatis.session.SqlSessionFactoryBuilder;

import org.apache.ibatis.io.Resources;
import java.io.IOException;
import java.io.InputStream;
import java.util.List;

public class UserService {
    private UserMapper userMapper;

    public UserService(){
        try {
            String resource = "mybatisConfig.xml";
            InputStream inputStream = Resources.getResourceAsStream(resource);
            SqlSessionFactory sqlSessionFactory = new SqlSessionFactoryBuilder().build(inputStream);
            userMapper = sqlSessionFactory.openSession(true).getMapper(UserMapper.class);
        } catch (IOException e) {
            throw new RuntimeException(e);
        }
    }

    public User findById(Long id){
        return userMapper.findById(id);
    }

    public List<User> findAll(){
        return userMapper.findAll();
    }
}
建立连接和关闭客户端连接
package com.learn;

import org.apache.http.HttpHost;
import org.elasticsearch.client.RequestOptions;
import org.elasticsearch.client.RestClient;
import org.elasticsearch.client.RestHighLevelClient;
import org.elasticsearch.client.indices.CreateIndexRequest;
import org.elasticsearch.client.indices.CreateIndexResponse;
import org.elasticsearch.common.settings.Settings;
import org.elasticsearch.common.xcontent.XContentType;
import org.junit.After;
import org.junit.Before;
import org.junit.Test;

import java.io.IOException;

public class ElasticDemo {

    private RestHighLevelClient client;

    /**
     * 建立连接
     */
    @Before
    public void init() throws IOException {
        client = new RestHighLevelClient(
                RestClient.builder(
                        new HttpHost("192.168.206.99", 9200, "http")
                )
        );
    }

    /**
     * 关闭客户端连接
     */
    @After
    public void close() throws IOException {
        client.close();
    }
}
最终项目结构如图

Java实现创建库和映射
@Test
public void test01() throws IOException {
    // 1.创建CreateIndexRequest对象,并指定索引库名称
    CreateIndexRequest request = new CreateIndexRequest("user");

    // 2.指定settings配置
    request.settings(Settings.builder()
            .put("index.number_of_shards", 1)
            .put("index.number_of_replicas", 1));

    // 3.指定mapping配置
    request.mapping("{\n" +
            "    \"properties\": {\n" +
            "      \"id\": {\n" +
            "        \"type\": \"long\"\n" +
            "      },\n" +
            "      \"name\": {\n" +
            "        \"type\": \"keyword\"\n" +
            "      },\n" +
            "      \"age\":{\n" +
            "        \"type\": \"integer\"\n" +
            "      },\n" +
            "      \"gender\":{\n" +
            "        \"type\": \"keyword\"\n" +
            "      },\n" +
            "      \"note\":{\n" +
            "        \"type\": \"text\",\n" +
            "        \"analyzer\": \"ik_max_word\"\n" +
            "      }\n" +
            "    }\n" +
            "  }", XContentType.JSON);

    // 4.发起请求,得到响应
    CreateIndexResponse response = client.indices().create(request, RequestOptions.DEFAULT);

    System.out.println("response=" + response.isAcknowledged()); // true
}
这样,可以在 kibana 中查看一下,我们新建的索引库
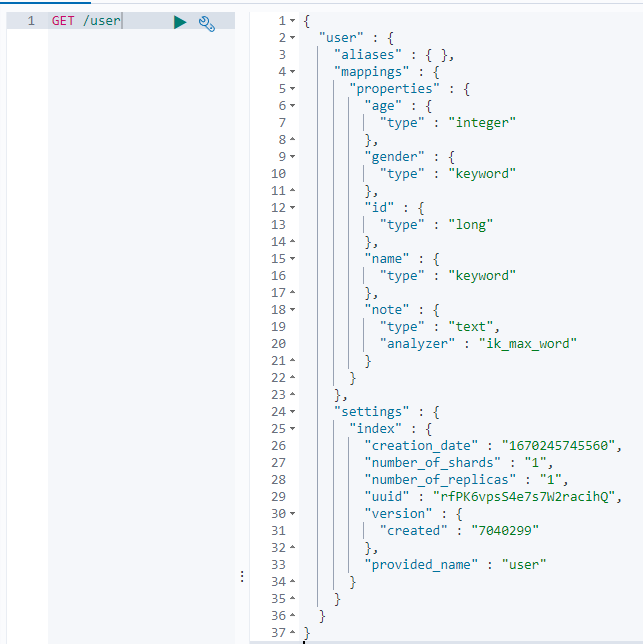
查看索引库
@Test
public void test02() throws IOException {
    // 创建对象用于描述本次请求的语义,本次请求要做什么
    GetIndexRequest request = new GetIndexRequest("user");

    // 发送请求给es,并接收请求结果
    GetIndexResponse response = client.indices().get(request, RequestOptions.DEFAULT);
    Map<String, MappingMetaData> mappings = response.getMappings();
    MappingMetaData data = mappings.get("user");
    Map<String, Object> sourceAsMap = data.getSourceAsMap();
    System.out.println(sourceAsMap);
}

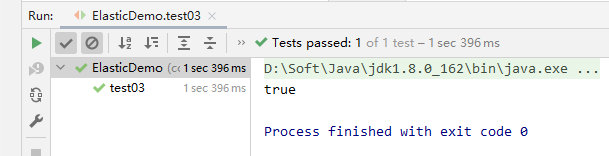
删除索引库
@Test
public void test03() throws IOException {
    DeleteIndexRequest request = new DeleteIndexRequest("user");
    AcknowledgedResponse response = client.indices().delete(request, RequestOptions.DEFAULT);
    System.out.println(response.isAcknowledged());
}

 浙公网安备 33010602011771号