从零开始学习GDI+ (二) 基本概念与基本操作
上文给新手学习GDI+讲述了vs环境等的准备工作,并且可以直接用GDI+绘图了。本文开始,讲述的可能偏理论,建议学习的过程中大胆尝试,多使用API。
首先上官方文档https://docs.microsoft.com/en-us/windows/win32/gdiplus/-gdiplus-gdi-start
官方文档是最权威与第一手(当然有时候有错误)的,其他人的说法经过自己的加工,增加了解释,也会带来错误的风险。英文能力强,强烈建议通过官网
学习与尝试。
GDI+的新特性。
1、图像(Graphics)对象 与画图工具(如Pen、Brush、GraphicsPath、Font、Image)分离,这与GDI中需要将画图工具导入DC中完全不同。因此GDI也
称为状态模型编程,而GDI+则称为非状态模型编程。松耦合总是易于方便拓展。在我们这个例子中就是绘图更自由了,调整画笔时,不再需要频繁取出dc与存入dc了。
2、多函数重载。以DrawLine为例,可以传入Point,也可以传入int,方便不同场景使用不同的API。而GDI则比较固定。

3、当前位置,GDI讲究当前的绘图点,模拟一个人画画的全过程。如画一条线的话,需要调用MoveToEx(该函数甚至返回之前的点),再调用LineTo
而GDI+则无当前位置的概念,讲究的是绘制过程。DrawLine传入的起始点与结束点便可以划线。
4、绘制与填充,GDI中Rectangle(矩形)直接使用dc的画笔画边界(border),用dc的画刷填充。而GDI+则分成了两个部分DrawRectangle与FillRectangle。
5、区域的操作,GDI提供的区域函数比较简单 CreateRoundRectRgn、CreatePolygonRgn、CreateEllipseRgn等。GDI+不提供类似函数,通过Region维护,并提供了
Intersect,Union,Xor,Exclude,Complement,Translate等功能函数来构建复杂地区域。
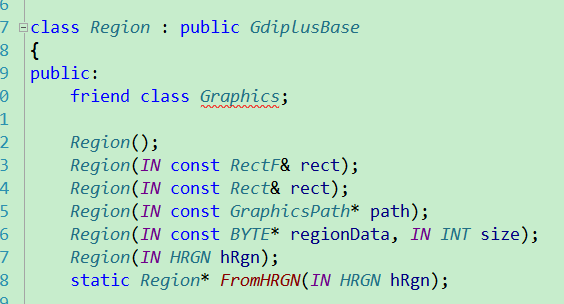
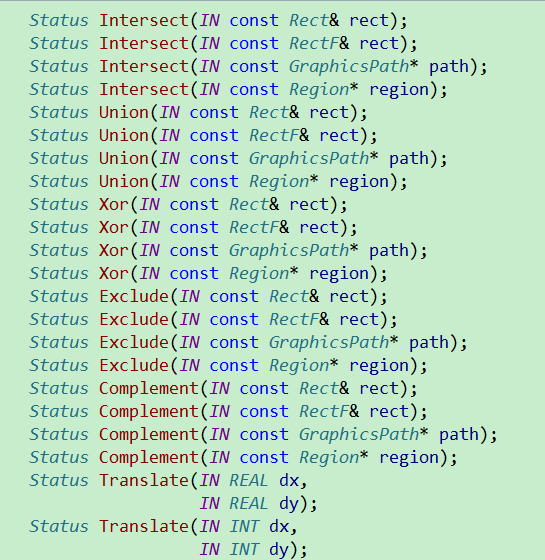
GDI+的使用:
我们一般在main函数入口附近进行初始化GdiplusStartup ,并在程序结束前进行资源回收GdiplusShutdown。如果不进行初始化,任何使用GDI+编译不会报错,甚至也能运行,
但如你所见,UI全是空的,因为GDI+对象无法正常工作。
GDI+的基本操作:
1、重要的Graphics对象。

Graphics是GDI+的核心,他的构造函数的参数解释下。
(绘图本质是利用绘图工具在绘图平面上做画,以下我把绘图平面称为【画布】)
hdevice:设备句柄,此时画布如打印机
hwnd:窗口句柄,此时画布是窗口
image:图像对象,此时画布是图片(没错,图片也可以作画,画完后保存的话图片变了)
hdc:设备上下文句柄,此时画布要根据上下文才能知道
icm:是否使用色彩配置文件校正色彩。
总之,Graphics可以在应用程序窗口、图片、打印机、绘图仪、传真机等等作画!
动手试一试吧:
1)写一个在打印机作画的函数 注意需要 #include <commdlg.h>
void OnPrintOut()
{
    //要打印的文档信息
    DOCINFO docInfo;
    ZeroMemory(&docInfo, sizeof(docInfo));
    docInfo.cbSize = sizeof(docInfo);

    docInfo.lpszDocName = _T("TestPrint");

    PRINTDLG printDlg;
    ZeroMemory(&printDlg, sizeof(printDlg));
    printDlg.lStructSize = sizeof(printDlg);
    printDlg.Flags = PD_RETURNDC;

    if (PrintDlg(&printDlg))
    {
        StartDoc(printDlg.hDC, &docInfo);
        StartPage(printDlg.hDC);

        //开始在打印机上作画
        Graphics graphics(printDlg.hDC);

        //调试的话放到cpp目录,否则放到exe目录
        Image image(_T("test.png"));
        graphics.DrawImage(&image, 0, 0);

        Pen blue(Color(255, 0, 0, 255));
        graphics.DrawRectangle(&blue, 200, 500, 200, 150);
        graphics.DrawEllipse(&blue, 200, 500, 200, 150);
        EndPage(printDlg.hDC);
        EndDoc(printDlg.hDC);
    }

    if (printDlg.hDevMode)
    {
        GlobalFree(printDlg.hDevMode);
    }
    if (printDlg.hDevNames)
    {
        GlobalFree(printDlg.hDevNames);
    }
    if (printDlg.hDC)
    {
        DeleteDC(printDlg.hDC);
    }
}
2)在菜单功能,把“关于”菜单项的功能注释掉,改成我们的功能

3)编译运行看看,如果有打印机,看看打印出来的是否是你画的呢?
2、画基本图形
GDI+的默认的坐标系的原点位于画布的左上角,x轴向右,y轴向下。默认的单位是像素。(让我想起了高DPI的恐慌,目前网易云信也是不支持动态变化的,但重启会生效。还得抽时间攻克下。)注意:不同的画布的像素的大小不一定一样,更改了分辨率也会影响像素。比如从480*720 变到920*1440,明显程序变小了。
1)画直线
一条直线先前已经玩过了,这里补充下一次画多根线。
void GDIPlusDrawLines(HDC hdc)
{
    Graphics graphics(hdc);
    Pen green(Color(255, 0, 255, 0), 3);
    PointF p1(10, 10);
    PointF p2(10, 100);
    PointF p3(50, 50);
    PointF p4(10, 10);
    PointF point[] = { p1, p2, p3, p4 };
    graphics.DrawLines(&green, point, sizeof(point) / sizeof(point[0]));

}
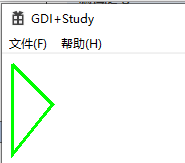
2、画矩形,之前也玩过了,GDI+支持一次性画多个矩形,试试吧。
void GDIPlusDrawRectangles(HDC hdc)
{
    Graphics graphics(hdc);
    Pen blue(Color(255, 0, 255, 0), 3);
    RectF r1(10,10,100,50);
    RectF r2(40,40,100,50);
    RectF r3(80,40,50,100);
    RectF rs[] = { r1, r2, r3};
    graphics.DrawRectangles(&blue, rs, sizeof(rs) / sizeof(rs[0]));

}
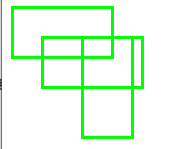
3、画曲线
DrawCurve、DrawClosedCurve(闭合曲线)、DrawBezier(贝塞尔曲线)
额,发现每个函数都写demo比较费时且无聊,大家又不一定跟着尝试,增加点乐趣吧,点的位置随机,矩阵的位置随机。
1) 包含下头文件 <time.h> 和<stdlib.h>,using namespace std;
2) 初始化指定下随机数种子
//初始化种子
srand((unsigned)time(NULL));
3)写随机函数
Point GetRandomPoint(int xmax, int ymax)
{
    Point t;
    t.X = rand() % xmax;
    t.Y = rand() % ymax;
    return t;
}

Rect GetRandomRect(int xmax, int ymax)
{
    Rect t;
    Point t1 = GetRandomPoint(xmax, ymax);
    Point t2 = GetRandomPoint(xmax, ymax);

    if (t1.X < t2.X)
    {
        t.X = t1.X;
        t.Width = t2.X - t1.X;
        if (t1.Y<t2.Y)
        {
            t.Y = t1.Y;
            t.Height = t2.Y - t1.Y;
        }
        else
        {
            t.Y = t2.Y;
            t.Height = t1.Y - t2.Y;
        }
    }
    else
    {
        t.X = t2.X;
        t.Width = t1.X - t2.X;
        if (t1.Y < t2.Y)
        {
            t.Y = t1.Y;
            t.Height = t2.Y - t1.Y;
        }
        else
        {
            t.Y = t2.Y;
            t.Height = t1.Y - t2.Y;
        }
    }

    return t;
}
4)描点函数
//描点
void DrawEllipsePoint(HDC hdc, Point t)
{
    Graphics graphics(hdc);
    SolidBrush redbursh(Color::Red);
    graphics.FillEllipse(&redbursh, t.X-5, t.Y-5, 10, 10);
}
5)开始作画
void DrawCurves(HDC hdc, int xmax, int ymax)
{
    Graphics graphics(hdc);
    Point t[] = { GetRandomPoint(xmax, ymax),
        GetRandomPoint(xmax, ymax), GetRandomPoint(xmax, ymax), GetRandomPoint(xmax, ymax) };

    int t_size = sizeof(t) / sizeof(t[0]);
    //画曲线
    Pen green(Color::Green, 3);
    graphics.DrawCurve(&green, t, t_size);
    //增加弯曲程度
    Pen blue(Color::Blue, 3);
    graphics.DrawCurve(&blue, t, t_size, 1.3f);
    //画闭合曲线
    Pen gray(Color::Gray, 3);
    graphics.DrawClosedCurve(&gray, t, t_size);
    //画贝塞尔曲线
    Pen orange(Color::Orange, 3);
    graphics.DrawBezier(&orange, t[0],t[1],t[2],t[3]);

    for (int i = 0; i < t_size;++i)
    {
        DrawEllipsePoint(hdc, t[i]);
    }
}

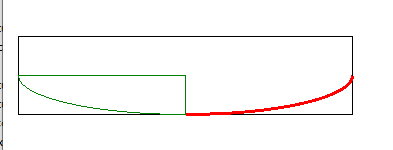
4、画圆弧与扇形
DrawArc 、DrawPie
void DrawArcPie(HDC hdc,int xmax, int ymax)
{
Graphics graphics(hdc);
Rect t = GetRandomRect(xmax, ymax);
//先画矩形边框(增加对左边的认知)
Pen black(Color::Black); //默认一像素
graphics.DrawRectangle(&black, t);
//画弧线
Pen red(Color::Red, 3);
graphics.DrawArc(&red, t, 0/*起始位置*/, 90/*需要画的弧度大小*/);
//画扇形
Pen green(Color::Green, 1);
graphics.DrawPie(&green, t, 90/*起始位置*/, 90/*需要画的弧度大小*/);
}
5、填充区域、画刷与颜色
FillClosedCurve(填充封闭曲线)、FillEllipse(填充椭圆)、FillPath(填充路径)
FillPie(填充扇形)、FillPolygon(填充多边形)、FillRectangle(填充矩形)
FillRectangles(填充巨型集)、FillRegion(填充区域)。
GDI+使用画刷来填充的:单色画刷、影线画刷、纹理画刷、线性渐变画刷与路径渐变画刷(画刷以后详细展开)
我们之前已经接触过颜色了,Color,由argb组成。a是alpha色彩的透明度、r是red红色、g是green绿色、b是blue蓝色。GDI+对透明度的支持是基于以下算法:output = foreground*alpha/255 + background*(255-alpha)/255。(以后详细展开)
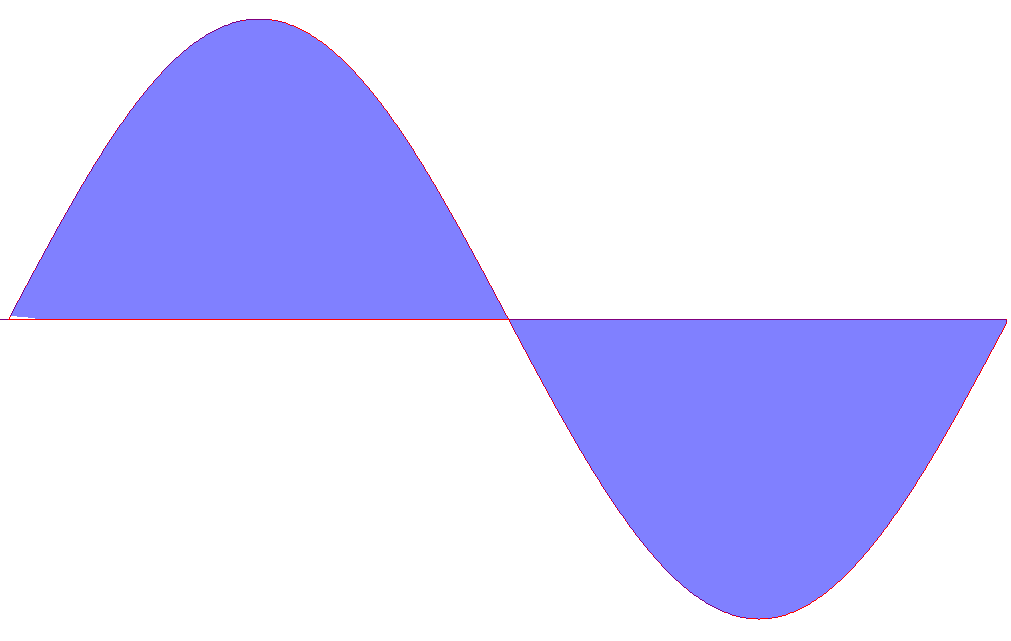
下面,我们来填充一个正弦图形试试
//用半透明蓝色填充 填充sinx 与 x轴的区域
void FillSinRegion(HDC hdc, int xmax, int ymax)
{
    const REAL Pi = 3.1415926;
    //从0 到 2pi
    //计算1弧度=多少像素,从50px ->xmax-50px 画
    REAL perX = (xmax - 100)*1.0 / (2 * Pi);
    //众项长度单位1=多少像素
    REAL perY = (ymax - 100)*1.0/2;

    //画点,理论上越多越精确,我们取500+1点。大家可以试试更多
    const int counts = 500;
    Point t[counts*2];
    t[0].X = 50;
    t[0].Y = ymax / 2;
    //步长
    REAL stepX = (2 * Pi) / counts;
    REAL step = stepX*perX ;
    //计算正弦值
    for (int i = 1; i < counts ; i++)
    {
        t[i].X = t[i - 1].X + step;
        REAL v = sin(i*stepX);
        t[i].Y = ymax / 2 - v*perY;
    }
    //画x轴
    t[counts].X = t[counts - 1].X;
    t[counts].Y = ymax / 2;
    for (int i = 1; i < counts; i++)
    {
        t[counts + i].X = t[counts + i - 1].X - step;
        t[counts + i].Y = ymax / 2;
    }

    Graphics graphics(hdc);
    SolidBrush blue(Color(255 / 2, 0, 0, 255));
     Pen r(Color::Red);
     graphics.DrawPolygon(&r, t, counts*2);
    graphics.FillClosedCurve(&blue,t,counts*2);

}
6、输出问题
DrawString
void  PrintText(HDC hdc, int xmax, int ymax)
{
    TCHAR s[32];
    _tcscpy_s(s, _T("Hello GDI+"));

    RectF t(10,10,200,50);


    Font f(_T("Arial"), 26);
    StringFormat Fmt;
    Fmt.SetAlignment(StringAlignmentCenter);
    Fmt.SetLineAlignment(StringAlignmentCenter);

    SolidBrush red(Color::Red);
    Graphics graphics(hdc);
    graphics.DrawString(s, _tcslen(s), &f, t, &Fmt, &red);

    Pen black(Color::Black);
    graphics.DrawRectangle(&black, t);

}

本文所有源码见:https://github.com/xuhuajie-NetEase/GDI-Study


【推荐】编程新体验,更懂你的AI,立即体验豆包MarsCode编程助手
【推荐】凌霞软件回馈社区,博客园 & 1Panel & Halo 联合会员上线
【推荐】抖音旗下AI助手豆包,你的智能百科全书,全免费不限次数
【推荐】博客园社区专享云产品让利特惠,阿里云新客6.5折上折
【推荐】轻量又高性能的 SSH 工具 IShell:AI 加持,快人一步