Consul ACL使用
一、 启用配置文件
./consul agent -server -ui -bootstrap-expect=1 -data-dir=data -node=consul -advertise="192.168.1.222" -bind="0.0.0.0" -client="0.0.0.0" -config-dir=conf
config-dir:指定配置目录,配置文件为.json格式
二、 在配置文件中启用ACL
将文件保存在config-dir目录下,acl.json
{
    "datacenter":"dc1",
    "acl": {
        "enabled": true,        //启用acl
        "default_policy": "deny",    //匿名不可访问
        "down_policy": "extend-cache",
        "tokens": {
            "master": "p2BE1AtpwPbrxZdC6k+eXA=="        //根token,类似root密码
        }
    }
}
三、获取管理员token
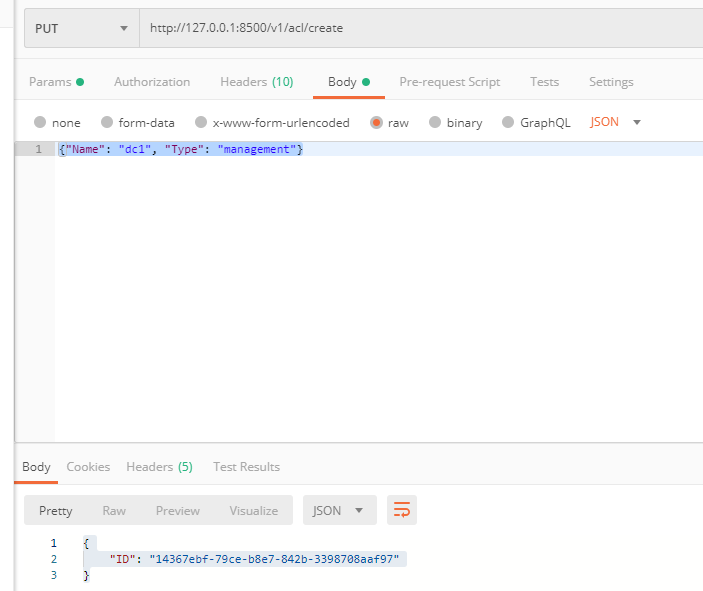
使用第一步命令重启consul后调用Token下发接口:
http://x.x.x.:8500/v1/acl/create
http mehtod: put
http header:X-Consul-Token:p2BE1AtpwPbrxZdC6k+eXA==
request body:json
RequestBody:
{"Name": "dc1", "Type": "management"}
返回:
{
    "ID": "14367ebf-79ce-b8e7-842b-3398708aaf97"
}
使用postman:

返回结果

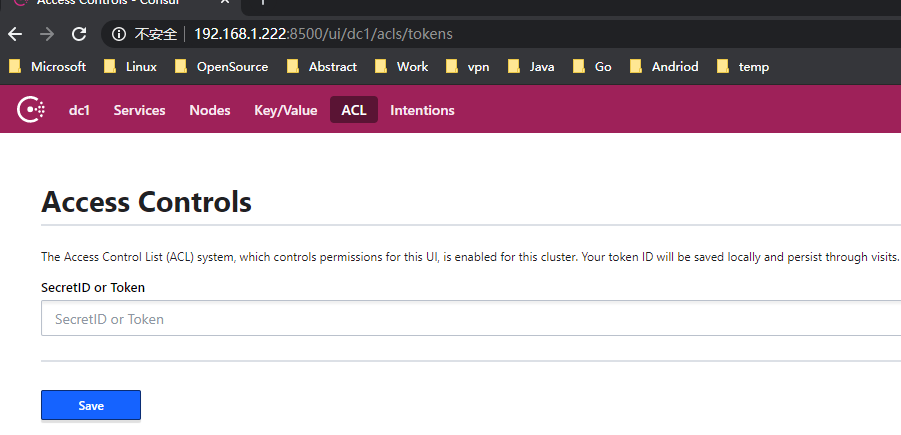
将 返回的token 写入consul页面,完成登录

四、创建新Token[可选]
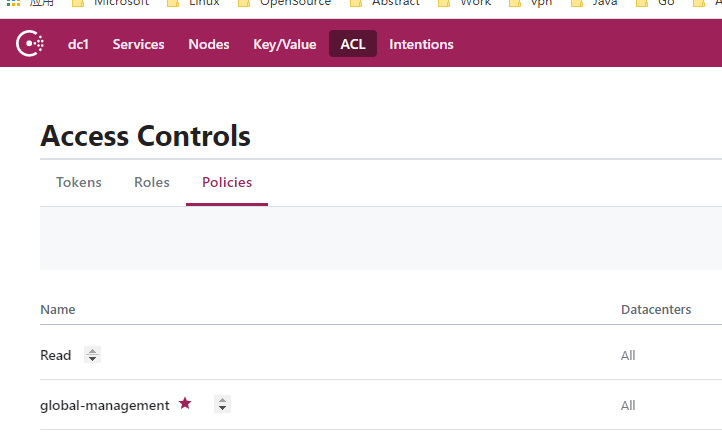
- 创建policies,进入policies tab

2. 创建你要的token,先创建policies, 以下是管理员权限,然后返回Token页创建Token
acl = "write"
agent_prefix "" {
 policy = "write"
}
event_prefix "" {
 policy = "write"
}
key_prefix "" {
 policy = "write"
}
keyring = "write"
node_prefix "" {
 policy = "write"
}
operator = "write"
query_prefix "" {
 policy = "write"
}
service_prefix "" {
 policy = "write"
 intentions = "write"
}
session_prefix "" {
 policy = "write"
}
五、如果使用fabio,配置fabio.propertites,修改以下参数,并重启
registry.consul.token = xxxxxxxx-180f-4875-66de-xxxxxxxxxx
曾经年少多少事 而今皆付谈笑中!


