Ubuntu安装Kubenetes+Kubesphere(1)
1.创建虚拟机
主要步骤:
- 新建虚拟机
- 创建虚拟机名称
- 定义虚拟机地址
- 自定义内存大小
- 启动虚拟机内存
- 勾选镜像(ubuntu)
- 虚拟机完成
- 开启虚拟机,进行ubuntu系统配置
-
- 分配磁盘
- 定义用户名()
2.配置系统设置
2.1配置root账号登录
设置管理员账号登录密码
subo passwd root
切换管理员账号
su
配置ssh文件
vim /etc/ssh/sshd_config
按i是开启编辑模式找到内容PermitRootLogin without-password 修改为PermitRootLogin yesESC键退出编辑模式:wq(保存并退出编辑)ip addr (查询IP地址)使用ip地址链接FinalShell
重启ssh文件
service ssh restart
2.2设置ubuntu20.04,设置静态IP
参考: https://www.cnblogs.com/kehoudaanxianjie/p/13139636.html
- 假设IP地址修改为192.168.1.100,子网掩码24位即255.255.255.0,网关设置为192.168.1.1,
DNS1:223.5.5.5,DNS2:223.6.6.6
network:
  ethernets:
    ens33:
      dhcp4: no
      addresses: [192.168.1.100/24]
      optional: true
      gateway4: 192.168.1.1
      nameservers:
        addresses: [223.5.5.5,223.6.6.6]

version: 2
应用配置
sudo netplan apply
配置APT源
cp /etc/apt/sources.list sources.list.bak
apt-get update
3.安装Docker及依赖软件
curl -sSL https://get.daocloud.io/docker | sh
apt-get install -y conntrack socat ebtables ipset
sudo mkdir -p /etc/docker
sudo tee /etc/docker/daemon.json <<-'EOF'
{
  "registry-mirrors": ["https://chn4ef4v.mirror.aliyuncs.com"]
}
EOF
sudo systemctl daemon-reload
sudo systemctl restart docker
3.1配置无密码SSH登录
1. 通过运行以下命令在 server1 上创建密钥。直接按回车键跳过所有提示。
ssh-keygen
一直按回车到命令结束
2. 将密钥复制到所有 GlusterFS 节点.
ssh-copy-id root@node1

ssh-copy-id root@node2

ssh-copy-id root@node3
3. 请验证您可以从 server1 通过无密码登录访问所有服务器机器。
ssh root@node1

ssh root@node2

ssh root@node3
1. 运行以下命令在 所有 上安装 software-properties-common。
apt-get install software-properties-common -y
2. 添加社区 GlusterFS PPA。
add-apt-repository ppa:gluster/glusterfs-7
3. 请确保使用的是最新安装包。
apt-get update
4. 安装 GlusterFS 服务器。
apt-get install glusterfs-server -y
5. 请确保也在 node2 和 node3 上运行上述命令,并在所有机器上验证安装包版本。
glusterfs -V
1. 运行以下命令在 node1 上加载三个必要的内核模块。
echo dm_thin_pool | sudo tee -a /etc/modules

echo dm_snapshot | sudo tee -a /etc/modules

echo dm_mirror | sudo tee -a /etc/modules
2. 安装 thin-provisioning-tools。
apt-get -y install thin-provisioning-tools
3. 请确保您也在 node2 和 node3 上运行以上命令。
iptables -I INPUT -p all -s '192.168.1.103' -j ACCEPT
iptables -I INPUT -p all -s '192.168.1.104' -j ACCEPT
iptables -I INPUT -p all -s '192.168.1.105' -j ACCEPT
service glusterd start
systemctl enable glusterd
1. 在 server1 上运行以下命令添加其他节点并创建集群。
gluster peer probe node2

gluster peer probe node3
2. 请验证集群中的所有节点均已成功连接。
gluster peer status
Number of Peers: 2
Hostname: node2
Uuid: e1192d6a-b65e-4ce8-804c-72d9425211a6
State: Peer in Cluster (Connected)
Hostname: node3
Uuid: 9bd733e4-96d4-49d5-8958-6c947a2b4fa6
State: Peer in Cluster (Connected)
https://github.com/heketi/heketi/releases/download/v10.4.0/heketi-v10.4.0-release-10.linux.amd64.tar.gz
tar zxvf heketi-v10.4.0-release-10.linux.amd64.tar.gz
cd heketi
cp heketi /usr/bin
cp heketi-cli /usr/bin
1. 创建 Heketi 服务文件。
vi /lib/systemd/system/heketi.service
[Unit]
Description=Heketi Server
[Service]
Type=simple
WorkingDirectory=/var/lib/heketi
ExecStart=/usr/bin/heketi --config=/etc/heketi/heketi.json
Restart=on-failure
StandardOutput=syslog
StandardError=syslog
[Install]
WantedBy=multi-user.target
2. 创建 Heketi 文件夹。
mkdir -p /var/lib/heketi

mkdir -p /etc/heketi
3.创建 JSON 文件以配置 Heketi。
vi /etc/heketi/heketi.json
{
  "_port_comment": "Heketi Server Port Number",
  "port": "18080",

  "_use_auth": "Enable JWT authorization. Please enable for deployment",
  "use_auth": false,

  "_jwt": "Private keys for access",
  "jwt": {
    "_admin": "Admin has access to all APIs",
    "admin": {
      "key": "123456"
    },
    "_user": "User only has access to /volumes endpoint",
    "user": {
      "key": "123456"
    }
  },

  "_glusterfs_comment": "GlusterFS Configuration",
  "glusterfs": {
    "_executor_comment": [
      "Execute plugin. Possible choices: mock, ssh",
      "mock: This setting is used for testing and development.",
      "      It will not send commands to any node.",
      "ssh:  This setting will notify Heketi to ssh to the nodes.",
      "      It will need the values in sshexec to be configured.",
      "kubernetes: Communicate with GlusterFS containers over",
      "            Kubernetes exec api."
    ],
    "executor": "ssh",

    "_sshexec_comment": "SSH username and private key file information",
    "sshexec": {
      "keyfile": "/root/.ssh/id_rsa",
      "user": "root"
    },

    "_kubeexec_comment": "Kubernetes configuration",
    "kubeexec": {
      "host" :"https://kubernetes.host:8443",
      "cert" : "/path/to/crt.file",
      "insecure": false,
      "user": "kubernetes username",
      "password": "password for kubernetes user",
      "namespace": "Kubernetes namespace",
      "fstab": "Optional: Specify fstab file on node.  Default is /etc/fstab"
    },

    "_db_comment": "Database file name",
    "db": "/var/lib/heketi/heketi.db",
    "brick_max_size_gb" : 1024,
 "brick_min_size_gb" : 1,
 "max_bricks_per_volume" : 33,


    "_loglevel_comment": [
      "Set log level. Choices are:",
      "  none, critical, error, warning, info, debug",
      "Default is warning"
    ],
    "loglevel" : "debug"
  }
}
1. 启动 Heketi。
systemctl start heketi
2. 检查 Heketi 的状态。
systemctl status heketi
systemctl enable heketi
fdisk -l
vi /etc/heketi/topology.json
{
    "clusters": [
       {
         "nodes": [
           {
             "node": {
               "hostnames": {
                 "manage": [
                   "192.168.1.103"
                ],
                "storage": [
                  "192.168.1.103"
                ]
              },
              "zone": 1
            },
            "devices": [
              "/dev/sdb"
            ]
          },
          {
            "node": {
              "hostnames": {
                "manage": [
                  "192.168.1.104"
                ],
                "storage": [
                  "192.168.1.104"
                ]
              },
              "zone": 1
            },
            "devices": [
              "/dev/sdb"
            ]
          },
          {
             "node": {
               "hostnames": {
                 "manage": [
                   "192.168.1.105"
                ],
                "storage": [
                  "192.168.1.105"
                ]
              },
              "zone": 1
            },
            "devices": [
              "/dev/sdb"
            ]
          }
        ]
      }
    ]
  }
export HEKETI_CLI_SERVER=http://localhost:18080
heketi-cli -s $HEKETI_CLI_SERVER --user admin --secret '123456' topology load --json=/etc/heketi/topology.json
Creating cluster ... ID: fc4a237cceaf33bc14ce9fdc2cf2e86c
        Allowing file volumes on cluster.
        Allowing block volumes on cluster.
        Creating node 192.168.1.103 ... ID: 6e1023d99c7c5a34fe21b90644809183
                Adding device /dev/sdb ... OK
        Creating node 192.168.1.104 ... ID: 0aad2a60a7f178226158d86c2d1a6805
                Adding device /dev/sdb ... OK
        Creating node 192.168.1.105 ... ID: 87576f0f26aa63c6e627e49d0bff1a46
                Adding device /dev/sdb ... OK
heketi-cli cluster info fc4a237cceaf33bc14ce9fdc2cf2e86c --user admin --secret '123456'
Cluster id: fc4a237cceaf33bc14ce9fdc2cf2e86c
Nodes:
0aad2a60a7f178226158d86c2d1a6805
6e1023d99c7c5a34fe21b90644809183
87576f0f26aa63c6e627e49d0bff1a46
Volumes:

Block: true

File: true
apiVersion: storage.k8s.io/v1
kind: StorageClass
metadata:
  name: mysc
provisioner: kubernetes.io/glusterfs
reclaimPolicy: Retain
parameters:
  gidMax: "50000"
  gidMin: "40000"
  resturl: http://192.168.1.103:18080
  volumetype: replicate:3
  restauthenabled: "true"
  restuser: "admin"
  restuserkey: "123456"
kubectl apply -f sc.yml
kubectl patch storageclass mysc -p '{"metadata": {"annotations":{"storageclass.kubernetes.io/is-default-class":"true"}}}'
kubectl get sc
https://kubesphere.com.cn/docs/quick-start/minimal-kubesphere-on-k8s/
4. 使用Kubekey安装Kubenetes
参考: https://github.com/kubesphere/kubekey/blob/master/README_zh-CN.md
具体步骤如下:
1. 在官网下载最新版Kubekey: https://github.com/kubesphere/kubekey/releases
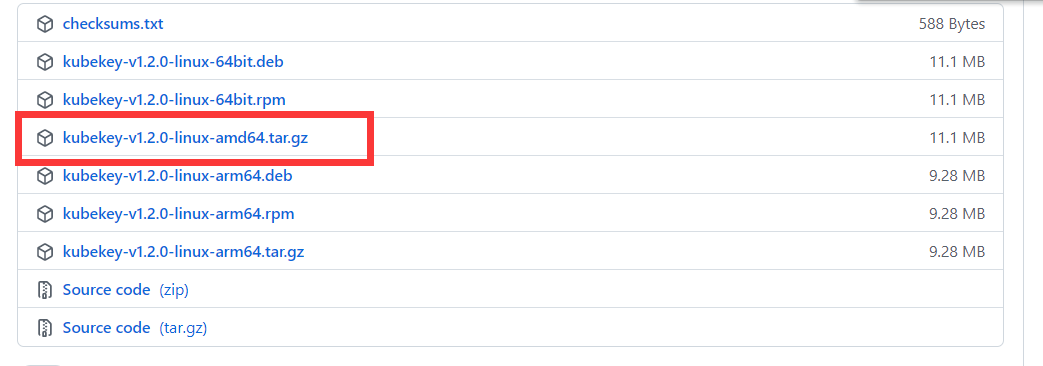
2. 选择Linux AMD64的tar.gz包如下图:
3.在node1中创建文件夹并将上一步下载的文件上传至该文件夹
# 创建K8S要下载文件的目录
 mkdir kubekey

 # 到k8s目录下
 cd kubekey
4.解压缩文件:
tar -zxvf kubekey-v1.2.0-linux-amd64.tar.gz
5.可删除kk文件外的其他文件
6.给kk文件授权:
chmod 777 ./kk
7.创建配置文件
./kk create config
8.依据实际情况修改配置文件
9.使用配置文件创建集群
./kk create cluster -f /root/kubekey/config-sample.yaml
kubectl get node
等待所有节点为Ready状态则Kubenetes安装成功

5.分布式文件系统

 浙公网安备 33010602011771号